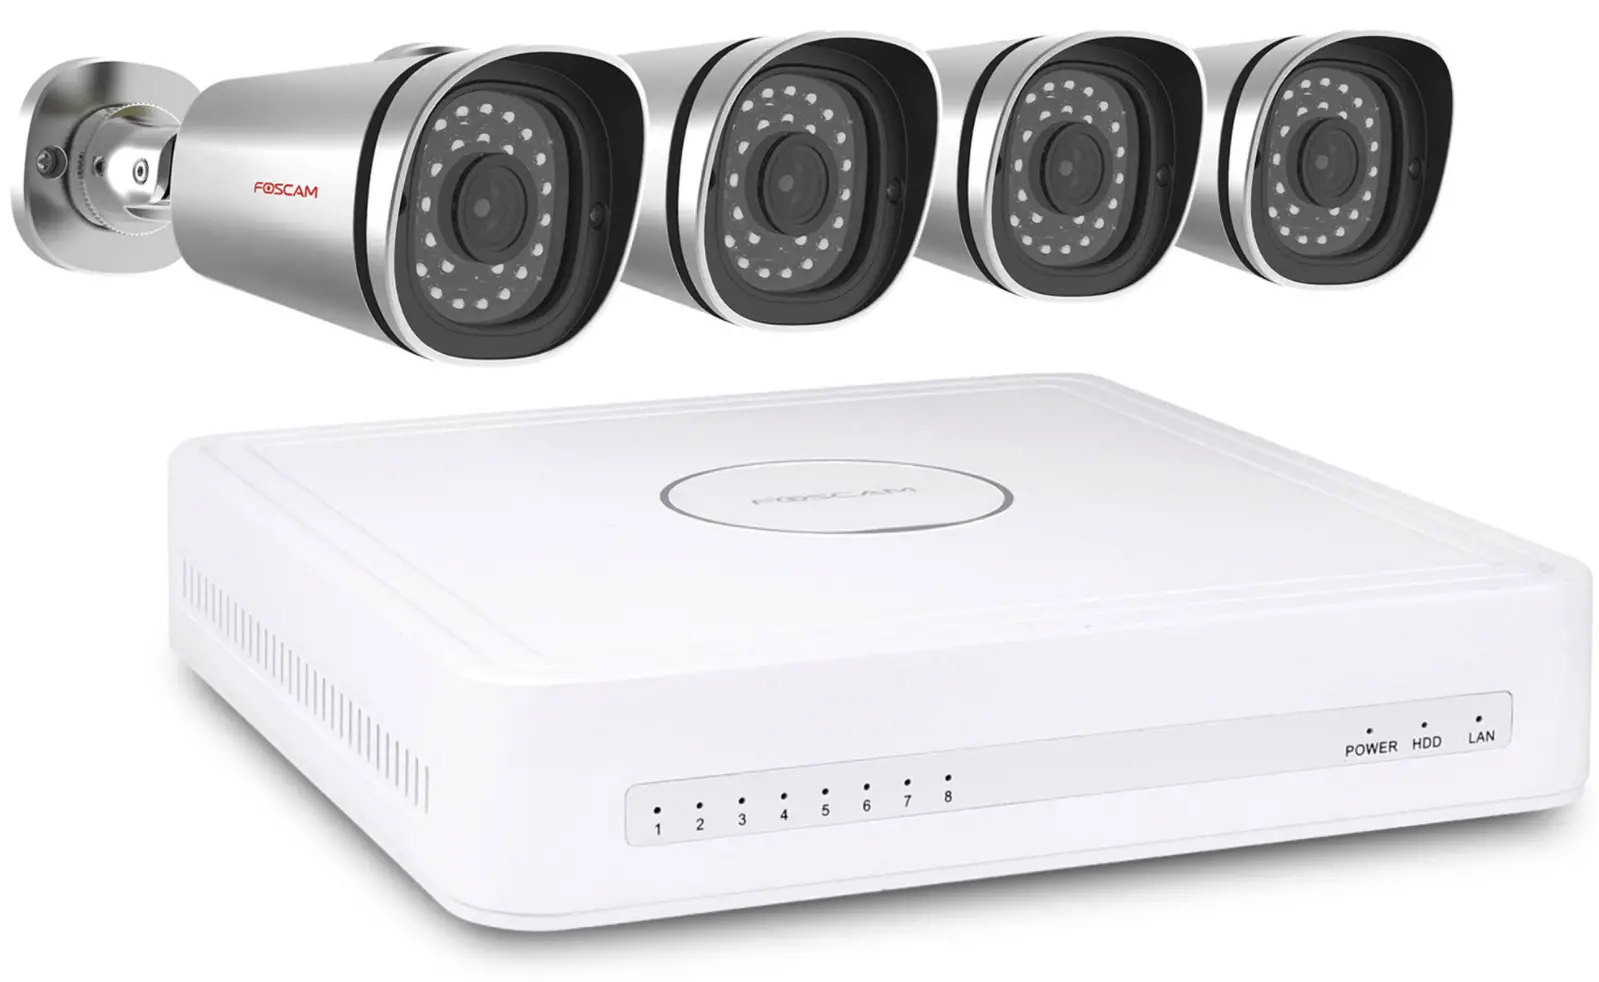
FOSCAM 8 Channel NVR
Security Tips
- Please change the password of your Foscam NVR App account, and NVR and cameras username regularly. The password should contain a combination of numbers, letters and special characters.
- Please keep the username and password of your cameras, NVR and Foscam NVR App account safe.
- Please update your camera to the latest firmware regularly for an optimal user experience.
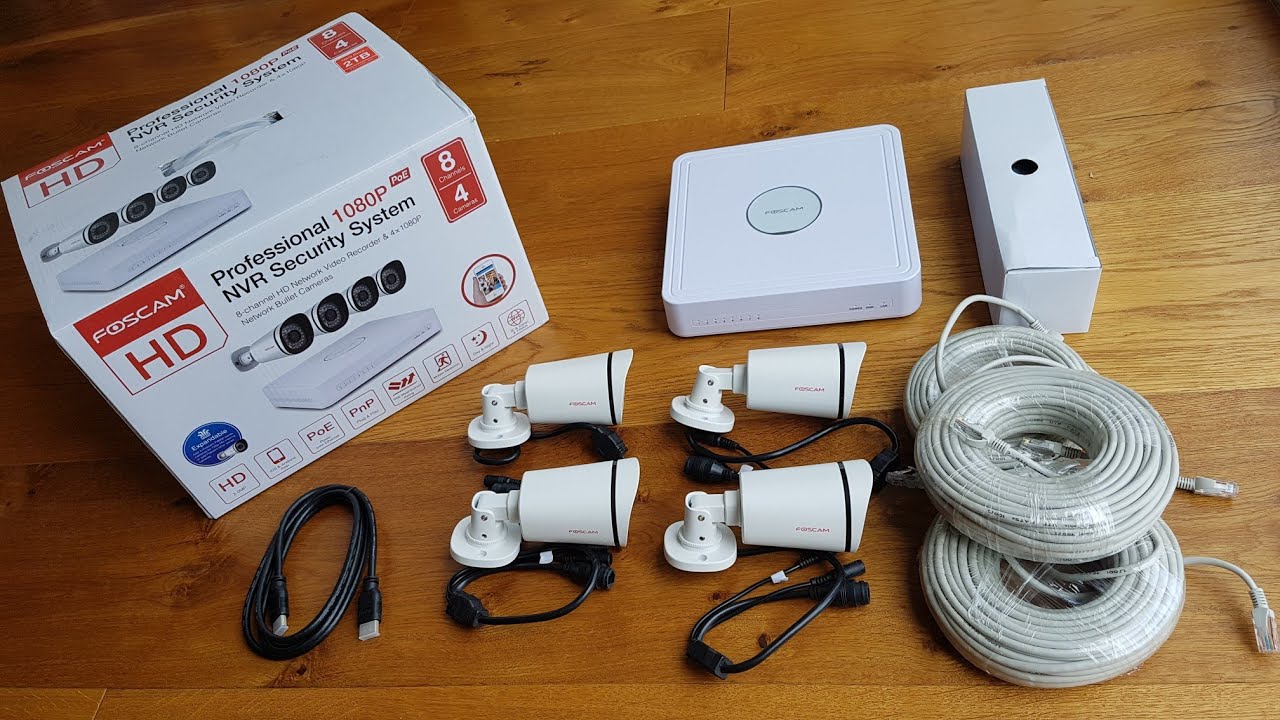
Package Contents
| 8 Channel NVR | |
| 4 x 1080P Bullet IP Cameras | Screw Pack |
| 2 x 25m (82 ft) Ethernet Cable | USB Mouse |
| 2 x 15m (49 ft) Ethernet Cable | Power Adapter for NVR |
| 1 x1.5m (5 ft) Ethernet Cable | Warranty Card |
| Quick Setup Guide | Quick Operation Guide |
Installing the Cameras
Place the cameras in your preferred locations and use the included screws to mount them.

Please Note:Ensure that the rain or water will not reach the connector ports at the end of the pig tail wiring. These connectors are not weather-resistant.
NVR Structure
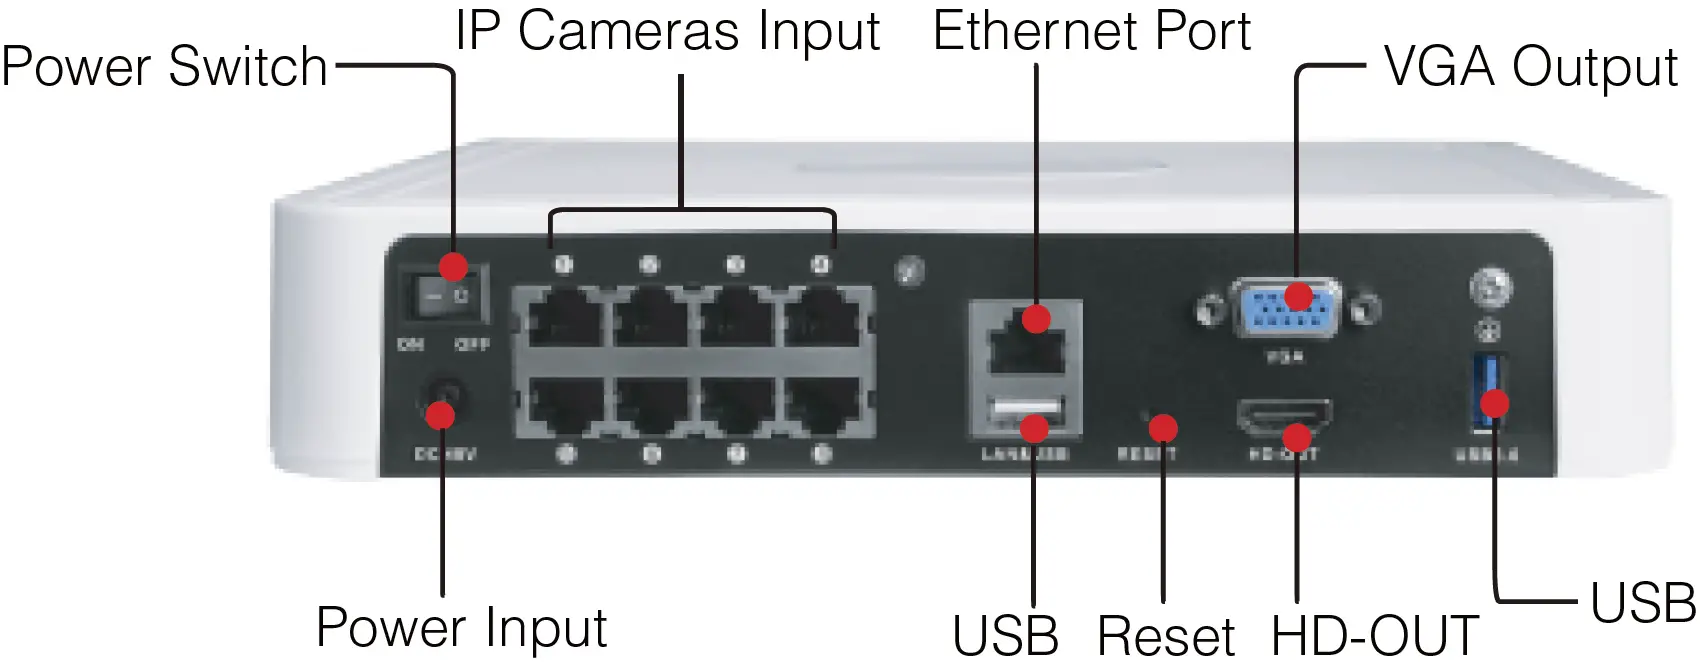
- Power Switch : Power on / off button.
- IP Cameras Input : These ports are for both power and video and are where you plug in your camera cables.
- Ethernet Port : 10 / 100Mb. You can connect your NVR to the internet via the Ethernet cable.
- VGA Output : Connect to your TV or computer monitor via VGA port. Power Input : This is where you connect the NVR’s DC power supply. USB : For connecting your USB mouse to control the NVR.
- Reset : Press and hold the “Reset” button for a few seconds while the NVR is powered on, and then release.The NVR will automatically reboot and restore factory settings. The username and password will be set to the default value, which are “admin / (blank)” respectively.
- HD-OUT : Connect to your HDTV or computer monitor with HD-OUT port.
Device Connection
Step One – Connect Monitor
A: Connect the NVR to your HDTVPlug one end in to the HD-OUT socket on the rear of the NVR and the other in to a spare HD-OUT port on your TV.

Note: If you have already connected your NVR using HD-OUT you don’t need to do it again using the VGA port.
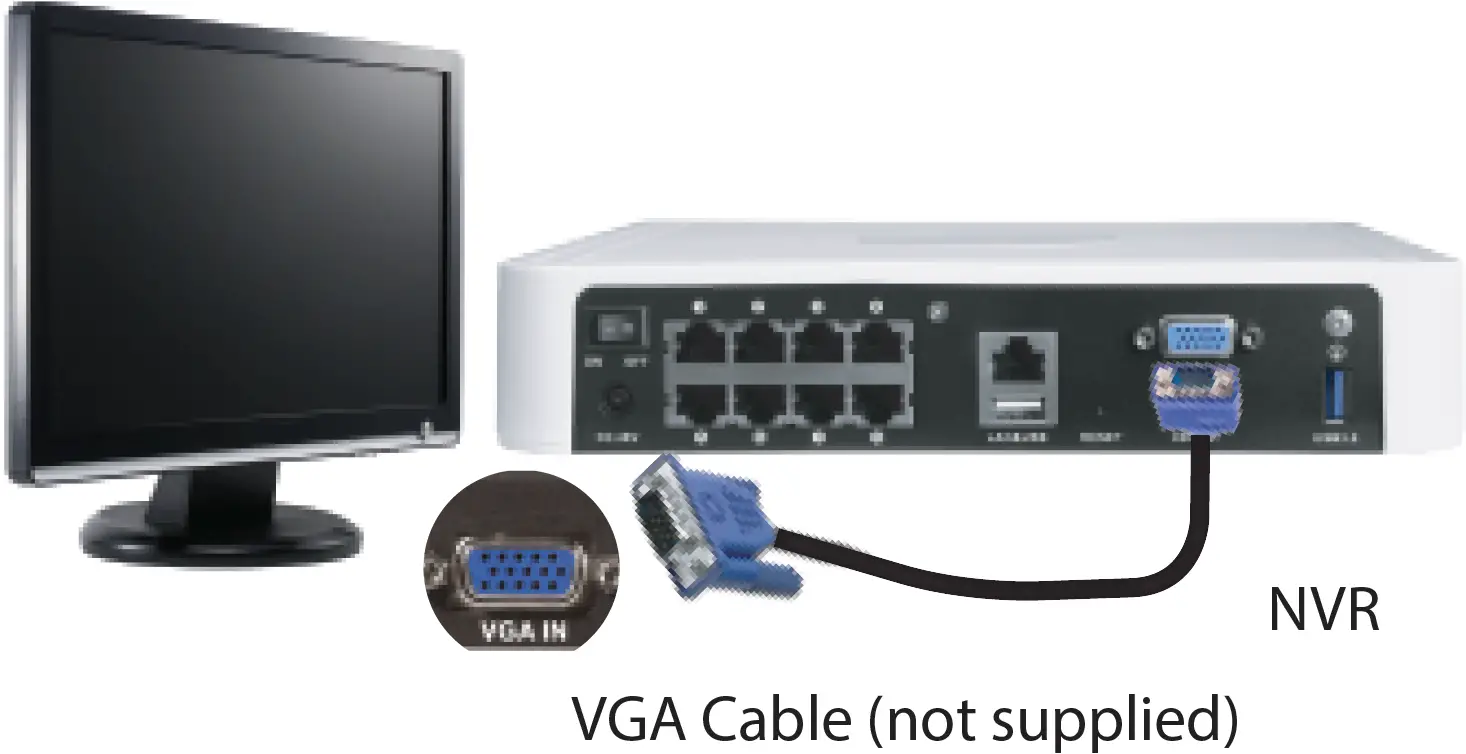
Connect the NVR to a Monitor or TV
Use the VGA cable that came with your monitor to connect it to the NVR’s VGA port.
Connect Your Cameras
To connect your cameras to the NVR simply connect the supplied cable in to the socket of the small cable coming from the camera then plug the other end of this cable into one of the ports on the back of the NVR.There is a one-to-one relationship between the IP Camera Input port and the video channel of your NVR.

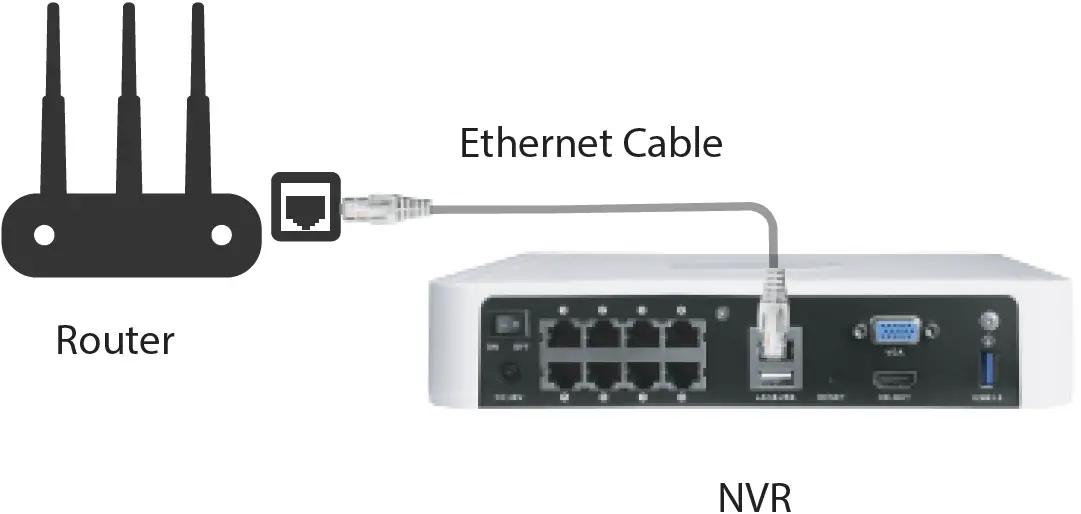
Connect to Your Network
Please connect your NVR to the router using Ethernet cable. Please make sure your router is connected to the internet.
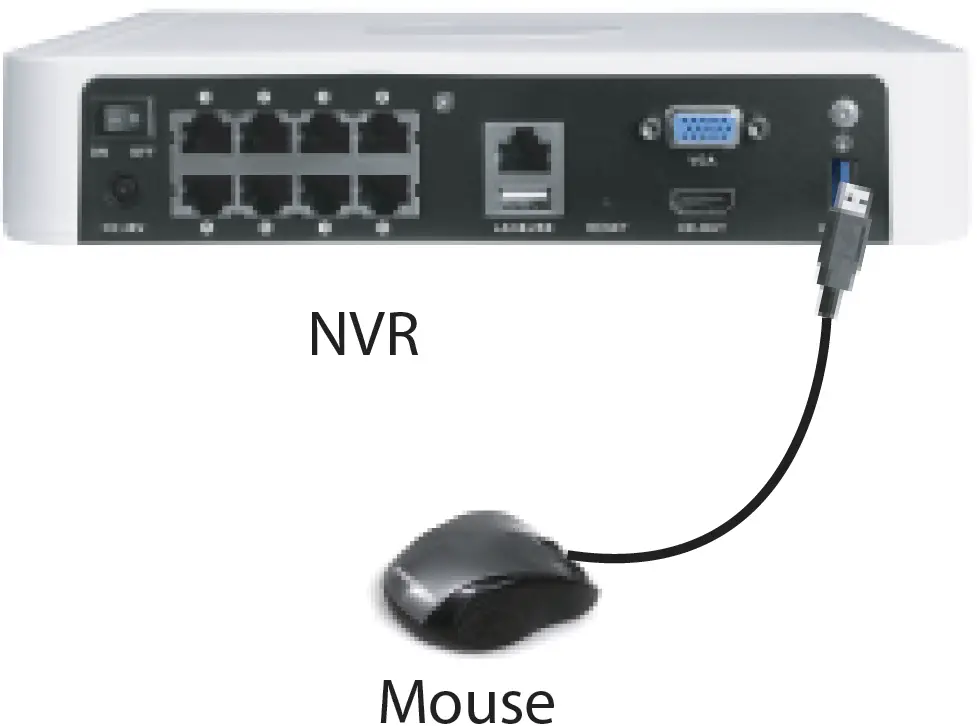
Connect the Mouse
The USB mouse supplied with your NVR can be connected to either of the two rear USB ports.
Connect the Power Adapter
Connect the power adapter to the power input port.
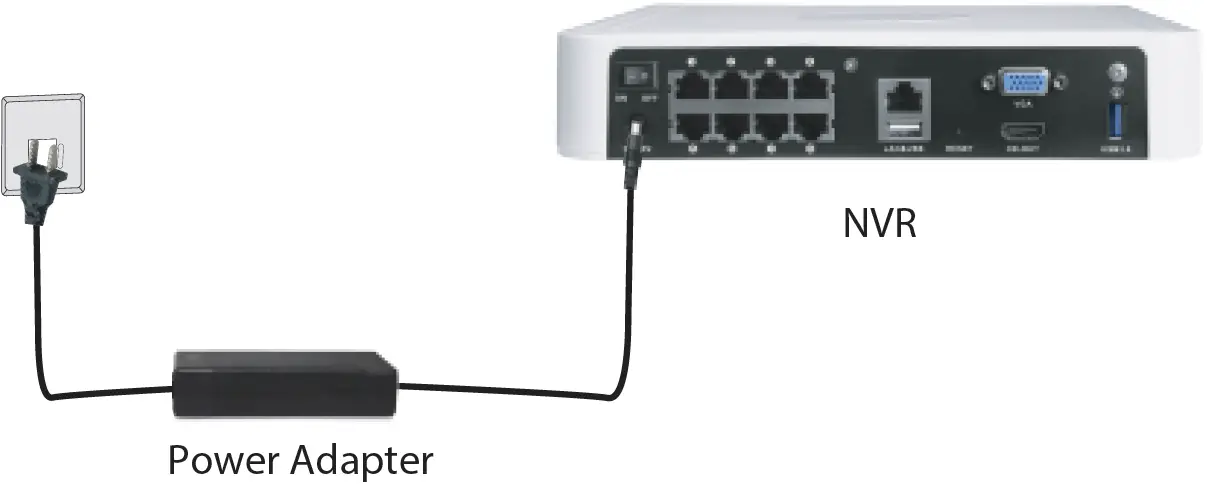
The connection are now complete. You can turn on the power to enter your NVR’s user interface.
Product Performance
Power Supply: DC 48V 2.0A 96W (NVR)DC 12V 1.0A 12W (IPC)
Technical Support
If you have problems with your Foscam device, please contact the reseller you purchased from, or you can e-mail the headquarter technical support team: [email protected]Your valuable comments and suggestions on improving Foscam products are welcomed!
CE Certificate statement Website: https://www.foscam.com/company/ce-certificate.html
Exporter and Importer Information Opened to Public: https://www.foscam.com/company/open-information.html
Manufacturer: Shenzhen Foscam Intelligent Technology Co., LtdAddr: Room 901, Unit B, Building 7, Xingke 1st StreetVanke Cloud City Phase 1, Nanshan Dist., Shenzhen, 518055, Chinawww.foscam.com
 report this ad
![]()
References
[xyz-ips snippet=”download-snippet”]