![]() Quick Setup GuideHD Wireless PTZ Dome IP Camera
Quick Setup GuideHD Wireless PTZ Dome IP Camera

To view this guide in other languages (e.g. Nederlands, ), and for detailed manuals, tools, etc., please visit foscam.com/downloads.
Setting Up Your Foscam Security Camera
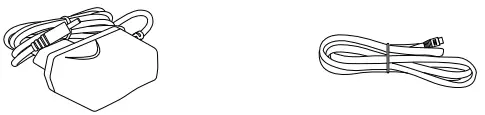
Getting StartedPackage Contents

Security Tips
- Please change the password of your camera regularly, using a combination of numbers, letters, and special characters.
- We recommend that you regularly update your camera to the latest available software and firmware versions to help ensure the best experience for your camera.
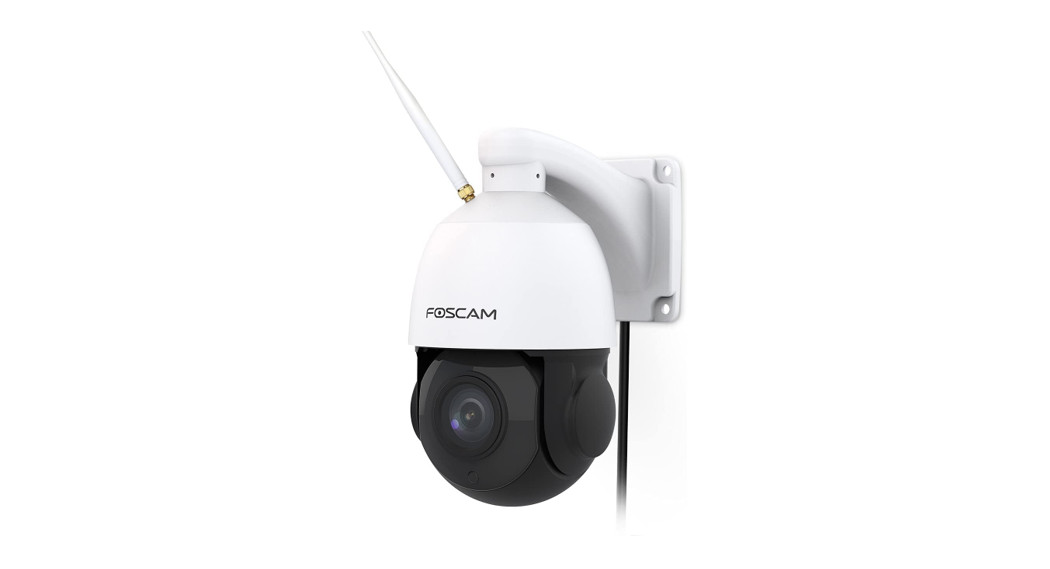
Physical Description
Warning:
The cords on this product present a potential strangulation hazard. For child safety, please keep these cords out of the reach of children.
Setting Up Your Camera:
Wired Connection via Foscam App (Recommended)
Note: We highly recommend that you first begin the setup process by connecting your camera to your Internet router with an Ethernet cable. After setup is successful, you’ll be able to unplug the cable and log in to your wireless network for WiFi operability.Minimum Requirements:To help ensure a smoother video experience on the smartphone, it’s recommended that your smartphone has the following:
- iOS: version 8.1 or higher.
- Android: 4.1 or higher, using a device with a Graphics Processing Unit (GPU) function.
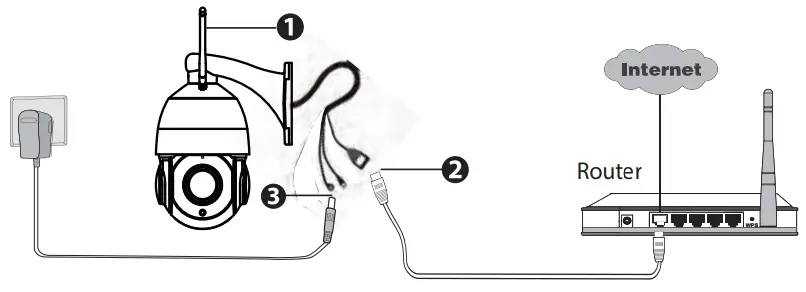
Camera Setup Steps:
- Please mount the antenna and make sure it is in a vertical upright position.
- Connect the camera to your Internet router using an Ethernet cable.
- Connect the power adapter to the camera, and wait for a few moments until the camera alerts you that the “Wired connection succeeded” (if the device is connected with the audio output device).
- From your smartphone, search for “Foscam” via the App Store or Google Play Store. Download, install and open the App to begin configuration.
- Under “Foscam” select “Tap to add a camera” and then select “Camera”, after scanning the QR code, which is located at the bottom of your camera (see illustrations below).

- On the “Choose Setup Method” screen, confirm that “Wired” is selected (upper-left corner) and tap “Ready for Wired Connection.” Wait a few moments for a message confirming that the setup process has been completed (see illustrations below).
Connecting Your Camera Over WiFi
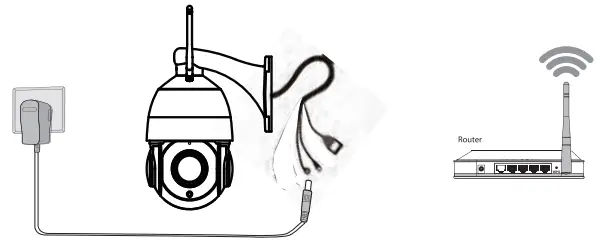
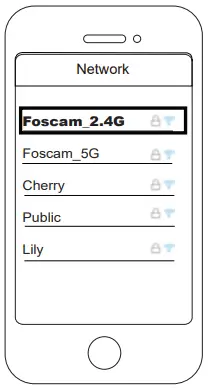
Once you’ve added your camera successfully using the wired connection method above, tap your live camera feed from the My Cameras screen > tap the gear in the upper-right > tap Network > tap the WiFi network you wish to connect to and enter your WiFi password.Note: The camera supports dual-band 2.4GHz & 5GHz WiFi, the speed of 5GHz WiFi is high but the penetrability is weak, so we suggest you use the 2.4GHz WiFi when there is a wall.
Other Ways to Access Your Camera
 Other Ways to Access Your Camera
Foscam Cloud Service
You can access the camera via the Foscam Cloud website: https://www.myfoscam.comSome of the benefits of viewing your camera in the cloud:
- It’s simple and convenient to remotely access and manage all your WiFi security cameras.
- Enjoy the latest features first through Foscam Cloud including cloud storage, video sharing, and more.
- Getting started is fast–if you have already registered an account through Foscam App, you can directly use your login credentials for Foscam Cloud.
Foscam VMS

If you would like to manage multiple cameras, we suggest you install the Foscam VMS. You can download the “Foscam VMS” from foscam.com/vms.
Hardware Installation
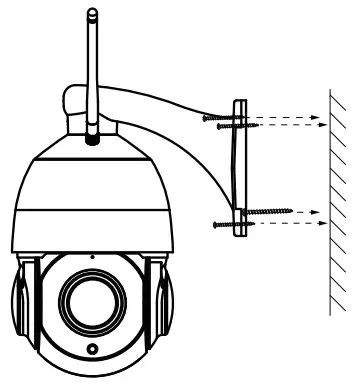
Fixate the camera to your preferred location and use the provided screws to mount it.Please Note:Ensure that the rain or water will not reach the connector ports at the end of the pigtail wiring. These connectors are not weather-resistant.
Important Notice
Camera Username & PasswordThe camera username & password are used to access and manage your camera. Having a strong password can improve the security of your camera significantly.If you have forgotten either of them, please press the “Reset” button and hold it for more than 15 seconds while the camera is powered on. After hearing the voice prompt (if the device is connected with the audio output device), release the button. The camera will automatically reboot and the default settings will be restored. The default username/password will then become an admin / random password on the MAC sticker. Please save your MAC sticker.After restoring to the factory default settings, please delete the camera from Foscam App, and then add it again.Foscam Cloud Service Account Username & PasswordYour Foscam Cloud service account and password may be used to access both Foscam App and the Foscam Cloud service website. Therefore, you may register the account username & password on either one.Storage MediaYour camera supports cloud, NVR (Network Video Recorder), and Micro SD card (only supports FAT-32 format) storage formats. If you wish to record and playback large amounts of video, we recommend using a Foscam NVR device as well.Firmware UpgradeYou can upgrade the firmware of your camera with Foscam App by using the new “One-key Online Upgrade” feature (Open Foscam APP, select Settings > Firmware Upgrade).You also can download the latest version to upgrade your camera from our official website foscam.com/upgrades.Safety Tips
- Please ensure that the proper power supply is used before using the camera.
- Please install the camera securely using the screws provided.
- To avoid the risk of fire or electric shock, please keep your camera connectors in a cool, dry place.
- Please keep the camera out of reach of small children.
- Change your default port to a greater range to help ensure the safety of your connection.
- Check the logs of your Foscam cameras frequently. Foscam Cameras have embedded logs reminding you which IP addresses are accessing the camera.
![]()
 report this ad
CE Certificate Website: https://www.foscam.com/company/ce-certificate.htmlExporter and Importer Information Opened to Public: https://www.foscam.com/company/open-information.htmlwww.foscam.comQuestions? For any issues that occur during the setup process, please write to [email protected] –we’re here to help!As a result of product upgrades and other reasons, this guide may not be able to update in time, resulting in inconsistency with the official website information, please take the official website (www.foscam.com) information as the standard.
FCC Caution:
Any changes or modifications not expressly approved by the party responsible for compliance could void the user’s authority to operate the equipment.This device complies with part 15 of the FCC Rules. Operation is subject to the following two conditions: (1) This device may not cause harmful interference, and (2) this device must accept any interference received, including interference that may cause undesired operation.
IMPORTANT NOTE:
Note: This equipment has been tested and found to comply with the limits for a Class B digital device, pursuant to part 15 of the FCC Rules. These limits are designed to provide reasonable protection against harmful interference in a residential installation. This equipment generates, uses, and can radiate radio frequency energy and, if not installed and used in accordance with the instructions, may cause harmful interference to radio communications. However, there is no guarantee that interference will not occur in a particular installation. If this equipment does cause harmful interference to radio or television reception, which can be determined by turning the equipment off and on, the user is encouraged to try to correct the interference by one or more of the following measures:–Reorient or relocate the receiving antenna.–Increase the separation between the equipment and receiver.–Connect the equipment into an outlet on a circuit different from that to which the receiver is connected.–Consult the dealer or an experienced radio/TV technician for help.FCC Radiation Exposure Statement: This equipment complies with FCC radiation exposure limits set forth for an uncontrolled environment. This equipment should be installed and operated with a minimum distance of 20cm between the radiator& your body.This transmitter must not be co-located or operating in conjunction with any other antenna or transmitter.
[xyz-ips snippet=”download-snippet”]