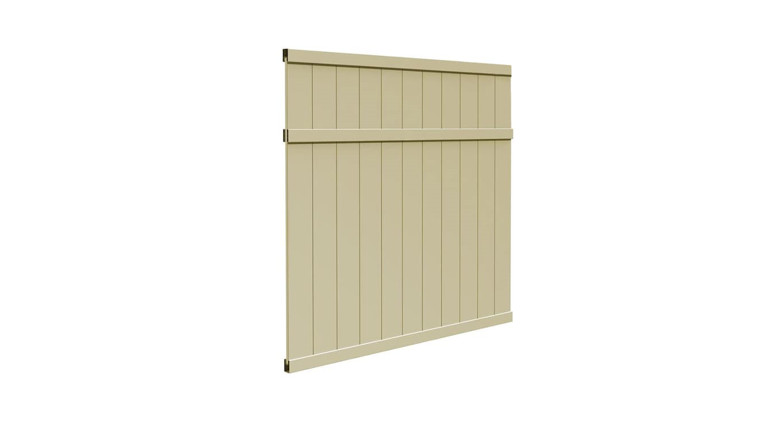
![]() Brighton 6×6 Privacy PanelINSTALLATION INSTRUCTIONS
Brighton 6×6 Privacy PanelINSTALLATION INSTRUCTIONS
![]() WARNING:
WARNING:
- Improper installation of this product can result in personal injury. Always wear safety goggles when cutting, drilling, and assembling the product.
- Incorrect installation may cause harm to the product or individual.
NOTICE:
- DO NOT attempt to assemble the kit if parts are missing or damaged.
- DO NOT return the product to the store, for assistance or replacement
READ INSTRUCTIONS PRIOR TO INSTALLATION
TOOLS/MATERIALS NEEDED:
| Posts |
| Post Hole Digger/Shovel |
| Concrete |
| Coarse Gravel (6″ per hole) |
| Line Stakes with String |
| Safety Glasses |
| Hacksaw or Chopsaw |
| Drill |
| 1/8″ Drill Bit |
| #2 Square Drive Bit |
| Level |
| Pencil |
| Tape Measure |
| Glue |
| (2) 2″ Wood Spacer Blocks |
INSTALLATION
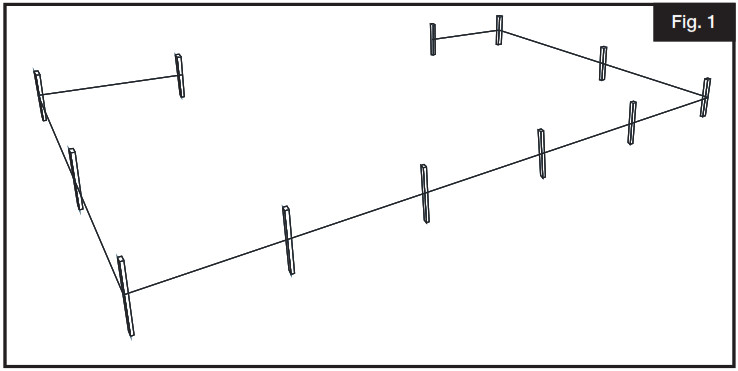
- Fence Location:Mark the fence location using string and line stakes (Fig. 1).

- Post Location:Measure the width of the fence panel (X) plus 3/8″ for brackets. Then measure the width of the post (Y) (Fig. 2). Add these measurements together. This is the oncenter measurement for post hole location.
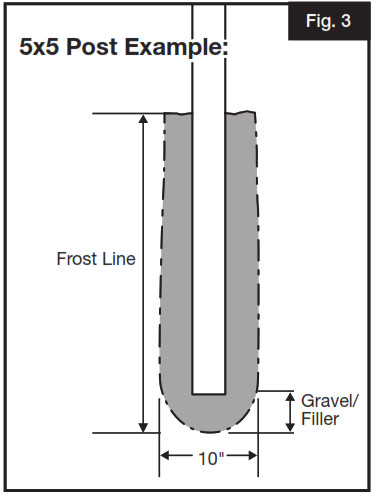
- Post Installation:Dig first two post holes 10″ in diameter down to your specified frost line. Insert filler/gravel into the bottom of both holes and then set first post in post holes. Add wet or dry concrete mix according to the manufacturer’s instruction to the top of the hole for first post only and level it. Example: When your frost line is 36″ insert 12″ of gravel/filler and 24″ of post with concrete surrounding.
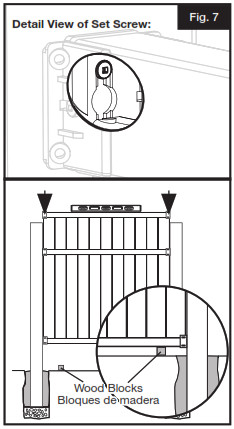
Diameters based on post size: 10″ for 5″ x 5″ post 8″ for 4″ x 4″ post - Rail Bracket Location:a. If you are installing with Set & SecureTM Bracket Kit, measure 23/4″ down from the top center of the post and mark it. This is the location for the Set screw* (Fig. 4). Pre-drill and install Set screws as anchors to hang the panel from. *Set screws are only needed for top rail brackets.b. If you are installing with aluminum brackets, measure down 2″ from the top center of the post and mark it. This location marks the top of the top aluminum bracket. Measure remaining rails and mark for the respective bracket locations (Fig. 5). For more details, see aluminum bracket instructions.
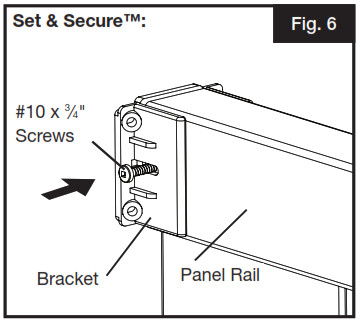
- Add Set & SecureTM Brackets to Panels: Slide brackets onto each rail of the panel. Pre-drill and secure with provided screws (Fig. 6).
- Hang Panel With Set & SecureTM Brackets: Hang the panel on the screws between the posts. To help stabilize the panel, use wood spacer blocks under panel and check alignment with a level (Fig. 7).
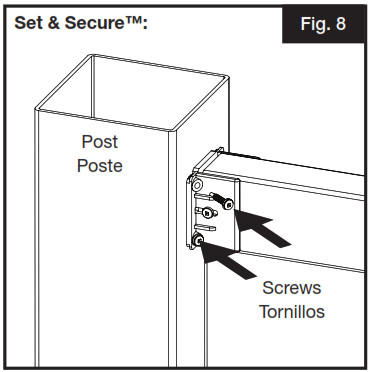
- Attach Panel With Set & SecureTM Brackets: Next, install the remaining screws for the brackets into the posts (Fig. 8).
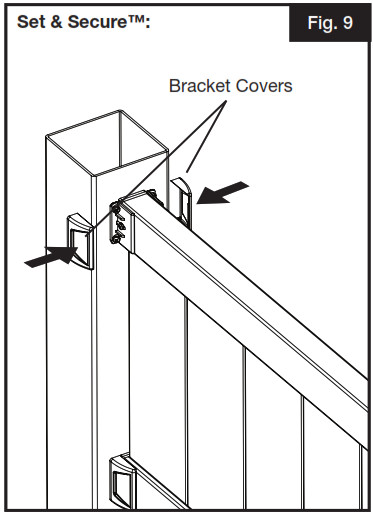
- Finishing Covers for Set & SecureTM Brackets: Add decorative bracket covers to all brackets installed (Fig. 9).Attach post tops to posts with glue (Fig. 10).NOTE:*Varied Terrain Installation:The Set screw position and post heights may require adjustment depending on your varied terrain (Fig. 11).

 b. If you are installing with aluminum brackets, measure down 2″ from the top center of the post and mark it. This location marks the top of the top aluminum bracket. Measure remaining rails and mark for the respective bracket locations (Fig. 5). For more details, see aluminum bracket instructions.
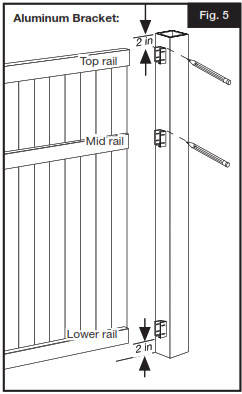
 Attach post tops to posts with glue (Fig. 10).
 NOTE:*Varied Terrain Installation:The Set screw position and post heights may require adjustment depending on your varied terrain (Fig. 11).
BARRETTE OUTDOOR LIVING7830 FREEWAY CIRCLE MIDDLEBURG HEIGHTS, OHIO 44130TEL: (800) 336-2383• WWW.FREEDOMPRODUCT.COM
To register your product, please visit: FreedomProduct.comTo obtain and review a copy of the warranty please go to: Freedomproduct.com/warranty.You can also contact 1.888.418.4400 or write to Freedom Outdoor Living,7830 Freeway Circle, Middleburg Heights, Ohio 44130 to obtain a copy of the warranty.
BY![]() FREEDOM-WEB
FREEDOM-WEB
References
[xyz-ips snippet=”download-snippet”]