![]()
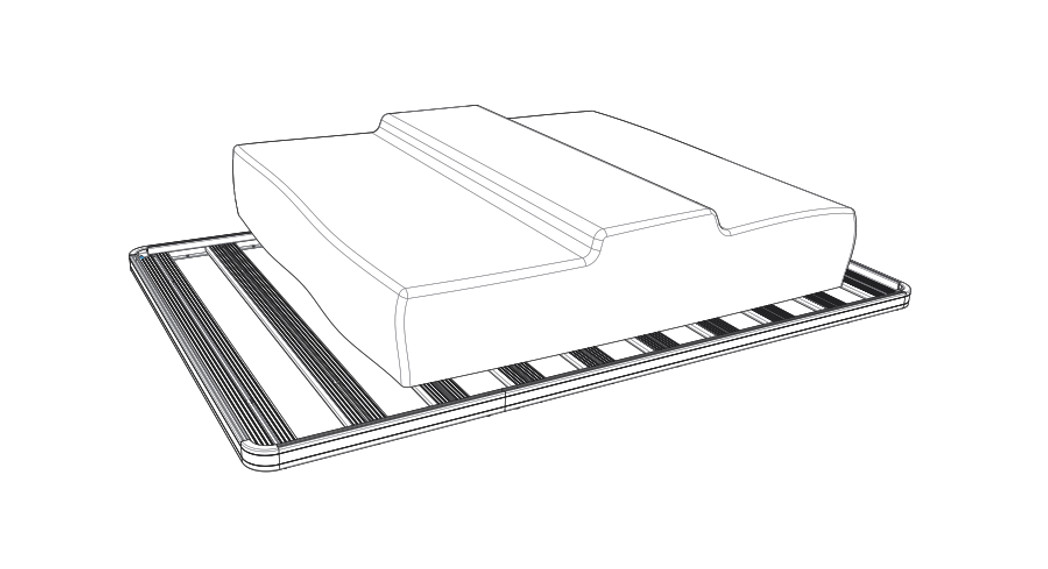
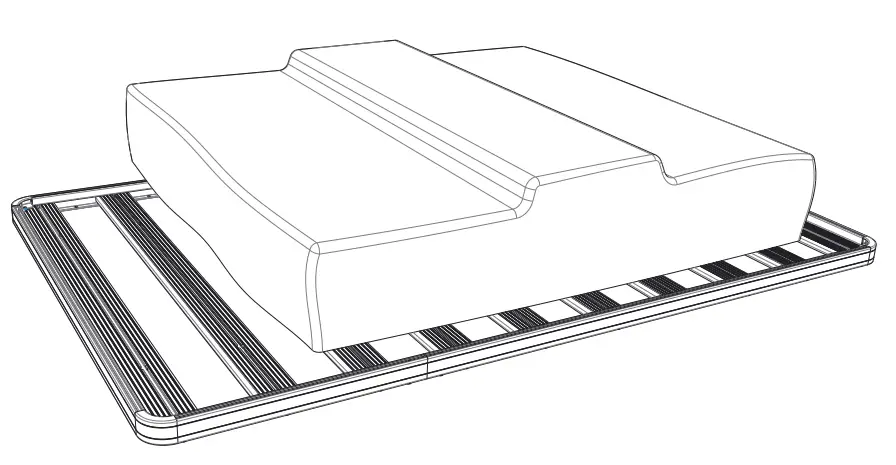
Rooftop tentTENT031

 READ ME FIRST!Thank you for purchasing a Front Runner Roof Top Tent.Before you start, take a moment to familiarize yourself with these Fitting Instructions and the components received.Refer to Page 2 for a list of all the components, quantities and tools required. IMPORTANT WARNING!IT IS CRITICAL THAT ALL FRONT RUNNER PRODUCTS BE PROPERLY AND SECURELY ASSEMBLED AND ATTACHED TO YOUR VEHICLE. IMPROPER ATTACHMENT COULD RESULT IN AN AUTOMOBILE ACCIDENT AND COULD CAUSE SERIOUS BODILY INJURY OR DEATH. YOU ARE RESPONSIBLE FOR ASSEMBLING AND SECURING ALL FRONT-RUNNER PRODUCTS TO YOUR VEHICLE. CHECKING THE ATTACHMENTS PRIOR TO USE, AND PERIODICALLY INSPECTING THE PRODUCTS FOR ADJUSTMENT, WEAR AND DAMAGE. THEREFORE YOU MUST READ AND UNDERSTAND ALL OF THE INSTRUCTIONS AND PRECAUTIONS SUPPLIED WITH YOUR FRONT RUNNER PRODUCT PRIOR TO INSTALLATION OR USE. IF YOU DO NOT UNDERSTAND ALL OF THE INSTRUCTIONS AND CAUTIONS, OR IF YOU HAVE NO MECHANICAL EXPERIENCE AND ARE NOT THOROUGHLY FAMILIAR WITH THE INSTALLATION PROCEDURES, YOU SHOULD HAVE THE PRODUCT INSTALLED BY A PROFESSIONAL INSTALLER OR OTHER QUALIFIED PERSONNEL.
GET ORGANIZED
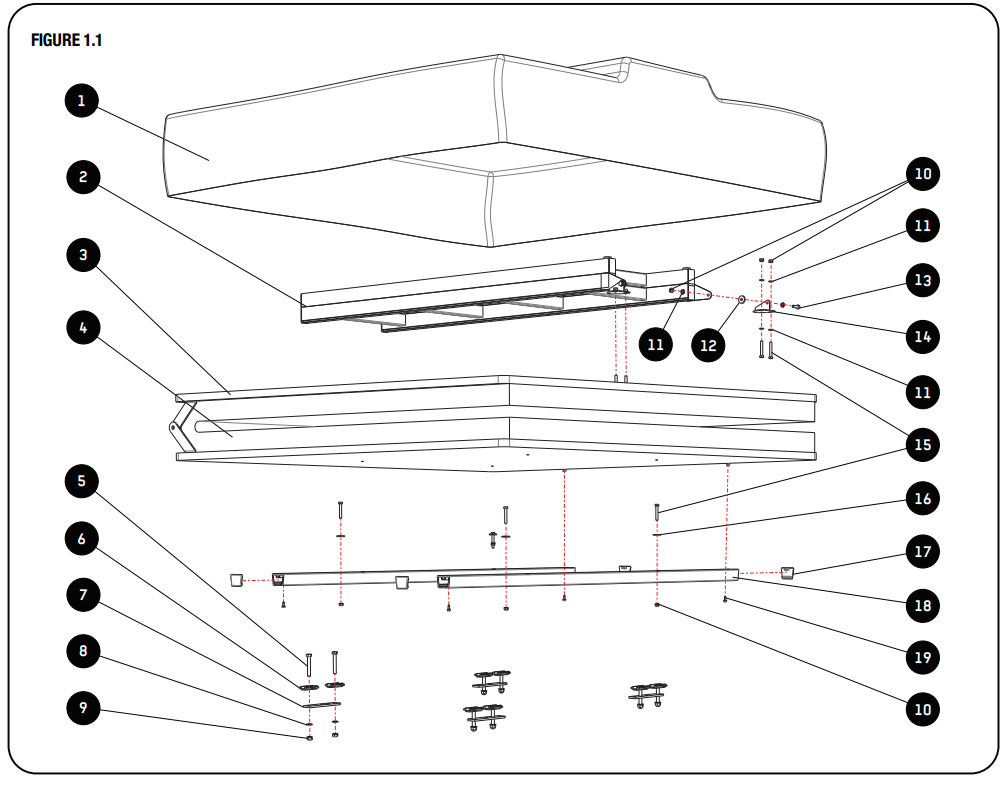
Here is what you are looking at for TENT031
IN THE BOX
| 1 | 1 X | Tent Cover (TENT035) |
| 2 | 1 X | Ladder (TENT025) |
| 3 | 1 X | Tent Base |
| 4 | 1 X | Mattress |
| 5 | 8 X | M8x55 Stainless Steel Hex Bolt |
| 6 | 8 X | Channel Plate |
| 7 | 4 X | Stainless Steel Load Bar Plate |
| 8 | 8 X | M8 Flat Washer |
| 9 | 8 X | M8 Nyloc Hex Nut |
| 10 | 10 X | M6 Nyloc Hex Nut |
| 11 | 10 X | M6 Flat Washer |
| 12 | 2 X | M6x25x3 Black Nylon Flat Washer |
| 13 | 2 X | M6x20 Stainless Steel Hex Bolt |
| 14 | 2 X | Stainless Steel Ladder Hinge Mount |
| 15 | 10 X | M6x40 Stainless Steel Hex Bolt |
| 16 | 4 X | M6x30 Stainless Steel Flat Washer |
| 17 | 4 X | Mounting Channel End Cap |
| 18 | 2 X | Mounting Channel (TENT038) |
| 19 | 4 X | Self Tapping Screw |
| 20 | 3 X | U-Shaped Support Tube (TENT048) |
| 21 | 2 X | Long Fly Sheet Bow |
| 22 | 4 X | Medium Fly Sheet Bow |
| 23 | 1 X | Fly Sheet Bow Bag |
| 24 | 1 X | Fly Sheet (TENT024) |
TOOLS NEEDED

MAKE A CHOICE
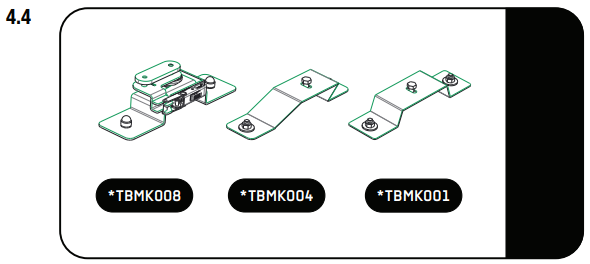
HOW WILL YOU BE MOUNTING YOUR ROOFTOP TENT?If you have a basket-type roof rack with raised edges that are 2 inches or more from the top of the rack slats, it is unlikely that you will be able to use the rack to mount your tent without some major modifications.If you’re using a Front Runner rack, be sure you have the appropriate Front Runner tent mount kit (TBMK001 – Low mount kit, TBMK004 – High mount kit or TBMK010 – Quick release mount kit).
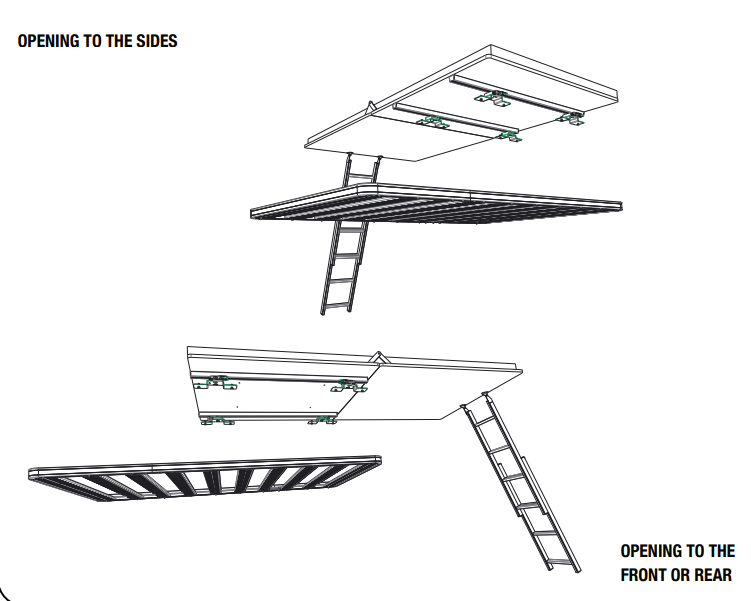
The Roof Top Tent is supplied with brackets and hardware to allow mounting directly to the Front Runner and other manufacturer’s load bars.WHICH WAY DO YOU WANT YOUR TENT TO OPEN? CONSIDER THE FOLLOWING:How will you be accessing the interior of the vehicle when camping?Will you be using any optional Annexes?On some vehicles, it’s not possible to open the tent over the rear, as some tailgates and windows open higher than the rear roofline which may interfere with the tent.If the tent opens over the rear, it can provide a small amount of shelter from the sun and rain. This is particularly useful if the tailgate is used as a kitchen, or as a changing room with the optional annexes.If you choose to install the tent over the rear of the vehicle, there is an extra step in the installation procedure. You will need to shorten the aluminum base mounting channels.If opened over the side, the tent and optional annex (TENT032) can be positioned to shelter one of the side doors. This can be useful when accessing luggage for changing, or supplies for food prep. The tent can open either over the driver or passenger side doors.If you’d like to position the tent on the rack towards the front of the vehicle, leaving more space on the rear of the rack for gear, the tent would need to open over the sides. While it is possible to have the tent open over the hood of the vehicle, the ladder would need to be modified to attach to a bull bar.
2.1
PREPARING THE TENT FOR FITMENT

Look for the 4 pre-drilled holes on one side of the tent base (Arrows A). These will be used to fix the mounting channel (Item 18).There are 2 pairs of pre-drilled holes along the edge of the extrusion (B Arrows). This is where the ladder will mount on the opening side of the tent.
![]() Open the tent, remove the mattress and insert the four M6 Hex bolts and accompanying washers (Item 15 and 17) from the inside of the tent through the pre-drilled holes in the base of the tent.Place the mounting channels (Item 18) over the bolts (Item 15) according to the direction you want your tent to open, Option 1 or Option 2 and secure loosely with M6 Nuts (Item 10).
Open the tent, remove the mattress and insert the four M6 Hex bolts and accompanying washers (Item 15 and 17) from the inside of the tent through the pre-drilled holes in the base of the tent.Place the mounting channels (Item 18) over the bolts (Item 15) according to the direction you want your tent to open, Option 1 or Option 2 and secure loosely with M6 Nuts (Item 10).
![]() Note: This following step is not required if you are mounting your tent to open over the sides of the rack. Jump ahead to step 3.3
Note: This following step is not required if you are mounting your tent to open over the sides of the rack. Jump ahead to step 3.3![]() This Step is for mounting your tent that it opens either over the front or rear of your vehicle. Position the mounting channels in place, using the holes in the base as a guide.
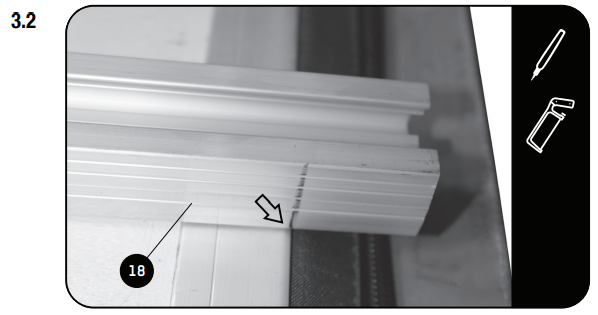
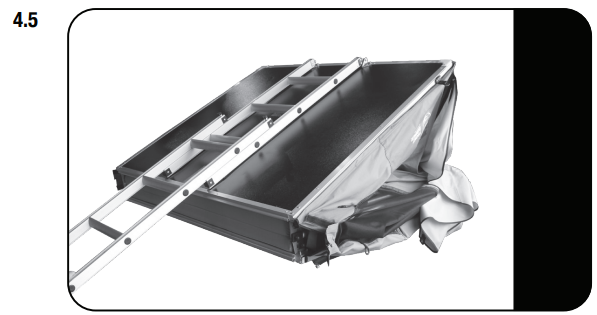
This Step is for mounting your tent that it opens either over the front or rear of your vehicle. Position the mounting channels in place, using the holes in the base as a guide.![]() Mark up the amount that needs to be trimmed off on both ends. Trim off with a hacksaw or other appropriate tool.
Mark up the amount that needs to be trimmed off on both ends. Trim off with a hacksaw or other appropriate tool.

![]() If you had to trim the mounting channels you will also need to drill a 4mm hole 20mm from the edge of each end of the channels, as shown.Securely mount the channels to the base with the Hex bolts and Washers (Item 15 and 17).Now use the self-tapping screws (Item19) to secure the ends of the mounting channels to the bases aluminum edging.
If you had to trim the mounting channels you will also need to drill a 4mm hole 20mm from the edge of each end of the channels, as shown.Securely mount the channels to the base with the Hex bolts and Washers (Item 15 and 17).Now use the self-tapping screws (Item19) to secure the ends of the mounting channels to the bases aluminum edging.
FITMENT

![]() Secure the ladder to the hinges (Item 14) as shown, note the position of the plastic washer (Item 12).
Secure the ladder to the hinges (Item 14) as shown, note the position of the plastic washer (Item 12).
![]() Fit and secure the ladder hinges to the base of the tent with the four M6x40mm hex bolts (Item 15). Insert the bolts from the inside of the tent and secure them with four M6 Nyloc nuts (Item 10) and washers (Items 11).
Fit and secure the ladder hinges to the base of the tent with the four M6x40mm hex bolts (Item 15). Insert the bolts from the inside of the tent and secure them with four M6 Nyloc nuts (Item 10) and washers (Items 11).
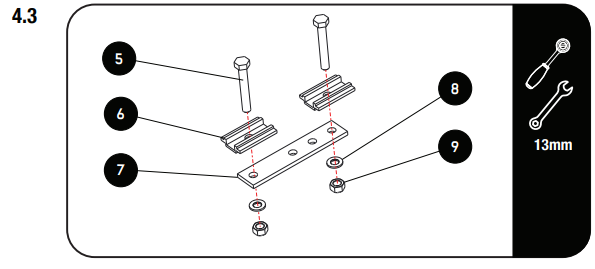
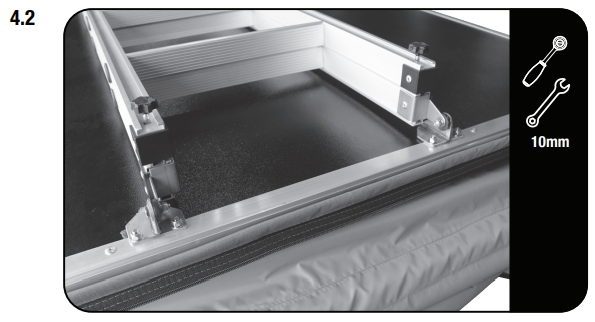
![]() If mounting to an old-fashioned steel rack with oval/rectangular rails or to load bars that are no wider than 90mm and no higher than 38mm. Use the load bar plates supplied (Item 7).Insert the M8 hex bolts (Item 5) through the channel plates (Item 6) and then the channel plate with the hex bolt into the mounting channel.Secure as shown.
If mounting to an old-fashioned steel rack with oval/rectangular rails or to load bars that are no wider than 90mm and no higher than 38mm. Use the load bar plates supplied (Item 7).Insert the M8 hex bolts (Item 5) through the channel plates (Item 6) and then the channel plate with the hex bolt into the mounting channel.Secure as shown.
![]() If mounting to a Front Runner Rack refer to the fitting instructions supplied with your Front Runner Tent Mount Kit.
If mounting to a Front Runner Rack refer to the fitting instructions supplied with your Front Runner Tent Mount Kit.![]() Fit the plastic end caps to the mounting channel ends (Item 17).Once your tent is securely mounted move on to the next step.
Fit the plastic end caps to the mounting channel ends (Item 17).Once your tent is securely mounted move on to the next step.
![]() Open the tent using the ladder as a lever.Checking that the ladder reaches the ground. The ladder has pre-drilled holes that secure it in place.
Open the tent using the ladder as a lever.Checking that the ladder reaches the ground. The ladder has pre-drilled holes that secure it in place.
![]() When extended and resting on solid ground, the ladder should have a slight angle outwards.The ladder has been pre-drilled for the popular vehicle heights, you may need to drill one additional hole on either side of the ladder if you need it to be shorter.
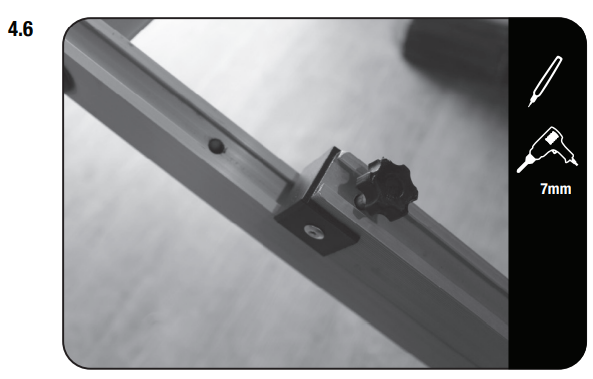
When extended and resting on solid ground, the ladder should have a slight angle outwards.The ladder has been pre-drilled for the popular vehicle heights, you may need to drill one additional hole on either side of the ladder if you need it to be shorter.![]() Disengage the pins to position the ladder to the desired angle.Mark the position of the pins and using a 7mm bit, drill the 2 additional holes for the pins to lock in to.
Disengage the pins to position the ladder to the desired angle.Mark the position of the pins and using a 7mm bit, drill the 2 additional holes for the pins to lock in to.
WARNING! READ ME FIRST!NEVER EXTEND THE LADDER BEYOND THE FACTORY HOLES AND LOCKING POSITIONS.DO NOT DRILL NEW HOLES PAST THE EXISTING HOLES.THE LADDER IS NOT SAFE WHEN EXTENDED PAST THE FACTORY HOLES.IF A LONGER LADDER IS NEEDED FOR EXTREMELY HIGH VEHICLES, PLEASE ORDER A LADDER EXTENSION. (TENT022)
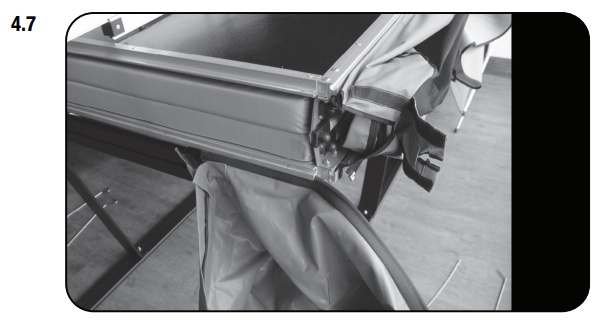
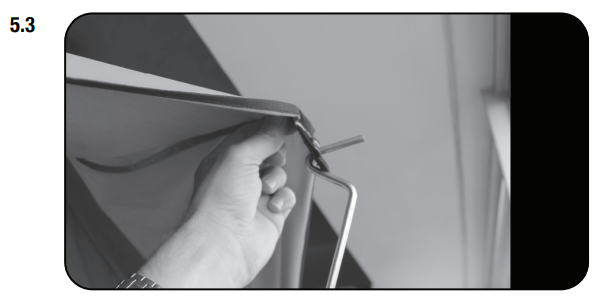
![]() Fit the tent cover by sliding the beaded edge into the aluminum channel of the tent base as shown.
Fit the tent cover by sliding the beaded edge into the aluminum channel of the tent base as shown.
SETTING UP YOUR TENT
![]() Fit the three U-shaped support tubes as shown.
Fit the three U-shaped support tubes as shown.![]() These do not need to be removed again once fitted.
These do not need to be removed again once fitted.

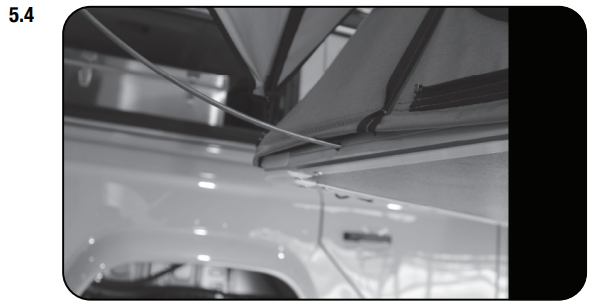
![]() Fit the two longer fly sheet bows on each side of the tent, sliding them securely into the round section of the aluminum channel between the baseboards.
Fit the two longer fly sheet bows on each side of the tent, sliding them securely into the round section of the aluminum channel between the baseboards.
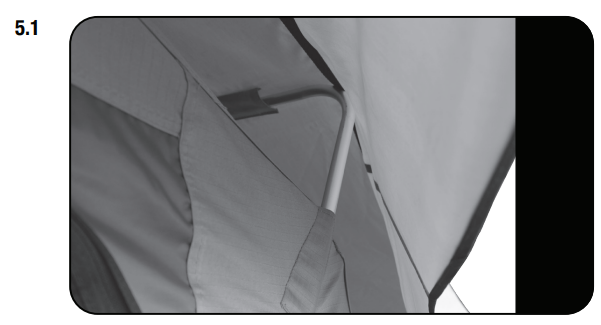
![]() Insert the top hook by using two hands and pushing up and inward to create a curve, making it easier to hook into the eyelets.
Insert the top hook by using two hands and pushing up and inward to create a curve, making it easier to hook into the eyelets.
![]() To fit the four shorter bows to the front and rear of the fly sheet, slide them into the holes near the ends of the aluminum extrusion on the base of the tent. Use the same technique as in Step 5.6 to secure them.Note: The window bows will maintain some curve after the first use – no worries! This is normal.
To fit the four shorter bows to the front and rear of the fly sheet, slide them into the holes near the ends of the aluminum extrusion on the base of the tent. Use the same technique as in Step 5.6 to secure them.Note: The window bows will maintain some curve after the first use – no worries! This is normal.![]() The steel bows can be stored in their bag, under the mattress when not in use.
The steel bows can be stored in their bag, under the mattress when not in use.
COVER

![]() Fully zip the three edges of the cover to the base and use the velcro to pull in and secure the four corners of the cover.
Fully zip the three edges of the cover to the base and use the velcro to pull in and secure the four corners of the cover.

![]() Secure the cover with the two straps by feeding them through the buckle as shown and pulling tight.
Secure the cover with the two straps by feeding them through the buckle as shown and pulling tight.
COMPLETION
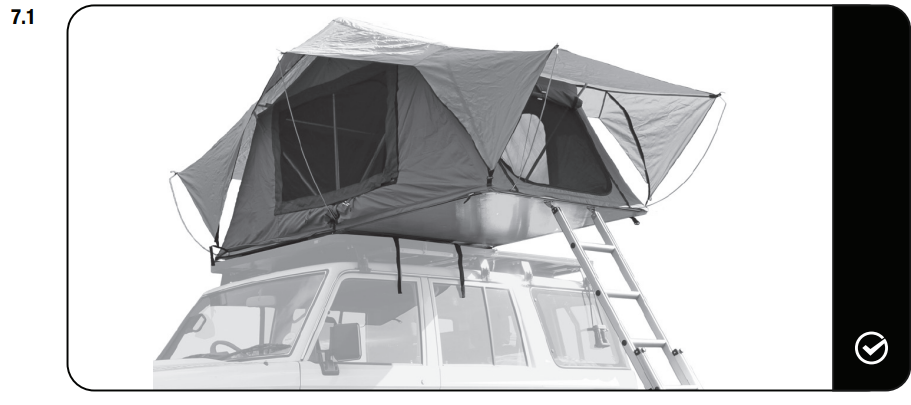
Congratulations. You did it. Take a step back and admire your work!
ROOF TOP TENT CARE
Air your tent at regular intervals, even when you are not using it. This can prevent possible mould growth, which can be caused by wet or damp weather conditions.
INSTALL OTHER VEHICLE AND RACK ACCESSORIES
Now’s the time to visit your favorite Front Runner Dealer in person or online.
Be sure to tag us. We love to see our gear in action! #FrontRunnerOutfitters #BornToRoamShare your adventures on:
TENT031_REV_A05_MV© 2021 FRONT RUNNER VEHICLE OUTFITTERS
[xyz-ips snippet=”download-snippet”]