

FrSky Access Taranis X90 Plus
Introduction
The FrSky Taranis X9D Plus 2019 is a re-designed version with additions like an additional momentary button placed on the top left shoulder making it ergonomically friendly for DLG pilots to activate launch mode, and features a program scroll wheel making it even easier to navigate the menus. The upgraded MCU is used in conjunction with a re-designed mainboard that further increases the computing capability and increases the data storage. The upgrades not only improve the running of LUA scripts, it also optimizes overall performance like voice speech outputs.
The 2019 version uses the latest ACCESS communication protocol, it boasts 24 channels with a faster baud rate and lower latency with a high-speed module digital interface. Along with the new spectrum analysis function added to the OpenTX firmware, it is now possible to check the airwaves for RF noise with an accurate SWR indicator. This version will give you a further improved experience based on the classic Taranis remote control. Additionally, tons of extra upcoming features that ACCESS brings will make this an ideal transmitter for any skill level.
The SE 2019 version is installed with the upgraded switches and M9 hall sensor gimbals and features the addition of a PARA wireless trainer function which makes them compatible with the FrSky Free Link App and AirLink S.
Layout
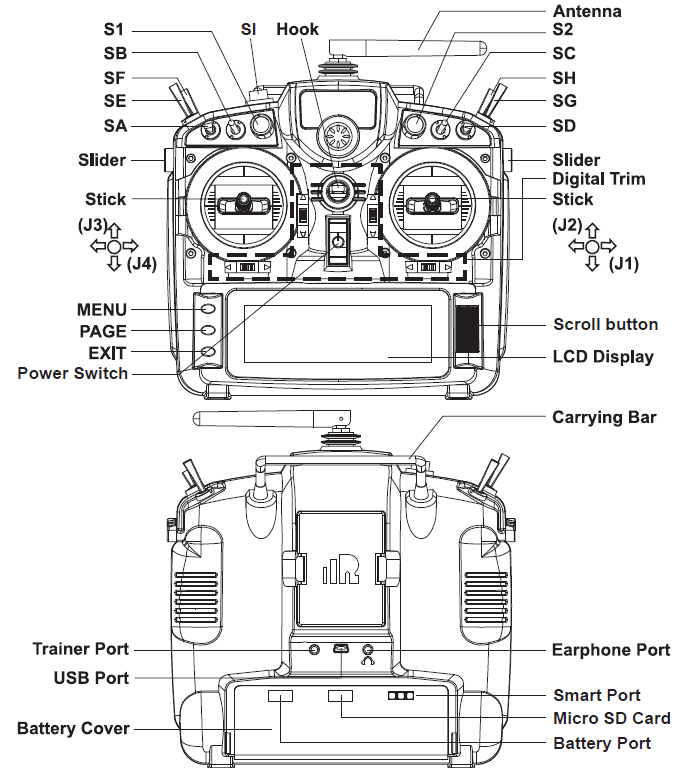
Switch
- SA: 3 positions; Short lever
- SB: 3 positions; Long lever
- SC: 3 positions; Long lever
- SD: 3 positions; Short lever
- SE: 3 positions; Short lever
- SF: 2 positions; Long lever
- SG: 3 positions; Short lever
- SH: 2 positions; Momentary, Long lever
Tact switch, Momentary
- Micro SD card is not provided with shipment.
- USB port is for upgrading, reading/writing Micro SD cards and internal memory of radio contents and charing (Includes USB cable in packge but without the adapter).
- Smart Port is for firmware upgrade for all FrSky S.Port devices.
Specifications
- Model name: Taranis X9D Plus 2019/Taranis X9D Plus SE 2019
- Dimension: 200*194*110 (L*W*H)
- Weight: Taranis X9D Plus 2019: 670g (without battery)Taranis X9D Plus SE 2019: 700g (without battery)
- Operating Current: (Typ)
- Backlight LCD resolution: 212*64
- Model Memories: 60 models (Extenable by Micro SD card)
- Number of channels: 24 channels
- Operating Voltage Range: DC 6.5~8.4V
- Opertaing Temperature: -10℃~60℃ (14℉~140℉)
- Smart Port, Micro SD card slot and USB Port
- OpenTX system
Features
- Classic Taranis form factor design
- High-speed module digital interface
- Easy launch momentary button
- Installed with ACCESS protocol
- Supports spectrum analyzer function
- Accurate SWR indicator
- Haptic vibration alerts and voice speech outputs
Comparison List
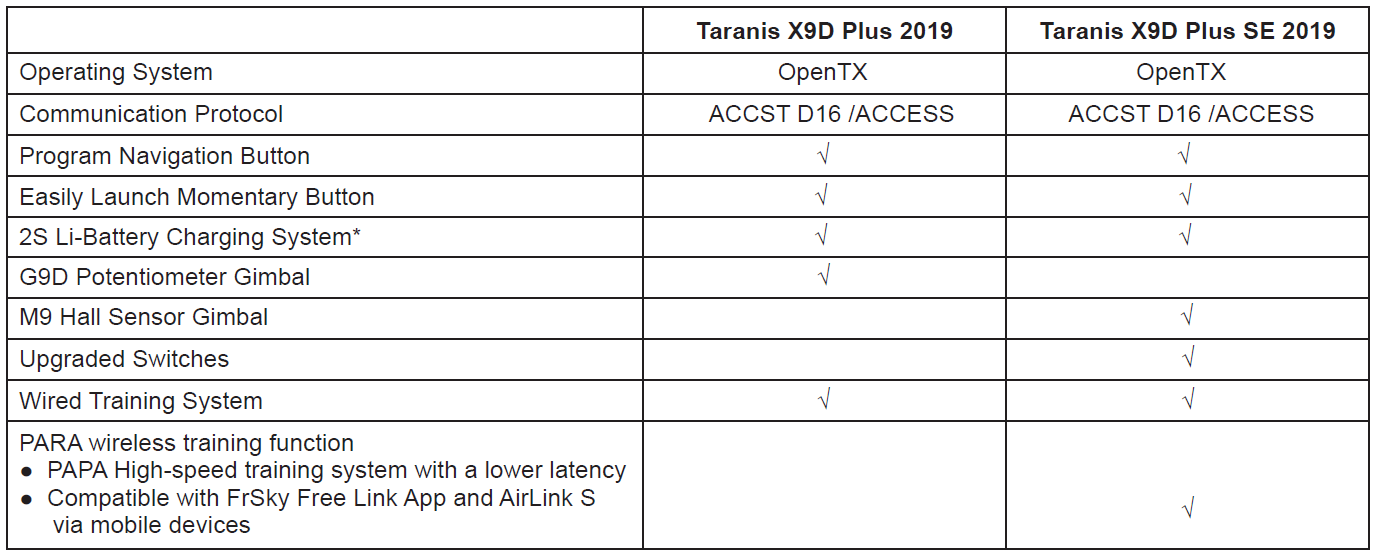
About USB 2S Li-battery balance charging :
The Green Power indicator LED state:
- Led on: charging
- Led off: charge end
- Led flash: charge fault
To navigate the menus, Taranis X9D Plus 2019/Taranis X9D Plus SE 2019 has the following elements:
- Scroll Button
- MENU Button
- PAGE Button
- EXIT Button
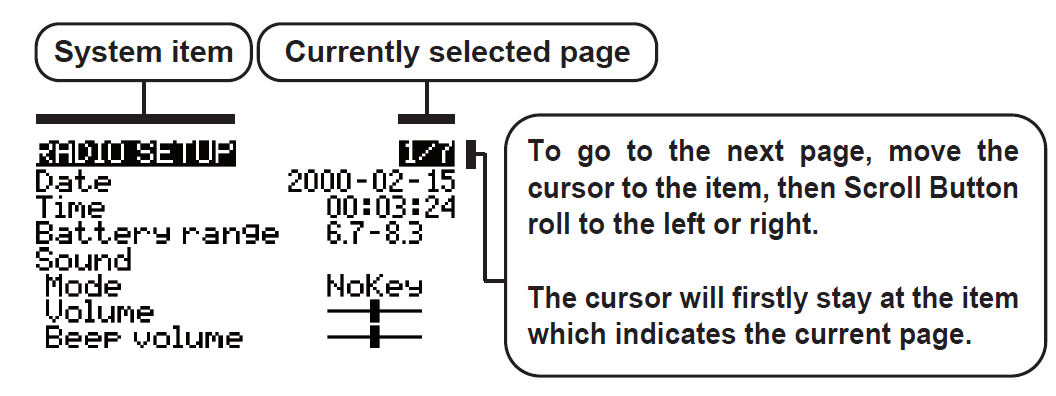
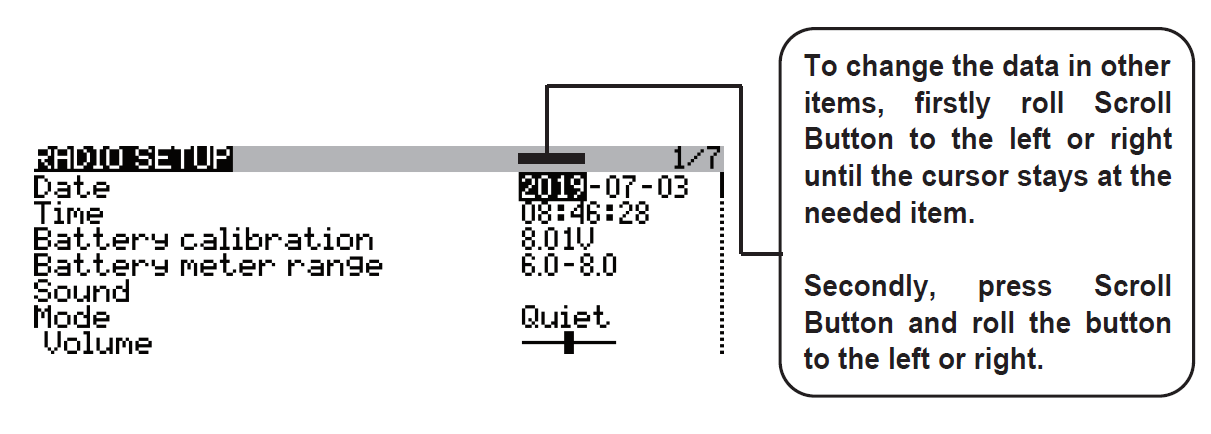
Taranis X9D Plus 2019/Taranis X9D Plus SE 2019 supports OpenTX system
To navigate menus or widgets, roll the button to left or right as navigation.
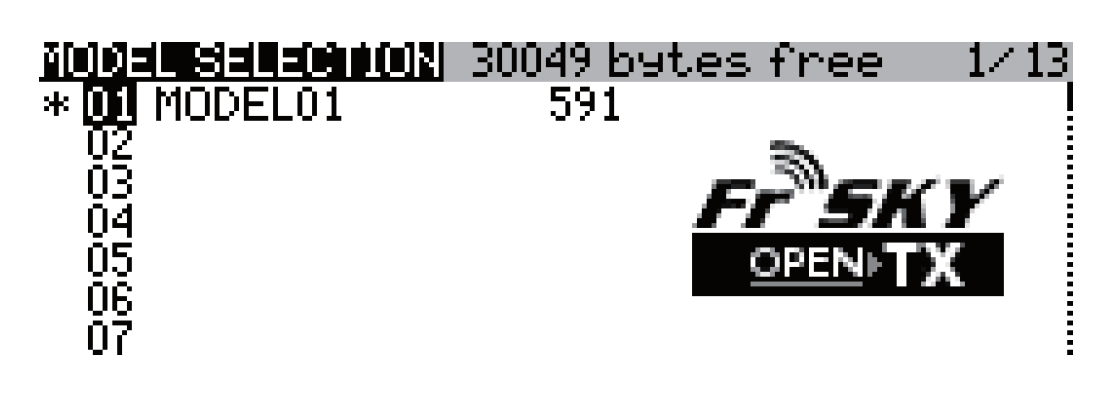
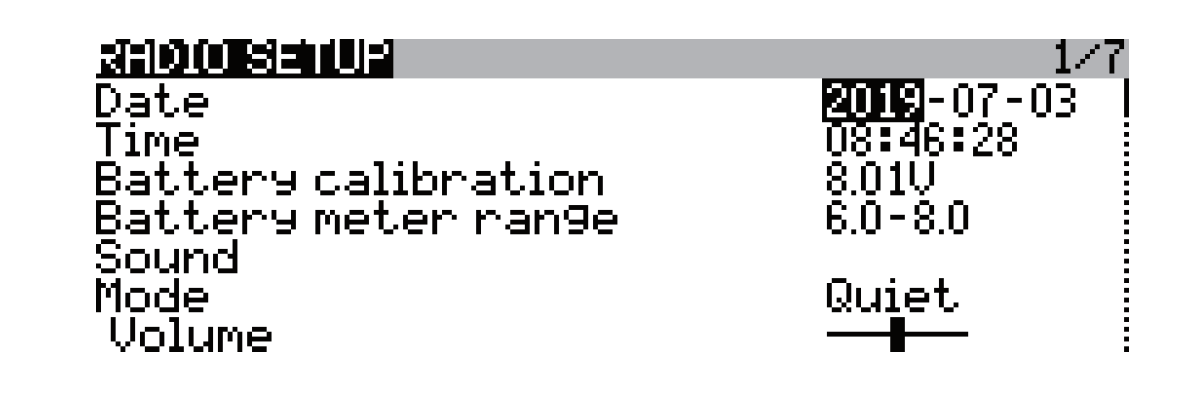
To go to the [Model] menu, press the button.To go to the [RADIO SETUP] menu, press the button, and hold for one second.
To go to switch the page, press the button.To go to the [Telemetry] menu, press the button, and hold for one second.
To exit current page or operation widgets.
Menu tree
Overview of the menu tree
Quick select options
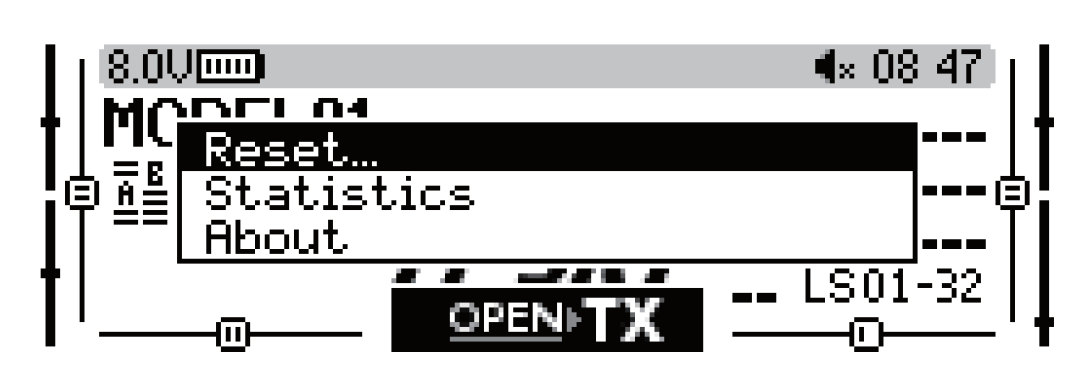
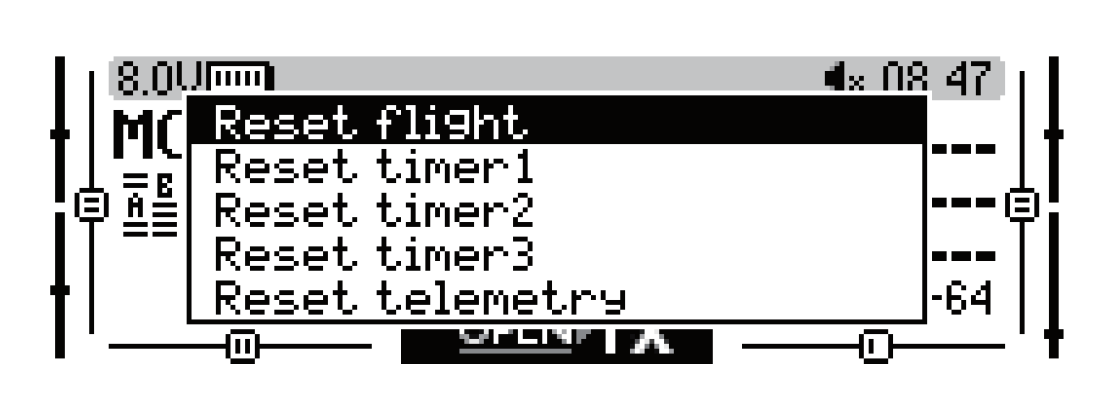
Long press the Scroll Button there will generate a pop-up where the user can reset timer, reset telemetry values, reset all above, jump to the tele setup page.
Model Setup for Taranis X9D Plus 2019/Taranis X9D Plus SE 2019 Internal RF Module
Step 1: Set the Mode for Taranis X9D Plus 2019/Taranis X9D Plus SE 2019 Internal RF.
Go to the MODEL SETUP menu, and select the Internal RF, select [Mode] [ACCESS].
Step 2: Set the Channel Range
The Internal RF module of Taranis X9D Plus 2019/Taranis X9D Plus SE 2019 supports up to 24 channels. The channel range is configurable, and needs to be confirmed before use.
Step 3: Set the Receiver Number
When you create a new model, the system will assign you a receiver number automatically, but this can be easily changed. The range of the receiver number is 00-63, with the default number being 01 (use 00 is not recommended). Once the receiver is set to desired number and is bound to the Taranis X9D Plus 2019/Taranis X9D Plus SE 2019, the bind procedure will not need to be repeated unless the receiver number is changed. In this case, either set the receiver number to the previous one or repeat the bind procedure.
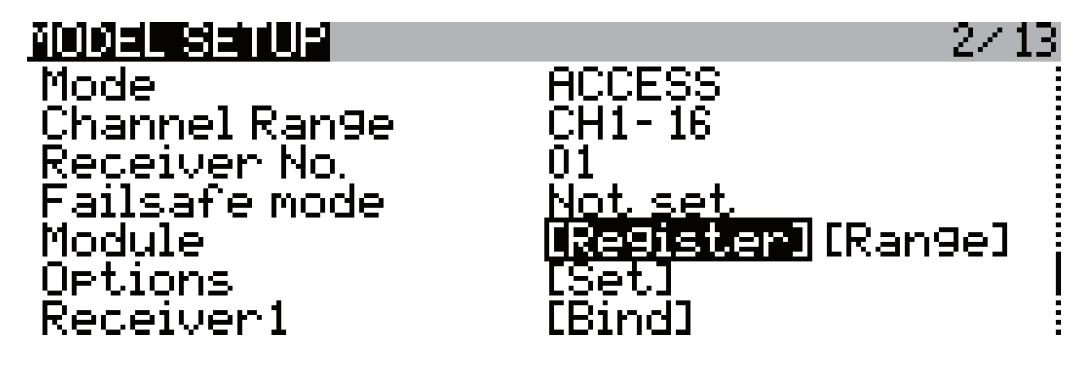
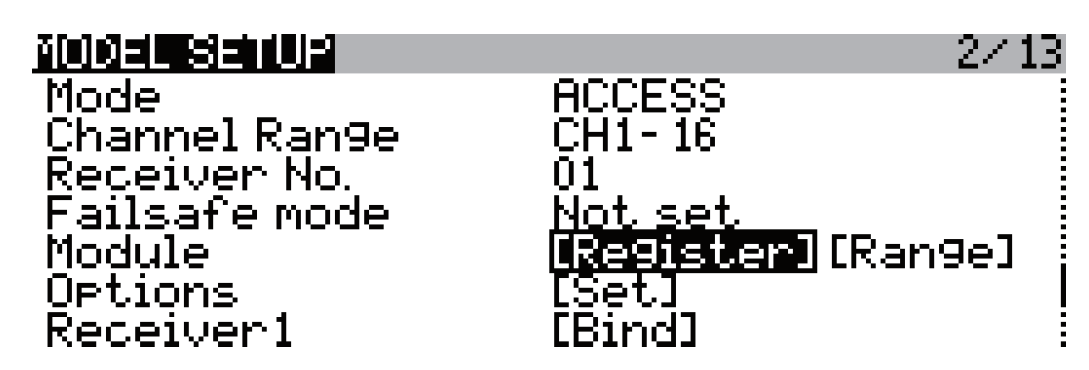
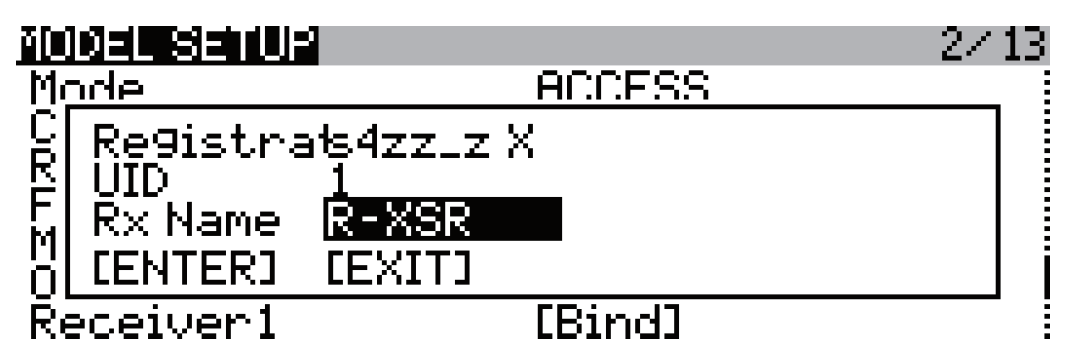
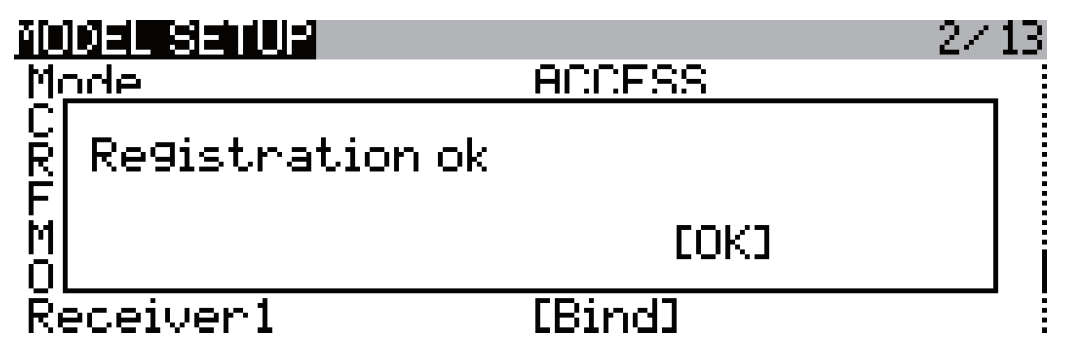
Step 4: Registration
In ACCESS, select the Module [Register] into Registration status. Then Press the F/S button and power on your receiver, and select the “RX Name XX” and [ENTER] to complete the Registration process then power down the receiver.
Step 6: Set Failsafe mode
There are 4 failsafe modes: No pulse, Hold, Custom and receiver.No Pulse: on loss of signal the receiver produces no pulses on any channel. To use this type, select it in the menu and wait 9 seconds for the failsafe to take effect.
Hold: the receiver continues to output the last positions before signal was lost. To use this type, select it in the menu and wait 9 seconds for the failsafe to take effect.
Custom: pre-set to required positions on lost signal. Move the cursor to “Set” and press the Scroll Button, and you can see FAILSAFE SETTING screen below. Move the cursor to the channel you want to set failsafe on, and press the Scroll Button.
When moving the corresponding sticks or switches, you will see the channel bar moving. Move the channel bar to the place you want for failsafe and long press the Scroll Button to finish the setting. Wait 9 seconds before failsafe takes effect.
Receiver: set the failsafe on the receiver (see receiver instructions) in ACCESS, select it in the menu and wait 9 seconds for the failsafe to take effect.
Step 7: Range
Range refers to Taranis X9D Plus 2019/Taranis X9D Plus SE 2019 range check mode. A pre-flight range check should be done before each flying session. Move the cursor to [Range] and press the Scroll Button. In range check mode, the effective distance will be decreased to 1/30. Press the Scroll Button or EXIT to exit.
FLYING SAFETY
Warning:
To ensure the safety of yourself and others, please observe the following precautions.
Have regular maintenance performed. Although your Taranis X9D Plus 2019/Taranis X9D Plus SE 2019 protects the model memories with non-volatile EEPROM memory (which does not require periodic replacement) and of a battery, it still should have regular check-ups for wear and tear. We recommend sending your system to your FrSky Service Center annually during your non-flying-season for a complete check-up and service.
Battery
Using a fully charged battery (DC 6.5~8.4V). A low battery will soon die, causing loss of control and a crash. When you begin your flying session, reset your transmitter’s built-in timer, and during the session pay attention to the duration of usage. Also, if your model used a separate receiver battery, make sure it is fully charged before each flying session.
Stop flying long before your batteries become over discharged. Do not rely on your radio’s low battery warning systems, intended only as a precaution, to tell you when to recharge. Always check your transmitter and receiver batteries prior to each flight.
Where to Fly
We recommend that you fly at a recognized model airplane flying field. You can find model clubs and fields by asking your nearest hobby dealer.
Always pay particular attention to the flying field’s rules, as well as the presence and location of spectators, the wind direction, and any obstacles on the field. Be very car eful flying in areas near power lines, tall buildings, or communication facilities as there may be radio interference in their vicinity.
At the flying field
To prevent possible damage to your radio gear, turn the power switches on and off in the proper sequence:
- Pull throttle stick to idle position, or otherwise disarm your motor/engine.
- Turn on the transmitter power and allow your transmitter to reach its home screen.
- Confirm the proper model memory has been selected.
- Turn on your receiver power.
- Test all controls. If a servo operates abnormally, don’t attempt to fly until you determine the cause of the problem.
- Start your engine.
- Complete a full range check.
- After flying, bring the throttle stick to idle position, engage any kill switches or otherwise disarm your motor/ engine.
If you do not turn on your system on and off in this order, you may damage your servos or control surfaces, flood your engine, or in the case of electric-powered or gasoline-powered models, the engine may unexpectedly turn on and cause a severe injury.
Make sure your transmitter can’t tip it over. If it is knocked over, the throttle stick may be accidentally moved, causing the engine to speed up. Also, damage to your transmitter may occur.
In order to maintain complete control of your aircraft it is important that it remains visible at all times. Flying behind large objects such as buildings, grain bins, etc. must be avoided. Doing so may interrupt the radio frequency link to the model, resulting in loss of control.
Do not grasp the transmitter’s antenna during flight. Doing so may degrade the quality of the radio frequency transmission and could result in loss of control.
As with all radio frequency transmissions, the strongest area of signal transmission is from the sides of the transmitter’s antenna. As such, the antenna should not be pointed directly at the model. If yo ur flying style creates this situation, easily move the antenna to correct this situation.
Before taxiing, be sure to extend the transmitter antenna to its full length.A collapsed antenna will reduce your flying range and cause a loss of control. It is a good idea to avoid pointing the transmitter antenna directly at the model, since the signal is weakest in that direction.
Don’t fly in the rain! Water or moisture may enter the transmitter through the antenna or stick openings and cause erratic operation or loss of control. If you must fly in wet weather during a contest, be sure to cover your transmitter with a plastic bag or waterproof barrier. Never fly if lightning is expected.
Updates
FrSky is continuously adding features and improvements to our radio systems. Updating (via USB Port or the Micro SD card) is easy and free. To get the most from your new transm itter, please check the download section of the FrSky website for the latest update firmware and guide for adjusting your sticks. (www.frsky-rc.com)
FrSky Access Taranis X90 Plus 2019/ Taranis X90 Plus SE 2019 Instruction Manual – FrSky Access Taranis X90 Plus 2019/ Taranis X90 Plus SE 2019 Instruction Manual –
[xyz-ips snippet=”download-snippet”]