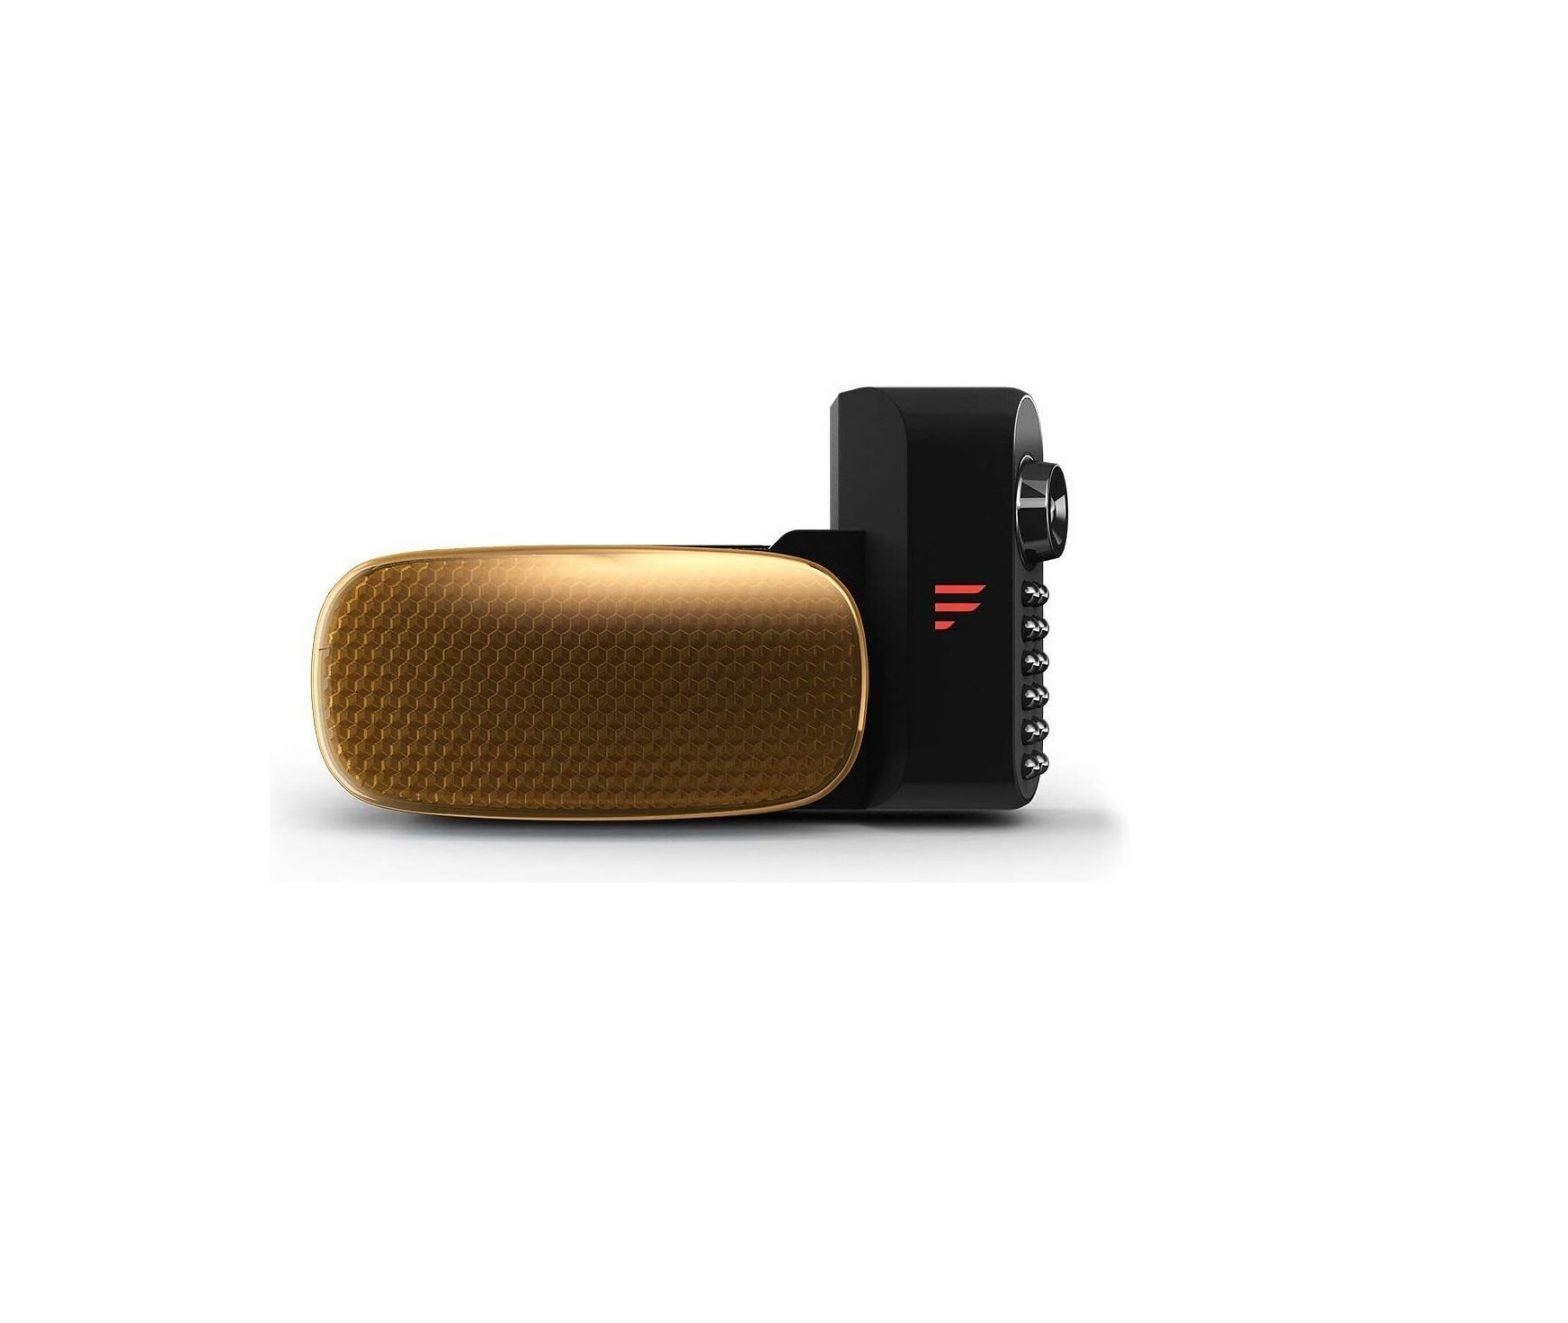
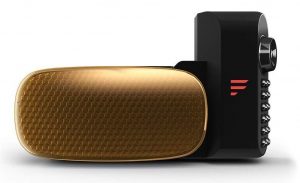
FURRION Traffic light
What’s in the box
Make sure you have the following items included in the packaging. If any item is damaged or missing, contact your dealer.
- Traffic light x 1 (different by model)
- Instruction Manual x 1
Traffic light Installation
CAUTION: Ensure there are no electrical cables, gas lines, pipes or other important parts behind where the drill holes will be. To prevent the risk of electric shock or fire, during installation, remove the key from the ignition and isolate the 12V or 24V power source.
Suitable Installation Position
- For optimum performance, the camera should be mounted where there is minimal obstruction between the camera and monitor. Dense side-wall material and electrical appliances can reduce signal strength.
- Where practical, as high as possible at the rear of the vehicle.
- Horizontal-center of the vehicle or as close as is optimal.
- Mount camera at least 2 inches above or below running lights. Close proximity to lights may cause image blooming, blurring and reduced night vision performance.
- The area should be flat with enough surface area to accommodate the bracket.
- The surface area should be clean and dry for a watertight installation.
- Ensure that power can be fed to the installation area from within the vehicle.
 Traffic Light Location
 Traffic Light Location
- Select a suitable position on the side of the vehicle wall where you would like to install the camera.
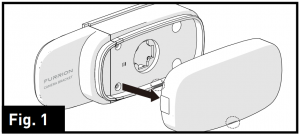
- Remove the lens cover by lifting the slot at the bottom of the traffic light. (Fig. 1)
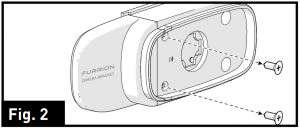
- Remove the two screws holding the decorative part using a Phillips-head screwdriver and set aside. (Fig. 2)
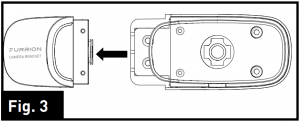
- Pull to remove the decorative part from traffic light and save in a safe place in case of future use. (Fig. 3)
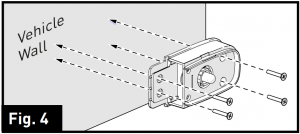
- Secure the traffic light base on the vehicle wall using the four flat self tapping screws (quad drive flat head #6 x ³/4” self-drilling wood screw). (Fig. 4)
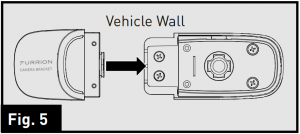
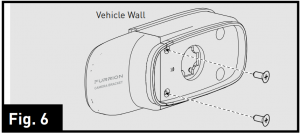
- Insert the decorative part into the traffic light base and secure with the two flat self-tapping screws provided. (Fig. 5 and Fig. 6)
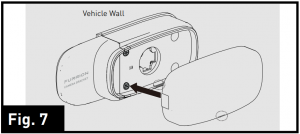
- Replace the lens cover over the traffic light base and press until a “click” is heard. The camera is now fully installed onto the vehicle. (Fig. 7 )
Installing to Camera (if purchased)
- Select a suitable position on the side of the vehicle wall where you would like to install the camera.
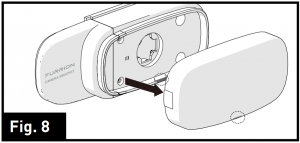
- Remove the lens cover by lifting the slot at the bottom of the traffic light. (Fig. 8)
- Remove the two screws holding the decorative part using a Phillips-head screwdriver and set aside. (Fig. 9)
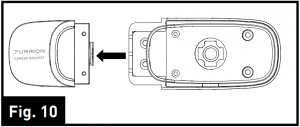
- Pull to remove the decorative part from traffic light and save in a safe place in case of future use. (Fig. 10)
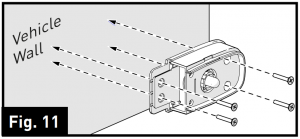
- Secure the traffic light base on the vehicle wall using the four flat self tapping screws (quad drive flat head #6 x ³/4” self-drilling wood screw). (Fig. 11)
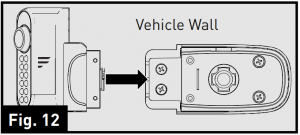
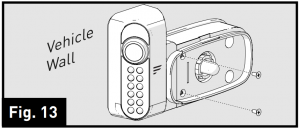
- Insert the left camera into the traffic light base and secure with the two flat self-tapping screws provided. (Fig. 12 and Fig. 13)
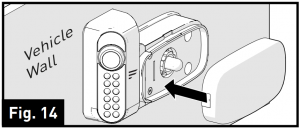
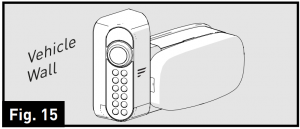
- Replace the lens cover over the traffic light base and press until a “click” is heard. The camera is now fully installed onto the vehicle. (Fig. 14 and Fig. 15)
- As required, repeat steps 1 – 7 to install the traffic lights to the right, front and rear cameras respectively.

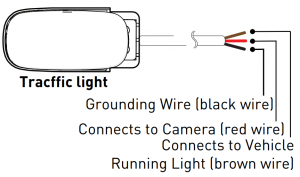
Connecting the Traffic Light
|
|
| Never connect the traffic light to a power source over 12V, damage to the traffic light may occur. |
Furrion Innovation Center & Institute of Technology
©2007-2018 Furrion Ltd. Furrion® and the Furrion logo are trademarks licensed for use by Furrion Ltd.and registered in the U.S. and other countries.
![]()
References
[xyz-ips snippet=”download-snippet”]