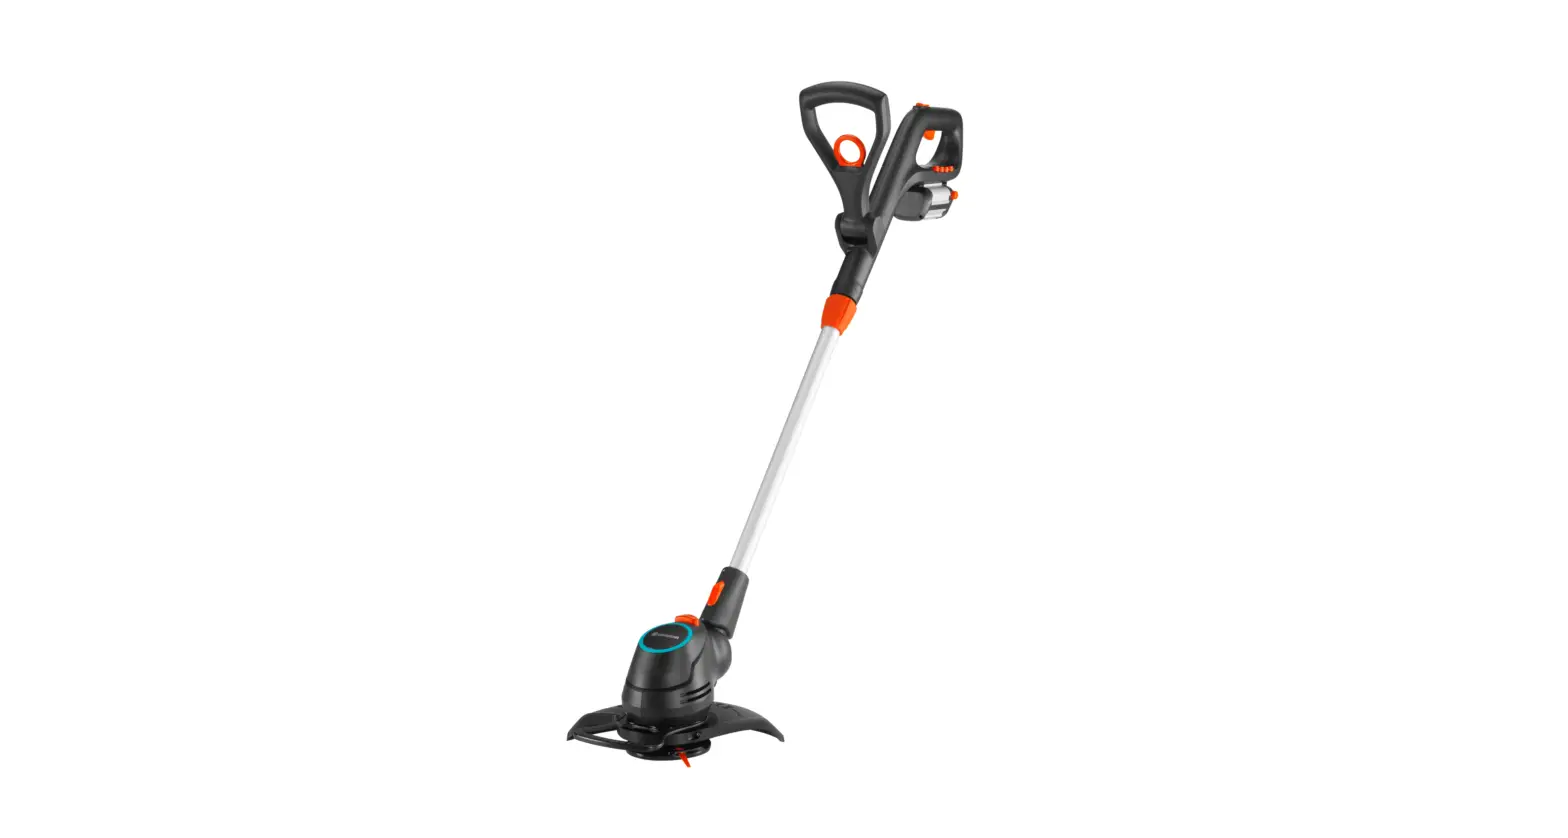
EastCut, Comfortcut 23 Battery Trimmer
EasyCut 23/18V P4A Art. 14700EN Operator’s manual Battery Trimmer
ComfortCut 23/18V P4A Art. 14701
EN
A1
A2
A3
1 43O1C
12 5
O2å
Y
XY
O3å >
9 8O4ç «
O5
O6
O7
7 0
2
O8
O10
O11
r
e
w
6
O9
7
O12
q 57 1
O13
O14
M1
zr
t N
u
e
5 2
Y Cu
T1
T2
o iA
B
i
8
8
3
EN
EN Battery Trimmer1. SAFETY . . . . . . . . . . . . . . . . . . . . . . . . . . . . . . . . . . . . . . . . . . . . . . . 4 2. ASSEMBLY . . . . . . . . . . . . . . . . . . . . . . . . . . . . . . . . . . . . . . . . . . . . 5 3. OPERATION. . . . . . . . . . . . . . . . . . . . . . . . . . . . . . . . . . . . . . . . . . . . 5 4. MAINTENANCE . . . . . . . . . . . . . . . . . . . . . . . . . . . . . . . . . . . . . . . . . 6 5. STORAGE . . . . . . . . . . . . . . . . . . . . . . . . . . . . . . . . . . . . . . . . . . . . . 7 6. TROUBLESHOOTING . . . . . . . . . . . . . . . . . . . . . . . . . . . . . . . . . . . . 7 7. TECHNICAL DATA . . . . . . . . . . . . . . . . . . . . . . . . . . . . . . . . . . . . . . . 7 8. ACCESSORIES . . . . . . . . . . . . . . . . . . . . . . . . . . . . . . . . . . . . . . . . . 7 9. SERVICE / WARRANTY. . . . . . . . . . . . . . . . . . . . . . . . . . . . . . . . . . . . 8Original instructions.This product may be used under supervision, or if instruction regarding the safe use of the product has been provided and the resulting dangers have been understood, by children aged 8 and above, as well as by persons with physical, sensory or mental disabilities or a lack of experience and knowledge. Children must not be allowed to play with the product. Cleaning and user maintenance must not be performed by children without supervision. The use of this product by young people under the age of 16 is not recommended.Intended use: The GARDENA Trimmer is intended to trim and to cut lawn and areas of grass in private domestic gardens and allotments. The product is not intended for long term use.DANGER! Risk of injury! v Do not use the product to cut hedges, to chop up material orto make compost.1. SAFETYIMPORTANT! Read the operator’s manual carefully before use and keep for future reference.Symbols on the product:Read operator’s manual.Keep bystanders away.Always wear approved hearing protection. Always wear approved eye protection.Remove the Battery before cleaning or maintenance.Do not expose to rain. DANGER! Risk of injury to other people! Keep other people out of the area where you are working.For the charger: Remove plug from the mains immediately if the cable is damaged or cut.General safety warnings Electrical safetyDANGER! Electric shock! Risk of injury due to electric shock. v The product must be supplied through a residual current device (RCD)having a rated residual operating current not exceeding 30 mA.
Do not overreach and keep the balance at all times. Always be sure of the footing on slopes. Walk, never run. Do not touch moving hazardous parts before the machine is disconnected from the mains and the moving hazardous parts have come to a complete stop. Always wear substantial footwear and long trousers while operating the machine.Safe operating practices 1 Training a) Read the instructions carefully. Be familiar with the controls and the correctuse of the machine. b) Never allow children or people unfamiliar with these instructions to use themachine. Local regulations can restrict the age of the operator. c) Keep in mind that the operator or user is responsible for accidents or hazardsoccurring to other people or their property.2 Preparation a) Before use check the supply and extension cord for signs of damage oraging. If the cord becomes damaged during use, disconnect the cord from the supply immediately. DO NOT TOUCH THE CORD BEFORE DISCONNECTING THE SUPPLY. Do not use the machine if the cord is damaged or worn. b) Before use, always visually inspect the machine for damaged, missing or misplaced guards or shields. c) Never operate the machine while people, especially children, or pets are nearby.3 Operation a) Keep supply and extension cords away from cutting means. b) Wear eye protection and stout shoes at all times while operating the machine. c) Avoid using the machine in bad weather conditions especially when there isa risk of lightning. d) Use the machine only in daylight or good artificial light. e) Never operate the machine with damaged guards or shields or without guardsor shields in place. f) Switch on the motor only when the hands and feet are away from the cuttingmeans. g) Always disconnect the machine from the power supply (i. e. remove the plugfrom the mains, remove the disabling device or removable battery) 1) whenever the machine is left unattended; 2) before clearing a blockage; 3) before checking, cleaning or working on the machine; 4) after striking a foreign object; 5) whenever the machine starts vibrating abnormally. h) Take care against injury to feet and hands from the cutting means. i) Always ensure that the ventilation openings are kept clear of debris.4 Maintenance and storage a) Disconnect the machine from the power supply (i. e. remove the plug from themains, remove the disabling device or removable battery) before carrying out maintenance or cleaning work. b) Use only the manufacturer’s recommended replacement parts and accessories. c) Inspect and maintain the machine regularly. Have the machine repaired only by an authorized repairer. d) When not in use, store the machine out of the reach of children.Additional safety warnings Battery safety
Read all the safety and general instructions.
Failure to observe the safety and general instructions may result in electric shock, fire and / or serious injury.
Store these instructions in a safe place. Only use the charger if you can fully evaluate all functions and carry them out without restrictions, or if you have received corresponding instructions.
v Supervise children during use, cleaning and maintenance. This will ensure that children do not play with the charger.
v Charge only lithium-ion batteries of the POWER FOR ALL system type PBA 18V with a capacity of 1.5 Ah or more (5 battery cells or more). The battery voltage must match the battery charging voltage of the charger. Do not charge any nonrechargeable batteries. Otherwise there is a risk of fire and explosion.
v
Do not expose the charger to rain or wet conditions.
Water entering a power tool will increase the risk of electric shock.
v Keep the charger clean. Dirt poses a risk of electric shock.
v Always check the charger, cable and plug before use. Stop using the charger if you discover any damage. Do not open the charger yourself, and have it repaired only by a qualified specialist using only original replacement parts. Damaged chargers, cables and plugs increase the risk of electric shock.
v Do not operate the charger on an easily ignited surface (e. g. paper, textiles, etc.) or in a flammable environment. There is a risk of fire due to the charger heating up during operation.
4
EN
v In order to avoid safety hazards, if the power supply cord needs to be replaced, this must be done by GARDENA or by a customer service centre that is authorised to repair GARDENA power tools.
v Do not operate the product while it is charging.
Products sold in GB only: Your product is fitted with an BS 1363/A approved electric plug with internal fuse (ASTA approved to BS 1362). If the plug is not suitable for your socket outlets, it should be cut off and an appropriate plug fitted in its place by an authorised customer service agent. The replacement plug should have the same fuse rating as the original plug. The severed plug must be disposed of to avoid a possible shock hazard and should never be inserted into a mains socket elsewhere.
v These safety warnings apply only for lithium-ion batteries of the POWER FOR ALL system PBA 18V.
v Only use the battery with products of the POWER FOR ALL system manufacturers. This is the only way in which you can protect the battery against dangerous overload.
v Recharge only with the charger specified by the manufacturer. A charger that is suitable for one type of battery pack may create a risk of fire when used with another battery pack.
v The battery is supplied partially charged. To ensure full battery capacity, fully charge the battery in the charger before using your power tool for the first time
v Keep battery packs out of the reach of children.
v Do not open the battery. There is a risk of short-circuiting.
v In case of damage and improper use of the battery, vapours may be emitted. The battery can set alight or explode. Ensure the area is well ventilated and seek medical attention should you experience any adverse effects. The vapours may irritate the respiratory system.
v If used incorrectly or if the battery is damaged, flammable liquid may be ejected from the battery. Contact with this liquid should be avoided. If contact accidentally occurs, rinse off with water. If the liquid comes into contact with your eyes, seek additional medical attention. Liquid ejected from the battery may cause irritation or burns.
v If the battery is damaged liquid can be ejected and cover nearby surfaces. Check affected parts. Clean these parts or change them if necessary.
v Do not short-circuit the battery pack. When the battery pack is not in use, keep it away from other metal objects, like paper clips, coins, keys, nails, screws or other small metal objects, that can make a connection from one terminal to another. Shorting the battery terminals together may cause burns or a fire.
v The battery can be damaged by pointed objects such as nails or screwdrivers or by force applied externally. An internal short circuit may occur, causing the battery to burn, smoke, explode or overheat.
v Never service damaged battery packs. Service of battery packs should only be performed by the manufacturer or authorized service providers.
v
Protect the battery against heat, e. g. against continuous intense
sunlight, fire, dirt, water and moisture.
There is a risk of explosion and short-circuiting.
v Only operate and store the battery at an ambient temperature between 20 °C and + 50 °C. Do not leave the battery in your car in the summer, for example. At temperatures of < 0 °C some devices may experience a loss of power.v Only charge the battery at an ambient temperature which is between 0 °C and + 45 °C. Charging outside of this temperature range can increase the risk of damage to the battery and pose a fire hazard.
Electrical safety
DANGER! Cardiac arrest! This product makes an electromagnetic field while it operates. This field may under some conditions interfere with active or passive medical implants. To decrease the risk of conditions that can possibly injure or kill, we recommend persons with medical implants to speak with their physician and the medical implant manufacturer before you operate the product. Only use the battery product between 0 °C to 40 °C. Disconnect the battery in case of emergency. Do not use the product nearby a water, or for pond care. Protect the battery contacts from moisture.Personal safety
DANGER! Risk of suffocation! Small parts can be easily swallowed. There is also a risk that the polybag can suffocate toddlers. Keep toddlers away when you assemble the product. If the trimmer vibrates heavily, replace the blade and check the blade holder for damage. Check the wear rib if ok before usage. Use the front handle to transport the trimmer. Use personal protective equipment. Wear gloves for cleaning the cutting device. Always wear eye protection.
Protective equipment such as gloves, non-skid safety shoes, or hearing protection used for appropriate conditions will reduce personal injuries. Be careful during adjustment of the product to prevent entrapment of the fingers between moving and fixed parts of the machine, or while assembling the protective cover. Don’t use water, or chemical substances for cleaning the guard or other parts of the trimmer. Keep all nuts, bolts and screws tight to be sure the product is in a safe working condition. Do not disassemble the product further than the delivery status. Warning! When wearing hearing protection, and due to the noise produced by the product, the operator may not notice persons approaching. While operation and transport pay special attention to the hazard for other people. Stay alert, watch what you are doing and use common sense when operating a power tool. Do not use a power tool while you are tired or under the influence of drugs, alcohol or medication. A moment of inattention while operating power tools may result in serious personal injury.2. ASSEMBLYDANGER! Risk of injury! Cut injury when the product starts accidentally. v Wait for the plastic blades to stop and remove the battery before you assemble the product.To assemble the protective cover and the plant guard [ Fig. A1 / A2 ]:DANGER! v The product may only be used when the protective cover isassembled.1. Slide the front part of the protective cover 3 onto the trimmer head 1until it engages.2. Slide the rear part of the protective cover 2 onto the trimmer head 1until it stops.3. Tighten the both screws 4 carefully. 4. Slide the plant guard 5 onto the trimmer head 1 until it engages.To attach the plastic blade to handle [ Fig. A3 ]: The scope of delivery includes 5 plastic blades. There are 4 spareplastic blades in the openings 9 on the handle.For the assembly of the plastic blade into the blade holder, see 6. TROUBLESHOOTING To replace the plastic blade.3. OPERATIONDANGER! Risk of injury! Cut injury when the product starts accidentally. v Wait for the plastic blade to stop and remove the battery before you adjust or transport the product.To charge the battery [ Fig. O1 / O2 / O3 ]:CAUTION! v Note the mains voltage! The voltage of the power source mustmatch the voltage specified on the rating plate of the charger.Thanks to the intelligent charging process, the charge condition of the battery is automatically detected and then charged up with the optimal charge current depending on battery temperature and voltage. In this way, the battery is treated with care and remains permanently fully charged when it is stored in the charger.1. Push the locking button > and remove the battery Y from the battery holder C.2. Connect the battery charger X into a mains socket. 3. Slide the battery charger X onto the battery Y.
5
EN
When the battery charge indicator å at the charger flashes greenthe battery is being charged.When the battery charge indicator å at the charger illuminatespermanently green the battery is completely charged (Charging time, see 7. TECHNICAL DATA).4. Examine the charge status regularly while you charge.5. When the battery Y is completely charged, you can disconnect the battery Y from the charger X.
Meaning of the Indication Elements:Indication on the charger [ Fig. O3 ]:Flashing of the Battery The charging procedure is indicated by flashing of the battery chargeCharge Indicator å indicator å.Note: The charging procedure is only possible when the battery temperature is within the allowable charging temperature range, see 7. TECHNICAL DATA.
Continuous Lighting of the BatteryCharge Indicator å
Continuous lighting of the battery charge indicator å indicates thatthe battery is fully charged or that the temperature of the battery is not within the allowable charging temperature range and can therefore not be charged.When the battery is not inserted, continuous lighting of the batterycharge indicator å indicates that the mains plug is inserted in thesocket outlet and that the battery charger is ready for operation.
Battery charge status indication N on the product [ Fig. O4 / O14 ]:After starting the product, the battery charge status indication Nis displayed for 5 seconds.
Battery charge status 67 100 % charged 34 66 % charged 11 33 % charged 0 10 % charged
Battery charge status indication«, and illuminate green « and illuminate green « illuminates green « flashes green
If the LED « flashes green, the battery must be charged. If the error LED ç is illuminated or flashing, see 6. TROUBLESHOOTING.
To set the working position: Working position 1 [ Fig. O5 ]: For standard trimming.
Working position 2 [ Fig. O6 /O7 ]:Trimming beneath obstaclesThe tube can be lowered from standard position 1 to two lowered positions 2 or 3 for trimming beneath obstacles.1. Put the trimmer on the floor.2. Hold the trimmer by the tube 7 with both hands so that you can push the unlock button 0 with one finger.3. Push the unlock button 0 and lower the tube 7 to the requiredposition.4. Release the unlock button 0 and let the tube 7 engage again.
Working position 3 (only for Art. 14701) [ Fig. O8 /O9 ]:Cutting at lawn edges.CAUTION! The trimmer may only be used when the trimmer head is locked at 0° or 90°.To rotate the trimmer head 1 to 90°, the tube must be in standardposition 1.1. Hold the trimmer by the tube 7 with both hands so that you can push the unlock button q with one finger.2. Push the unlock button q and rotate the trimmer head 1 from0° to 90° until it engages.3. Release the unlock button q and let the tube 7 engage again.
To adjust the tube length [ Fig. O10 ]:
DANGER! The product must not be used when the tube is completely inserted (transport position).1. Loosen the clamping sleeve 6. 2. Pull out the tube 7 to the required length. 3. Tighten the clamping sleeve again 6.To adjust the position of the additional handle [ Fig. O11 ]: The position of the additional handle can be adjusted to your body height.
1. Pull the lever w. 2. Tilt the additional handle e to the desired position. 3. Release the lever w again.If the trimmer is correctly set to the body height, the posture is upright and the trimmer head in working position 1 is tilted forwards slightly.v Hold the trimmer by the main handle r and additional handle e insuch a manner that the trimmer head is tilted forwards slightly.To adjust the plant guard: Work position [ Fig. O12 ] Park position [ Fig. O13 ]v Pull off the plant guard 5 and put it on into the required position untilit engages.To start the trimmer [ Fig. O1 /O14 ]:DANGER! Risk of injury! Risk of injury if the product does not stop when you release the start lever. v Do not bypass the safety devices or switches. For example do not attach the start lever to the handle.The product is provided with a two-switch safety device (start lever with starting lockout) to prevent the product from being turned on by accident.To start:1. Put the battery Y into the battery holder C until it audibly engages. 2. Hold the additional handle e with one hand. 3. Hold the main handle r with the other hand, slide the startinglockout t forward and pull the start lever z. The trimmer starts and the battery charge status indication N isdisplayed for 5 seconds.4. Release the starting lockout t again.CAUTION! Avoid contact of the plastic blade and the blade carrier with hard objects (walls, stones fences etc.) to prevent the plastic blade and the blade carrier from wearing or breaking.To stop:1. Release the start lever z.The trimmer stops.2. Push the locking button > and remove the battery Y from the battery holder C.4. MAINTENANCEDANGER! Risk of injury! Cut injury when the product starts accidentally. v Wait for the plastic blade to stop and remove the battery before you maintain the product.To clean the trimmer [ Fig. M1 ]:DANGER! Risk of injury! Risk of injury and risk of damage to the product. v Do not clean the product with water or with a water jet (in particular high-pressure water jet). v Do not clean with chemicals including petrol or solvents. Some can destroy critical plastic parts.The airflow slots must always be clean.1. Clean the airflow slots u with a soft brush (do not use a screwdriver).2. Clean all movable parts after each operation. Especially remove anygrass and dirt from the protective cover 2.To clean the battery and the battery charger: Make sure that the surface and the contacts of the battery and the battery charger always are clean and dry before you connect the battery charger. Do not use running water. v Battery charger: Clean the contacts and the plastic parts with a softand dry cloth. v Battery: Occasionally clean the ventilation slots and the terminals onthe battery using a soft brush that is clean and dry.
6
EN
5. STORAGE
To put into storage: The product must be stored away from children.
1. Remove the battery.2. Charge the battery.3. Clean the trimmer, the battery and the battery charger (see 4. MAINTENANCE).4. Store the trimmer, the battery and the battery charger in a dry, enclosed and frost-free place.
Disposal:(in accordance with RL2012/19/EC)The product must not be disposed of to normal household waste. It must be disposed of in line with local environmental regulations.IMPORTANT!v Dispose of the product through or via your municipal recycling collection centre.
Disposal of the battery:
The GARDENA battery contains lithium-ion cells that should
not be disposed of with normal household waste at the end of
its life.
Li-ion
IMPORTANT!v Dispose of the batteries through or via your municipal recycling collection centre.
1. Discharge the lithium-ion cells completely (contact the GARDENA Service).2. Protect the contacts on the lithium-ion cells against short circuits.3. Dispose of the lithium-ion cells properly.
6. TROUBLESHOOTING
DANGER! Risk of injury! Cut injury when the product starts accidentally. v Wait for the plastic blade to stop and remove the battery before you troubleshoot the product.To replace the plastic blade [ Fig. T1 / T2 ]:
Problem
Possible Cause
Remedy
Trimmer can no longer be Start lever is stuck. stopped
v Remove the battery and loosen the start lever
Trimmer does not start or stops.LED « is flashing green[ Fig. O4 ]
Battery is empty.
v Charge the battery.
Trimmer does not start or stops.Error-LED ç is illuminatedred [ Fig. O4 ]
Battery temperature is outside v Wait until the battery tem-
the permissible temperature
perature is between
range.
0 °C + 45 °C again.
There are drops of water or v Remove the water drops / moisture between the battery moisture with a dry cloth. contacts on the trimmer.
Engine is blocked.
v Remove the obstacle. Start again.
Trimmer does not start or stops.Error-LED ç is flashingred [ Fig. O4 ]
Product is defective.
v Contact the GARDENA Service.
Trimmer does not start or stops.Error-LED ç is notilluminated [ Fig. O4 ]
Battery is not put completely into the battery holder.Battery is defective.
v Put the battery completely into the battery holder until it audibly engages.v Replace the battery.
Product is defective.
v Contact the GARDENA Service.
Charging is not possible.Battery charge indicator åis continuously illuminated [ Fig. O3 ]
The battery is not connected (correctly).Battery contacts are dirty.
v Connect the battery to charger correctly.v Clean the battery contacts (e. g. by connecting and disconnecting the battery several times. Replace the battery if necessary.
Battery temperature is outside v Wait until the battery
the permissible charging
temperature is between
temperature range.
0 °C + 45 °C again.
Battery is defective.
v Replace the battery.
Battery charge indicator å Mains plug of the charger is v Insert the mains plug into the
is not illuminated [ Fig. O3 ] not (correctly) plugged in.
mains socket (completely).
Socket outlet, mains cable or charger is defective.
v Check the mains voltage. Let the charger be checked if necessary by an authorised specialist dealer or the GARDENA Service.
NOTE: For any other malfunctions please contact the GARDENA service department. Repairs must only be done by GARDENA service departments or specialist dealers approved by GARDENA.
DANGER! Risk of cutting injuries!v Do not use metal cutting elements or spare parts and accessories not intended for use by GARDENA.
If the wear rib o is no longer visible, the blade carrier i must bereplaced. Contact the GARDENA Service.The plastic blades may only become worn to half the original length at most. Only use original GARDENA Spare Blades RotorCut. Spare plastic blades are available from your GARDENA dealer or directly from GARDENA Service.· GARDENA Spare Blades RotorCut for Turbotrimmer Art. 5368
To remove the plastic blade:1. Turn the trimmer over.2. Push the end of the plastic blade down slightly (A), slide the plasticblade 8 inside through the blade carrier i (B) and pull out.
To insert the plastic blade:v Slide the new plastic blade 8 from inside through the slot in metal of the blade carrier i until it audibly engages (click).When the new plastic blade is correctly inserted, it can be moved more easily.
Problem Trimmer is not cutting cleanly or not cutting at allTrimmer vibrates severely
Possible Cause
Remedy
Plastic blade is worn or too short.
v Replace the plastic blade.
Plastic blade is broken off. v Replace the plastic blade.
Plastic blade is excessively v Replace the plastic blade. worn and creates an unbalance.
Blade carrier is worn.
v Replace the blade carrier.
7. TECHNICAL DATA
Battery Trimmer
Unit
Value (Art. 14700)
Value (Art. 14701)
Rated current
A
2.3
2.3
Rated voltage
V (DC)
18
18
Cutting width
cm
23
23
Rpm of blade carrier
R/min.
9500
9500
Weight (without Battery) kg
2.0
2.1
Sound pressure level L 1) pAUncertainty k
dB (A)
74 2.5
pA
Sound power level L 2): WAmeasured / guaranteed Uncertainty kWA
dB (A)
83 / 85 1.6
Hand/arm
vibration
a 1) vhw
Uncertainty k
m/s2
vhw
< 2.5 1.5
Measuring process complying with: 1) EN 50636-2-91
74 2.586 / 88 1.8< 2.5 1.5 2) RL 2000/14/EC
NOTE: The stated vibration emission value has been measured according to a standardised test procedure and can be used for comparison of one electric power tool with another. It can also be used for preliminary evaluation of exposure. The vibration emission value can vary during actual use of the electric power tool.
8. ACCESSORIESGARDENA Spare Blades As replacement for consumed plastic RotorCut for Turbotrimmer blades.
Art. 5368
7
E N
GARDENA Replacement blade carrier
Available via the GARDENA Service.
GARDENA Wheel set for For easy cutting of lawn edges. trimmer (only for Art. 14701)
Art. 9880
GARDENA System Battery PBA 18V/36 P4A PBA 18V/45 P4A PBA 18V/72 P4A
Battery for additional duration or for replacement.
Art. 14902 Art. 14903 Art. 14905
GARDENA Battery Charger AL 1810 CV P4A
Art. 14900-28 (UK) Art. 14900-52 (AU / NZ)
GARDENA Battery Quick Charger AL 1830 CV P4A
Charger for fast charging the POWER FOR Art. 14901-28 (UK)
ALL system Batteries PBA 18V..W-..
Art. 14901-52 (AU / NZ)
9. SERVICE / WARRANTYService:Please contact the address on the back page.Warranty statement:In the event of a warranty claim, no charge is levied to you for the services provided.GARDENA Manufacturing GmbH grants a warranty for all original GARDENA new products for two years from the date of original purchase from the retailer, provided that the devices have been for private use only. This manufacturer’s warranty does not apply to products acquired second hand. This warranty includes all significant defects of the product that can be proved to be material or manufacturing faults. This warranty is fulfilled by supplying a fully functional replacement product or by repairing the faulty product sent to us free of charge; we reserve the right to choose between these options. This service is subject to the following provisions:· The product has been used for its intended purpose as per the recommendations in the operating instructions.· Neither the purchaser nor a third party has attempted to open or repair the product.· Only Original GARDENA replacement parts and wear parts have been used for operation.· Presentation of the receipt.Normal wear and tear of parts and components (such as blades, blade fixing parts, turbines, light bulbs, V-belts / toothed belts, impellers, air filters, spark plugs), visual changes, wear parts and consumables are excluded from the warranty.This manufacturer’s warranty is limited to replacement and repair of products in accordance with the abovementioned conditions. The manufacturer’s warranty does not constitute an entitlement to lodge other claims against us as a manufacturer, such as for damages. This manufacturer’s warranty does not, of course, affect statutory and contractual warranty claims against the dealer / retailer.The manufacturer’s warranty is governed by the law of the Federal Republic of Germany.In case of a warranty claim, please return the faulty product, together with a copy of the receipt and a description of the fault, with postage paid to the service address.Consumables: The plastic blade and the blade carrier are consumables and are not included in the warranty.
Deutschland / Germany GARDENA Manufacturing GmbH Central Service Hans-Lorenser-Straße 40 D-89079 Ulm Produktfragen: (+ 49) 731 490 – 123 Reparaturen: (+ 49) 731 490 – 290 service@gardena.com http: //www.gardena.comAlbania KRAFT SHPK Autostrada Tirane-Durres Km 7 1051 TiraneArgentina ROBERTO C. RUMBO S.R.L. Predio Norlog Lote 7 Benavidez. ZC:1621 Buenos Aires ventas@rumbosrl.com.arAustralia Husqvarna Australia Pty. Ltd. Locked Bag 5 Central Coast BC NSW 2252 Phone: (+ 61) (0) 2 4352 7400 customer.service@ husqvarna.com.auAustria / Österreich Husqvarna Austria GmbH Industriezeile 36 4010 Linz Tel. : (+ 43) 732 77 01 01- 485 service.gardena@ husqvarnagroup.comAzerbaijan Firm Progress a. Aliyev Str. 26A 1052 BakuBelarus Private Enterprise “Master Garden” Minsk Sharangovich str., 7a Phone: (+375) 17 257-00-33 Mob.: (+375) 29 676-16-09 mg@mastergarden.byBelgium Husqvarna Belgium nv Gardena Division Leuvensesteenweg 542 Planet II E 1930 Zaventem BelgiëBosnia / Herzegovina SILK TRADE d.o.o. Industrijska zona Bukva bb 74260 TesanjBrazil Husqvarna do Brasil Ltda Av. Francisco Matarazzo, 1400 19º andar São Paulo SP CEP: 05001-903 Tel: 0800-112252 marketing.br.husqvarna@ husqvarna.com.brBulgaria AGROLAND . 8 , 13 5 1700 .: (+ 359) 24 66 69 10 info@agroland.euCanada / USA GARDENA Canada Ltd. 100 Summerlea Road Brampton, Ontario L6T 4X3 Phone: (+1) 905 792 93 30 info@gardenacanada.com
Chile REPRESENTACIONES JCE S.A. Av. Del Valle Norte 857, Piso 4 Santiago RM Phone: (+ 56) 2 24142560 contacto@jce.clChina Husqvarna (Shanghai) Management Co., Ltd.
3F, Benq Square B, No207, Song Hong Rd., Chang Ning District, Shanghai PRC. 200335207 B3200335Colombia Husqvarna Colombia S.A. Calle 18 No. 68 D-31, zona Industrial de Montevideo Bogotá, Cundinamarca Tel. 571 2922700 ext. 105 jairo.salazar@ husqvarna.com.coCosta Rica Compania Exim Euroiberoamericana S.A. Los Colegios, Moravia, 200 metros al Sur del Colegio Saint Francis San José Phone: (+ 506) 297 68 83 exim_euro@racsa.co.crCroatia Husqvarna Austria GmbH Industriezeile 36 4010 Linz Tel. : (+ 43) 732 77 01 01- 485 service.gardena@ husqvarnagroup.comCyprus Med Marketing 17 Digeni Akrita Ave P.O. Box 27017 1641 NicosiaCzech Republic Husqvarna Cesko s.r.o. Türkova 2319 / 5b 149 00 Praha 4 Chodov Bezplatná infolinka : 800 100 425 servis@cz.husqvarna.comDenmark GARDENA DANMARK Lejrvej 19, st. 3500 Værløse Tlf.: (+ 45) 70 26 47 70 husqvarna@husqvarna.dk www.gardena.com /dkDominican Republic BOSQUESA, S.R.L Carretera Santiago Licey Km. 5 ½ Esquina Copal II. Santiago Dominican Republic Phone: (+ 809) 736-0333 joserbosquesa@claro.net.doEcuador Husqvarna Ecuador S.A. Arupos E1-181 y 10 de Agosto Quito, Pichincha Tel. (+ 593) 22800739 francisco.jacome@ husqvarna.com.ecEstonia Husqvarna Eesti OÜ Valdeku 132 EE-11216 Tallinn info@gardena.eeFinland Oy Husqvarna Ab Gardena Division Lautatarhankatu 8 B / PL 3 00581 HELSINKI www.gardena.fi
France Husqvarna France 9 /11 Allée des pierres mayettes 92635 Gennevilliers Cedex France http : // www.gardena.com / fr N° AZUR : 0 810 00 78 23 (Prix d’un appel local)Georgia Transporter LLC 113b Beliashvili street 0159 Tbilisi, GeorgiaGreat Britain Husqvarna UK Ltd Preston Road Aycliffe Industrial Park Newton Aycliffe County Durham DL5 6UP info.gardena@ husqvarna.co.ukGreece . . 92 ..104 42 . (+ 30) 210 51 93 100 info@papadopoulos.com.grHungary Husqvarna Magyarország Kft. Ezred u. 1- 3 1044 Budapest Telefon: (+ 36) 1 251- 4161 vevoszolgalat.husqvarna@ husqvarna.huIceland BYKO ehf. Bildshöfoa 20 110 ReykjavikIreland Husqvarna UK Ltd Preston Road Aycliffe Industrial Park Newton Aycliffe County Durham DL5 6UP info.gardena@ husqvarna.co.ukItaly Husqvarna Italia S.p.A. Via Santa Vecchia 15 23868 VALMADRERA (LC) Phone: (+ 39) 0341.203.111 assistenza.italia@ it.husqvarna.comJapan Husqvarna Zenoah Co. Ltd. Japan 1-9 Minamidai, Kawagoe 350-1165 Saitama Japan gardena-jp@ husqvarnagroup.comKazakhstan LAMED Ltd. 155 /1, Tazhibayevoi Str. 050060 Almaty IP Schmidt Abayavenue 3B 110 005 KostanayKorea Kyung Jin Trading CO.,LTD. 107-4, SunDuk Bld., YangJae-dong, Seocho-gu, Seoul, (zipcode: 137-891) Phone: (+ 82) (0)2 574-6300Latvia Husqvarna Latvija SIA Ulbrokas 19A LV-1021 Rga info@gardena.lvLithuania UAB Husqvarna Lietuva Ateities pl. 77C LT-52104 Kaunas info@gardena.lt
Luxembourg Magasins Jules Neuberg 39, rue Jacques Stas Luxembourg-Gasperich 2549 Case Postale No. 12 Luxembourg 2010 Phone: (+ 352) 40 14 01 api@neuberg.luMexico AFOSA Av. Lopez Mateos Sur # 5019 Col. La Calma 45070 Zapopan, Jalisco Mexico Phone: (+ 52) 33 3818-3434 icornejo@afosa.com.mxMoldova Convel S.R.L. 290A Muncesti Str. 2002 ChisinauNetherlands Husqvarna Nederland B.V. GARDENA Division Postbus 50131 1305 AC ALMERE Phone: (+ 31) 36 521 00 10 info@gardena.nlNeth. Antilles Jonka Enterprises N.V. Sta. Rosa Weg 196 P.O. Box 8200 Curaçao Phone: (+ 599) 9 767 66 55 pgm@jonka.comNew Zealand Husqvarna New Zealand Ltd. PO Box 76-437 Manukau City 2241 Phone: (+ 64) (0) 9 9202410 support.nz@husqvarna.co.nzNorway Husqvarna Norge AS Gardena Division Trøskenveien 36 1708 Sarpsborg info@gardena.noPeru Husqvarna Perú S.A. Jr. Ramón Cárcamo 710 Lima 1 Tel: (+ 51) 1 3 320 400 ext. 416 juan.remuzgo@ husqvarna.comPoland Husqvarna Poland Spólka z o.o. ul. Wysockiego 15 b 03-371 Warszawa Phone: (+ 48) 22 330 96 00 gardena@husqvarna.com.plPortugal Husqvarna Portugal , SA Lagoa – Albarraque 2635 – 595 Rio de Mouro Tel.: (+ 351) 21 922 85 30 Fax : (+ 351) 21 922 85 36 info@gardena.ptRomania Madex International Srl Soseaua Odaii 117 – 123, RO 013603 Bucureti, S 1 Phone: (+ 40) 21 352.76.03 madex@ines.roRussia / ,,” 141400, ., . , , 39, .6 ,, “, 02_04 http: //www.gardena.ruSerbia Domel d.o.o. Autoput za Novi Sad bb 11273 Belgrade Phone: (+381) 1 18 48 88 12 miroslav.jejina@domel.rs
Singapore Hy- Ray PRIVATE LIMITED 40 Jalan Pemimpin # 02-08 Tat Ann Building Singapore 577185 Phone: (+ 65) 6253 2277 shiying@hyray.com.sgSlovak Republic Husqvarna Cesko s.r.o. Türkova 2319 / 5b 149 00 Praha 4 Chodov Bezplatná infolinka: 800 154 044 servis@sk.husqvarna.comSlovenia Husqvarna Austria GmbH Industriezeile 36 4010 Linz Tel. : (+ 43) 732 77 01 01- 485 service.gardena@ husqvarnagroup.comSouth Africa Husqvarna South Africa (Pty) Ltd Postnet Suite 250 Private Bag X6, Cascades, 3202, South Africa Phone: (+ 27) 33 846 9700 info@gardena.co.zaSpain Husqvarna España S.A. Calle de Rivas nº 10 28052 Madrid Phone: (+ 34) 91 708 05 00 atencioncliente@gardena.esSuriname Deto Handelmaatschappij N.V. Kernkampweg 72-74 P.O.Box: 12782 Paramaribo Suriname South America Phone: (+597) 438050 www.deto.srSweden Husqvarna AB / GARDENA Sverige Drottninggatan 2 561 82 Huskvarna SverigeSwitzerland / Schweiz Husqvarna Schweiz AG Consumer Products Industriestrasse 10 5506 Mägenwil Phone: (+ 41) (0) 62 887 37 90 info@gardena.chTurkey Dost Bahçe Di Ticaret Mümessillik A. Yunus Mah. Adil Sok. No:3 Ic Kapi No: 1 Kartal 34873 Istanbul Phone: (+ 90) 216 38 93 939 info@dostbahce.com.trUkraine / « » . , 34, 204- 03022, . . (+38) 0 800 504 804 info@gardena.uaUruguay FELI SA Entre Ríos 1083 CP 11800 Montevideo Uruguay Tel : (+ 598) 22 03 18 44 info@felisa.com.uyVenezuela Corporación Casa y Jardín C.A. Av. Caroní, Edif. Trezmen, PB. Colinas de Bello Monte. 1050 Caracas. Tlf : (+ 58) 212 992 33 22 info@casayjardin.net.ve104070000- 2-506.9.96600..0001//00452211 ©© GGAARRDDEENNAAManufacturing GmbH DM-a8n9u0f7a9ctuUrlimng GmbH hDt-tp8:9//0w7w0wU.glmardena.com
 report this ad
42
References
Husqvarna Group
www.net.ve – This website is for sale! – www Resources and Information.
Садовый Инвентарь | Садовые Инструменты | GARDENA
GARDENA – Garden tools – GARDENA
Husqvarna Ecuador
DETO HANDELMAATSCHAPPIJ N.V.. DETO SHOWROOM
Husqvarna Australia | Tools & Equipment for Lawn, Garden and Forestry
Husqvarna Colombia
Husqvarna Forest, Lawn & Garden
Husqvarna Magyarország
Husqvarna UK | Chainsaws, Lawn Mowers & Garden Tools
GARDENA – puutarhatyökalut – GARDENA
Husqvarna Brasil
[xyz-ips snippet=”download-snippet”]