![]()
PANOPTIX™ ICE FISHING KITINSTALLATION INSTRUCTIONS
Assembling the Portable Mount
You need a Phillips screwdriver to assemble the portable mount.
- Insert the handle 1 into the two openings on the portable mount base 2..

- Secure the handle to the base using the two 42 mm machine screws 3 and two nuts 4
- Slide the included hook and loop straps through the narrow slots beside the battery compartment.
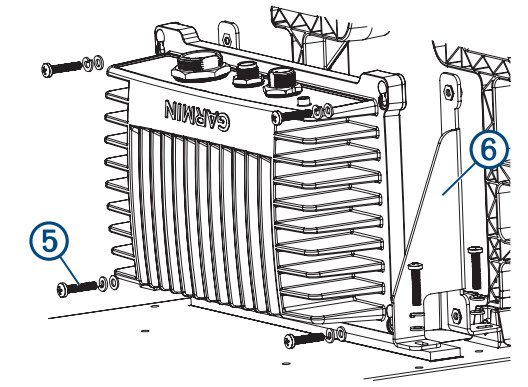
- If you are installing a Panoptix LiveScope™ sonar module, using the eight included 21 mm screws 5, split washers, and flat washers, attach the two included brackets 6 to the module, and secure the brackets to the portable mount.
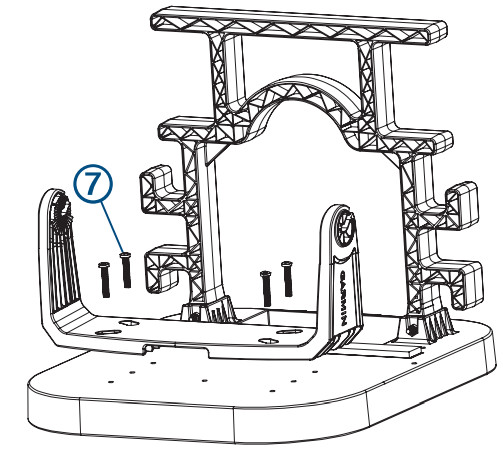
- Align the Chartplotter bail mount over the hole pattern that matches your bail mount, with the openings on the top of the bail mount facing the back of the base.
- Secure the device mount to the base using the four included 24 mm machine screws 7 and the included washers if you are installing a metal bail mount.NOTICEOnly use the included washers if you are installing a metal bail mount. If you are installing a plastic bail mount, do not use the four included washers.NOTE: Do not use the self-threading screws included with the Chartplotter. Only use the machine-threaded screws included with this portable kit or use M4 machine screws.
- Place the included rubber washers on the bail-mount knobs, and screw the knobs into the sides of the cradle or Chartplotter.
- Place the cradle or Chartplotter into the bail mount, with the rubber washers between the knobs and the cradle, and tighten the knobs.The rubber washers enable you to adjust the viewing angle without adjusting the knobs.
- Place the battery (not included) into the battery compartment under the handle.
- Pull the straps under and around the bottom of the portable mount, and wrap them tightly around the battery.

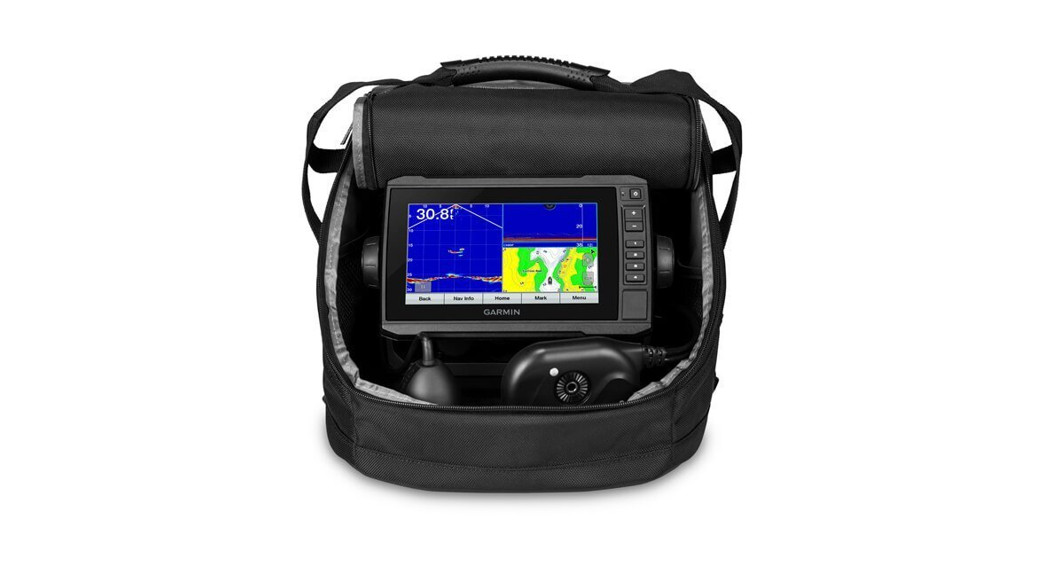
Placing the Portable Mount in the Bag
After you have assembled the portable mount, you should place it in the bag, which makes it easier to carry and protects it from the elements. The bag contains loops that allow you to tether the bag as needed.
- Place the portable mount into the bag.
- If necessary, wrap the excess power cable and transducer cables around the handle.
- Close all of the zippers.
You can use the zipper at the back of the bag for quick access to charge the battery. You can store the wall charger in the interior zippered pocket, and store the transducer in the exterior side pocket.
Connecting the Cables
 CAUTIONEnsure that you connect the correct spade connector to the correct battery terminal. Damage to the battery or device, or bodily harm may occur if the device is improperly connected to the battery (not included).
- Obtain an appropriate power cable and transducer cable to use with your Chartplotter and transducer.The all-in-one power and transducer cable (010-12676-40) works with 7 inches or larger ECHOMAP ™ chart plotters.
- Connect the 4-pin power cable and transducer cable to the Chartplotter.
- If you are connecting a transducer, connect the power leads to the gray bare wire connectors on the power cable.
- If you are connecting a Panoptix LiveScope sonar module, connect the 2-pin power cable to the sonar module.
- Slide the red spade connector onto the positive (red) terminal on the battery.
- Slide the black spade connector onto the negative (black) terminal on the battery.
Limited Warranty
The Garmin ® standard limited warranty applies to this accessory. For more information, go to www.garmin.com/support/warranty.html.
© 2019 Garmin Ltd. or its subsidiariesGarmin ® and the Garmin logo are trademarks of Garmin Ltd. or its subsidiaries, registered in the USA and other countries. LiveScope ™ and Panoptix ™ are trademarks of Garmin Ltd. or its subsidiaries. These trademarks may not be used without the express permission of Garmin.
© 2019 Garmin Ltd. or its subsidiariessupport.garmin.com
References
[xyz-ips snippet=”download-snippet”]