GATOR Full Hd 1080p Front Hdvr92w + Hd 720p Rear Dash Cam User Manual
Introduction:
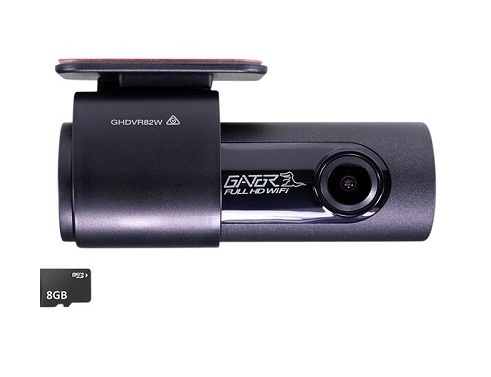
Thank you for purchasing the Gator GHDVR92W FULL HD 1080P Dash Cam. Please ensure that you have read the product manual and instructions in full, prior to installation and use.Failure to do so may result in product failure/damage or incorrect operation and therefore impactthe product performance.
Attention: Dash Cam GPS power cable must be used to retain date and time settings.
Product features
- FULL HD 1920×1080 @ 30FPS
- 145 Degree wide angle lens
- Surface mount with 270 degree rotation
- WiFi & GPS tracking via App
- Super capacitor
- G-Sensor function
- Seamless cycle loop recording
- Hand gesture photo function
- Rear camera input HD 1280×720 @ 25FPS
- 120 Degree wide angle lens
- Surface mount with 360 degree rotation
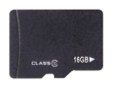
- 16GB Micro SD card included
- Supports Micro SD card class10 up to 64GB
- CMOS Sensor
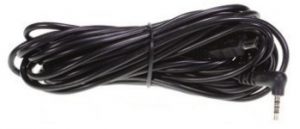
- 6 M (total length) secondary camera cable
Package components
- GHDVR92W

- Dash Cam GPS power cable
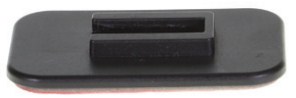
- Mounting Bracket
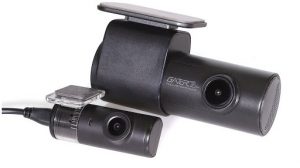
- Rear camera cable
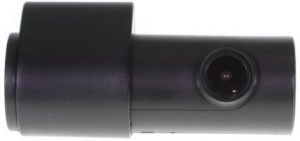
- Rear camera
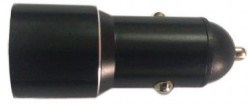
- Car Charger
- 16G Micro SD Card


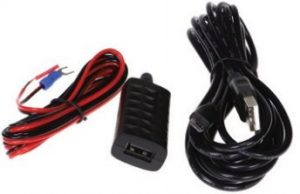
Universal hard wiring kit GHWCUSB2 (Sold separately)
The GATOR GHWCUSB2 enables a professional installation of a GATOR DASH CAM into your vehicle. Instead of sourcing power from the accessory socket of the vehicle, the GHWCUSB2 allows the dash cam to be wired directly to the vehicles fuse box.
Product structure
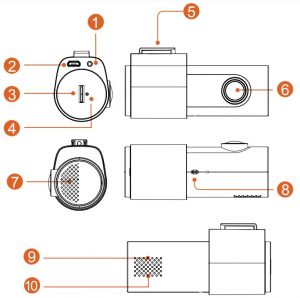
- Rear camera input
- Power socket
- Micro SD card slot
- Reset
- Camera mount to adhesive bracket
- Front camera lens
- Speaker
- Hand gesture sensor
- Red light indicator (Recording)
- Green light indicator (Wifi connected)
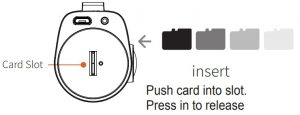
Inserting Micro SD Card
|
|
16G |
32G |
64G |
|
Duration |
1.5h |
3h |
6h |

Fixing the Dash Cam
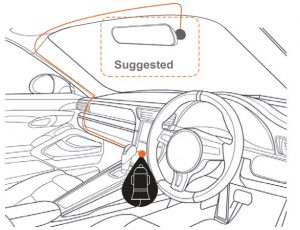
Installation of Dash Cam
- Check orientation of the Dash Cam front camera first before installation.
- Ensure windscreen is clean and free of debris. Use an Alcohol wipe to enhance adhesion.
- Place mounting bracket on Dash Cam after checking Dash Cam orientation. Removebacking off 3M tape and press & hold firmly to windsreen for 60 seconds.
- Fix where the vision is not blocked (Place close to rear-view mirror is recommended). Do not install the device on airbag or within its working range.
- Insert Micro SD card into the Dash Cam.
- Insert Micro USB end of the GPS power cable into the Micro USB interface/ charging point of the Dash Cam. Remove backing off 3M tape of GPS cable and fix to window. Connect USB charging end of the GPS power cable into 12V power socket of vehicle.
- Adjust the mounting bracket and rotate the camera direction to get the best view. Ensure of the vehicles bonnet is visible from the bottom of the screen for alignment.
- Turn vehicles ignition on and the Dash Cam will power ON and start recording automatically, you will hear an audible tone and voice prompt says `recording’.
- When recording the LED light indicator will glow red.
- For the Dash Cam to work it must receive power from the charging adapter. Once power is removed or turned off the Dash Cam will save the current file and turn off.
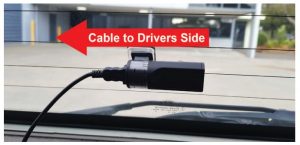
Installation of rear view camera
- Insert the rear camera cable into the video input of the Dash Cam and test.
- Then run the cable to the rear cameras location.
- Fix the cable along the ceiling or A-pillar where it can be safely hidden. (Drivers side).
- Then mount the rear camera to the inside of the vehicles window, with the cable input facing driver side.
Indicator lights
- When the red LED light indicator is flashing on the Dash Cam, the Dash Cam is in recording mode.
- When the green LED light indicator on the Dash Cam is on, the Dash Cam is connected to WiFi of your smartphone.
Hand gesture photo / video function (Dash Cam Only)
Whilst recording you can wave your hand in front of the hand gesture photo sensor, the Dash Cam will make a click sound and automatically takes a photo. It will also capture and save 10 seconds of the current recorded video, 5 seconds before and 5 seconds after hand gesture initiation.
Resetting the Dash Cam
Insert a paper clip in the reset button hole and press for a few seconds to reset the Dash Cam.
Pairing the Dash Cam to a Smartphone
Settings, recording footage and taking photos can all be done via WiFi and downloading the `GATOR Dash Cam GHDVR92W’ APP. For iPhones search the APP Store or for Android devices via Google Play. To pair the Dash Cam with your smartphone, go to your WiFi settings and display all devices for connection. Select your Dash Cam model (GHDVR92W).Enter the password 12345678. Once paired to your DASH CAM then launch `GATOR Dash Cam GHDVR92W’ APP to access functions.
Pairing screen
 Press pairing button to connect via WiFi
Connecting to the Dash Cam screen
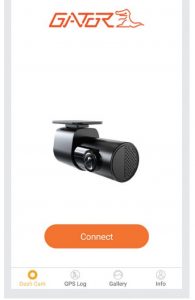 Press connect to access the viewer and app functions
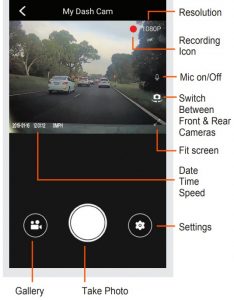
Dash Cam interface screen
Dash Cam video and photo gallery screen
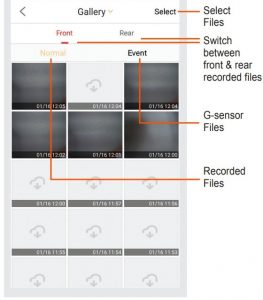 View, videos/photos taken on the Dash Cam to your phone. Press select button to download or delete
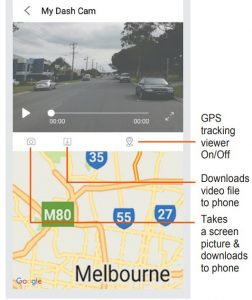
Video and photo playback (APP browser interface)
To view your files via the APP, click on the recorded video or photo icon, select your file to play the file. Select the downloading icon and the selected file will download from the DASH CAM to your Smartphone for viewing. Use the same procedure for pictures. Alternatively press the select wording, click on individual files and press the download arrow icon. You can also remove the SD card from the Dash Cam and plug the card directly into your computer to access files.
GPS tracking instructionsThe GPS data is automatically saved to the video files. In order to see the GPS data, you will need to download the video from the Dash Cam to your phone. To view the GPS data log you must disconnect from the Dash Cam. Then go to the Gallery on page 11 to view the GPS log through the viewer. You can also download the video to your PC and view it through the free downloadable software at our website. www.tdj.com.au/firmware/Gator/DVR Dash Cams/ GHDVR92WThis software is only for PC platforms.ATTENTION: To avoid any possible GPS signal interference, make sure the DASH CAM is away from any other car audio equipment.
Dash Cam video/photo & GPS viewing screen
Dash Cam settings screen

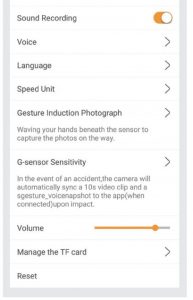
Press the settings icon to get into the settings menu. Press the arrow icons or slide buttons to edit settings.
| Model number: | Dash Cam product number |
| Camera Firmware: | Firmware/Software version number |
| WiFi- Setting: | To modify password |
| Resolution: | Change recording resolution 1080P or 720P |
| Video Length: | This is the length of recorded video files. 1,2 or 3 Minutes |
| Sound Recording: | Turns microphone recording sound on or off. If you want to stop the Dash Cam recording sound in the cabin of your vehicle, set this feature to ‘off’. |
| Voice: | Turns voice prompts from the Dash Cam on or off |
| Language: | Choose Chinese or English as the default language |
| Speed Unit: | Choose Km/h or MPH for the recorded speed |
Gesture Induction Photograph: Turn the hand gesture voice prompt on or off. Choose the sensitivity level for the hand gesture function. High, Medium, Low or Close (Turn Off).
G-sensor Sensitivity:High, Medium, Low Sensitivity or Shutdown (Turn off) and available. This function activates in the case of a car accident by determining the gravitational acceleration (1g = 9.8 meters/second^2). When this function activates the Dash Cam will automatically sync a 10 second video clip and save it to the Event folder on the SD card. We recommend Low Sensitivity to avoid false triggers. Note: With this function turned on it may fill up the SD card with locked video files. Re-format the SD card to create space. The device does NOT guarantee video recording of all accidents as built-in impact sensor may not be activated due to combination of user settings and the level of impact during the collision.Volume:Use slider to change volume settings on the Dash CamManage the TF card:Information is displayed for the Micro SD card. Formatting of the SD card is done here.Reset:Reset all settings of the App back to default.
Data backup
Remove SD Card from the Dash Cam and use a reader connected to a computer to access files and folders.EVENT folder is for locked G-sensor filesGPS folder saves GPS dat filesNORMAL folder is for video filesPHOTO folder is for photo files
Formatting SD card
It is advisable to format the SD card regularly if you have the setting G-sensor function on or create Locked files. This will fill up the card causing it to stop recording any footage.
Infringement of copyright warning
Please note that this product is for personal use only, the method of use shall not violate the goods, or infringe on domestic or international copyright laws. Recorded images are for personal use only, please note that in some cases to use this product to record performances, exhibitions or business activities may infringe the copyright or other legal rights and interests of others.
Product specifications
| DASH CAM | |
| Wi-Fi/GPS | WIFI 2.4G |
| Video | MOV |
| Full HD 1920*1080P (16:9) @ 30fps | |
| Picture format | JPG |
| Picture | 1920*1080 pixels |
| Viewing Angle | 145 degree view angle |
| Functions | G-Sensor, Loop recording |
| REAR CAMERA | |
| Video | MOV |
| HD 1280*720P (16:9) @ 25fps | |
| Viewing Angle | 120 degree view angle |
| OSD Language | English |
| Audio | Built-in Microphone and speaker |
| Storage | Micro SD card (16GB inc) 64GB Class 10 Max |
| Input / Output | USB Micro (Power)/ 2.5mm (Camera) |
| Battery | Super capacitor |
| Power Output | DC 5V/3.1A Max |
| Voltage | 12-24V |
Troubleshooting guide
Cannot take pictures or record video?Please check whether there is enough space on the micro SD card or internal storage.
Stopping automatically while recording?Check to see whether there is enough space on the Micro SD card. Ensure correct Micro SD card is being used, 8-64Gb Class 10 or above Micro SDHC/XC is recommended. Other types of Micro SD cards may not be suitable for use in Dash Cams. If the correct Micro SD Card is being used, format the Micro SD Card in a computer. Micro SD cards have a limited lifespan and become corrupt after a period of time. This is due to the continuous loop recording function. If this has occurred, you will need to replace you Micro SD Card.
Fuzzy/dirty image?Please check if the lens is filled with dirt or fingerprints and clean carefully. Please clean the lens with cloth before shooting. Make sure to peel off the transparent protective sticker on the front of the Dash Cam’s lens.
The DASH CAM is jammed or not responding?Please reset the device by pushing in the reset button on the side of the Dash Cam.
Micro SD card not recognized by DASH CAM?Format card in the Dash Cam’s menu setting’s before use.
Safety information & warnings
- Do not use the Dash Cam in damp working conditions; the Dash Cam is not waterproof.
- Do not try opening the shell or trying to repair the DashCam by yourself. If the accessories for the Dash Cam have any problems, please take it to an authorized repair agent for repair.Do not use a chemical substance, cleaning solvent or cleaner to clean the Dash Cam, please use a moist soft cloth if you would like to clean the Dash Cam.
- Do not use the Dash Cam under conditions where dust is present.
- Please pay attention to cleaning the lens surface, use a moist soft cloth to clean the lens before use, to avoid poor video footage.
- Gator is NOT responsible for the loss of any recorded video during operation. Although designed to withstand high impact of car collision,
- Gator does NOT guarantee recording of accidents where the impact may cause the device to be damaged.
Technical assistance
If you need assistance setting up or using your Gator product now or in the future, call Gator Support. Australia.TEL: 03 8587 8898FAX: 03 8587 8866Mon-Fri 9am 5pm AEST
 Please retain this user guide for future reference.If you would like to download a digital copy of this manual, or other Gator manuals/software, please visit the http://gatordriverassist.com website and click on `Firmware & Manuals” for information on where to find the manuals/software.This manual is considered correct at time of printing but is subject to change.For latest manuals and updates refer to the website.For PC users a video viewing App is also available to download from the website.
References
[xyz-ips snippet=”download-snippet”]