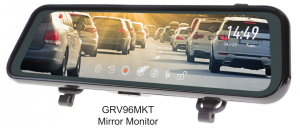
GATOR GRV96MKT Touch Screen Mirror Display
Introduction
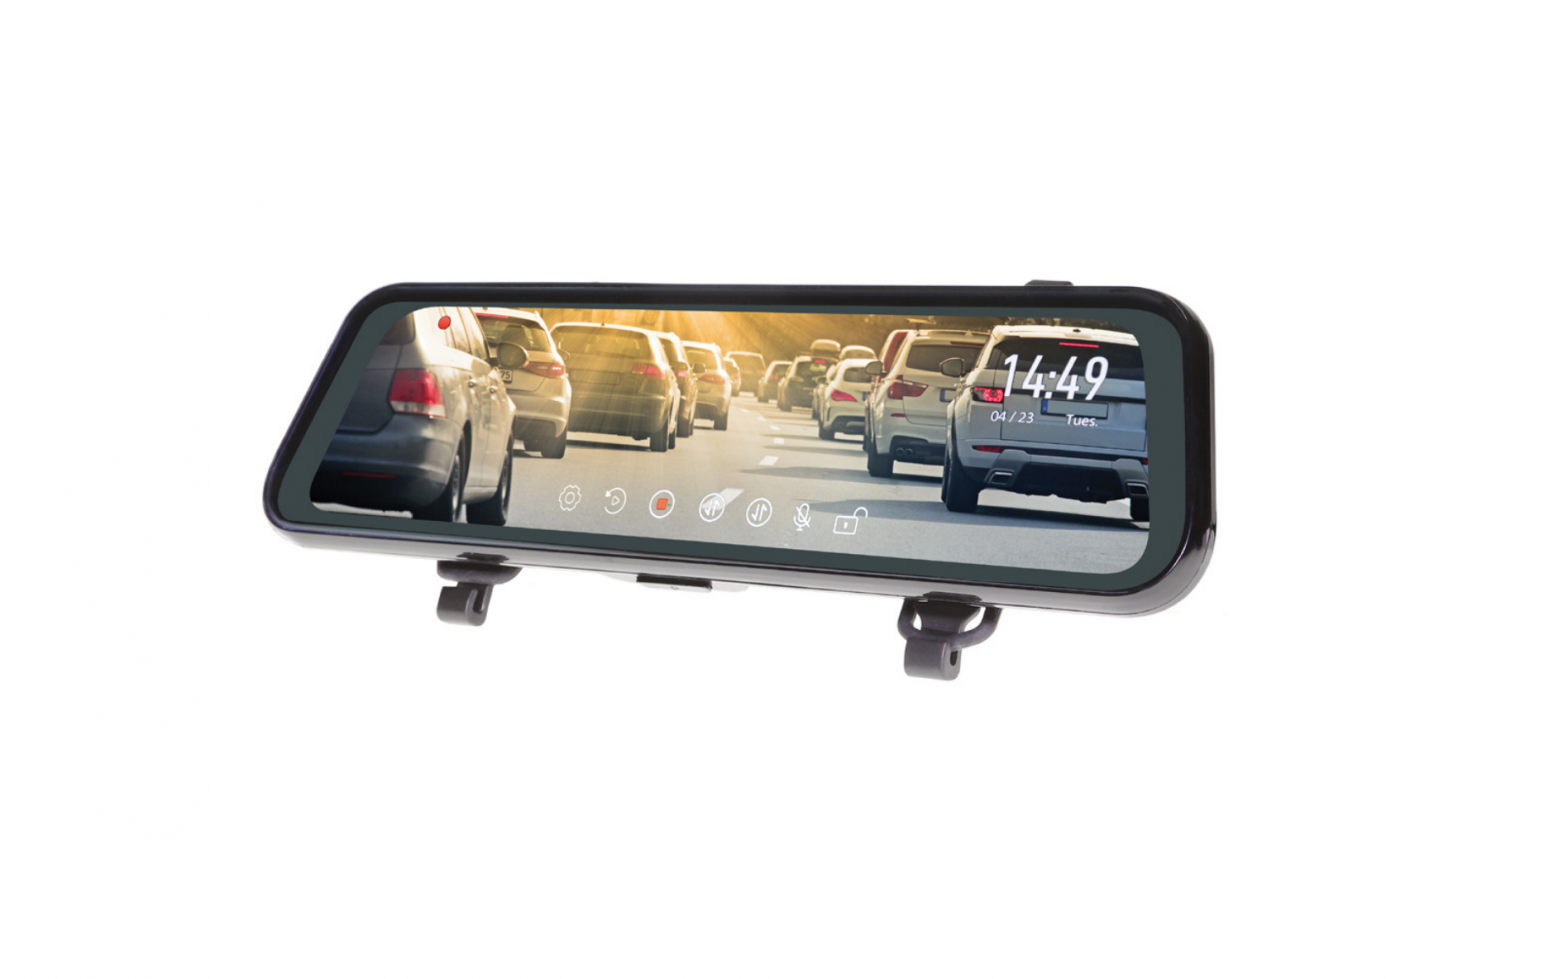
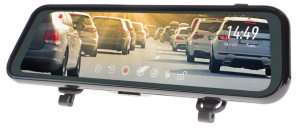
Thank you for purchasing the Gator GRV96MKT Mirror Monitor. This product is a convenient and durable travelling video and data recorder. Please ensure that you have read the product manual and instructions in full, prior to installation and use. Failure to do so may result in product failure/damage or incorrect operation and therefore impact the product performance.
ATTENTION: The Mirror Monitor must be connected to power when in use. The internal battery only holds date and time settings.
Product features
- 9.35″ High-resolution LCD touch screen mirror monitor
- Front camera FHD video recording 1920* 30 FPS
- 120 Degree wide angle lens
- Rear camera HD video recording 1920* 25 FPS
- 110 Degree wide angle lens surface mount rear camera
- Rear camera with mirror image function
- Reverse camera functionality with trigger wire
- Parking guide lines
- Live streaming functionality
- G-Sensor, Loop recording
- 400mAh 3.7V Rechargeable battery
- Seamless cycle loop recording
- Rubber clip-on mount
- 16GB Micro SD
- Supports Micro SD card class10 up to 128GB
- 12/24V DC car adapter (3.4M length}
- Camera lead (6M length with camera)
- Dimensions 72(H) x 18(W) x 260mm(L}
Package components


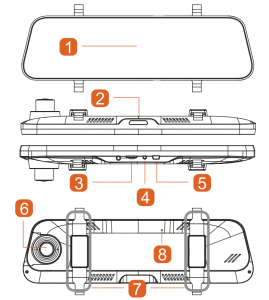
Product structure
- LCD touch screen
- Power button
- Micro SD card slot
- Rear camera input
- Power input (Mini USB)
- Forward recording camera
- Mounting clip-on system
- Reset button

Installation of the Mirror Monitor
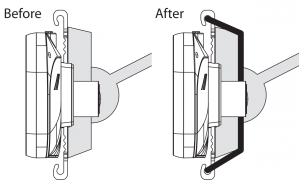
Flexible bands go behind the existing vehicles mirror and attach to the plastic hooks on Gator Mirror Monitor.
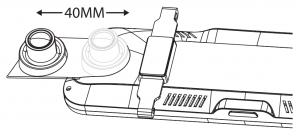
The forward facing cameras mounting arm can be extended outwards as well as the camera lens angled up and down.
- Insert Micro SD card into the Mirror Monitor
- Clip on mirror design securely mounts on the existing rear view mirror in the vehicle by stretching the bands at the back.There are two positions based on thickness of existing mirror.
- Insert power cable into the DC-in of the Mirror Monitor.Connect the DC charging end of the power cable into the 12-24V power socket of your vehicle. Test the Mirror Monitor is working before fixing the cable along the ceiling or A-pillar where it can be safely hidden.
- Connect the rear camera to the input on the mirror. Test the camera is working correctly and orientation before fixing the cable and securing the camera mount on your vehicle. Mirror orientation can also be changed on the touch screen .
- Attach the red trigger wire to the reverse light of your vehicle to engage parking guide lines when vehicle is put into reverse gear.The black wire can also be used as an additional earth if required.
- Turn vehicles ignition on, and the Mirror Monitor will automatically start recording.
- When recording the recording indicator LED will flash red.
- For the Mirror Monitor to work it must receive power from the charging adapter. Once power is removed or turned off the Mirror Monitor will save the current file and turn off.
- Manually adjust the viewing angle on the Mirror Monitor by extending the forward facing camera arm and or moving the lens up or down. Electronically scroll Up/Down on the touch screen to also change viewing area display.
Hard wiring kit GUNIHWC (Sold separately)
This can be purchased from your retailer to hard wire your Mirror Monitor to your vehicle. A 3 Meter extension cable is also available separately. (GRV90EXT)
NOTE: The GUNIHWC Hardwire Kit is a simple plug and play solution to hardwire any Mirror Monitor or device using Mini or Micro USB for power. The Hardwire Kit is compatible with 12V/24V DC for car or truck installations. Please ensure that you have read the product manual and instructions in full, prior to installation and use. Failure to do so may result in product failure/damage or incorrect operation and therefore impact the product performance.
Touch screen functions
- Recording indicator
- Settings
- Playback
- Stop/Start recording
- Image rotation for rear camera
- Front or rear view
- Microphone ON/OFF
- Lock/Unlock recorded files
- Date/Time
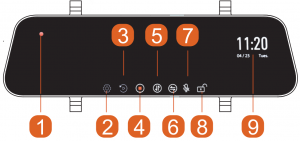
Long press the power button to turn the Mirror Monitor ON/OFF.Short press the power button whilst recording to turn the display off, recording will continue. The recording indicator will start flashing RED when recording has started. To stop and start recording, simply press the stop/start recording icon on the touch screen. When recording press the lock icon to lock the recorded video. Recording indicator LED will flash YELLOW. Press the Image rotation button to rotate rear recording. Note the camera does not have GYRO so the recorded footage will not rotate, thus footage will be upside down. Press the Microphone icon to turn audio on or off. To enter settings or playback video files you must stop the recording. In live-view & reversing mode touch the screen and scroll Up/Down to change viewing area display. Note this does not effect recording, for visual display purposes only. Touch the screen and scroll Left/Right to change brightness.
Settings
Press settings icon to enter video settings. Select function and select settings to make changes. Press arrow icon to exit the function.
| Function | Description |
| Movie Mode | 1080P |
| Movie Clip Time | 1/2/3 Min |
| Sound Record | On/Off |
| Mirror | On/Off |
| Clock Settings | Date/Time |
| Stamp | Date+ Logo/Date/Logo/Off |
| Language | English/Russian/Chinese |
| Flicker | 50/60 Hz |
| LCD Power Save | 5 Sec /10 Sec /1 Min / Off |
| PQ Mode | Soft/Standard/Bright |
| G-sensor | Off/High/Medium/Low |
| Volume | On/Off |
| Reset Setup | Yes/No (All settings will be deleted) |
| Format SD-Card | Yes/No (All data will be deleted) |
| FW Version | Firmware version |
Video playback mode
When not recording press the playback icon ![]() to select recorded video footage. Press the icons to view recorded files on screen
to select recorded video footage. Press the icons to view recorded files on screen
![]() Recorded files
Recorded files
![]() Locked recorded files
Locked recorded files
![]() Front recorded files
Front recorded files
![]() Rear recorded files
Rear recorded files
During playback press icons on screen to lock/ unlock/ go back/ go forward/ pause and delete recorded video files. Press return arrow to exit to menu files. Press return arrow to exit playback.
Connecting to a computer
You can remove the SD card from the Mirror Monitor and plug the card directly into your computer to access files. With the SD card inserted, and when connected to a computer. Two folders will appear in the storage device. Normal and Event for locked files. Inside folders will also be separate folders for front and rear recordings.
G-sensor sensitivity
This function activates in the case of a car accident by determining the gravitational acceleration (1g = 9.8 meters/second”2). When this function activates the Mirror Monitor will automatically save a 1 minute video file and save it to the Event folder on the SD card. We recommend Low Sensitivity to avoid false triggersNote: With this function turned on it may fill up the SD card with locked video files. Re-format the SD card to create space. The device does NOT guarantee video recording of all accidents as built-in impact sensor may not be activated due to combination of user settings and the level of impact during the collision.
Reversing guide lines
When triggered, the reversing guide lines only assist a driver with backing into a parking space or aligning with an object behind the vehicle. They do not measure distance. You should always get out of the vehicle and visually check the distance to aid the driver when using guide lines.
Formatting SD card
It is advisable to format the SD card when you first use the Mirror Monitor and also regularly if you have the setting G-sensor function on or create Locked files. This will fill up the card causing it to stop recording any footage. 64-128GB Micro SD cards need to be formatted in the Mirror Monitor to be recognized.
Infringement of copyright warning
Please note that this product is for personal use only, the method of use shall not violate the goods, or infringe on domestic or international copyright laws. Recorded images are for personal use only, please note that in some cases to use this product to record performances, exhibitions or business activities may infringe the copyright or other legal rights and interests of others.
Product specifications
| Display | 9.35″ High-resolution CD touch screen |
| Colour | Black |
| Video | MOV |
| Resolution Front | FHD 1920* 30FPS |
| Resolution Rear | FHD 1920* 25FPS |
| Frequency | 50HZ/60HZ |
| M U | MST MSC 33 |
| Front Camera | 120 Degree wide angle lens |
| Rear Camera | Surface mount butterfly camera 95 Degree wide angle lens |
| Functions | G-Sensor, Loop recording |
| OSD Language | English/Russian/Chinese |
| Audio | Built-in Microphone and speaker |
| Storage | Supports Micro SD card Class 10, 128GB Max |
| Power | USB2.0 DC5V 2.5A |
| Battery | 400mAh 3.7V Rechargeable battery |
| Car charger | DC input: 12-24V, output: 5V |
| Dimensions | 72*18*260mm (H*W*L) |
Troubleshooting guide
Problem: The Mirror mount will not stay attached to the existing mirror
Solution:
- The rubber bands used to mount the Mirror Monitor can tightened by using the different rungs for adjustment.
Problem: The Mirror Monitor will not power on
Solution:
- Vehicle Accessory Socket – Check the vehicle accessory socket has power, simply plug another device and see if it powers up (or use a test light/ multimeter to check for power).
- Mirror Monitor Power Cable – Check the fuse in the tip of the accessory plug, it may need to be replaced.
- Mirror Monitor – Connect the Mirror Monitor to a computer via the USB cable to see if it powers up.
Problem: The Mirror Monitor shuts down when connected to the vehicle and the battery will not charge
Solution:
- The battery will only charge while the vehicle is switched on.
- If the vehicle is not frequently used the Mirror Monitor battery will fully discharge and may need to be connected to a domestic USB charger (such as a smartphone charger) for approximately 4 hours to fully charge.
Problem: The Mirror Monitor battery only lasts for a few minutes when power is disconnected
Solution:
- This is normal. Batteries in Mirror Monitors only hold enough power to safely shut down the Mirror Monitor, securely save the last file when power is disconnected and retain settings.
- The Mirror Monitor is designed to be connected to power at all times while being used.
Problem: The time & date settings reset every time the Mirror Monitor is powered on
Solution:
- The time and date settings will reset when the Mirror Monitors battery is flat. Make sure the Mirror Monitors battery is fully charged in order to retain the time and date settings.
Problem: The Mirror Monitor menu cannot be accessed
Solution:
- While the Mirror Monitor is recording the Menu can not be accessed. Stop recording before pressing the Menu button.
Problem: The Mirror Monitor screen turns off after a few minutes when the Mirror Monitor is powered on
Solution:
- Mirror Monitors have an automatic screen saver feature. This helps reduce heat in the Mirror Monitor and also makes the Mirror Monitor less distracting to the driver.
- If you prefer the screen remain on, this can be changed in the Mirror Monitor settings under “LCD Power Save”.
Problem: The Mirror Monitor feels warm when it is operating
Solution:
- It is normal for the Mirror Monitor to feel warm to the touch during typical use, especially when it is recording HD video.
Problem: The Mirror Monitor stops automatically while recording
Solution:
- Check to see whether there is enough space on the Micro SD card.
- Ensure correct Micro SD card is being used, 8-32Gb Class 10 or above Micro SDHC is recommended. Other types of Micro SD cards may not be suitable for use in Mirror Monitors.
- If the correct Micro SD Card is being used, format the Micro SD Card in a computer.
- Micro SD cards have a limited lifespan and become corrupt after a period of time. This is due to the continuous loop recording function. If this has occurred, you will need to replace you Micro SD Card.
Problem: The Micro SD card is not recognised by the Mirror Monitor
Solution:
- Format the Micro SD card before using. Be sure the Micro SD card is compatible with the device, see “Stops automatically while recording” fault.
Problem: The Mirror Monitor will not record video or take pictures
Solution:
- Check to see whether there is enough space on the Micro SD card. If not, the Micro SD card will need to be formatted.
Problem: Video files can not be played on the PC
Solution:
- The video files from the Mirror Monitor are in .MOV format and may not be compatible with your PC if suitable playback software is not installed.
Problem: My videos are blurry, dirty or discoloured
Solution:
- Check to see if there are any finger prints or dirt present on the camera lens. If needed, clean with a soft dry cloth before recording.
- Also be sure to have removed the transparent lens cover during installation.
Problem: The Mirror Monitor is frozen or not responding
Solution:
- Reset the unit by pushing and holding the reset button for a few seconds and try again.
- Format Micro SD Card in a computer.
Problem: Unresolved issues
Solution:
- Reset the unit by pushing and holding the reset button for a few seconds and try again.
- Format Micro SD Card in a computer.
- Contact Gator Technical Department
Safety information & warnings
- Do not use the Mirror Monitor in damp working conditions; the Mirror Monitor is not waterproof.
- Do not try opening the shell or trying to repair the Mirror Monitor by yourself. If the accessories for the Mirror Monitor have any problems, please take it to an authorized repair agent for repair.
- Do not use a chemical substance, cleaning solvent or cleaner to clean the Mirror Monitor, please use a moist soft cloth if you would like to clean the Mirror Monitor.
- Do not use the Mirror Monitor under conditions where dust is present.
- Please pay attention to cleaning the lens surface, use a moist soft cloth to clean the lens before use, to avoid poor video footage.
- Gator is NOT responsible for the loss of any recorded video during operation.
- Although designed to withstand high impact of car collision, Gator does NOT guarantee recording of accidents where the impact may cause the device to be damaged.
Technical assistance
If you need assistance setting up or using your Gator product now or in the future, call Gator Support. AustraliaTEL: 03 – 8587 8898FAX: 03 – 8587 8866Mon-Fri 9am – 5pm AEST
Please retain this user guide for future reference.
If you would like to download a digital copy of this manual, or other Gator manuals/software, please visit the gatordriverassist.com website and click on ‘Firmware & Manuals” or search for the product model number for more information, accessories and products.
This manual is considered correct at time of printing but is subject to change. For latest manuals and updates refer to the website.
Copyright© 2017 by TDJ AustraliaAll rights reserved. No part of this publication may be reproduced, distributed, or transmitted in any form or by any means, including photocopying, recording, copying or other electronic or mechanical methods, without the prior written permission of the author.
For more information on the Gator range go to our website

[xyz-ips snippet=”download-snippet”]