GE APPLIANCES Air Fry Toaster Oven G9OAABSSPSS Owner’s Manual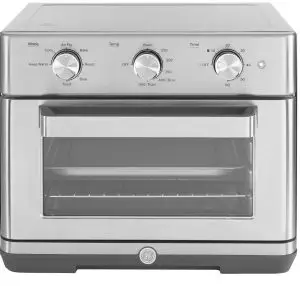
THANK YOU FOR MAKING GE APPLIANCES A PART OF YOUR HOME.
Whether you grew up with GE Appliances, or this is your first, we’re happy to have you in the family.
We take pride in the craftsmanship, innovation and design that goes into every GE Appliances product, and we think you will too. Among other things, registration of your appliance ensures that we can deliver important product information and warranty details when you need them.
IMPORTANT SAFETY INFORMATION
READ ALL INSTRUCTIONS BEFORE USING THE APPLIANCE
WARNING: Read all safety instructions before using the product. Failure to follow these instructions may result in fire, electrical shock, serious injury, or death.
IMPORTANT SAFEGUARDS
Always follow these safety precautions when using this appliance.
- Carefully read all instructions before operating the toaster oven.
- Remove and discard all packaging materials prior to operating the oven.
- WARNING Remove plug from outlet when the appliance is not in use, before putting on or taking off parts, and before cleaning. Allow to cool before cleaning.
- WARNING To reduce risk of fire or electric shock, always operate oven with crumb tray properly installed.
- To protect against electrical shock do not immerse cords, plugs, or appliance in water or other liquid.
- Always place oven on a level, stable, and heat-resistant surface whenever oven is in operation
- Keep at least 4” (10 cm) clearance on all sides of the appliance whenever oven is in operation. Do not operate appliance underneath wall cabinets.
- Do not place any of the following materials in the oven: paper, plastic, pot holders, linens, gasoline or other flammable vapors and liquids.
- A fire may occur if the toaster-oven is covered or touching flammable material, including curtains, draperies, walls, and the like, when in operation. Do not store any item on top of the appliance when in operation.
- The exterior surfaces of the appliance can be hot during and after oven operation. Allow appliance to cool completely before handling.
- Do not touch hot surfaces. Use handle or knobs.
- Do not store items on top of the appliance, as this surface can be very hot during and after oven operation.
- To prevent burns or injury, always use proper protection, such as hot pads or oven mitts, when removing or handling items from oven.
- Do not touch heating elements or interior surface of oven during or after use. Allow to cool before cleaning or handling.
- Do not let power cord hang over edge of table or counter. Do not let power cord contact hot surfaces.
- Always clean the oven according to cleaning and care instructions, as provided on page 10.
- Do not clean with metal scouring pads. Pieces can break off th pad and touch electrical parts involving a risk of electric shock.
- Do not operate any appliance with a damaged cord or plug or after the appliance malfunctions or has been damaged in any manner.Return appliance to the nearest authorized service facility for examination, repair, or adjustment.
- Oversize foods or metal utensils must not be inserted in a toasteroven as they may create a fire or risk of electric shock.
- The use of accessory attachments not recommended by the appliance manufacturer may cause injuries.
- Do not store any materials, other than manufacturers recommended accessories, in this oven when not in use.
- This appliance is intended for indoor household use only. Do not store or operate outdoors.
- Do not use appliance for other than intended use.
- Do not leave children alone – children should not be left alone orun attended in an area where an appliance is in use.
- Always stop oven operation before unplugging the appliance.
- Before handling, moving, or cleaning the appliance, always unplug the power cord from the wall outlet and ensure the appliance has properly cooled.
- Do not place on or near a hot gas or electric burner, or in a heated oven.
- Cook food thoroughly to help protect against foodborne illness.Minimum safe food temperature recommendations can be found at IsItDoneYet.gov and fsis.usda.gov. Use a food thermometer to take food temperatures and check several locations.
- Extreme caution should be exercised when using containers constructed of other than metal or glass.
- Extreme caution must be used when moving an appliance containing hot oil or other hot liquids.
- Use extreme caution when removing tray or disposing of hot grease.
- Do not cover crumb tray or any part of the oven with metal foil.This will cause overheating of the oven.
- To disconnect, turn any control to “off”, then remove plug from wall outlet.
- Avoid contacting moving parts.
WARNING![]() RISK OF FIRE OR ELECTRIC SHOCK
RISK OF FIRE OR ELECTRIC SHOCK
- TO REDUCE THE RISK OF FIRE OR ELECTRIC SHOCK, DONOT REMOVE COVER (OR BACK)
- Do not attempt to repair or replace any part of your toaster oven unless it is specifically recommended in this manual. All other servicing should be performed by authorized service personnel.
CAUTION: To ensure continued protection against risk of electric shock, connect to properly grounded outlets only.
WARNING: KEEP FLAMMABLE MATERIALS AWAY FROM THE TOASTER OVENFailure to do so may result in fire or personal injury.
- Do not store or use flammable materials in a toaster or near the toaster opening, including paper, plastic, pot holders, linens, wall coverings, curtains, drapes and gasoline or other flammable vapors and liquids.
- Never wear loose-fitting or hanging garments while using the appliance. These garments may ignite if they contact hot surfaces causing severe burns.
CAUTION A short power-supply cord is provided to reduce the risk resulting from becoming entangled in or tripping over a longer cord.
If an extension cord is used:
- The marked electrical rating of the cord set or extension cord should be at least as great as the electrical rating of the appliance;
- The cord should be arranged so that it will not drape over the countertop or tabletop where it can be pulled on by children or tripped over unintentionally;
- The cord set or extension cord should be a grounding-type 3-wire cord.
READ AND SAVE THESE INSTRUCTIONS
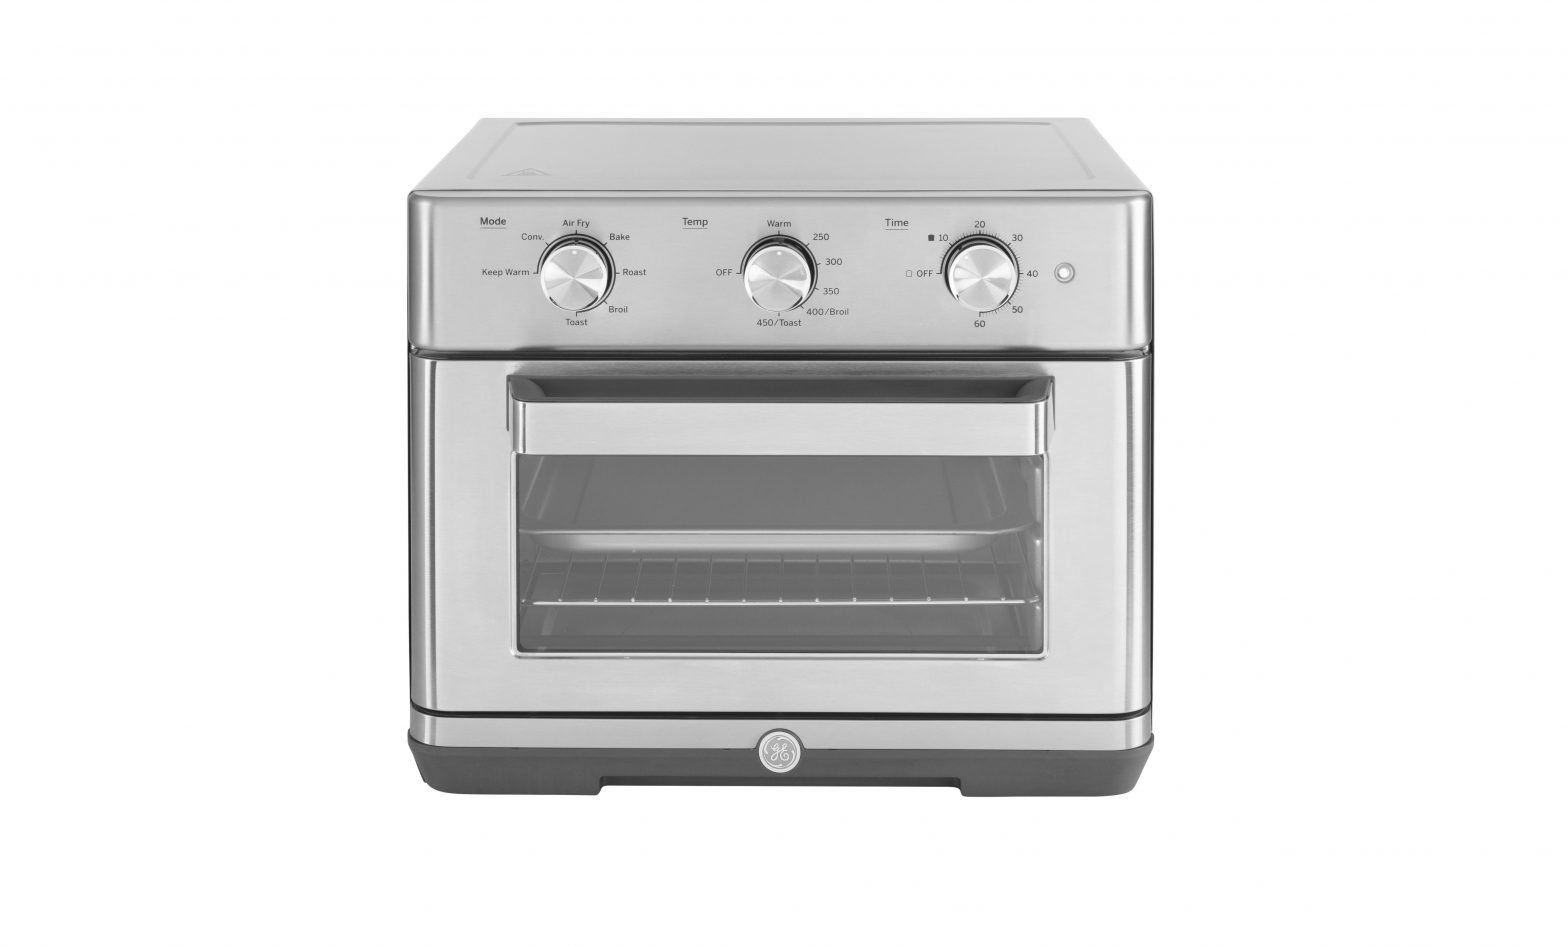
Parts Included

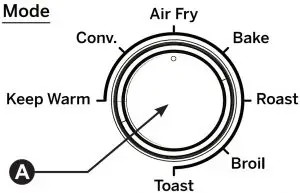
- A Mode Selection Knob
- B Temperature Knob
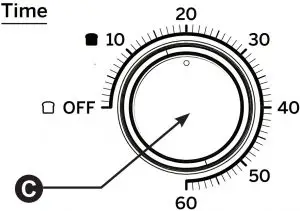
- C Timer Knob
- D Handle
- E Door Window
- F Crumb Tray
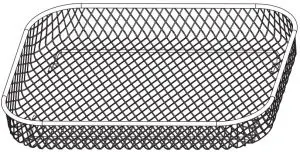
- Air Fry Basket

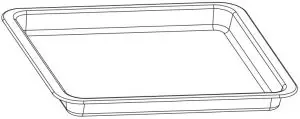
- Baking Pan
- Baking Rack

Getting Started
Unpacking and Cleaning
- Remove and safely discard all packing materials before operating the oven.
- It is recommended to wipe the interior of the oven cavity with a damp sponge before first use.
- It is recommended to thoroughly clean all accessories before first use.Accessories may be cleaned with. warm, soapy water. Rinse and dry thoroughly.
- Place the oven on a level and stable surface where oven has at least 4″ (10cm) of clearance on all sides of the unit, and at least 8″ (20cm) of clear space above.
- Do not place or store any items on top of the oven, with the exception of the provided accessories.
Powering the Oven
- Unravel power cord and plug into a grounded 120V power outlet
Before First Use
- It is recommended to operate the oven empty for 20-30minutes before first use. This will ensure any protective films on the heating elements are removed.
- When using the oven for the first time, the oven mayemit visible vapors and/or a slight odor. The vapors and odor are normal, safe, and not detrimental to the oven.Ensure that the room is well ventilated.
Controls
- A Cooking Mode KnobThis knob rotates to select the desired cooking mode
- B Temperature KnobThis knob rotates to select the desired oven temperature.
- C Timer KnobThis knob rotates to set the cooking time.
- D Oven Operation LightThis light illuminates to indicate that the oven is currently in operation. The light will turn off when cooking timer expires.


Functions
Air Fry
This mode is ideal for browning and crisping the exterior of foods. The air fry mode can produce a taste and texture similar to deep frying without the need to submerge the food in oil.
Bake
This mode is ideal for cooking foods that generally lack structure before the cooking process, such as cakes, cookies,muffins,pastries,ples, lasagnas, and casseroles.Food will be cooked thoroughly and evenly, which also makes this mode suitable for packaged frozen meals.
Toast
This mode is ideal for browning slices of bread, bagels,English muffins, and frozen waffles. Each slice will be browned evenly on both sides without the need for flipping the food.
Broil
This mode is ideal for quickly searing meats (e.g. steaks or fish ) crisping vegetable (e.g potatoes), or browning the top surface of foods (e.g. casseroles).
Roast
This mode is ideal for cooking foods that are generally solid before the cooking process, including a wide variety of meats and vegetables. Foods will be tender and moist on the inside, while developing a crispy texture on the exterior.
Keep Warm
This mode is useful for keeping freshly cooked meals warm while waiting for guests or preparing the rest of the meal.
Convection Roast
This mode is similar to the ROAST mode, but activates the convection fan to circulate hot air around the food. This causes the food to cook faster than normal ROAST mode, but the oven temperature may need to be reduced for some recipes.
Using the Toaster Oven
Selecting the Cooking Mode
To choose the cooking mode, rotate the Mode knob until the indicator on the knob points to the desired cooking mode.
Selecting the Oven Temperature
To choose the oven temperature, rotate the Temp knob until the indicator on the knob points to the desired oven temperature.
NOTE: When using the Broil cooking mode, the oven temperature should be set to “400°F/Broil”.
When using the Toast cooking mode, the oven temperature should be set to “450°F/Toast”.
When using the Keep Warm (“Warm”) mode, the oven temperature should be set to “Warm”.
Starting the Toaster Oven
Ensure the crumb tray is properly installed before operating the oven. Place the cooking accessory in the appropriate rack position. See Cooking Guide on page 8 for recommended rack positions based on cooking mode.
To start the selected cooking mode, rotate the Time knob to the desired cooking time. The oven will immediately begin to heat and the oven operation light will illuminate.
NOTE: If the Temp knob is set to the “OFF” position the oven will not heat and only the oven fan will operate.Please ensure the desired oven temperature has been set before setting the oven timer.
Stopping the Toaster Oven
When the selected cooking time has ended, the oven will emit an audible alarm to indicate the cooking cycle is complete. The oven will turn off automatically and the oven operation light will turn off.
To manualty turn off the oven at any time. rotate the Time knob to the -or position.
Cooling the Oven
The exterior surfaces of the oven can be very hot during and after use. To facilitate cooling. the oven fan may be operated without activating the heating elements. To manually cool the oven after use. turn the Mode knob to Fry’ and turn the temp knob to the ‘or position. Then rotate the Tune knob to about 5 minutes to activate the fan. The fan will automatically shut off when the alarm sounds.
Cooking Guide
Cooking Guide
Cook food thoroughly to help protect against foodborne illness. Minimum safe food temperature recommendations can be found at IsItDoneYet.gov Always check internal food temperature to confirm minimum safe temperatures have been reached.
Recommended Oven Rack Positions by Cooking Mode
| – | Upper Rack | Middle Rack | Lower Rack | |||
| Cooking Mode |  |
 |
 |
 |
 |
 |
| Air Fry | ||||||
| Bake | ||||||
| Toast | ||||||
| Broil | ||||||
| Roast | ||||||
| Warm | ||||||
| Convection | ||||||
| NOTE: The air fry basket must be placed on top of the wire rack at all times. DO NOT place air fry basket in the baking pan.NOTE: When baking greasy or oily foods, it is recommended to use the baking tray in the lower rack position. This will allow for easier clean up. |
It is generally recommended to use the provided air fry basket in the middle rack position for air frying. Foods may cook faster than expected if the oven is already hot when food is placed in the oven. If foods are browning or dryingout too quickly, try using the lower rack position or setting a lower oven temperature.
To avoid the need to stir or flip food during cooking, arrange the food in a single layer in the basket. Overcrowding the basket may negatively impact food texture and prolong cook times.
| Food Type | Recommended Amount | Temperature | Time |
| Bacon | 6 slices | 400°F | 8-13 minutes |
| Fresh Wings | 1 to 2 lbs | 400°F | 15-20 minutes |
| Frozen Wings | 1 ½ lbs | 400°F | 25-30 minutes |
| Fresh Hand-Cut French Fries | 1 lbs. or 2 Russet Potatoes, slice width of quarter inch | 400°F | 20-30 minutes |
| Sweet Potato Waffle Fries | 1 lb | 400°F | 10-13 minutes |
| Frozen French Fries | 1 lb | 450°F | 10-15 minutes |
| Breaded Pork Loins | 2 Pork Loins, breaded | 375°F | 20-30 minutes |
| Frozen Convenience Foods | ½ to 1 lb of Frozen Product | 400°F | 10 minutes |
| Mozzarella Sticks | 6 to 20 Mozzarella Sticks | 400°F | 7-9 minutes |
| Fish Sticks | 12oz or 20 sticks | 400°F | 10 minutes |
| Chicken Nuggets | 1 lb or 34 pieces | 400°F | 10 minutes |
| Chicken Tenders | 6 Chicken Tenderloins, breaded | 400°F | 10 minutes |
| Vegetables | 1 lb of Fresh Green Beans (or other legumes), Squash/ Zucchini, Asparagus, Brussel Sprouts | 400°F | 7-10 minutes |
| Fried Apples | 1 Apple peeled and cored, cut in wedges, coated lightly in cinnamon. | 400°F | 10 minutes |
Care and Cleaning
- Be sure the oven is turned off, unplugged, and cool before beginning cleaning.
- Clean the glass door with a sponge, soft cloth, or nylon pad and sudsy water. Do not use a spray cleaner.
- Remove slide rack and bake pan; wash in soapy waterTo remove stubborn spots, use a polyester or nylon pad.NOTE: DO NOT put the air fry basket, baking pan, baking rack, or crumb tray in the dishwasher.Accessories are not dishwasher safe.
- Remove crumb tray using the handle and dispose of crumbs. Wipe tray with a damp cloth and dry thoroughly before placing back into the oven.
- Wipe the outside of the oven with a damp cloth or sponge. Dry thoroughly.
- Do not attempt to clean the heating elements. Any food that comes into contact with the elements will burn off on its own.
COOKING CONTAINERS
Only metal, oven-proof glass or ceramic cookware without glass lids are recommended for use in this ovenFollow the manufacturers’ cleaning instructions to clean each of these products.
Troubleshooting
Save time and money! Please review the following troubleshooting chart before contacting Customer Support.
| Problem | Possible Solution |
| The oven does not turn on or fails to get hot. |
|
| Oven omits a burnt smell. | Ensure that the cooking time is appropriately set and that food is not being overcooked.Fats, oils, and sauces that have dripped onto the lower heating elements may cause some smoke or burning smell during oven operation.Ensure that the baking tray, oven rack, and drip tray are thoroughly clean before each use. |
| Heater tubes turn off during cooking. | The heater tubes turn on/off to control temperature. It is not a malfunction. |
| Smoke comes out. | The fat from the food sticking to the heater may cause smoke during cooking especially using “Broil” menu. Set lower temperature if necessary. |
| The food is undercooked after recommended time. |
|
| The food is not evenly cooked. |
|
| The food is not crispy after using Air Fry mode |
|
If the problem persists after trying these solutions, please contact GE Appliances Customer Support. See page 12 for Customer Support contact information.
GE Appliances Limited Warranty
If your appliance fails to operate properly while in use under normal household conditions within the warranty period, visit geappliances.com/contact for product care/maintenance self-help.
To initiate a warranty claim, please visit geappliances.com/contact, or call 1-800-GECARES. Please have your model number and serial number available. Return and packing instruction information will be provided at that time.
| For the Period of: | GE Appliances Covers |
| One YearFrom the date of the original purchase | If the toaster oven fails due to a defect in materials or workmanship, during the limited one- year warranty, GE Appliances will either repair your product, replace your product with a new or remanufactured product, or refund the purchase price of the product at GE Appliances sole discretion. |
What GE Appliances Will Not Cover:
- Failure of the product if it is abused, misused, or used for other than the intended purpose or used commercially.
- Replacement of house fuses or resetting of circuit breakers.
- Damage caused after delivery.
- Damage to the product caused by accident, fire, floods or acts of God.
- Incidental or consequential damage caused by possible defects with this appliance.
EXCLUSION OF IMPLIED WARRANTIESYour sole and exclusive remedies are product exchange or refund as provided in this Limited Warranty. Any implied warranties, including the implied warranties of merchantability or fitness for a particular purpose, are limited to one year or the shortest period allowed by law.
For sale in the 50 United States and the District of Columbia only: For US Customers: This limited warranty is extended to the original purchaser for products purchased for home use within the USA.Some states do not allow the exclusion or limitation of incidental or consequential damages. This warranty gives you specific legal rights, and you may also have other rights which vary from state to state. To know what your legal rights are, consult your local or state consumer affairs office or your state’s Attorney General.
Warrantor: GE Appliances, a Haier companyLouisville, KY 40225
For Customers in Canada: This limited warranty is extended to the original purchaser and any succeeding owner for products purchased in Canada for home use within Canada. In-home warrant service will be provided in areas where it is available and deemed reasonable by Mabe to provide.
Warrantor Canada: MC Commercial, Burlington, Ontario, L7R 5B6
Customer Support / Return Contacts
Service and Registration
Register your new appliance on-line at your convenience! Timely product registration will allow for enhanced communication and prompt service under the terms of your warranty, should the need arise.
Register your appliance at GEAppliances.com/register.
Contact Us
If you are not satisfied with the service you receive from GE Appliances, contact us on our Website with all the details including your phone number, or write to:
In the US: General Manager, Customer Relations | GE Appliances, Appliance Park | Louisville, KY 40225 GEAppliances.com/contact
In Canada: Director, Consumer Relations, MC Commercial Inc. | Suite 310, 1 Factory Lane | Moncton, N.B. E1C 9M3 GEAppliances.ca/en/contact-us
References
[xyz-ips snippet=”download-snippet”]