![]()
AlkaidUser Manual V, 1.0 https://www.geeetech.com/alkaid-msla-3d-printer-p-1210.htmlFor more details, please refer to our User Manual.Or scan the QR Code to enter the download page from your mobile browser.
Notice
![]() Please read this manual carefully to ensure that you can use the machine correctly.
Please read this manual carefully to ensure that you can use the machine correctly. since this product produces high-energy ultraviolet rays, it is recommended that you wear goggles when using it to ensure that you are not harmed.
![]() When adding photosensitive resin or removing the printed model, be sure not to let the 41photosensitive resin drip on the product shell and the rotary knobs of the resin tank, otherwise, it will cause the product shell to be corroded and the rotary knobs to be stuck.
When adding photosensitive resin or removing the printed model, be sure not to let the 41photosensitive resin drip on the product shell and the rotary knobs of the resin tank, otherwise, it will cause the product shell to be corroded and the rotary knobs to be stuck.![]() Clean the photosensitive resin in the resin tank in time, if you do not use this product for a long time, otherwise, it may cause damage to the tank.
Clean the photosensitive resin in the resin tank in time, if you do not use this product for a long time, otherwise, it may cause damage to the tank.![]() Since the photosensitive resin itself may have a peculiar smell, please use this product in a spacious and ventilated environment.
Since the photosensitive resin itself may have a peculiar smell, please use this product in a spacious and ventilated environment.![]() There are product instructions and detailed instructions on the use of slices in the gift U disk, please check them in time.
There are product instructions and detailed instructions on the use of slices in the gift U disk, please check them in time.![]() When the printer is working, please do not cut off the power, otherwise, it will cause printing failure
When the printer is working, please do not cut off the power, otherwise, it will cause printing failure![]() The 2K screen is a valuable and fragile device. When using the printer, make sure not to rn spill resin on the 2K screen, otherwise, it will damage the 2K screen. If you accidentally spill resin on the 2K screen, please turn off the power of the machine immediately and wipe the resin on the 2K screen clean, make sure there is not any residue. GI
The 2K screen is a valuable and fragile device. When using the printer, make sure not to rn spill resin on the 2K screen, otherwise, it will damage the 2K screen. If you accidentally spill resin on the 2K screen, please turn off the power of the machine immediately and wipe the resin on the 2K screen clean, make sure there is not any residue. GI ![]() Please do not disassemble this product privately. If you encounter any problems, please o contact the after-sales personnel of our company.
Please do not disassemble this product privately. If you encounter any problems, please o contact the after-sales personnel of our company.
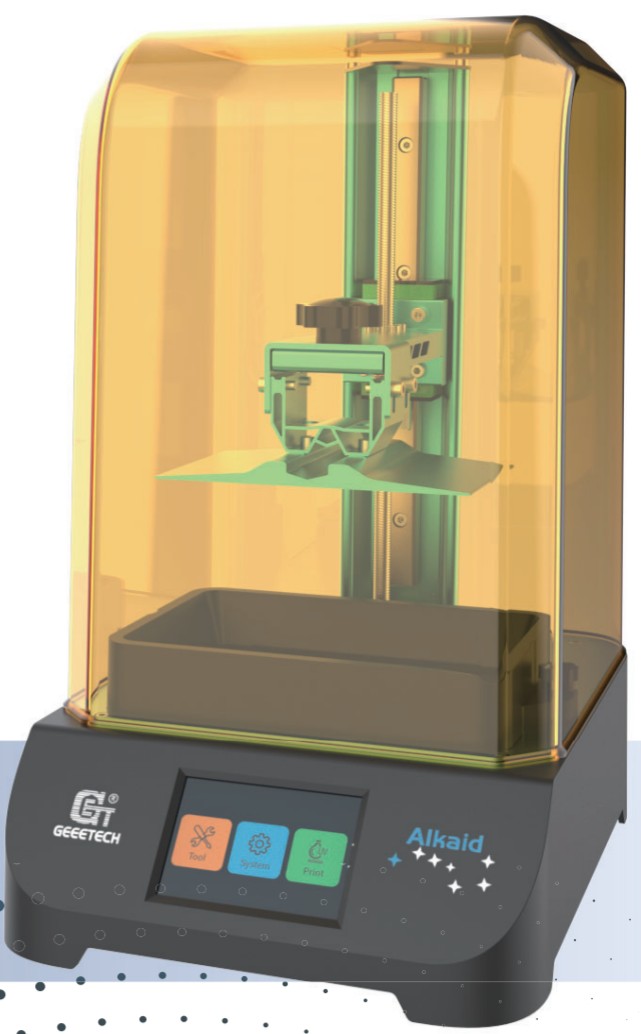
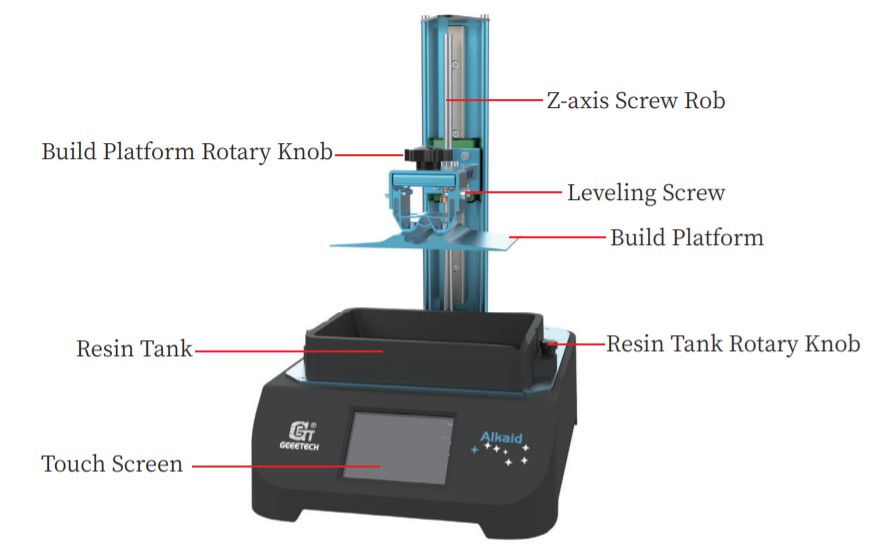
Machine Overview
 |
 |
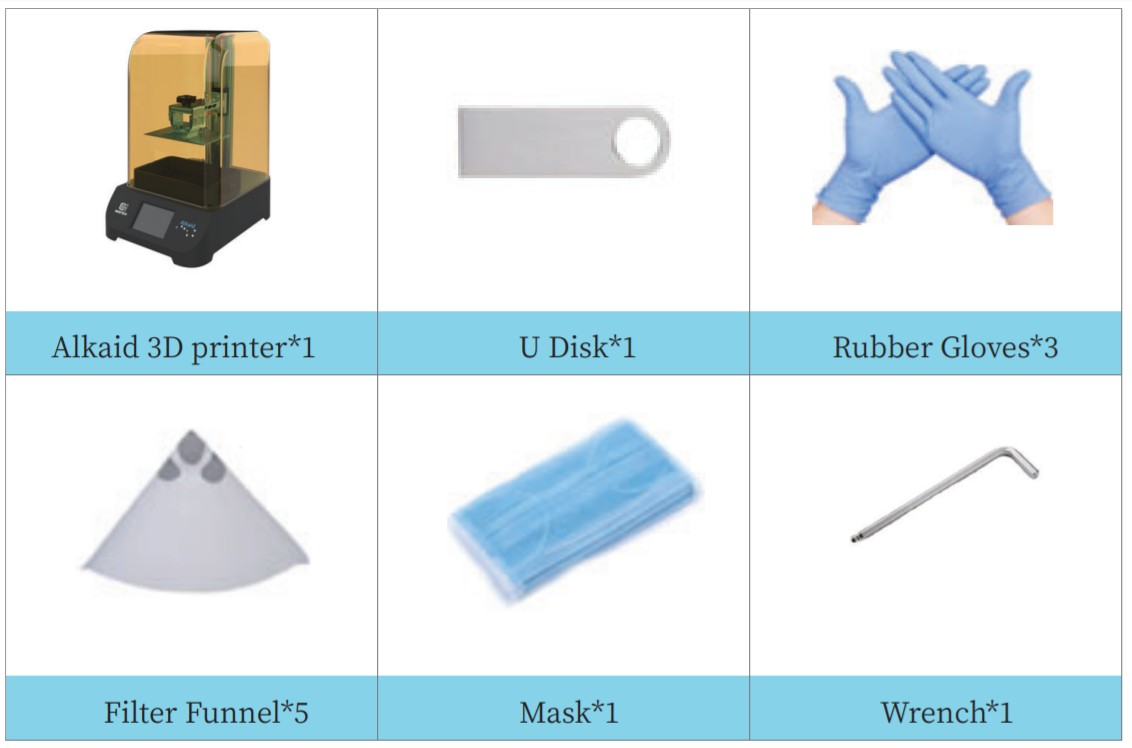
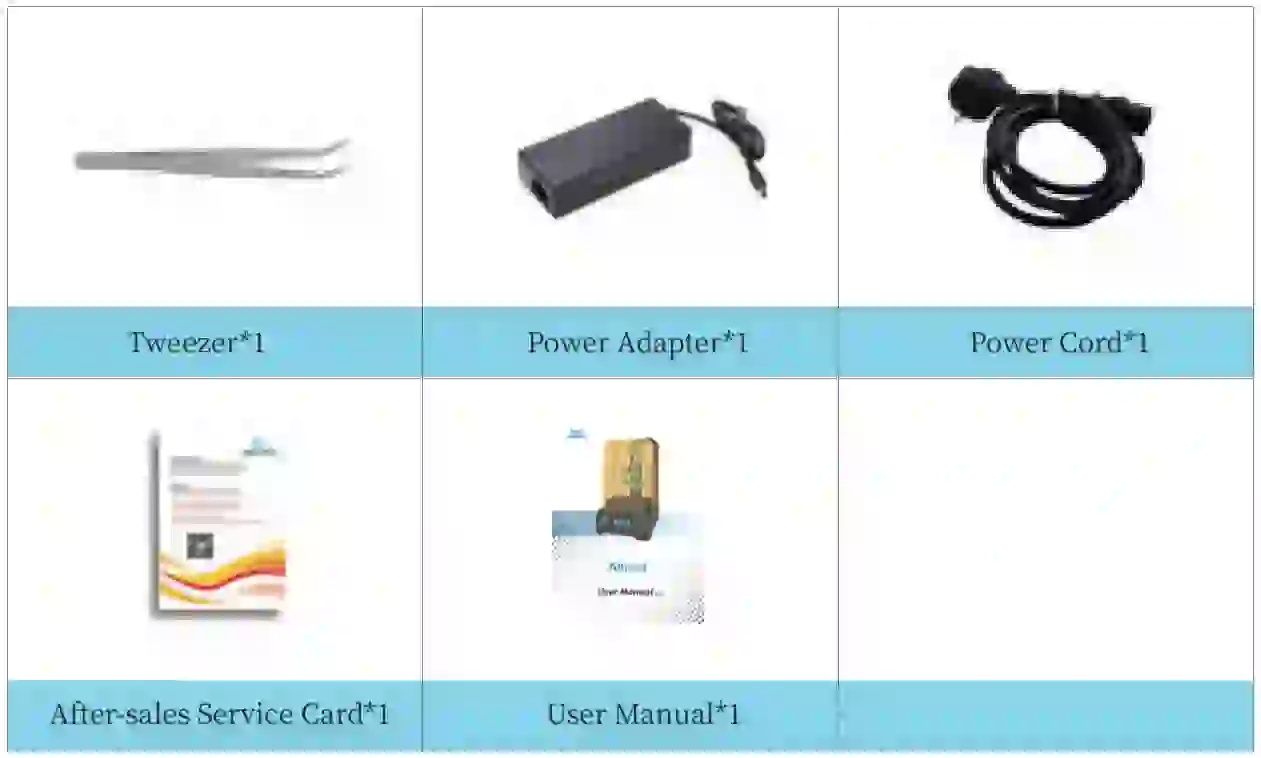
Parts List
Ul Instructions
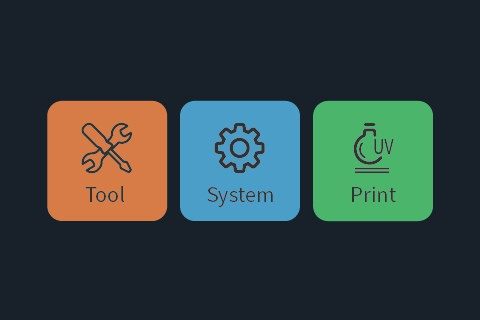
4.1 Tool menu description Move Z: Move the platform up and down along the Z-axisThere is no limit switch on the upper pan of the Z-axis of the machine.When the build platform moves up, please be careful not to let the build platform collide with the top baffle.
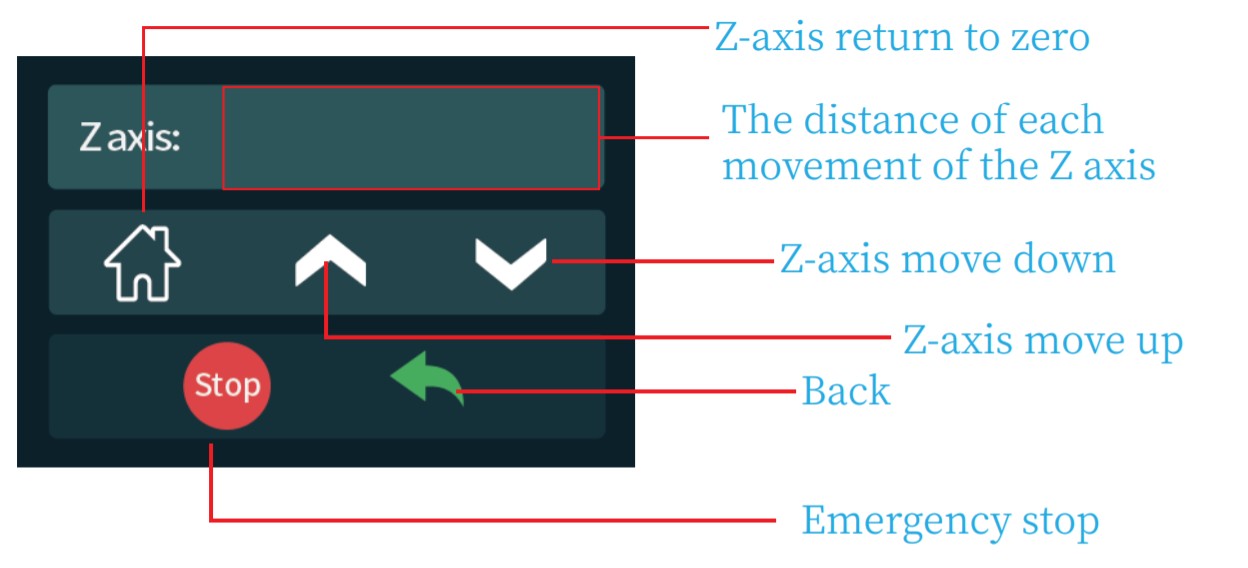
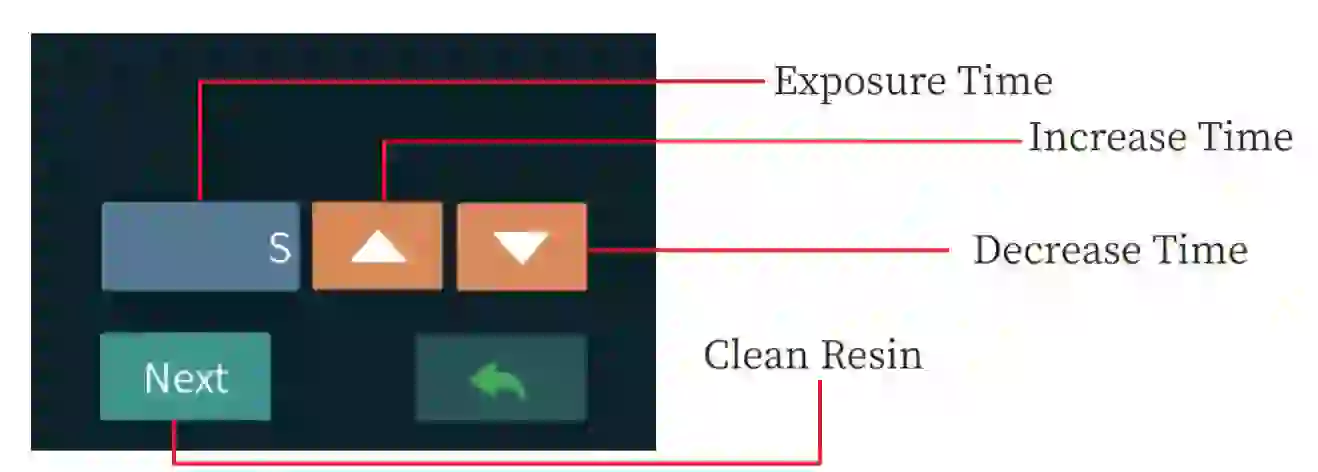
Exposure test setting: You can set the UV lamp exposure time and perform an exposure test.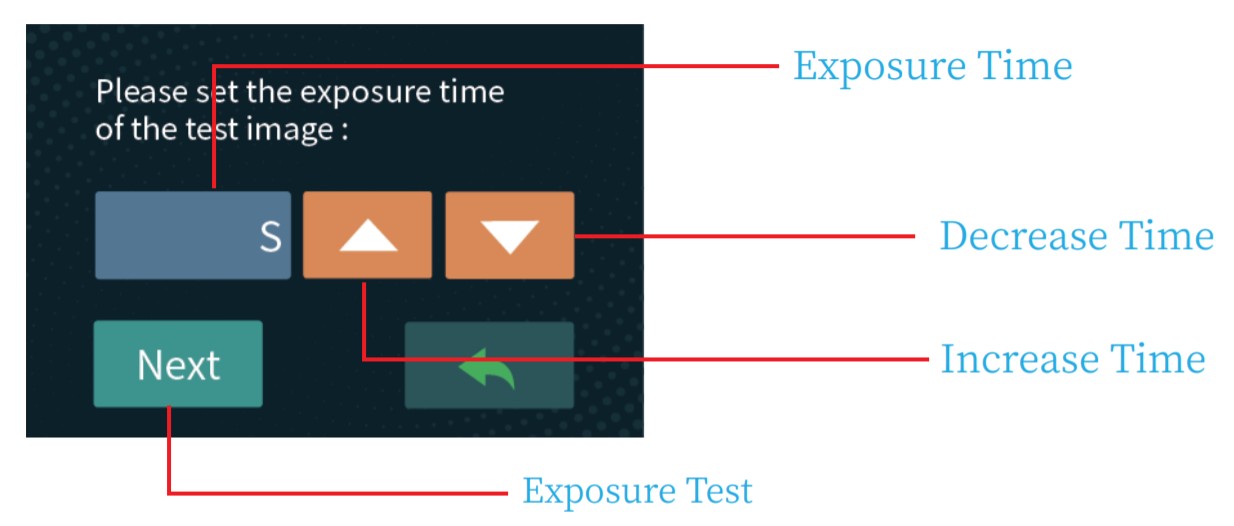 Set Z=0: Useless parameter.Stop: Click this icon to immediately stop the movement of the build plate on the Z-axis or unlock the motor.
 Clean: This function cures the residual resin in the resin tank through ultraviolet rays, and then manually cleans the residual resin
4.2 System Menu

Information: Machine ID and software and hardware version inhumation. turn or off the buzzer.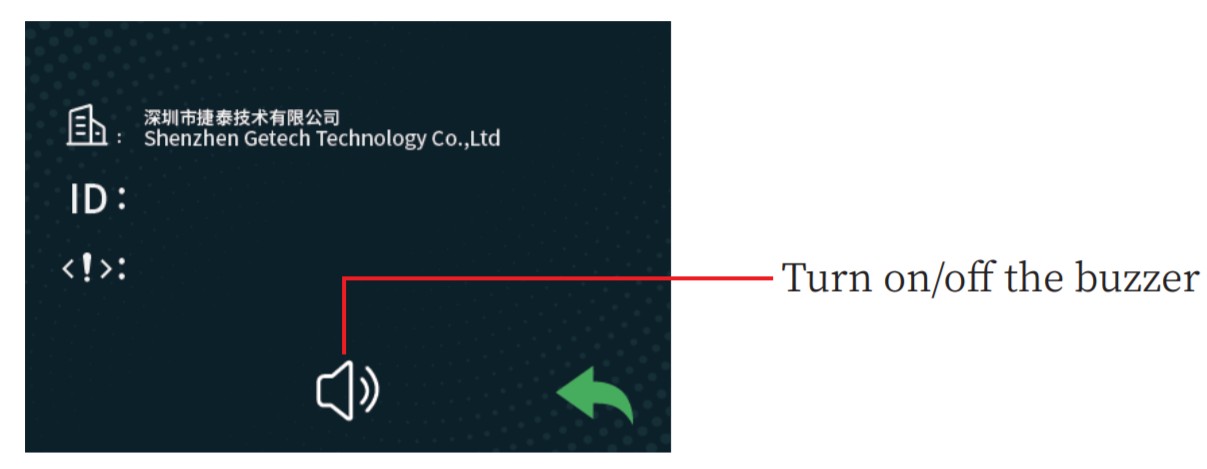 Calibration: Calibrate the touch screen.
 Service: Ahersales sent* information.
 language selection: Click once to switch between Chinese and English.
 Network: Non-function
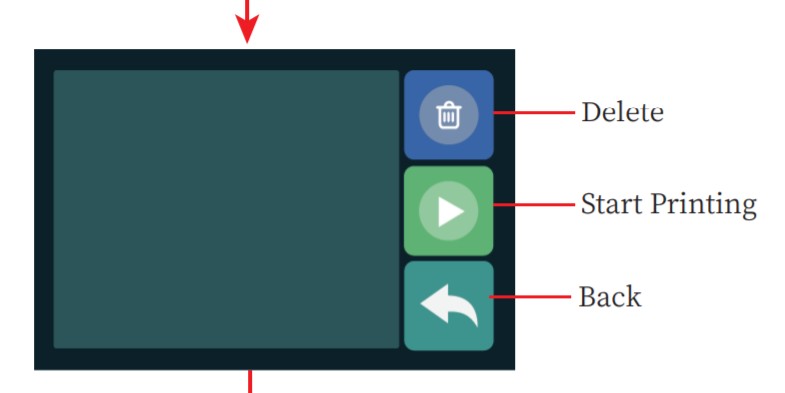
4.3 Print Menu
 |
 |
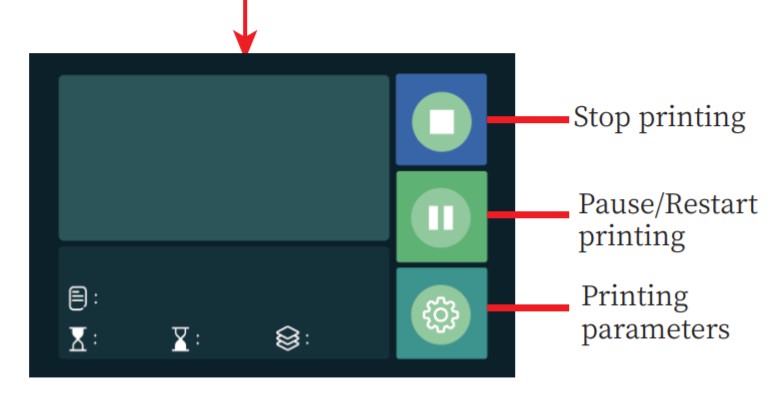 |
Printing parameterBottom Layer Count: Number of bottom layers.Bottom Exposure time(s): Exposure time of each layer of bottom layers.Exposure time(s): Exposure time of each layer in the middle.Light-off Delay(s): After the printing platform is raised, the UV lamp is delayed to turn off time.Note that these 4 parameters can also be set in slicing software.
Levling the bulid platfrom
5.1 lint connects the machine to the power supply. tum on the power switch.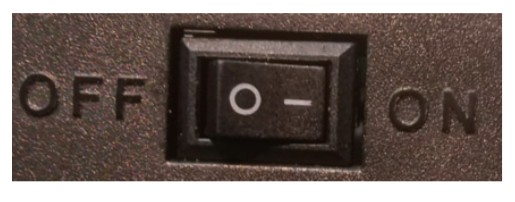 5.2 Tighten the build platform rotary knob.
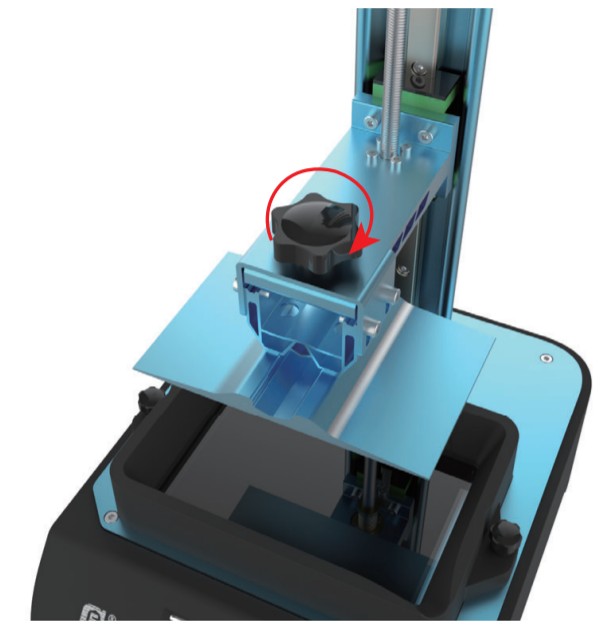 5.3 Fix the train tank on the machine platform.
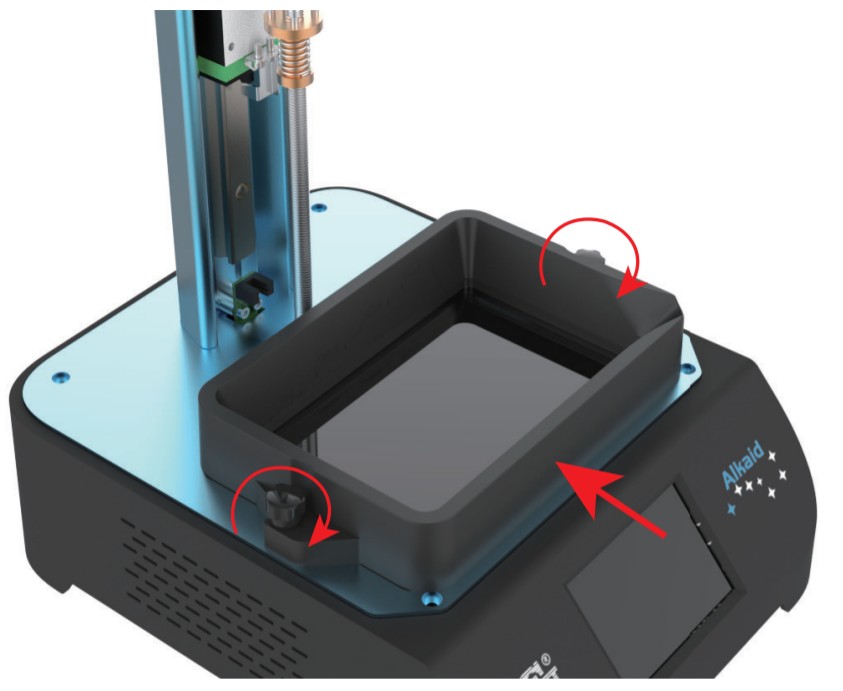 5.4 Loosen the 4 leveling screws of the build platform.
5.5 Enter the *Move Z menu and click the ‘Homes icon to make the build platform automatically reset to zero. At this time. the build platform will drop and then stop.5.6 While pressing the top of the build platform by hand. tighten the 4 leveling screws on the build platform.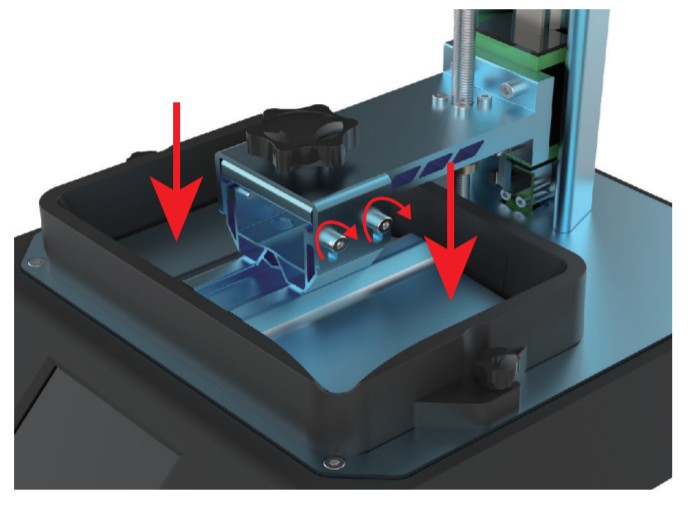
Instructions for the slicing software
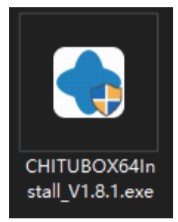
This product only supports the Chitubox slicing software. The attached U disk contains down-loaded files. Please install and use them on your PC. is6.1 Install the Chitubox slicing software.
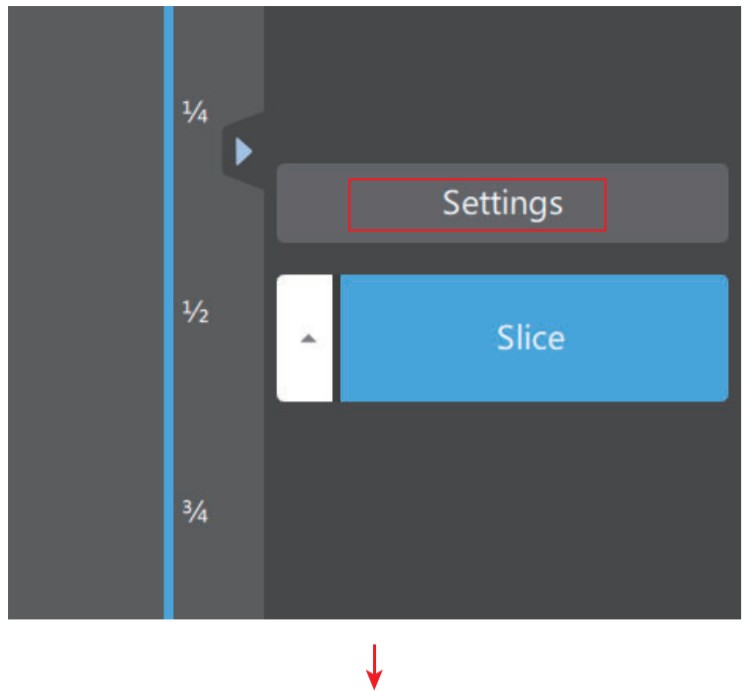
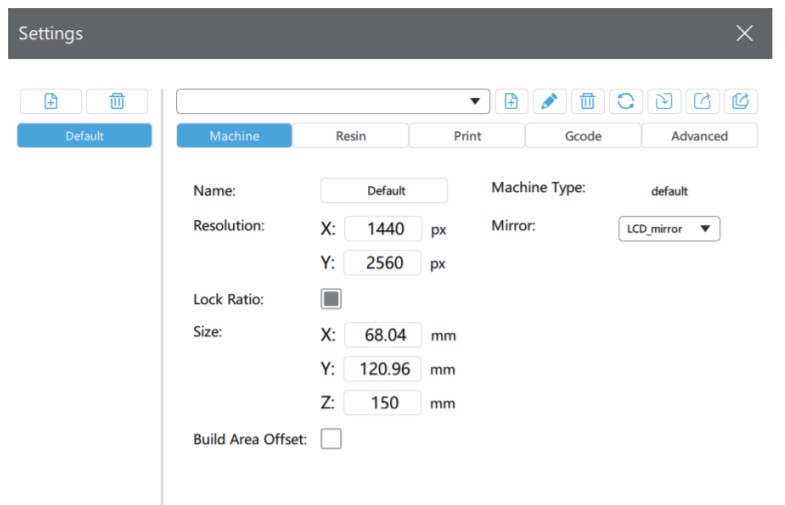
6.2 Click “Settings” in the slicing software and the page of printing setting parameters pops up.
 |
 |
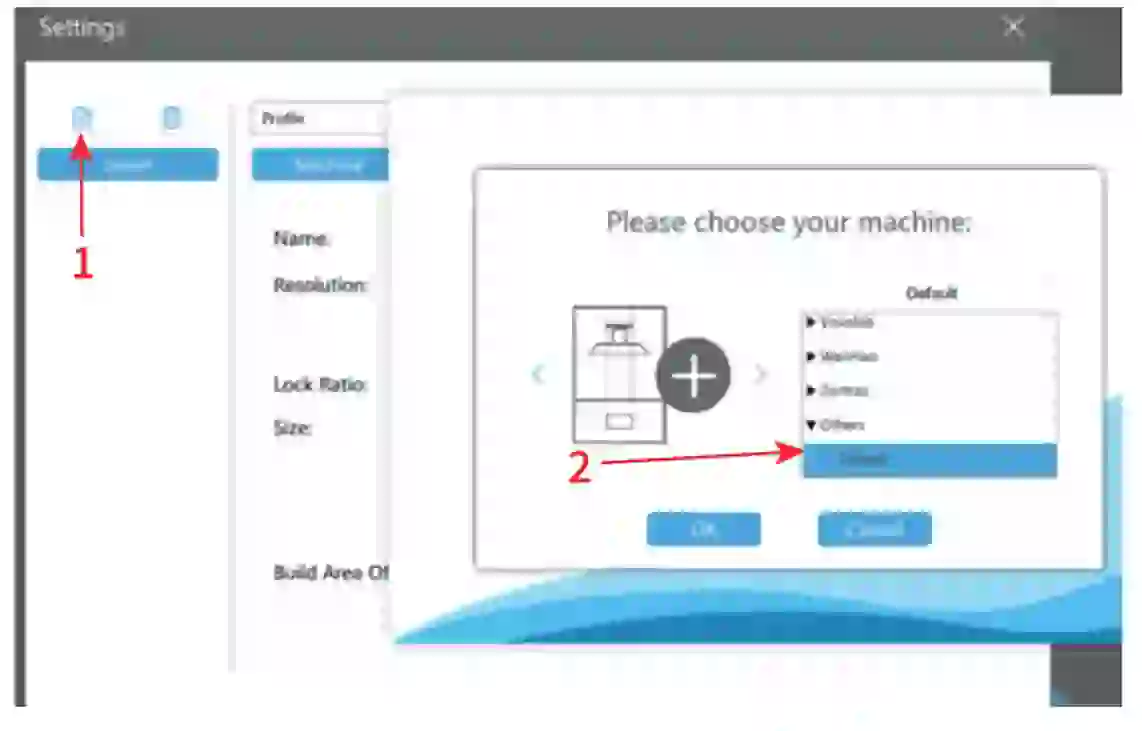
| 6.2 Add device
|
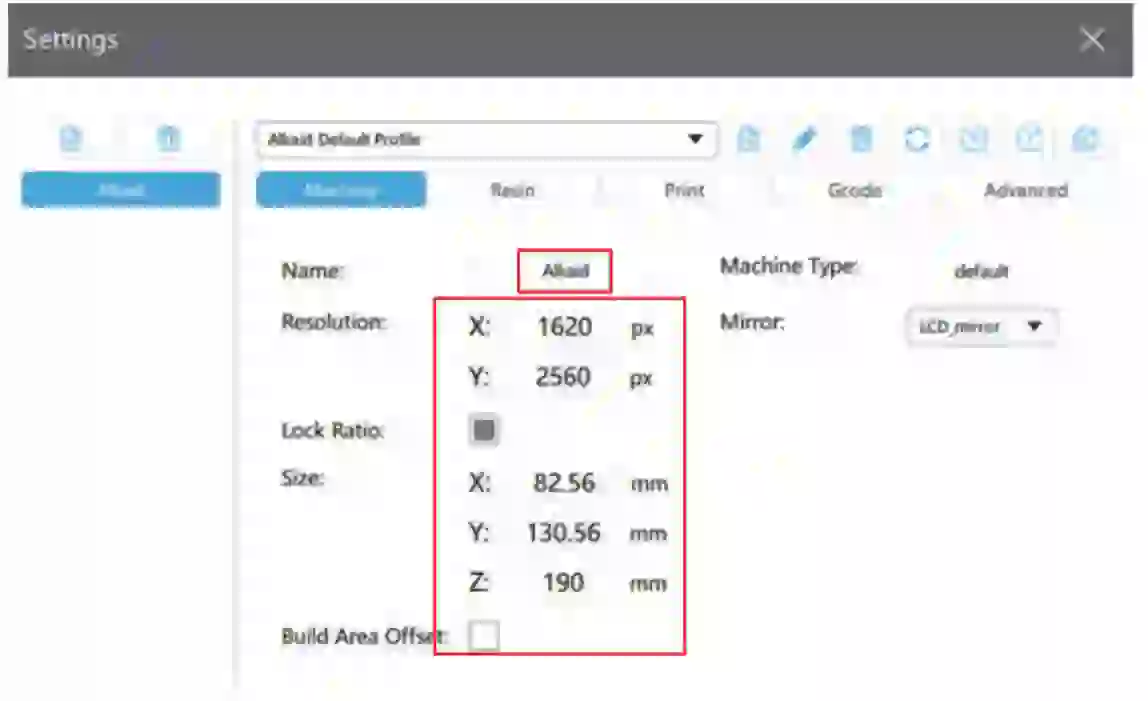
6.4 Set the printing size and LCD parameters of the machine. The parameters of ALICAID are shown in the following figure.We have placed the pre-set accessory file “Alkaid_Default_Pro-file_profile.cfe on the attached USB disk, which you can import and use directly.6.5 Description of printing parameters.
 |
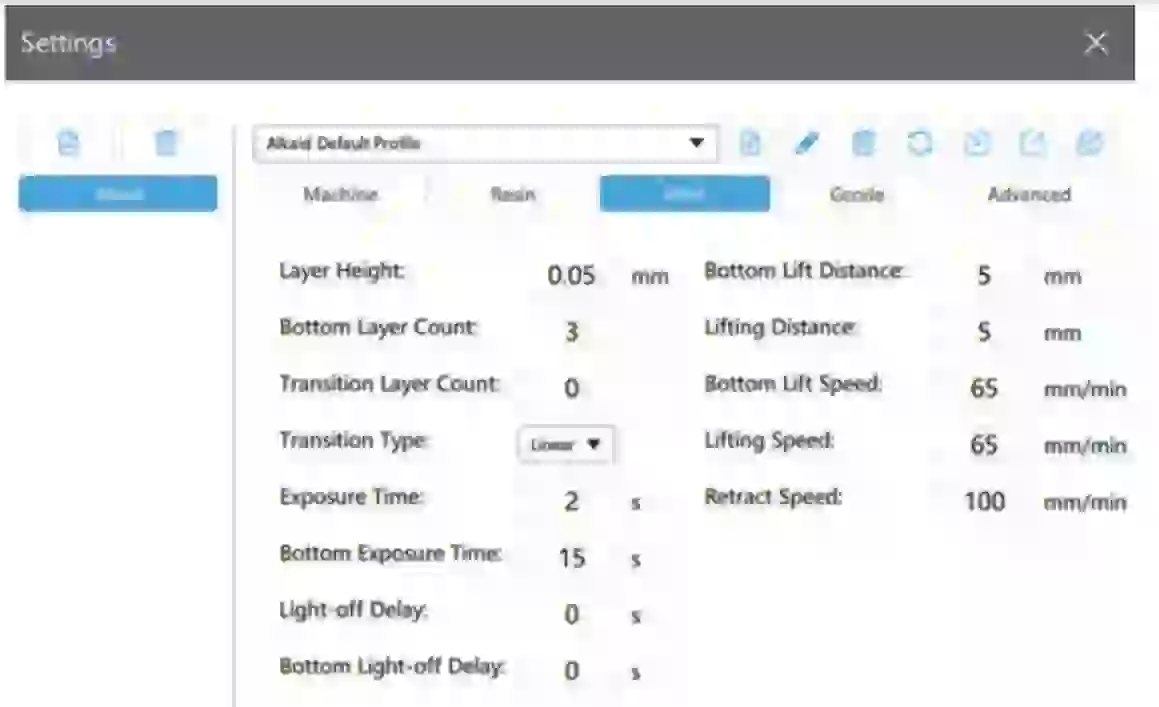 |
Layer Thickness:Thick lines, of each layer. such as 0.025,0.05;0.1mm.Bottom Laser Count:The number of solidified layers should be strengthened at the bottom, in oilier to make the model slick to the platform better.Expoturelime:Exposure Time of normal Layer.Bottom exposure time: The exposure time of the bottom layers is longer than that of the normal layers. to that the resin can be cured thoroughly and the model can adhere to the platform as far as possible.Light-off Delay: Final lighteff time – maximum value (total time o(2-axis up and down movement, light-off delay time). For example. total 2-axis up-down movement cycle is a second.If “light-off delay’ is set to 10 seconds.final light.off time is 10 seconds.If ‘light-off debris set to 1 second. The final light-off time is b seconds.Bottom Light-off Del*: Light. off delay time of the bottom layers.Bottom Lift Distance:When printing the bottom layers, the lifting distance of the forming platform.Lifting Distance When printing the normal layers. the lifting distance of the forming platform.Bottom Lift Speed:When printing the bottom layers, the lifting speed of the forming platform.lift Speed: When printing the normal layers, the lifting speed of the forming platform.Retract Speed: The downward speed atilt forming Platform
First Print
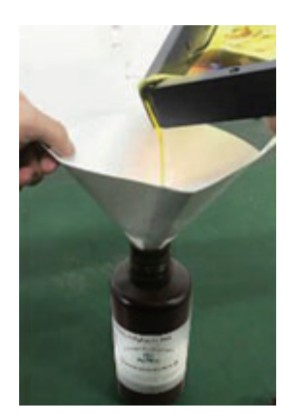
7.1 Before printing. please take your own safety protection. wear a mask and glow and then slowly pour the resin into the resin tank through the filter funnel. The resin cannot exceed the maximum scale of the tank.

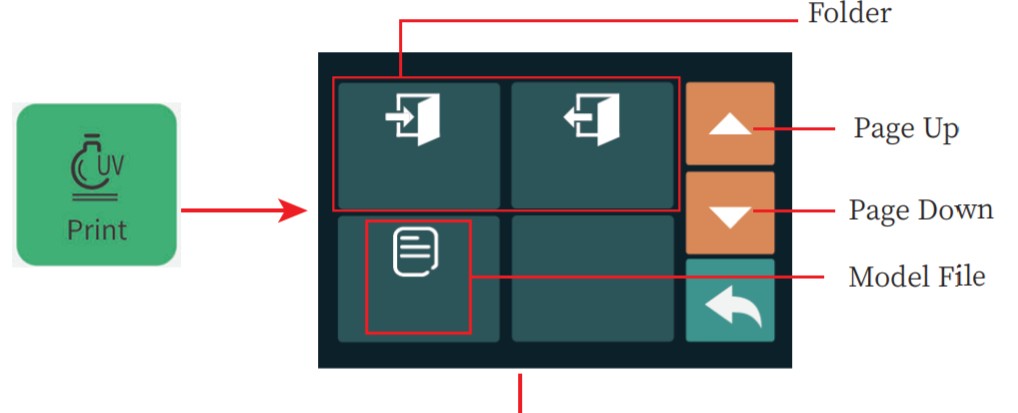
7.2 Put the sliced model le into the U disk and insert the U disk into the socket o the machine.7.3 Select “Print” on the screen, then select the file to be printed and start printing.7.4 During the printing process, if the resin in the material tank is not enough to complete the model printing, please click “Pause” first, then add resin to the resin tank after the Z-axis rises. After the resin is added, click the “Start” icon and the printing will continue.7.5 Please note that during the process of filling resin, do not spill resin on the machine shell or the fixing screws of the tank, otherwise the shell will be corroded and the fixing screws of the tank will be stuck.
Print Complete
After the model is completed, please let the model sit for a few minutes, and wait until the resin on the model doesn’t drop anymore, then loosen the build platform rotary knob, and remove the build platform from the printer. Then use a tool to remove the model from the build platform. Please pay attention to safety when removing the model to avoid being scratched by the model.After the model is taken off, you can choose the cleaning method according to the actual situation and perform secondary light curing (not using a printer). The following suggestions are for reference:Water-soluble light-curing resin:After cleaning with water, please dry the water on the model first, and then perform secondary light curing, otherwise the model will turn white during the secondary curing, which will affect the appearance of the model;Light-curing resin:
- The printed model can be cleaned with alcohol with a concentration of more than 95%, and the cleaning process is recommended not to exceed 1 minute. Excessive cleaning time will cause the structural performance of the resin part to deteriorate.
- After the model is cleaned with alcohol, it must be air-dried or the remaining alcohol must be blown with a hairdryer, and then light-cured for a second time until the surface of the nail scraped resin feels dry and the hardness is sufficient.
- In order to ensure the purity of the alcohol, the alcohol used for cleaning should not be reused too many times. The impure alcohol will cause the cleaned model to turn white and not clean. The specific cleaning time is based on the effect of no viscosity and no residual resin on the surface of model.
After printing, the unused resin must be filtered with a funnel when recycling, and the purpose is to remove the residue in the resin. Otherwise, the remaining residue will damage the screen and the release film during the next use.
Specification
|
Printing Parameters |
|
| Printing Technology: | LCD light curing surface forming technology |
| Printer Size: | 82mm*130mm*190mm |
| XY Resolution: | 0.051mm |
| LCD Size: | 6.08 inch |
| LCD resolution: | 2560’1620 pixels |
| Z-axis Precision: | 0.001mm |
| Layer Thickness: | 0.01-0.2mm |
| Printing Speed: | 30mm/h |
| UV Lamp Rated Power: | 45W |
| Resin | 405nm wavelength ultraviolet resin |
| Slicer Software | CHITUBOX |
| File Type: | .ctb |
| Working Environment Temperature: | 10°C-35°C |
| Working Environment Humidity: | 30%-70% |
|
Electrical Parameter |
|
| Power Adapter | Input: 100V-240V, 50/60Hz, Output:12\0A |
| Connectivity. | USB |
| Touch Screen: | 3.5 -Inch Full-color Touch Screen |
| LCD Screen Resolution: | 2K forming screen |
|
Mechanical Parameters |
|
| Machine Size | 286(L)mm*226(W)mm*372(H)mm |
| Package Size: | 308(L)mm*352(W)mm*458(H)mm |
| Net Weight: | 4.2kg |
| Gross Weight: | 5.8kg |
[xyz-ips snippet=”download-snippet”]