
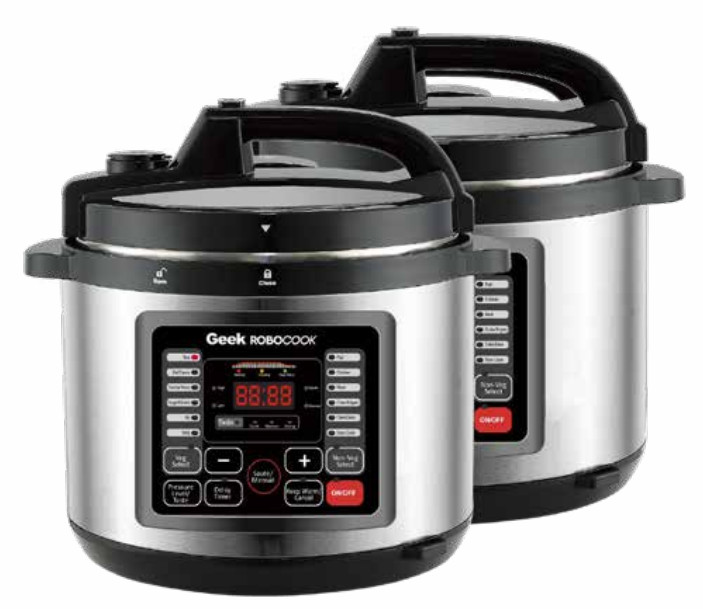
![]() Electric Pressure CookerModel: YBW60BInstruction Manual
Electric Pressure CookerModel: YBW60BInstruction Manual
IMPORTANT SAFEGUARDS
- READ THE MANUAL.
- This appliance cooks under pressure; please do not attempt to remove the lid while the cooker is operating. Improper use may result in burn or injury.
- Do not touch hot surfaces. Always use the handles.
- Do not overfill the cooking pot. Certain foods, such as rice or vegetables may expand during cooking. Overfilling the cooker may result in developing more pressure or clogging the vent pipe.
- Be aware that certain foods, such as applesauce, cranberries, pearl barley, oatmeal or other cereals, split peas, noodles, macaroni, rhubarb, or spaghetti can froth, and sputter, and clog the pressure release device (steam vent).
- Always check the pressure release vent for clogs before use.
- DO NOT immerse the cord, plug, or cooker in water or any other liquids to avoid electrical shock or damage the cooker.
- Keep cooking unit out of children’s reach.
- Unplug the appliance when not in use and before cleaning. Wait until the cooker and parts are cooled down to a safe temperature before removing or replacing any cooker parts.
- Do not operate this appliance with a damaged cord or plug. If your cooker experiences any malfunctions or has been damaged in any way, don’t attempt to use it.
- DO NOT use outdoors.
- DO NOT use the below hanging cabinets to avoid damage from steam that is released from the regulator knob.
- Use of any accessories that are not intended for this product may damage the unit and is subject to the void warranty.
- DO NOT place the cooker on an unstable surface. DO NOT use on newspaper, foam, or any other material that may block the vent at the
- The inner pot should be washed before first use.
- Do not touch the lid or any of the stainless steel surfaces when in use, as these surfaces will become hot during operation.
- When handling and lifting the pressure cooker, use the side handles and potholders.
- DO NOT lift the pressure cooker by the lid
- This pressure cooker is equipped with a cooking timer and will switch to warm/cancel when the cooking cycle is complete. HOWEVER, DO NOT LEAVE appliances unattended during operation. Close supervision is necessary when any appliance is used by or near children to avoid injury to themselves or others.
- Do not operate any appliance with a damaged cord or plug, or after the appliance malfunctions or has been damaged in any manner.
- Do not use the pressure cooker near or under surfaces that are heat sensitive or those that may be damaged by steam.
- To avoid scalding from escaping steam while removing the lid, carefully lift the lid angled away from yourself.
- Never open the lid as the contents are under pressure, extremely hot, and could cause burns. To prevent injury and scalding, do not open the lid by force. Contents are under pressure and extremely hot.
- If you use the quick release method by using the pressure release button steam and liquids will be released through the pressure relief valve. USE CAUTION, as the steam and liquids will be very hot. DO NOT attempt to open the lid by force as the contents are under pressure and extremely hot and could cause burns.
SAVE THESE INSTRUCTIONS.
PRODUCT INSTRURES & FEATURES
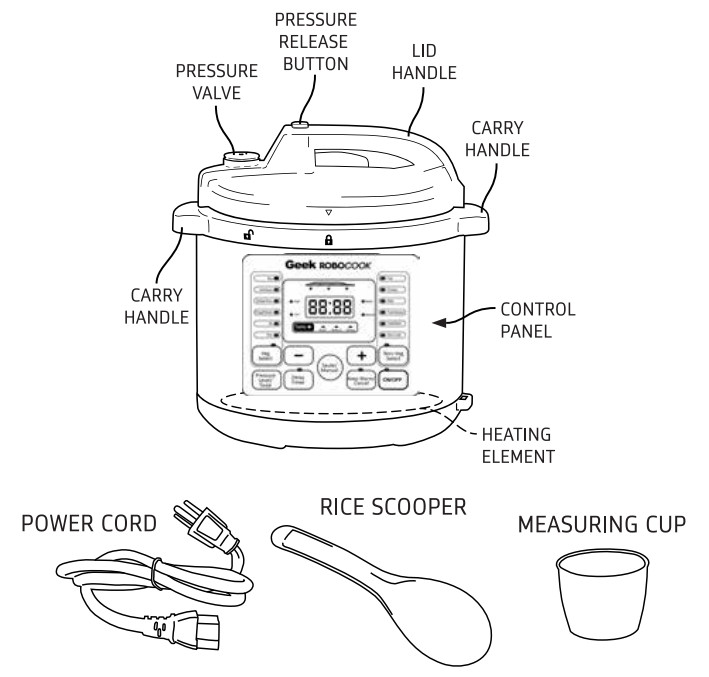
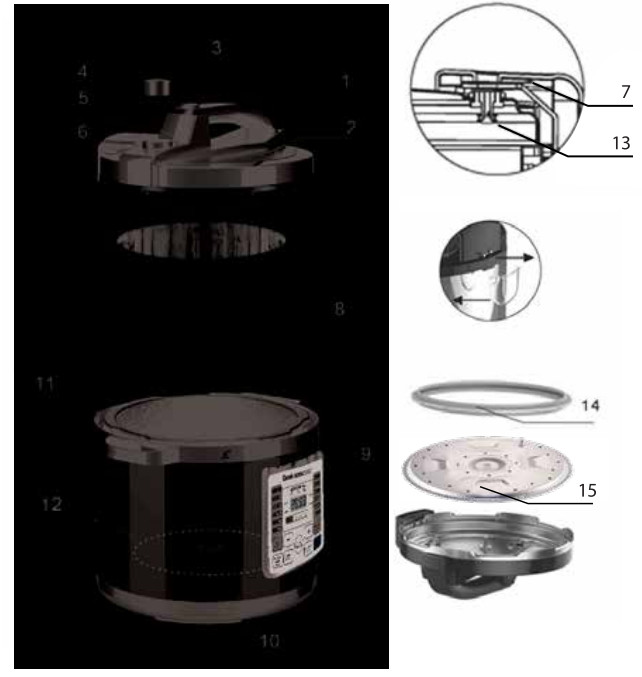
| 1. LID HANDLE | 8. INNER COOKING POT |
| 2. LID | 9. CONTROL PANEL |
| 3. PRESSURE RELEASE BUTTON | 10. HEATING ELEMENT |
| 4. PRESSURE LIMITING EXHAUST VALVE | 11. CONDENSATION CUP |
| 5. EXHAUST PIPE | 12. MAIN UNIT |
| 6. FLOAT VALVE | 13. LOCK |
| 7. FLOATER | 14. SEALING RING |
| 15. COOKER LID – UNDERSIDE |
PRESSURE COOKER SETTING

When the pressure cooker is plugged in “—” will appear on the LED Display. When a cook preset is selected, the default time will be displayed for 5 seconds in the LED window. Once the pressure builds, the cook timer will begin the countdown.
| Function | Default Taste | Pressure /Time | Cooking Time Range | Default pressure( adjustable or not) | Keep Warm Adjust | Preset Adjust | ||
| Quick | Medium | Strong | ||||||
| Rice | Medium | 10mins | 12mins | 18mins | 10-18mins( 1mins) | Low (Y) | 24 h | 24 h |
| Dat/Channa | Medium | 20mins | 40mins | 1: OOH | 20rnin-1.00H( 1mins) | High (Y) | 24 h | 24 h |
| Sambar/Gravy | Medium | 5 min | 8mins | 15 mins | 5-15rnis ( 1mins) | Low (Y) | 24 h | 24 h |
| Pongal/Khichadi | Medium | 10mins | 15mins | 20 mins | 10.20mins( 1mins) | High (Y) | 24 h | 24 h |
| Idly | Medium | 10mins | 15mins | 25 mins | 10-25mins ( 1mins) | Low (Y) | 24 h | 24 h |
| Soup | Medium | 15mins | 25mins | 45mins | 15-45mins(1mins) | Low (Y) | 24 h | 24 h |
| Fish | Medium | 8mins | 10mins | 15 mins | 8-15mins (1mins) | Low (Y) | 24 h | 24 h |
| Chicken | Medium | 10mins | 20mins | 30 mins | 10-30 mins(1mins) | Low (Y) | 24 h | 24 h |
| Meat | Medium | 20mins | 40mins | 60 mins | 20mins | Low (Y) | 24 h | 24 h |
| Pulav/ Biriyani | Medium | 5mins | 15mins | 25 mins | 5-25(1mins) | Low (Y) | 24 h | 24 h |
| Cake/Bake | Medium | 35mins | 40mins | 1:00H | 35min-1.00H(1mins) | // | 24 h | 24 h |
| Slow Cook | Medium | 2:00H | 4:00H | 8:00H | 2-8H(step-by-step 31mins) | 1/ | 24 h | 24 h |
| Saute | Medium | 20mins | 30mins | 40 mins | 20-40mins(1mins) | // | 24 h | 24 h |
| Manual | Medium | l mins | 10mins | 60 mins | 1mins-1.00H(1mins) | Low (Y) | 24 h | 24 h |
| Keep Warm | 60-70 C |
Note:Idly function cooking should keep pressure valve open.All menus can start heating with the lid open for pre-cooking purposes. Be sure to close the lid properly after pre-cooking for the menus function.
SPECIFICATIONS
| Model | Power Supply | Rated Power | Capacity of InnerPot | Working Pressure |
| YBW6OB | 220V-50Hz | 1000W | 6Qt | 0-70 kPa |
BEFORE FIRST USE
BEFORE FIRST USE
- Remove all packaging materials. Please locate the power cord before throwing away packaging materials.
- Clean the inner pot and lid with hot water, dish soap, and non-abrasive sponges only.
- Wipe the inside and outside of the appliance with a soft cloth.
USING THE APPLIANCE
- Open the lid with the control panel facing you. Grasp the lid handle and turn the lid clockwise until the arrow aligns with the Unlocked icon.
- Add the ingredients into the insert pot, in the pressure cooker.
- Food and liquid cannot exceed 2/3 of the cooking pot height.
- For food that expands in water, the liquid level cannot exceed 1/2 of the cooking pot height.
- Close the lid by turning the lid on the pressure cooker so the arrow aligns in the Locked position icon. See the image below:

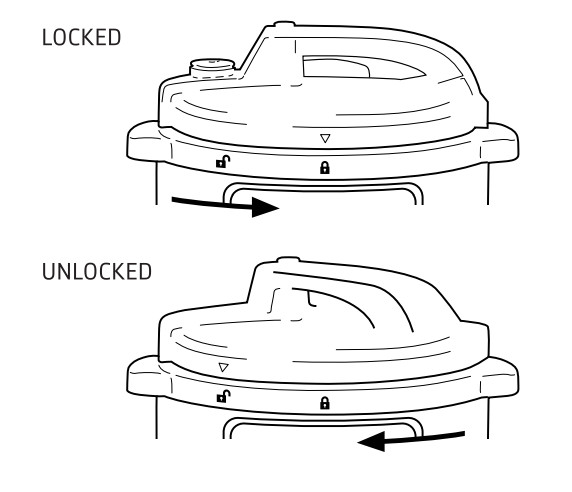
- In order to cook under pressure, the lid must be correctly installed and secured.
- Set the time and temperature by using one of the cook presets or the manual setting. The cooking time can be increased by pressing the plus or minus buttons. The pressure can be adjusted between Low, Med, and High by using the “Adjust Pressure” button.Note: The cooker will automatically start after 5 seconds of inactivity, so do not delay when setting up the time and temperature.
- Once the time and temperature are set, the cooker will automatically enter start mode and 4 red dashes will display and begin. Once the correct pressure has been reached, the set time will display and beginto count down.Note: During the initial cooking cycle,it is normal for air to release from the floater valve for 10 to 20 seconds. After the cold air is expelled, the remaining interior air temperature increases and the float valve will close.
- After pressure cooking is complete, the cooker will beep and enter “Keep Warm” mode while the cooker is naturally releasing pressure. Be sure to press the “Keep Warm/Cancel” button to turn off the “Warm”. CAUTION: If the lid does not open easily, there is still pressure inside the DO NOT open the lid by force.
- The pressure can be released manually using the pressure release Always use caution when manually releasing pressure as hot steam will be released from the valve. If a recipe states that the pressure needs to be released on its own, let the cooker sit for 10-30 minutes depending on the number of contents inside the unit. Be sure to press the pressure release button before attempting to open the lid.WARNING: Do not release steam manually with recipes containing liquid such as soups or stews. If the cycle has not been completed, press the Keep Warm/ Cancel button and unplug the cooker to allow the pressure to release naturally.
- There is no pressure in the cooker when :
- The unit is in warm mode
- The pressure and steam escaping from the valve is no longer audible
- The lid opens easily without force
- Remove the lid by twisting from the lid handle. The lid will not open unless all the pressure has been released. Never force open the lid. If it does not open freely, it is still under pressure.
- To prevent over-cooking, press the “Keep Warm/Cancel” button to turn the “Warm” mode off.
CLEANING
BE SURE TO CLEAN THE COOKER AND ITS PARTS AFTER EVERY USE.
- Switch pressure cooker to the Unlocked position, unplug and allow to cool completely before cleaning.
- Wash inner pot, condensation cup, and lid in hot water with dish soap. Rinse and dry thoroughly. To clean the condensation cup, remove it from the side of the cooker. Once clean and dry, snap the condensation back onto the side of the cooker.
- Wipe the exterior of the pressure cooker with a soft damp cloth and dry surfaces with a soft dry cloth. Do not use detergent or abrasive brushes or sponges as they will scratch the coating.
NOTE: Never immerse or place water inside the pressure cooker housing.

TROUBLESHOOTING
| Problem | Reason | Solution |
| It is difficult to close the lid. | The sealing ring is out of place.The float valve is stuck in the pushrod. | Place the sealing ring properly.Push the rod in place. |
| It is difficult to open the lid. | After releasing, the float valve has not gone down. | Press the float valve down. |
| Steam is leaking from the lid. | Sealing ring is not fitted. Food residue on sealing ring. The sealing ring is damaged. The lid is not secured properly. | Re-install sealing ring. Clean the sealing ring. Replace a sealing ring. Make sure lid is secured. |
| Steam is leaking from the flat valve. | There is food residue on the sealing ring.Sealing ring or floating valve is damaged. | Clean the sealing ring.Replace the sealing ring or flat valve. |
| The float valve will not rise. | The float valve is not aligned with the position of the sealing ring.
There is not enough food or liquid in the pot.Steam is leaking from the lid or the float valve. |
Set the flat valve to the correct position.Place enough liquid or food inside the pot.Refer to notes about lid or float valve leaking. |
| Problem | Reason | Solution |
| 0.00E+00 | Temperature sensor disconnected. | Contact customer services |
| 0.00E+00 | The temperature sensor has short circulated. | Contact customer services |
| Displays E03 as soon as the power cord isplugged in. | The temperature at the bottom of the cooking pot is too high. Powerboard is burned. | Replace the power board. |
| Displays E03 in the middle of the cooking process. | Food burned or stuck on the bottom of the pot; heatcannot transmit. | Clean the sticky or burned food off the pot. Note: Do not scrub too hard as it may damage the pot. |
| Displays E04 as soon as the power cord isplugged in. | Loose connection of the exterior power cord. | Plugin the exterior power cord again to ensure bothconnections with the cooker and with the outlet are tight. |
| Displays E04 as soon as the power cord isplugged in. | Loose connection of the interior red wire. | Contact customer services |
| Displays E04 as soon as the power cord isplugged in. | The pressure switch is disconnected. | Contact customer services |
| Displays E04 after pressure cooking starts. | The signal switch has a loose connection. | Contact customer services |
Warning
USE EXTREME CAUTION DURING OPERATION
- Do not place hands near, or come in close contact with the pressure release valve when pressure release is in process. Burns, scalding, and/or injury may result.
- Do not touch the lid during the cooking process, or while the unit is hot and pressurized.
- Do not cover the gap between the lid and the outer cooker. Do not cover the pressure cooker.
- Keep away from children
- Do not place the Inner Pot on other heat sources.
- Do not use metal utensils when removing food from the Inner Pot as they may scratch the surface of the pot.
- Do not disassemble the unit. Only use replacement parts certified and provided by the manufacturer.
- During operation, if the unit sounds an alarm and/ or the display shows Error codes (E01, E02. E03 or E04), please stop using and contact Customer Service for assistance.
- After cooking, unplug the power supply before enjoying your meal.
[xyz-ips snippet=”download-snippet”]