![]() SMART WI-FI3-WAY LIGHT SWITCHSTART GUIDE
SMART WI-FI3-WAY LIGHT SWITCHSTART GUIDE
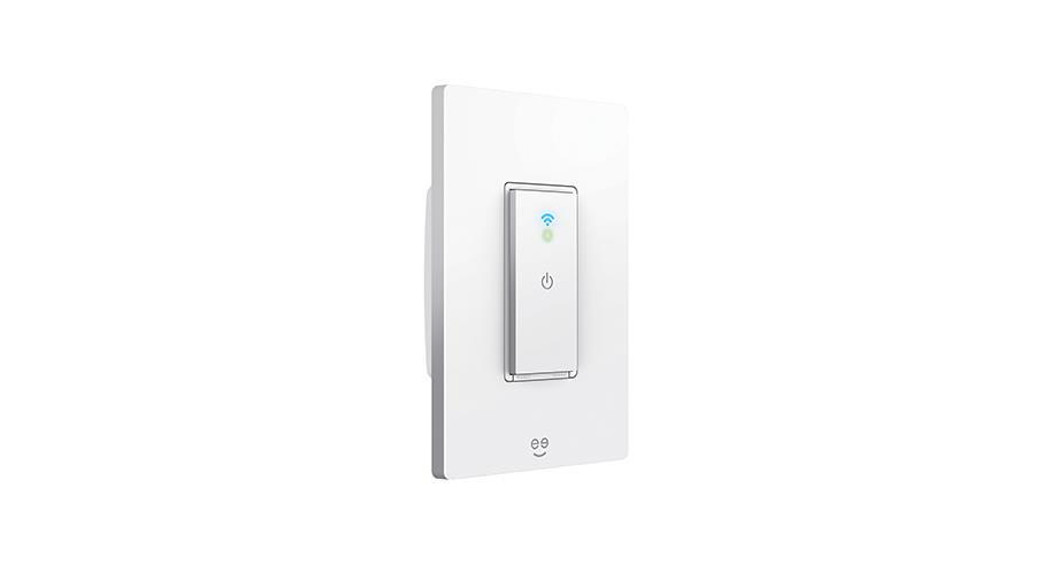
Thank you for purchasing your Geeni smart home product.Ready to get started? Download the Geeni app to manage your TAP (and all other Geeni devices) straight from your phone or tablet. Easily connect to your home Wi-Fi and control multiple devices with the touch of your fingertips.WARNING: RISK OF ELECTRIC SHOCK OR FIRE. Please follow all safety instructions on page five before installing, servicing, or removing your TAP.
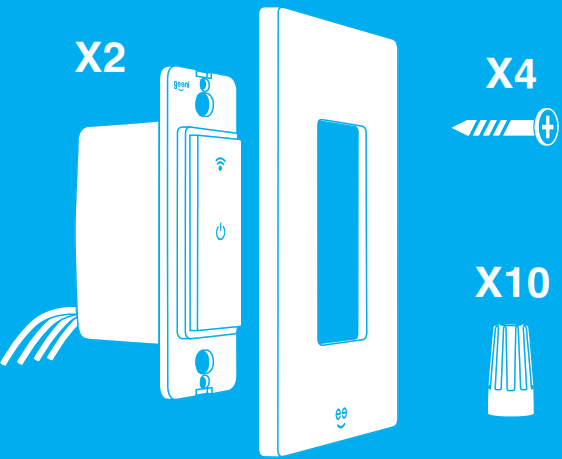
What’s in the Box
Get Ready
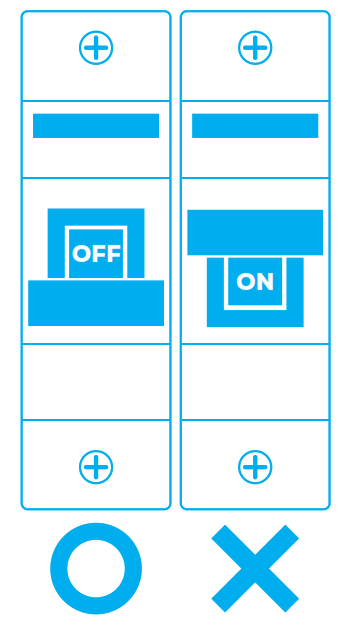
- Turn OFF the power supply at the circuit breaker or fuse. Use a noncontact voltage tester to ensure that power is off. More than one disconnect switch may be required to turn off the power.
- Confirm that you are replacing a 3-way switch where 2 switches control one fixture.
- Make sure the existing switch box has a neutral wire.
Download the Geeni app
Register a Geeni account
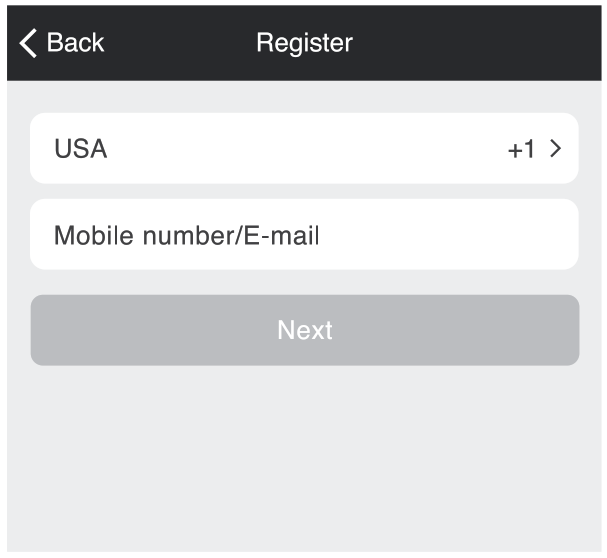 STEP 1Enter your mobile phone numberor email address.
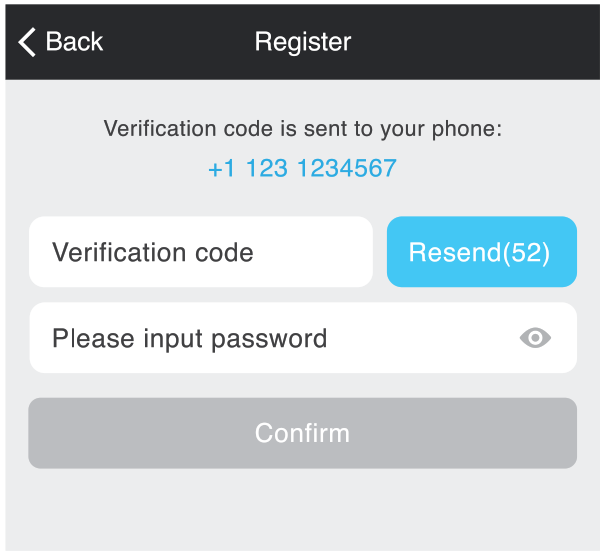 STEP 2Enter the verification code and create a password.
 STEP 3Log into the app.
Install
STEP 1Shut off power at the circuit breaker for the switch that you are replacing. More than one disconnection may be required to turn off power. Use a noncontact voltage tester to ensure that power is off.
 STEP 2Make sure the existing switch box has a neutral wire*. Remove old switch by disconnecting all wires.*Neutral wire is typically white.
Install, cont.
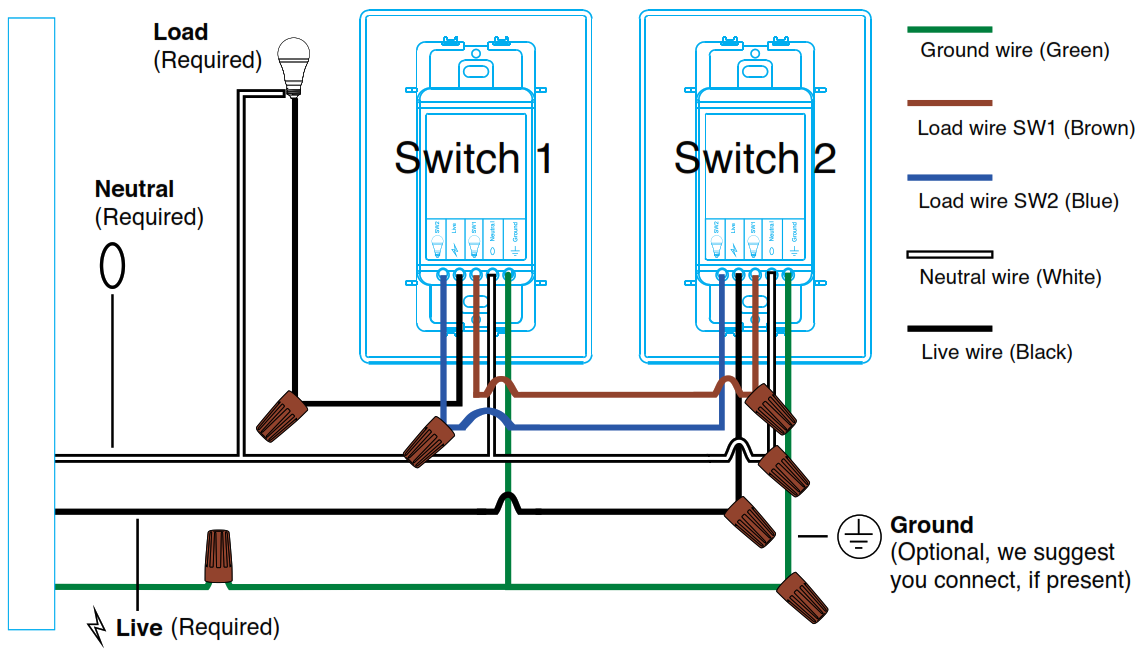
STEP 3
- Connect Switch 1 & Switch 2’s neutral wire (white) & load’s neutral wire to your home’s neutral wire.
- Connect Switch 1’s live wire (black) with load’s live wire.
- Connect Switch 2’s live wire (black) to your home’s live wire.
- Connect Switch 1 & Switch 2’s SW1 wires (brown) together.
- Connect Switch 1 & Switch 2’s SW2 wires (blue) together.
- Connect Switch 1 & Switch 2’s ground wire (green) to your home’s ground wire.
- Check that all wire nuts are secured.
STEP 4Use screws to secure TAP into your wall. Snap-on the included faceplate.STEP 5Restore power by reversing step 1.STEP 6Once power is connected, the blue indicator light will blink to indicate that TAP is ready to connect to Wi-Fi.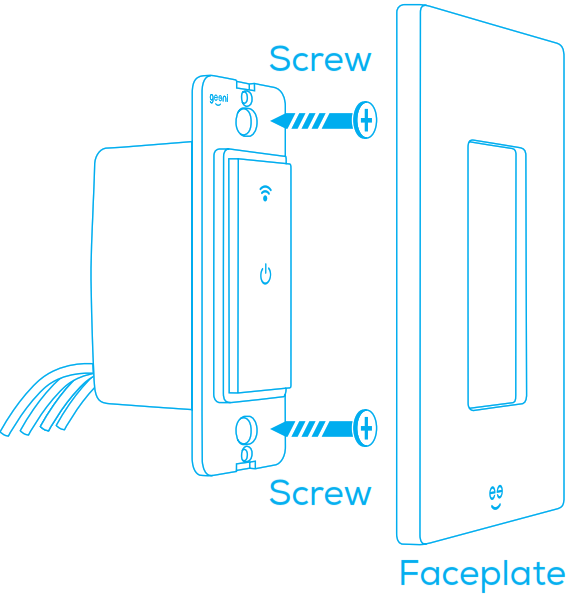

Reset and restart
QUICK TIP: On the TAP Faceplate, the Reset button as the Power Reset button, and the Restart button is also known as the Wi-Fi Reset button.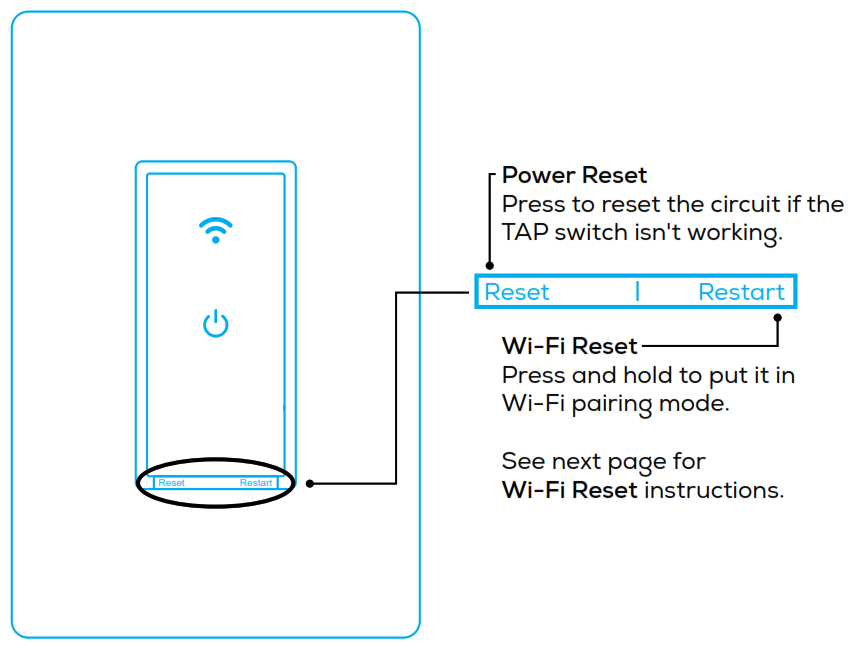
Reset and restart, cont.
How do I reset TAP and what does the blinking light mean?Reset TAP by pressing and holding the Wi-Fi Reset (Restart ) button for 3 seconds until the indicator begins to rapidly flash. The Wi-Fi Reset button is located on the bottom right side of the switch (not the switchplate) labeled “Restart”.– Reset one time (press and hold) to reach Easy Mode (Rapidly blinking blue, 2x per second)– Reset again (press and hold) to reach AP Mode (Slowly blinking blue, every 3 seconds)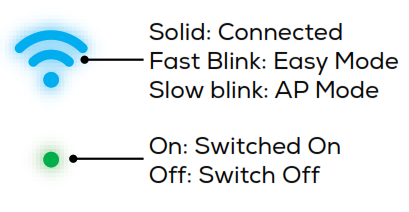
Connect: Easy Mode
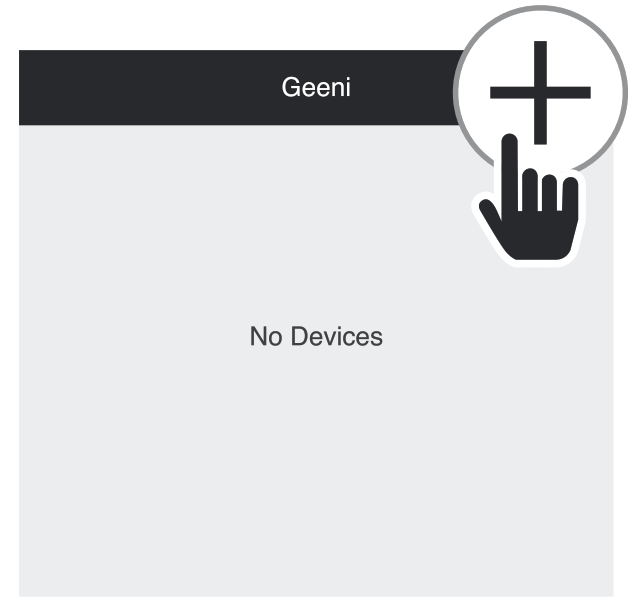 STEP 1Open the Geeni app. In the top corner of the Devices screen, click (+).Choose “Smart Power“.
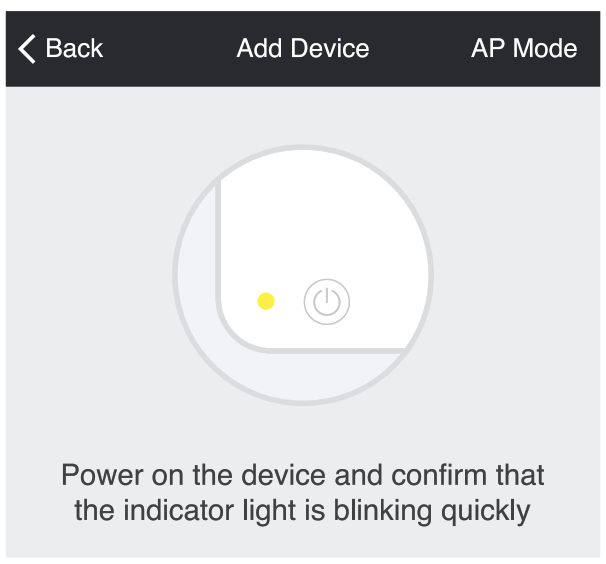 STEP 2Make sure TAP’s light is rapidly flashing blue.If not, reset to reach Easy Mode to connect (Page 9).Press “Next Step” in the app.
 STEP 3Enter your Wi-Fi network and password.
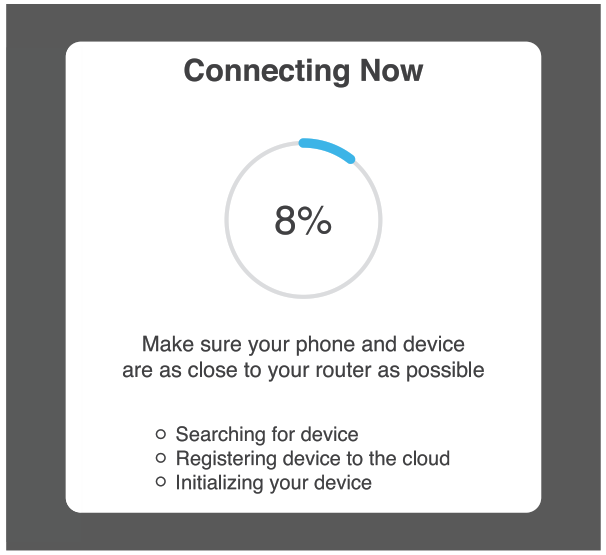 STEP 4The Geeni app will connect to TAP.
NOTE: Geeni can’t connect to 5GHz networks.*If the connection fails, try to connect using AP Mode.
Connect: AP Mode
STEP 1Make sure TAP’s light is slowly flashing blue.If not, reset to reach AP mode (page 9).
STEP 2Open the Geeni app. In the top corner of the Devices screen, click (+).Choose “Smart Power“.Choose “AP Mode” in the top corner.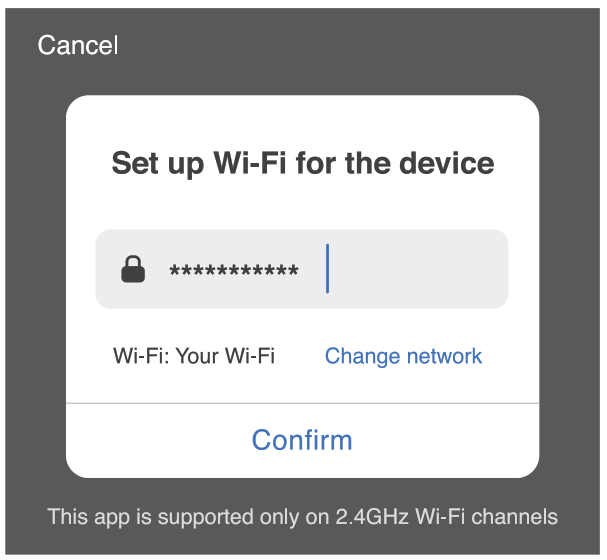 STEP 3Press “Next” and enter your Wi-Fi details.
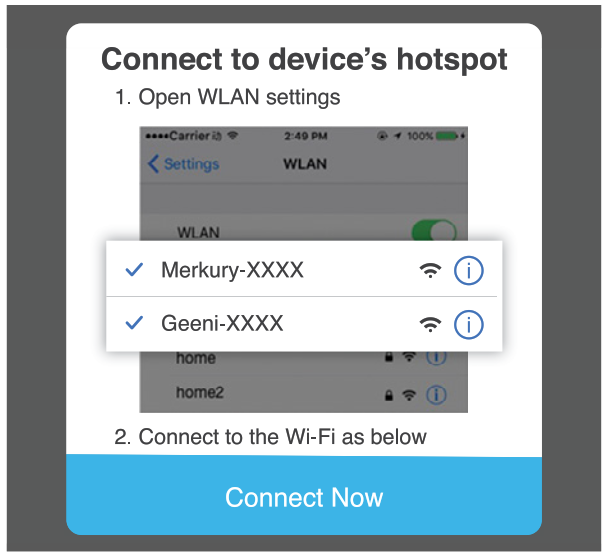
STEP 4Follow the instructions to choose the device from your Wi-Fi list.STEP 5The Geeni app will connect to TAP.NOTE: Geeni can’t connect to 5GHz networks.
Frequently Asked Questions
- Can I share with family and friends?Yes, you can share access to TAP and any other Geeni device. In the Geeni app, press the “Profile” button and click on “Device Sharing” to give or revoke sharing permissions. In order to share, the other user should already have downloaded the Geeni app and registered an account.
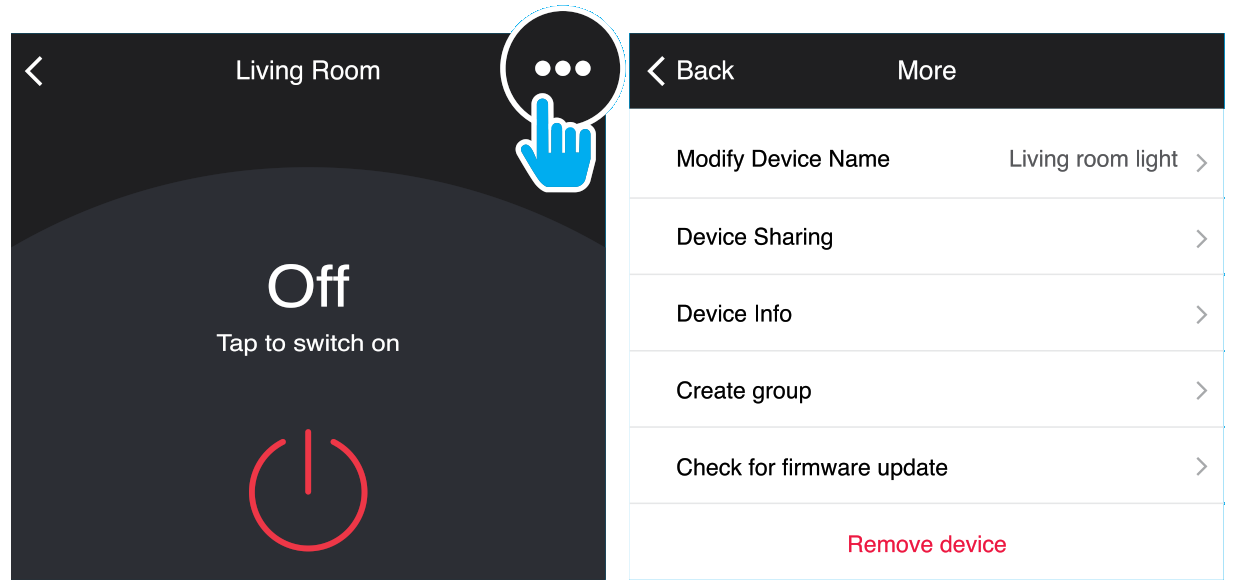
- Can I group multiple Geeni devices together?Yes, you can group multiple same-type devices by room, location, or however else you want. The same devices can be in multiple groups. For example, if you create a group for “Bedroom” and another group for “Entire House,” your Bedroom lights can be included in both groups. From your main device list, click on one of the devices you want to group, press the “ ” button on the top right for advanced settings, and click “Create Group.” You’ll be able to name a new group and choose which devices you’d like to group together.
- How many devices can I control?Geeni’s app can control an unlimited amount of devices in an unlimited amount of locations. Your router may have a limit of how many devices can be connected to one router.
- My Geeni device has a funny name. How do I rename it?From your main device list, click on one of the devices you want to rename, press the “ ” button on the top right for advanced settings, and click “Modify Device Name” (or “Modify Group Name”). You’ll then be able to choose a more familiar name. To rename a particular outlet, click the small pencil icon next to its name.
- What should I do if the device appears offline or is unreachable?Make sure your Wi-Fi router is online and in range, and check that you have the latest Geeni functionality by clicking “Check for firmware update” in your device settings. If power is connected but TAP is not responding, hold down the Restart button to cycle the fuse and give TAP a jump start.
- What’s the wireless range?The range of your home Wi-Fi is heavily dependent on your home router and the conditions of the room. Check with your router specifications for exact range data.
- If my Wi-Fi/Internet goes down, will Geeni still work?Geeni products need to be connected to Wi-Fi in order to use them remotely.
- What do the green and blue lights mean?The green light indicates power. If the green light is on, TAP is receiving power; if it is off, TAP is not receiving power. The blue light indicates connection. If the blue light is solid, TAP is connected; if the it is flashing quickly, TAP is ready to connect using the Easy Mode (page 10); if it is flashing slowly, TAP is ready to connect using the AP Mode (page 12).
Troubleshooting
Can’t connect to Wi-Fi?Make sure you entered the correct Wi-Fi password during the Wi-Fi setup.Check whether there are any Internet connection problems. If the Wi-Fi signal is too weak, reset your Wi-Fi router and try again.
Reset the device
To reconnect to Wi-Fi, hold down the Reset button for 3 seconds.– Reset 1 time (press and hold) to reach Easy Mode, indicated by rapidly blinking blue light. Refer to page 10 to connect in Easy Mode.– Reset 2 times (press and hold) to reach AP Mode, indicated by slowly blinking blue light. Refer to page 12 to connect in AP Mode.
System Requirements
• Existing neutral wire• Existing single-pole, one-way (not multi-location) light switch with box more than 2 inches deep• Mobile device running iOS® 9 or higher or Android™ 4.1x or higher• Existing 2.4GHz Wi-Fi network (not compatible with 5GHz Wi-Fi networks)• Geeni appIMPORTANT: TAP 3-Way requires a neutral wire. TAP 3-Way is a three-way switch, for multiple locations. Please consult a licensed electrician if you cannot locate a neutral wire or are unfamiliar with electrical installations.
Technical Specifications
• Rated Current: 10A• Input: 100V-240V / 50/60HZ• Wireless Frequency: 2.4GHz• Wireless Standard: IEEE802.11 b/g/n• Max Output: 800W INC, 400W CFL, 400W LED
FCC Notice:
This device complies with Part 15 of the FCC Rules. Operation is subject to the two following conditions:1. This device may not cause harmful interference.2. This device must accept any interference received, including interference that may cause undesired operation.Note: This equipment has been tested and found to comply with the limits for a Class B digital device, pursuant to Part 15 of the FCC Rules. These limits are designed to provide reasonable protection against harmful interference in a residential installation.
Important Information:
Before installing, read and follow all precautions, including the following:CAUTION: RISK OF ELECTRIC SHOCK OR FIRETAP must be installed and used in accordance with the National Electric Code. Please consult a licensed electrician if you are uncomfortable or unfamiliar with electrical work.Disconnect power before installing or modifying this product.CAUTION: Suitable for indoor use only.
Support:
 report this ad
If you encounter any issues, please contact us at [email protected] for help.To explore our full selection of products, visit us at: www.mygeeni.comToll-free support: 1 (888) 232-3143
© 2019 Merkury Innovations • 45 Broadway 3rd FL, New York NY 10006. The illustrated product and specifications may differ slightly from those supplied. Geeni is a trademark of Merkury Innovations LLC. iPhone, Apple and the Apple logo are trademarks of Apple Inc., registered in the U.S. and other countries. App Store is a service mark of Apple Inc. Galaxy S is a registered trademark of Samsung Electronics Co., Ltd. Google, Google Play, and related marks and logos are trademarks of Google LLC. iOS is a registered trademark of Cisco in the U.S. and other countries and is used under license. Amazon, Alexa and all related logos are trademarks of Amazon.com, Inc. or its affiliates. All other trademarks and trade names are those of their respective owners.Made in China
Can’t connect? Need help?
DO NOT RETURN THIS PRODUCT TO THE STORE
Geeni support:[email protected]1 (888) 232-3143Tap “Support” in the Geeni app
References
[xyz-ips snippet=”download-snippet”]