

DASH CAMERA Orbit 110
Quick User Manual
Disclaimer
- Please follow the set-up and usage instructions in the print material that came with this Dashboard Camera (dashcam) product.
- You should not set/install this dashcam at a place that would obstruct or reduce a driver’s view; make sure your usage complies with pertinent vehicle codes of your state, province, territory, or country.
- You should post the required notices of recordation to occupants inside the vehicle if voices or other information/signals pertaining to in-vehicle activities will be recorded.
- You should not change the dash cam’s setting or mode of operation or when the vehicle is in motion.
- The optional driving warning signals, including any visual or audible reminding signals, should not replace your decision-making and judgment that are needed for the proper operation of the vehicle.
- You should not leave the dashcam in a visible spot when no one is inside the vehicle, to avoid attracting break-ins to steal the unit or other property.
- You should avoid extended exposure of the dashcam to direct sunlight or extreme temperatures (either high or low temperature) which tend to degrade or damage the unit and its normal functionality.
- You should examine, check and/or verify the dashcam at least every six (6) months, including the associated memory cards, to ensure the video reception and recording are working properly. For each use, you should verify that the dashcam unit, the visible lights, and the audible sounds are working normally. If there are signs of non-operation or mal-function, you should immediately seek to replace the product and check to see if the product is covered under any applicable warranty.
- The dashcam unit may have additional functionality, such as transmission and recordation of audible or GPS signal or other identification information. If you have privacy concerns about these functions, make sure you follow the instruction to disable these functions.
- You should use the dashcam unit in the way it is intended. You should not use the dashcam unit in a way that would be illegal or that tends to physically damage the unit, or tends to cause danger to the safe operation of the vehicle or the occupants.
Thank You!
Thank you for purchasing the Orbit 110 dash camera.This user manual contains technical specifications and instructions for use, operation, and installation. Please read this manual carefully before using it.
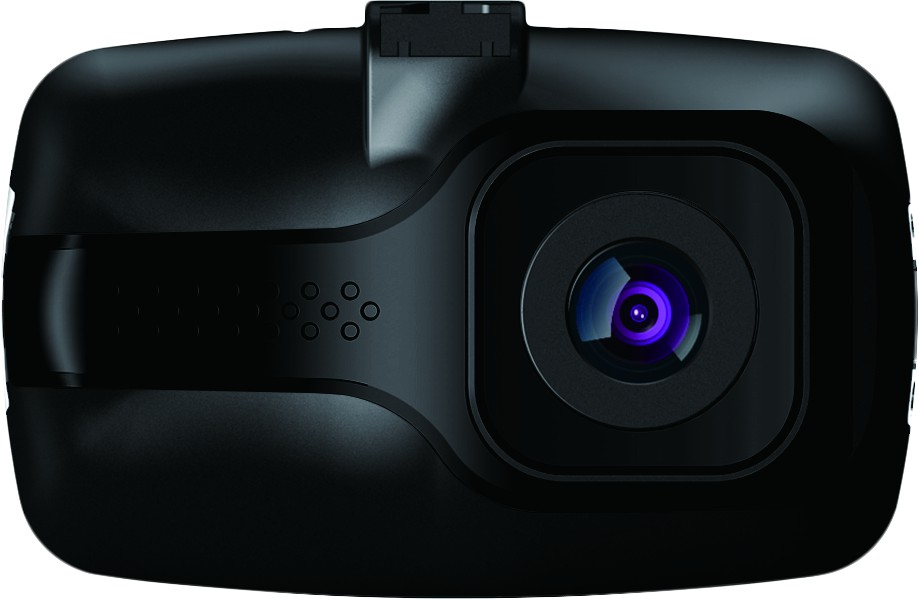
Product Overview
This product is a high-definition digital video camera, with high-quality digital audio &video, and USB charging function.
Package Contents
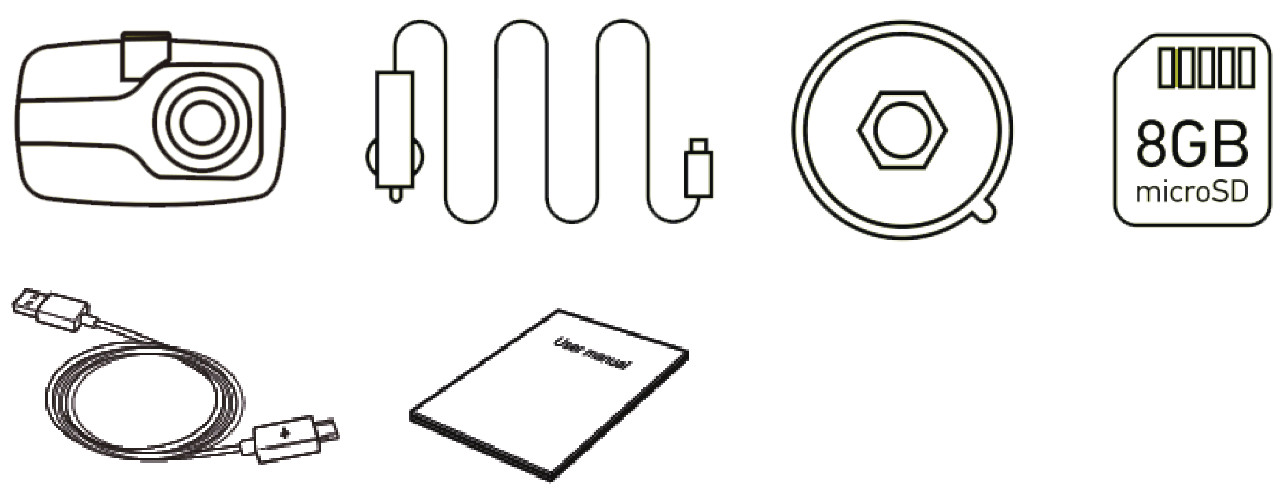
Orbit 110 Dash CamCar ChargerUSB CableCar Suction Mount8G Micro SD CardUser Manual and Warranty Card
Product Features
- Mini DVR, 120-degree grade A+ high-resolution ultra-wide-angle lens
- Built-in lithium battery can be charged while video recording function
- Seamless video
- 1.5 inch TFT LCD
- Built-in Mic/Speaker
- Support Micro SD card up to 32GB
- Motion Detection
- SOS file locking function
- Loop recording, Time and Date Stamp
- Parking Mode
Buttons and socket
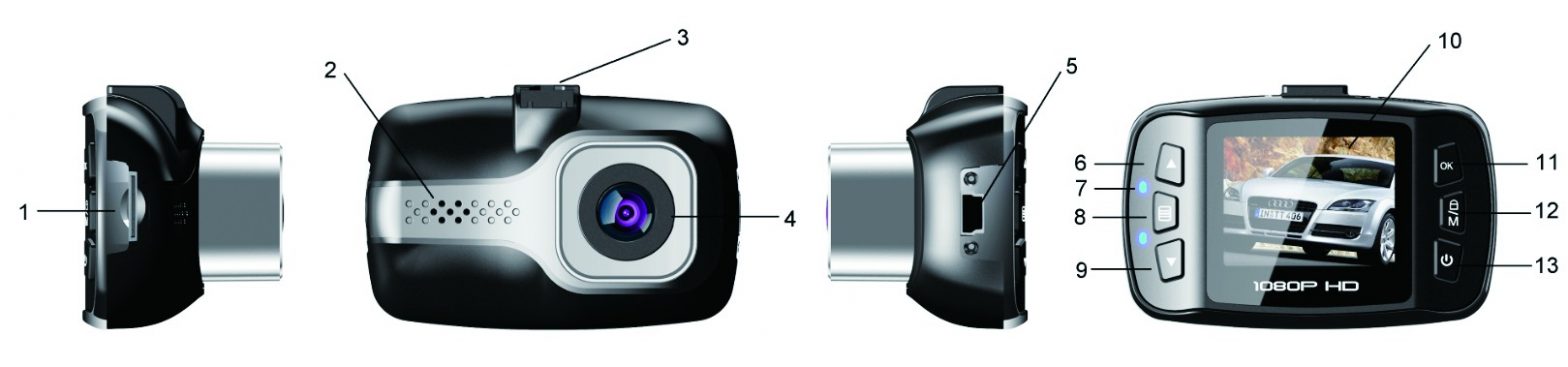
| 1.Micro SD Card Slot | 8. Menu Button |
| 2. Speaker | 9. Down Button |
| 3. Bracket Slot | 10. LCD Screen |
| 4. Lens | 11. OK /REC |
| 5. Mini USB Slot | 12. Mode/Lock |
| 6. Up Button | 13. Power button |
| 7. Indicator LED | 14. Power LED |
Where to Install Your Dash CamSettings
 Settings
POWER LED:Red – Indicates there is power suppliedINDICATOR LED:Blue – Flashing indicates recordingMode/Lock:Recording Mode: Lock emergency recordingPreview Mode: Return recording modePlayback Mode: Return preview modeUp Button:Preview Mode: Toggle to previous filePlayback Mode: Toggle to previous fileDown Button:Preview Mode: Toggle to next filePlayback Mode: Toggle to next fileOK :Recording Mode: Start Recording / StandbySetting Model: OKMenu Button:Video Mode: Enter in setting menuPlayback Mode: Delete/Lock/Unlock MenuReset:If the device fails to operate, try resetting the device. Press the reset button using a fine pen or paperclip.Power: Press and hold the power button for 3 seconds to turn on; Press and hold for 5 seconds to turn off.
Battery Charge
1)Directly connect the car charger with the charging cable in USB interface of the device.2)USB charging, use the USB cable and connect it to the computer
Micro SD Card Insert and Removal
1.Insert the Micro SD card into the Micro SD card slot on the dashcam.2.To take out the Micro SD card, please gently press down the Micro SD card and it should pop out of the slot.Caution3.Please pay attention to the direction of the Micro SD card when inserting.4.If the device and Micro SD card is incompatible, please insert a different Micro SD card to try again.5.Please use a high-speed Micro SD card (Class6 or above).
Video Recording Settings
In standby mode, press the Menu button to enter into video settings, then press the Up/Down button to choose the menu you want. Press the OK button to confirm.1.Video Resolution: FHD 1080P / HD 720P2.Loop Recording :Off / 1 Minute/ 2Minutes / 3 Minutes/ 5 Minutes3.Exposure: +2.0 / +1 / 0 / -1 / -24.Motion Detection: Off / On5.Date Stamp: Off / On6.Record Audio : Off / On7.G-Sensor : Off / High / Medium / Low
General Settings
In standby mode, press the Menu button repeatedly to enter in to general settings, then press the Up/Down button to choose the menu you want. Press the OK button to confirm.1.Parking Mode : Off / On2.Date/Time: YY/MM/DD3.Auto Power Off : Off / 1 Minutes / 3 Minutes4.Screen Saver : Off / 3 Minutes / 5 Minutes / 10 Minutes5.Beep Sound: Off / On6.Language: English/Français/Deutsch/Spanish/Chinese/Italian/Japanese/Korean7.Frequency: 50Hz / 60Hz8.Format SD Card: Cancel / OK9.Default Setting: Cancel / OK10.Version info
Recording:
When connected to a car charger, the device automatically goes into record mode and starts recording, the ● icon will display on the screen.A flashing red dot ● icon flash indicates that the device is recording. To stop recording, Press OK button and the red dot disappears, indicating that the recording has stopped.If you want to protect the current recordings, then press the Mode/Lock button, the emergency icon will appear on the screen, this indicates that those recordings have beenlocked and will not be overwritten by new video clips.
Playback Mode
In Standby mode, press the Mode/Lock button repeatedly to enter Playback mode. The device stores video on the Micro SD Card. Playback mode will allow you to review thesaved video and playback the video with sound.If you wish to delete or protect the file, press the OK button to access the playback setting menu.
Connecting to a PC
The Orbit 110 can be connected to a PC by using a USB data cable. The supplied USB cable is for charging and supplying power only. When the device is connected to the PC, mass storage is displayed on the device’s screen. You can view the Micro SD card content on the PC. When the device is detected on the PC as an external drive, select the DCIM folder to view. Recordings and images will be saved in the same folders. The emergency recording files will have a lock icon on the thumbnail of the file.
Note●The improper operation will cause the device to crash. If the dashcam crashes, press the reset button to resume the camera.●Don’t leave the camera in direct sunlight or where the temperature could go above 60 degrees Celsius or 140 degrees Fahrenheit for a long period of time.
Specifications
| LCD Screen | 1.5″ TFT LCD screen |
| Video Resolution | FFID 1920X1080 |
| Lens | 120-degree wide angle |
| Languages | English/ Francais / Spanish / Chinese simplified/ Chinese traditional |
| Photo Format | JPEG |
| Video Format | AVI |
| Motion Detection | YES |
| G-sensor | YES |
| Loop Recording | YES |
| USB Interface | USB 2.0 |
| Working Temperature | 0°C–60°C / 32°F–140°F |
| Storage Temperature | -10°C–70°C /14 °F -158 °F |
| Memory card | Micro SD card up to 32GB, Class 6 or above |
| Power | 5V/1.0A |
| Battery Capacity | Li-battery 110mAh |
Need more information? Visit our website via www.mygekogear.comFeel free to contact our service team at [email protected] if you have any additional questions.
References
[xyz-ips snippet=”download-snippet”]