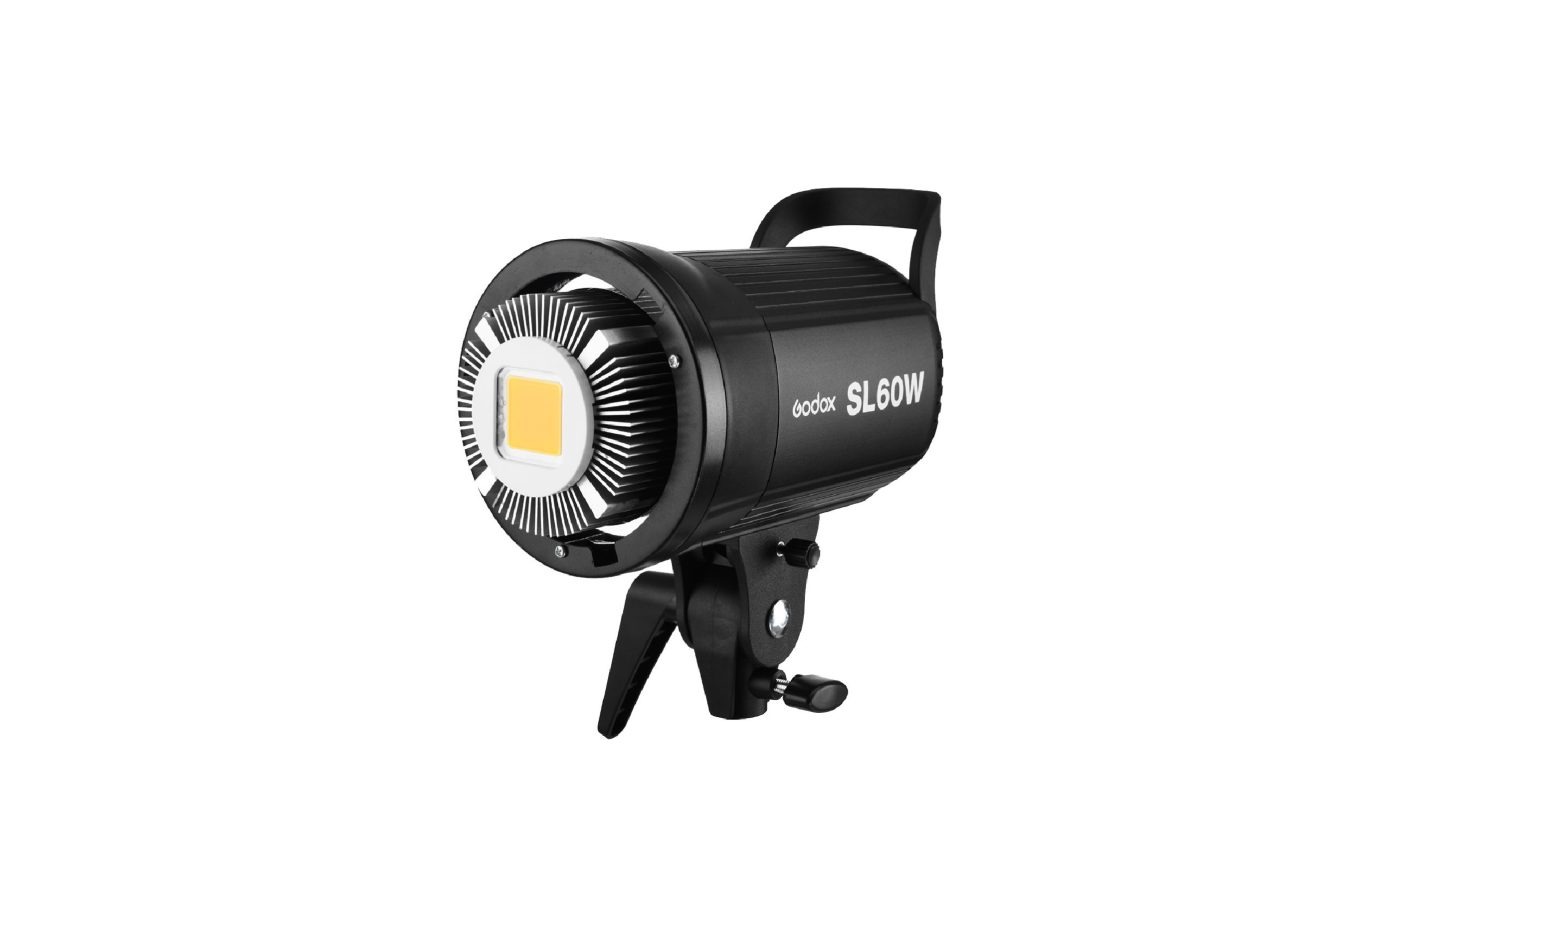
Godox SLB60W SL Series 60W Portable 5600K LED Video Light Instruction Manual
Foreword:
Thank you for purchasing this Godox Product! SL Series video lights are excellent for product shooting, photojournalistic and video recording, etc. It creates stable light resource and even illumination for photography. Two models are available: White Version (5600K), Yellow Version (3300K).
Features:
- 60W LED bulbs guarantee high light brightness
- The color rendering index is over 95 and R9 is 90, presenting the objects authentically
- Wirelessly adjust light brightness
- Wireless 433MHz grouping system (6 groups & 16 channels)
- Large-sized LCD panel. Settings auto saved
- With temperature control function to prevent overheating
- With specialized protect cover to protect the LED beads
- With red copper heat sink and built —in fan to offer excellent heat dissipation
| Type | Model |
| White Version ( Color Temperature 5600K) | SL60W |
| Yellow Version (Color Temperature 3300K) | SL60Y |
For your safety:
 A Do not place in high temperature or high humidity conditions.
- If this product overheats, it will cease operation and resume working after cooling down. This is due to the built-in over temperature protection.
- Do not handle with wet hands, immerse in water, or expose to rain.
- Do not dissemble or modify this product. Should the product break open as the result of a fall or other accident, send the defective back to authorized service center for inspection and maintenance.
Parts
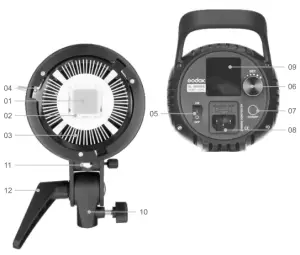
Body
- LED Beads
- Protect Cover
- Heatsink
- Accessory Slot
- ON/OFF Power Switch
- Select Dial + SET Button
- CH/GRP Button
- AC Power Jack
- LCD Panel (White in Blue)
- Mounting Bracket
- Umbrella Input
- Direction Adjusting Handle
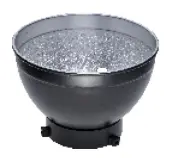
Accessories
- Standard Reflector
- Lamp Cover
- Power Cord

Operation
Using the Video Light
- Connect the light with AC power jack.
- Press the ON/OFF Power Switch, the video light begins to giving out light.
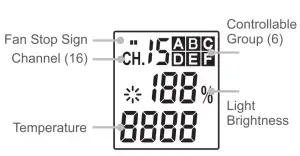
- LCD panel shows the information.
Light Brightness Adjustment
- Turn the select dial to adjust the light brightness.
- The light brightness adjustable range is at 10%-100%.
Temperature Indication
- This video light checks its temperature at any time to avoid dangerous situations. It will auto power off when the temperature is too high.
- Press the SET button for 2 seconds and the temperature can be switched between Celsius and Fahrenheit.
Wireless Remote Control
With 433 MHz wireless system, this product has remote grouping and control function. Up to 6 groups of video lights can be controlled. 16 channels are available with strong anti-interference capability.
- Please set the channels and groups of video light to the same as those of remote control before usage.
- When using the White Version, please set the color temperature of the remote control as 5600K constantly;
- When using the Yellow Version, please set the color temperature of the remote control as 3300K constantly;
Adjusting Channel/Group of the Video Light
- Press the CH/GRP button and the group icon blinks. Turn the select dial to choose a group ID (A to F).
- Press the CH/GRP button twice and the channel icon blinks. Turn the select dial to choose a channel ID (1 to 16).
Adjusting Channel/Group of the Remote Control
- Press the CH/GRP button and the group icon blinks. Press the”-“”+” button to choose a group ID (A to F).
- Press the CH/GRP button twice and the channel icon blinks. Press the”–+” button to choose a channel ID (1 to 16).
Adjusting Light Brightness/Color Temperature with the Remote Control
- Press the”-“”+” button to adjust the light brightness.
- Press the SET button of the remote control once and the color temperature icon blinks. Press the”2″+” button to adjust the color temperature.Note: Remote control purchased separately
Other Operation Tips:
- Pressing the ON/OFF button on the remote control can turn on/off all the video light groups.
- Pressing the “SET” button on the remote control for 2 seconds can turn on/off the current video light group.
- Please remove the battery if the light will not be used for an extended period of time.
![]() When there are some abnormal situations in the inner video light, the relevant LCD signs will blink as warnings. For example:
When there are some abnormal situations in the inner video light, the relevant LCD signs will blink as warnings. For example:
- When the fan stops working due to fault, II signs will blink to alarm.
- When heatsink’ temperature is over 70 Celsius degrees, the temperature on the LCD panel will blink and the video light will stop working.
Technical Data:
| Video Light | White Version SL6OW | Yellow Version SL60Y |
| AC Power Supply | AC 100-240V 50/60Hz | |
| Channel | 16 | |
| Group | 6 groups (A, B, C, D, E, F) | |
| Power | Max. 60W | |
| Color Temperature | 5600K±300K | 3300K±300K |
| 100% Illuminance (LUX) | 4100 (1m) | |
| 100% Luminous Flux | 4500 | |
| Color Rendering Index | >95 | |
| R9 | 90 | |
| TLCI(Qa) | >90 | |
| Light Brightness Range | 10%-100% | |
| Operation Temperature | -10-50°C | |
| Safe Temperature | 70°C | |
| Dimension | 23x24x14cm (Not included the Lamp Cover) | |
| Net Weight | Approx. 1.61kg |
Product design and specifications are subject to change without notice.
FCC Statement
This device complies with part 15 of the FCC Rules. Operation is subject to the following two conditions: (1) This device may not cause harmful interference, and (2) this device must accept any interference received, including interference that may cause undesired operation.Note: This equipment has been tested and found to comply with the limits for a Class B digital device, pursuant to part 15 of the FCC Rules. These limits are designed to provide reasonable protection against harmful interference in a residential installation. This equipment generates uses and can radiate radio frequency energy and, if not installed and used in accordance with the instructions, may cause harmful interference to radio communications. However, there is no guarantee that interference will not occur in a particular installation. If this equipment does cause harmful interference to radio or television reception. which can be determined by turning the equipment off and on. the user is encouraged to try to correct the interference by one or more of the following measures:
- Reorient or relocate the receiving antenna.
- Increase the separation between the equipment and receiver.
- Connect the equipment into an outlet on a circuit different from that to which the receiver is connected.
- Consult the dealer or an experienced radio/TV technician for help.
Warranty
Dear customers, as this warranty card is an important certificate to apply for our maintenance service, please fill in the following form in coordination with the seller and safe keep it. Thank you!
| Product Information | Model | Product Code Number |
| Customer Information | Name | Contact Number |
| Address | ||
| Seller Information | Name | |
| Contact Number | ||
| Address | ||
| Date of Sale | ||
| Note: |
Applicable Products
The document applies to the products listed on the Product Maintenance Information (see below for further information). Other products or accessories (e.g. promotional items, giveaways and additional accessories attached etc.) are not included in this warranty scope.
Warranty Period
The warranty period of products and accessories is implemented according to the relevant Product Maintenance information. The warranty period is calculated from the day(purchase date) when the product is bought for the first time, And the purchase date is considered as the date registered on the warranty card when buying the product.
How to Get the Maintenance Service
If maintenance service is needed, you can directly contact the product distributor or authorized service institutions. You can also contact the Godox after-sale service call and we will offer you service. When applying for maintenance service, you should provide valid wananty card. If you cannot provide valid warranty card, we may offer you maintenance service once confirmed that the product or accessory is involved in the maintenance scope, but that shall not be considered as our obligation.
Inapplicable Cases
The guarantee and service offered by this document are not applicable in the following cases:
- The product or accessory has expired its warranty period.
- Breakage or damage caused by inappropriate usage, maintenance or preservation, such as improper packing, improper usage, improper plugging in/out external equipment, falling off or squeezing by external force, contacting or exposing to the improper temperature, solvent, acid, base, flooding and damp environments, etc.
- Breakage or damage caused by non-authorized institution or staff in the process of installation, maintenance, alternation, addition and detachment;
- The original identifying information of product or accessory is modified, alternated, or removed.
- No valid warranty card.
- Breakage or damage caused by using illegally authorized, nonstandard or non-public released software.
- Breakage or damage caused by force majeure or accident; 8 . Breakage or damage that could not be attributed to the product itself.
Once met these situations above, you should seek solutions from the related responsible parties and Godox assumes no responsibility. The damage caused by parts, accessories and software that beyond the warranty period or scope is not included in our maintenance scope. The normal discoloration, abrasion and consumption are not the breakage within the maintenance scope.
Maintenance and Service Support Information
The warranty period and service types of products are implemented according the following Product Maintenance Information:
| Product Type | Name | Maintenance Period(month) | Warranty Service Type |
| Parts | Circuit Board | 12 | Customer sends the product to designated site |
| Battery | 3 | Customer sends the product to designated site | |
| Electrical parts e.g. battery charger, power cord, sync cable, etc. | 12 | Customer sends the product to designated site | |
| Other Items | Flash tube, modeling lamp, lamp body, lamp cover, locking device, package, etc. | No | Without warranty |
 report this ad
GodoxService Call: 0755-59609320-8062
[xyz-ips snippet=”download-snippet”]