G2Call AppTAPP G2CALL EN REV.0120USER MANUALG2+TECHNOLOGY

https://play.google.com/store/apps/details?id=com.golmar.g2call&hl=es
Cód. 50122917
|
|
| https://apps.apple.com/cr/app/g2call/id1448323696 | https://doc.golmar.es/search/manual/50122917 |
|
 |
Initial registering of a monitor to a Wi-Fi network
To register the monitor with the Wi-Fi network of your apartment, you will need to download and install the G2Call app on your phone. The app is available for Android and iOS operating systems and you can download it free ® TM from Google Play and the apple Store respectively.
Start the app once you have installed it on your mobile phone. Read the app’s terms and conditions of use carefully: you can only access the app after accepting them. The app will request permissions to access certain functions of the phone, such as the use of the speaker, microphone, etc. You must give your permission in order for the app to operate correctly.
During the registration process, some phones experience problems while they are connected to the mobile phone network. We recommend that you put your phone in flight mode with Wi-Fi activated during the registration process.
Turn on the Wi-Fi functionality of the master monitor using the icon![]() in the main menu. Go to the Wi-Fi screen of the settings menu and check that the pairing signal
in the main menu. Go to the Wi-Fi screen of the settings menu and check that the pairing signal ![]() appears in the top right of the screen.
appears in the top right of the screen.
To start registration, press the ‘Add monitor’ option. If there was already a monitor registered on your phone, press the icon ![]() to add a new monitor. Then press the ‘New monitor’ option, since this is the first time the monitor has been registered to the network of your apartment; if the monitor was previously registered to another network, reset the Wi-Fi settings Leave the app screen in the background and activate the Wi-Fi of your phone; connect. to the network that starts with ‘UID’, return to the app screen, and press ‘Next’.Select the Wi-Fi network that you are going to connect your monitor to. If you have more than one, select the nearest network to your monitor location.Note:Due to iOS operating system restrictions, it is not possible to display the list of available networks (see next page).
to add a new monitor. Then press the ‘New monitor’ option, since this is the first time the monitor has been registered to the network of your apartment; if the monitor was previously registered to another network, reset the Wi-Fi settings Leave the app screen in the background and activate the Wi-Fi of your phone; connect. to the network that starts with ‘UID’, return to the app screen, and press ‘Next’.Select the Wi-Fi network that you are going to connect your monitor to. If you have more than one, select the nearest network to your monitor location.Note:Due to iOS operating system restrictions, it is not possible to display the list of available networks (see next page).![]()
Enter the network access password. If you are registering on a device with an iOS operating system, manually enter the SSID identifier of the network. By pressing ‘Next’, the pairing process will start and can take up to two and a half minutes.If the pairing process successfully completes, the basic setup screen is displayed on the monitor. Assign it a name to differentiate it from other possible monitors that you have registered on the same phone. The factory setting of the connection password is ‘1234’. This password can only be changed once the monitor is registered. If the monitor is connected to a second door panel or surveillance cameras, indicate so.If the pairing process fails, however, go to the Wi-Fi screen of the monitor settings menu and verify that it is connected to your Wi-Fi network: your network name should appear in the SSID field and the top right part of the screen should show the intensity bars of the connection signal. If so, register the monitor using the ‘Monitor connected to network’ option.Once the process is finished, the registered monitor will appear as available.![]()
Registering of a monitor connected to the network
Make sure your phone has connectivity, either Wi-Fi or through your telephone service provider.If you choose the ‘Search’ option, the app will show you the identifiers (UID) of the connected monitors. Select the monitor you wish to register in your app, showing the basic configuration screen of the monitor.If you choose the ‘Add manually’ option, you can scan the QR code located on the back of the monitor with your phone, or manually enter the UID identifier (found on the Wi-Fi screen of the settings menu) on the monitor’s basic setup screen.Once the process is finished, the registered monitor will appear as available.
Advanced settings of a registered monitor
To access the advanced settings of a monitor registered in the app, press the preview screen of that monitor andthen icon![]() in the top right part of the screen. Even if the monitor is not connected at that time, you can adjust the settings.ID.To make changes to the monitor settings, the receipt of notifications must be turned off. In addition to the monitor settings, you can activate the password request function to unlock the door. This password is the same as that described on p. and can be changed in advanced settings. This password will be requested to 4 deactivate the function again.Use icon
in the top right part of the screen. Even if the monitor is not connected at that time, you can adjust the settings.ID.To make changes to the monitor settings, the receipt of notifications must be turned off. In addition to the monitor settings, you can activate the password request function to unlock the door. This password is the same as that described on p. and can be changed in advanced settings. This password will be requested to 4 deactivate the function again.Use icon![]() to to change the settings. Once completed, save the settings using icon
to to change the settings. Once completed, save the settings using icon![]() . To exit without saving changes, use icon
. To exit without saving changes, use icon![]() .
.
Password.
Change the connection password to the monitor. It is the same password used to unlock the door if the function has been activated. Once the password has been changed, save the changes using icon![]() . To exit without saving changes, use icon
. To exit without saving changes, use icon![]() .
.
Note: This password is saved on the monitor. If another phone had access to this monitor, you need to also make changes to the basic settings of that monitor.
Push to talk.The app has hands-free communication with the door panel. If you prefer, you can activate the ‘Push to talk’ function by marking the box.Preview.Set the quality of the default video signal (number of images per second) according to the type of data connection. It also defines whether the audio from the door panel to the phone is automatically activated upon receipt of the call, or whether it is necessary to press the pickup icon.
Wi-Fi.Change the Wi-Fi network that the monitor is connected to with another one available in your environment.Note: Due to iOS operating system restrictions, it is not possible to display the list of available networks, with it being necessary to manually enter the SSID identifier of the network.Network changes can only be carried out when the phone is in the same location as the monitor.Notification.In order to receive call transfers from this monitor, it is necessary to activate the notification function. Deactivate this function if you only wish to connect to the device without having been called.FW version.This shows the FW version of this monitor and the latest version in the remote communications server, which can be updated. The app notifies of the existence of a new FW version by means of an alert above the advanced configuration icon of the monitor.Time & Date synchronisation.Update the time and date of the monitor with the phone data.Delete.Delete the app monitor. Receipt of notifications must be deactivated for the deletion.
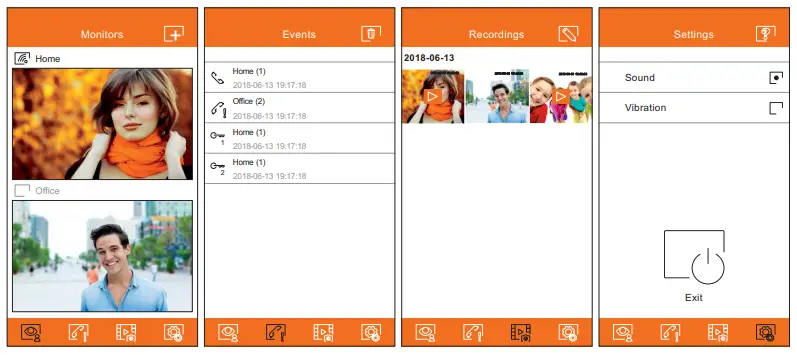
Main screen
When you run the app, and after the welcome screen, the selection screen of the connected monitors is displayed. Those with connectivity will show icon![]() . To view the image from one of the devices, press your registered monitor to access the communication screen (see next page).If you press icon
. To view the image from one of the devices, press your registered monitor to access the communication screen (see next page).If you press icon![]() , you will access the event screen. This screen shows the list of events: answered calls, missed calls, and door openings. Each event shows the door panel number in brackets and the time it occurred. Swipe the screen downwards to refresh the list. By pressing icon
, you will access the event screen. This screen shows the list of events: answered calls, missed calls, and door openings. Each event shows the door panel number in brackets and the time it occurred. Swipe the screen downwards to refresh the list. By pressing icon![]() , you can delete all events; if you press one of the events for 2 seconds, you can delete the events you select, or all simultaneously using icon
, you can delete all events; if you press one of the events for 2 seconds, you can delete the events you select, or all simultaneously using icon![]() .Icon
.Icon![]() will take you to the screen that shows the images or videos recorded from the app. Press on any recording to view it in full screen, from where you can also share or delete it individually. By clicking on icon, you candelete and share several or all recordings simultaneously. To do so, use icons
will take you to the screen that shows the images or videos recorded from the app. Press on any recording to view it in full screen, from where you can also share or delete it individually. By clicking on icon, you candelete and share several or all recordings simultaneously. To do so, use icons![]() ,
, ![]() and
and![]() .To access the app settings, press icon
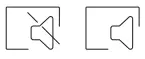
.To access the app settings, press icon ![]() . From here, you can select if you want the phone to ring and/or vibratewhen receiving a call. By clicking on icon ? , you can view the version of this app and Golmar’s privacy policy. In the case of Android devices, exit the app using icon
. From here, you can select if you want the phone to ring and/or vibratewhen receiving a call. By clicking on icon ? , you can view the version of this app and Golmar’s privacy policy. In the case of Android devices, exit the app using icon![]() , or force its closure: it will continue receiving calls and the app will not consume battery.
, or force its closure: it will continue receiving calls and the app will not consume battery.
Communication screen
If you activated call transfer on the monitor and the notifications are activated on the app, you will receive calls made on the street panel. A pop-up screen will show you the origin of the call. You can accept the call using icon![]() , or reject it by pressing . Once the call is accepted, you can establish audio communication by pressing icon
, or reject it by pressing . Once the call is accepted, you can establish audio communication by pressing icon![]() .Whether you access the communication screen through call reception or from the main screen, the options detailed below will be the same.
.Whether you access the communication screen through call reception or from the main screen, the options detailed below will be the same.![]()
 Activate or deactivate audio from the door panel during the viewing process. The initial state depends on the configuration of the preview of the monitor (p. ).6
![]() Activate or deactivate the phone’s microphone during the communication process. In communication mode, ‘Push to talk’ is deactivated.Take a photograph.
Activate or deactivate the phone’s microphone during the communication process. In communication mode, ‘Push to talk’ is deactivated.Take a photograph. Press to start recording a video. To end the recording, press the icon again.
 Change the source of the image. This icon appears enabled (white) if the system has more than one door panel or has an external camera connected and the monitor display has been activated. It is possible to make the change during display and communication processes.Start or end audio communication with the door panel displayed. Communication has a maximum duration of 90 seconds.
 In ‘Push to talk’ communication mode, keep the button pressed while talking and release it to listen.
Communication screen
 report this ad
 Activate the lock release or device connected to the CV output of the door panel. You will need to enter a password for activation if one was defined on p. .6Activate the lock release or device connected to the relay output of the door panel. You will need to enter a password for activation if one was defined on p. .6Change the quality of the video signal according to the type of data connection.
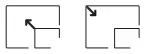 Switch between full-screen mode (horizontal orientation of the phone) and normal screen mode (vertical orientation).
[xyz-ips snippet=”download-snippet”]