![]()
![]()
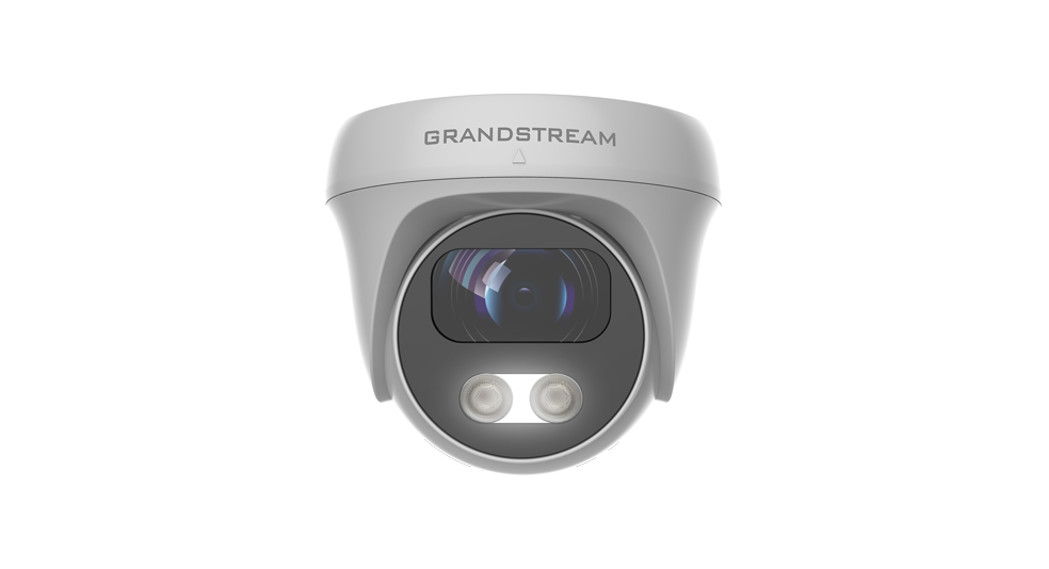
GSC3610FHD Infrared WeatherproofIP Dome CameraQuick Installation Guide
OVERVIEW
The GSC3610 is a high-definition, weatherproof, Infrared (IR) IP dome camera, ideal for monitoring in environments such as homes, offices, banks, hotels, retail, warehouses, and building entrances. The GSC3610 integrates with Grandstream’s free management utility software GSURF Pro, allowing video feeds as well as the device itself to be fully managed by this software, along with other ONVIF-compliant video management systems. Powered by an advanced Image Sensor Processor (ISP) and state-of-the-art image algorithms, the GSC3610 delivers 1080p FHD video resolution and offers exceptional H.264/H.265 performance with HTTP API for 3rd party redevelopment. It features SIP/VoIP technology with 2-way audio and video streaming feeds loaded directly to smartphones or SIP endpoints. The GSC3610 is equipped with integrated PoE for seamless installation, IR LEDs, and interfaces for external microphones and speakers. The combination of the GSC3610, Grandstream’s GSC3570 intercom phone, GXP/GRP IP phones, GXV video phones, portable WP Wi-Fi phones, and GS-Wave Mobile APP provides a complete end-to-end solution for video intercom, security monitoring, and recording needs.
PRECAUTIONS
- Do not attempt to open, disassemble, or modify the device.
- Do not expose this device to the temperature outside the range of -20 °C to 50°C and environment humidity more than 95% (non-condensing)
- Please install the camera correctly for a smooth operation.
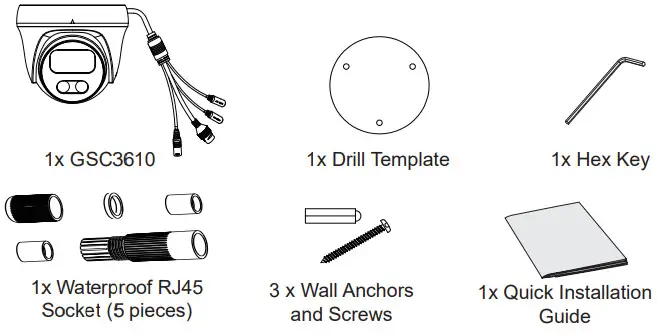
PACKAGE CONTENTS
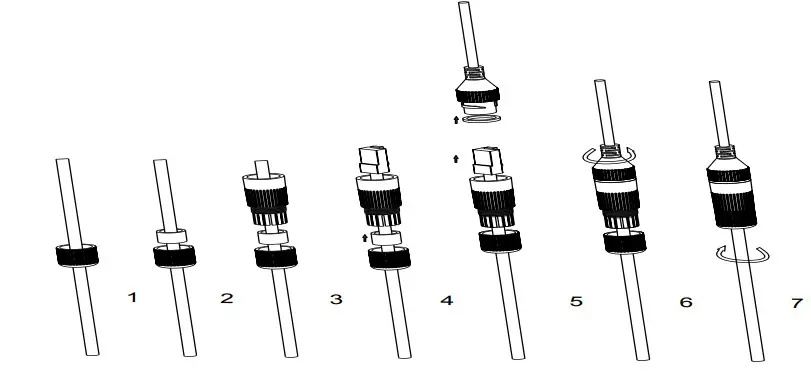
POWERING AND CONNECTING THE GSC3610The GSC3610 can be powered either using the right PSU (DC12V, 1A) or using a PoE switch. Please refer to the illustration below to do the wiring and connect the waterproof RJ45 socket: Option A (Recommended) Step 1: Based on T-568B to install the RJ45 plug, tighten the connector using the provided waterproof socket. Step 2: Connect another end of the cable into a switch supporting Power over Ethernet.
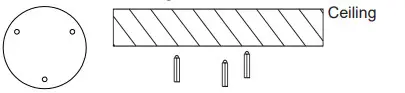
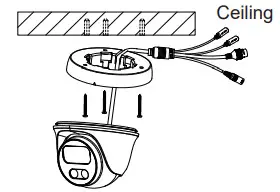
Option BStep 1: Wire the cable and connect it to a network switch like steps in Option A.Step 2: Connect a 12VDC, 1A (minimum) Power Adapter (not provided) to the power socket of the GSC3610 tail cable. Make sure the polarity “+”(center) and “-” (outside) are correctly connected.MOUNTING GSC3610Step 1:Use supplied drill template to drill holes at the ceiling. Select appropriate anchors or screws based on ceiling material.
Step 2:Remove the top cover of the camera by turning it counterclockwise as shown in the figure below. Refer to the arrow and small notch on the machinebody as shown below to align the machine cover.
Step 3:Place the cable into the groove of the camera cover, mount the cover into the ceiling using provided screws as shown in the below diagram. Leave the connectors of cable dangling outside the cover.
Step 4:Hold the body of the camera and align to the notch as shown in the diagram, then push the body of the camera into the cover of the camera already mounted at the ceiling.
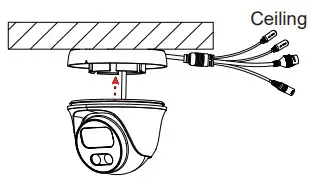
Step 5:Rotate the body of the camera to snap to the self-locking bracket.
GSC3610 CONFIGURATIONFollowing are the requirement to configure the GSC3610:
- Internet Browser like Firefox, Chrome, Microsoft Internet Explorer or Edge.
- DHCP server enabled on the network.
report this adFollow the steps below to access the GSC3610 WEB configuration page:
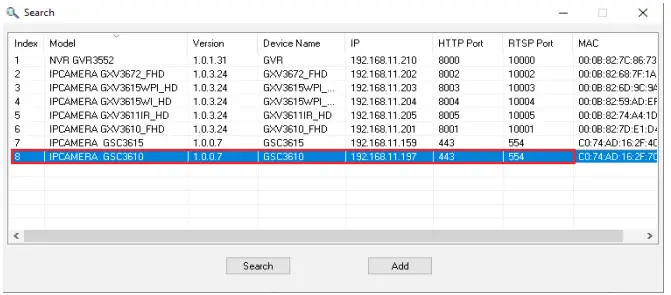
- Download and install the GS_Search tool from the link below: http://www.grandstream.com/products/tools/surveillance/GS_Search.zip
- Run the Grandstream GS_Search tool.
- Click on
 the button to start device detection.
 - The detected devices will appear in the output field as below.
- Double click on the detected device. The default browser (Chrome in this example) will open to display the camera’s login web interface.
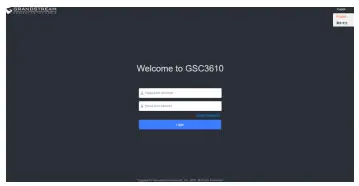
- Username and password are required to log in to the camera to manage the device. The default username is “admin”; the default password is a random password printed on a sticker which can be found in the camera body and back of the QIG.
- The default connection is via HTTPS. Once input the correct username and password, the device configuration webpage will be available.
- Click the “LiveView” tab on the up left corner of the WebUI, then click the “1” or “2” digit at the left bottom of a webpage, a live video feedwill be displayed inside the Browser after a while, as shown in the above screenshot. “1” means feeds is a primary video stream, “2” means feedsis a secondary video stream. Please refer to “Video & Audio Settings” in the WebUI for more detailed information about the configuration andparameters.The GNU GPL license terms are incorporated into the device firmware and can be accessed via the Web user interface of the device at my_device_ip/ gpl_license. It can also be accessed here: http://www.grandstream.com/legal/open-source-softwareTo obtain a CD with GPL source code information please submit a written request to [email protected] Refer to online documents and FAQ for more detailed information: http://www.grandstream.com/our-products This product is covered by one or more of the U.S. patents (and any foreign patent counterparts thereto) identified at www.cmspatents.com.
Grandstream Networks, Inc.126 Brookline Ave, 3rd FloorBoston, MA 02215. USATel : +1 (617) 566 – 9300Fax: +1 (617) 249 – 1987www.grandstream.comFor Warranty and RMA information, please visitwww.grandstream.com
References
[xyz-ips snippet=”download-snippet”]