
Grape Solar GS-50-KIT 50 Watt Off-Grid Charging Kit
![]()
Quick Connect Guide
IMPORTANT: Please read the GS-PWM-20A charge controller owner’s manual and GS-STAR-50W connection guide (both included with products) before assembling the kit.
For additional information about Grape Solar products:email [email protected], orcall 1-877-264-1014 for live telephone support.
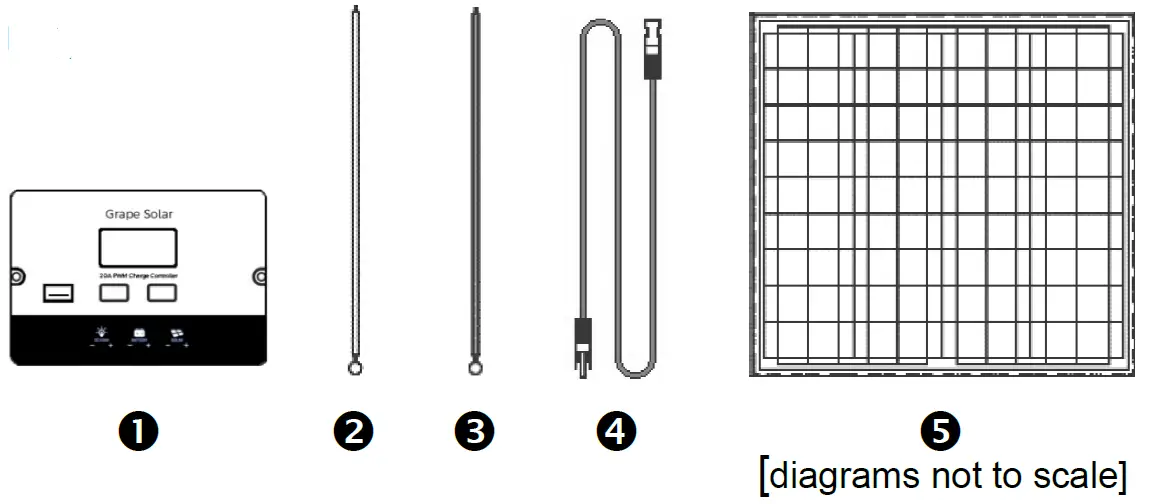
Check your order to make sure that all parts are included:
- GS-PWM-20A Charge Controller
- 5-foot Ring-lug Cable, Red
- 5-foot Ring-lug Cable, Black
- Black 15-foot MC4 Cable
- GS- STAR-50W Solar Panel
Additional tools and equipment you will need:
- Screwdriver– Philips Head
- Wire Stripper/Cutter
- 12-Volt Deep-Cycle Battery Bank
- Voltmeter (for Troubleshooting)
Mount the 50-watt solar panel 5 so that it is facing due South at approximately the same angle as your latitude. The ideal area has full sun and no shading. If the following connections are made during daylight, cover the panel with cardboard, cloth, or a similar opaque material so that the panel does not output power.
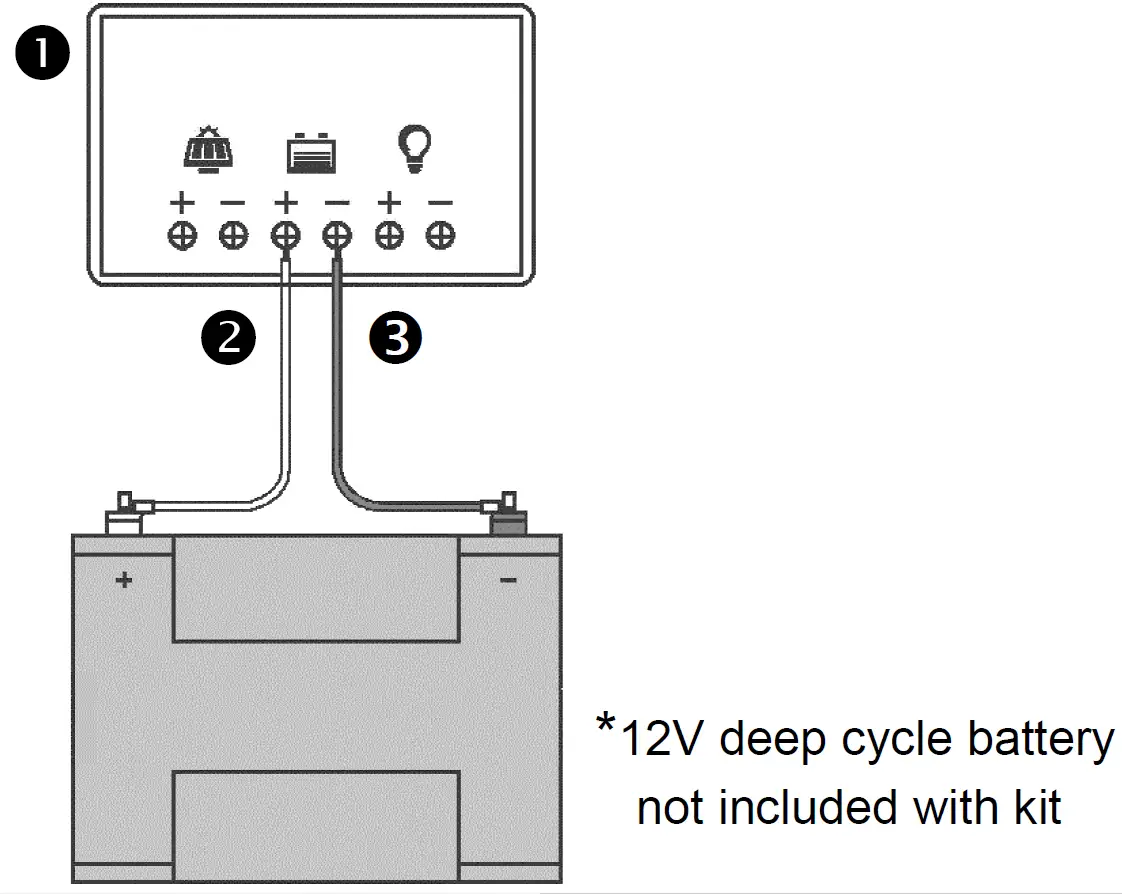
Connect the wire end of the red battery cable 4 to the “+BATTERY” terminal on the back of the GS-PWM-20A charge controller 1. Connect the wire end of the 5-foot black cable 3 to the “-BATTERY” terminal. A Phillips head screwdriver can be used to loosen and tighten the screw clamps onto the wires.Attach the ring lug end of the red cable 2 to the positive terminal of a 12V deep cycle battery. Attach the ring lug end of the black cable 3 to the negative terminal.
Using wire cutters, snip the 10-gauge, 15ft. MC4 extension cable 4 into two equal halves (7.5ft each.) On the cut ends, strip off ¼-inch of insulation, revealing bare wire.
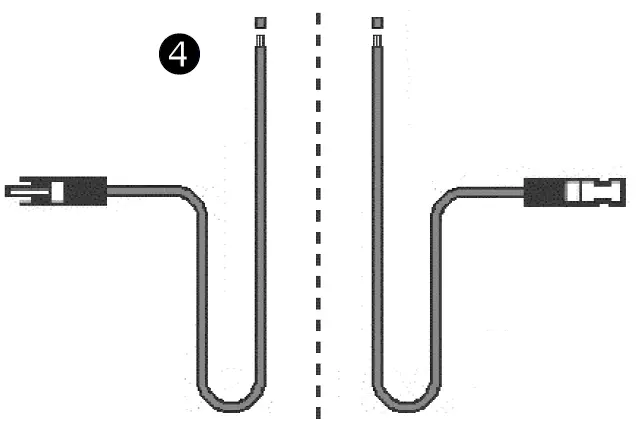
Connect the MC4 ends of the halved cable 4 to the compatible MC4 ends of the solar panel 5 cables.(Mark the end of the positive panel cable with a piece of tape to help distinguish polarity during connection.)
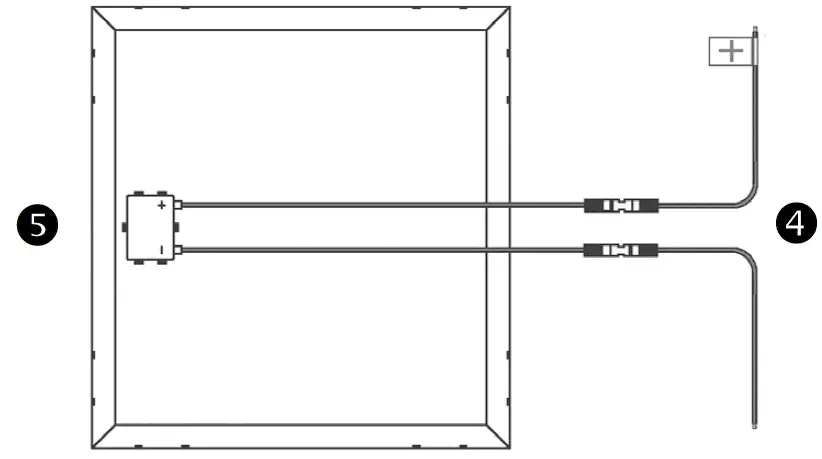
Connect the bare wire end of the positive cable 4 to the “SOLAR +” input of the charge controller 1 . Connect the negative bare end to the “SOLAR -” input. Now, you can mount the GS-PWM-20A charge controller to an indoor wall or within a NEMA-3R rated enclosure.
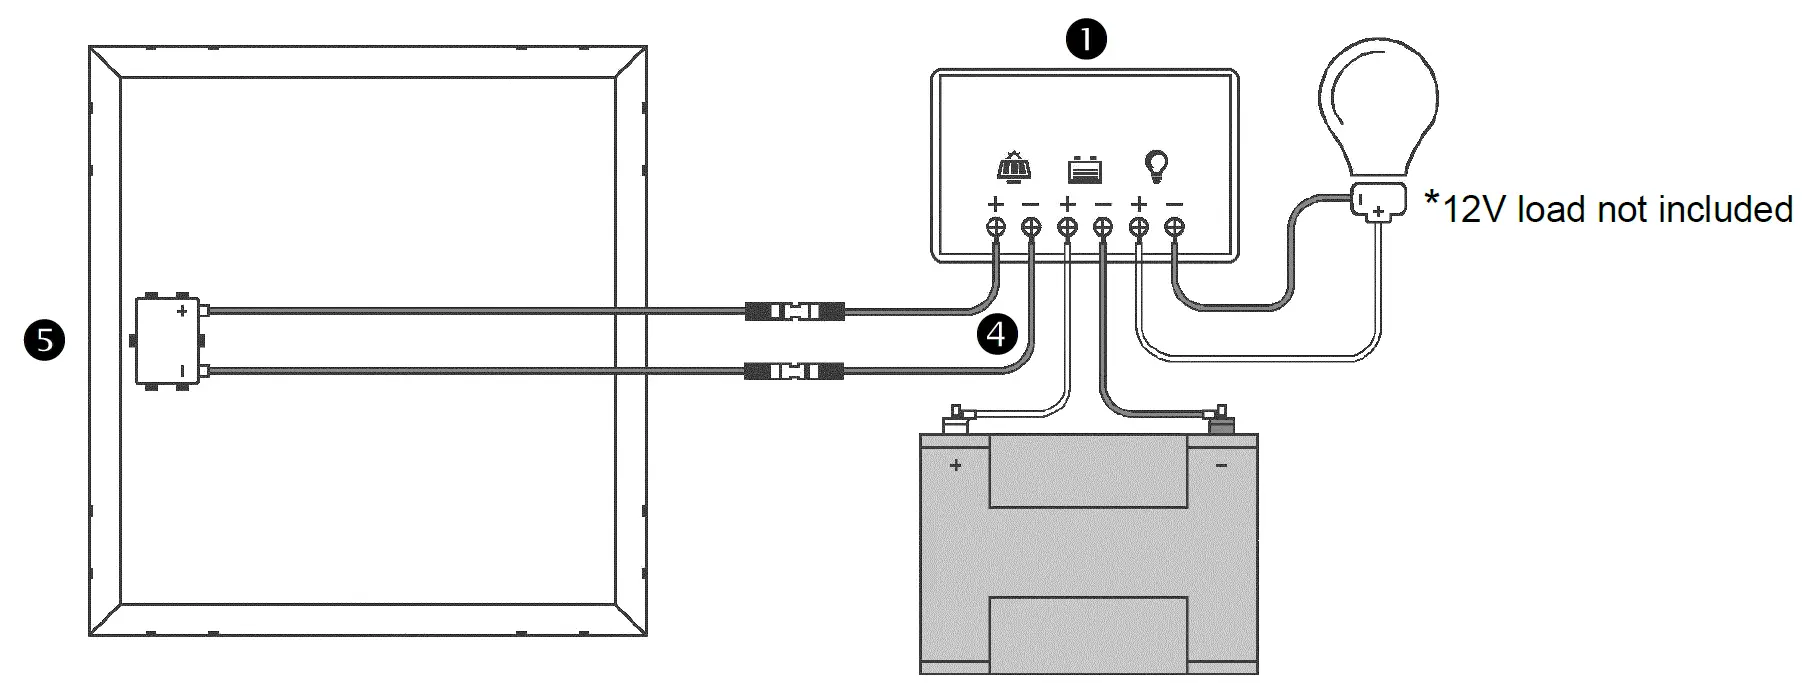
Remove the panel covering. In good sunlight, the charge controller’s 1 ”BAT %” should increase to 100%. Once the battery is fully charged and the controller is set to “LOAD ON,” the system will provide power through the load control output or through the two USB ports. If an inverter is added to the system, it must be connected to the battery bank, and not to the charge controller.
DISCLAIMERInstallations of this kit could be subject to national and local building and electrical codes. Installers should have adequate knowledge of national and local code to ensure the installation passes inspection by the local electric authority.Proper fuses or breakers should be used to comply with all local and national codes. Contact Grape Solar for specific recommendations.All batteries used for this system should be identical. Do not mix battery types or sizes. Do not mix old batteries with new batteries. Performance and charging anomalies can occur if the types, sizes, or ages of batteries are not identical.Grape Solar does not warrant the accuracy, sufficiency, or suitability to all customers of any technical or other information provided in product manuals. Grape Solar does not claim any responsibility or liability for losses, damages, costs or other expenses whether special, indirect, consequential or incidental, which might arise out of the use of such information.
www.GrapeSolar.comTel. 1-877-264-1014 (toll free), 1-541-349-9000
Document Version 200618©Copyright 2019, Grape Solar, Inc. All Rights Reserved
![]()
References
[xyz-ips snippet=”download-snippet”]