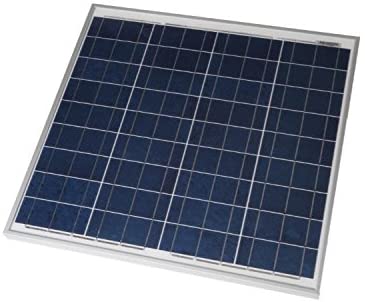
Grape Solar Photovoltaic Modules
Safety and Installation Manual
This document applies to Grape Solar photovoltaic modules with model number GS-Star-100W. Carefully read through this manual in its entirety before installing, operating or servicing the photovoltaic (PV) system. Failure to comply with the instructions described in this manual may cause bodily injury or damage to property, and invalidate Grape Solar’s limited warranty for photovoltaic modules!
GENERAL INFORMATION
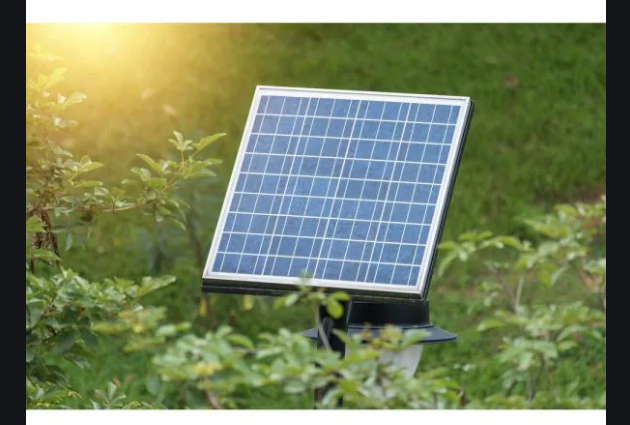
- Grape Solar photovoltaic (PV) modules are designed to produce DC electrical energy from sunlight.
- This manual contains important safety and installation information of Grape Solar PV modules. All safety and installation instructions described in this manual should be thoroughly understood before installing, operating and maintaining the PV system.
- Working on a PV system requires specialized knowledge, and must be performed by appropriately qualified and authorized personnel only.
- Grape Solar PV modules are subject to operate at ambient temperatures within the range -40°C to + 85°C (-40°F to +185°F).
- PV modules are intended for outdoor, land-based applications only.
- Rated power output specification of Grape Solar PV modules are made at the Standard Test Condition (STC), which is 1000W/m2 irradiance, 1.5 Air Mass (AM), and 25°C (77ºF) cell temperature. However PV modules can produce voltage at as little as 5% of full sunlight, either connected or not connected to an electrical circuit or load.
- Electrical current and power generated by PV module increases with light intensity and higher power output than the rated specifications can be achieved at colder temperatures.
- Reflection from snow, water or other surfaces can increase light intensity, and therefore increase the current and power generated by the module.
- Do not artificially concentrate light on the module. Concentrating light on the module may result in damage to the module and malfunction of the whole PV system.
- Follow all safety precautions of other equipment and components used in the PV system.
- Retain this manual for future reference.
- Grape Solar recommends that the customer makes a note of the serial numbers of modules in order to keep a record of the system.
SAFETY PRECAUTIONS
General Safety
- Ensure that the modules are used for the intended purpose only.
- When installing, operating and maintaining the PV system, observe all local, regional, national and international statutory regulations, guidelines, norms and code requirements.
- The safety information for other system components must also be followed.
- Keep children away from the module and PV system.
Handling Safety
- The utmost care is required when unpacking, transporting, and storing the modules. Leave modules in packaging until they are to be installed.
- Always store the modules in a dry, ventilated in-door space if possible. If the un-connected modules have to be stored outside for any length of time, always have the glass surface facing down and cover modules with water-proof material to prevent water collecting inside the panel and causing damage to exposed connectors.
- Carry modules with both hands. Do not use the junction box as a handle to hold or transport the module.
- Do not stand or step on the module.
- Do not drop module or allow objects to fall on module.
- Do not mark or scratch the front or rear surface of the module with sharp objects.
- Do not disassemble, modify or adapt the module such as drilling holes in the frame or glass. Do not apply paint or adhesive to the module rear surface.
- Do not remove any part or labeling installed by Grape Solar from the module. Doing so will void the module warranty.
- Keep all electrical contacts of module clean and dry. Do not handle modules when they are wet unless wearing the appropriate protective equipment.
- Do not leave a module unsupported or unsecured.
- There are no user serviceable parts within the module. Do not attempt to repair any part of the module. Broken or damaged modules must not be used and must be handled carefully and disposed properly since the broken glass can be sharp and cause bodily injury if not handled with the appropriate protective equipment, and contact with any surface or the frame of the broken module can result in electrical shock.
Installation Safety
- All installations must be performed in compliance with the National Electrical Code (NEC) and any applicable local codes by authorized personnel. If the module is installed in Canada, installation shall be in accordance with CSA C22.1, Safety Standard for Electrical Installations, Canadian Electrical Code, Part 1.
- Keep children away from module and the system when installing.
- Do not wear metallic jewelry while performing mechanical or electrical installation of modules to avoid accidental exposure to live circuits.
- When working with modules exposed to light, follow all applicable regulations regarding working with live electrical equipment.
- Do not install or handle the modules when they are wet or during periods of high wind.
- Do not install modules where contact with salt water is likely or where modules are likely to become partially or wholly submerged in fresh or salt water, examples of which include boats, docks and buoys.
- Always use insulated tools and rubber gloves that are approved for working on electrical installations to reduce the risk of electric shock.
- Always use equipment, connectors, wiring and support frames suitable for working with PV electric systems.
- When installing modules on elevated locations, such as a rooftop, use caution to avoid falling or other safety hazards by following appropriate safety practices and using required safety equipment.
- PV modules do not have a power ON/OFF switch. The only way to make modules inoperative is removing them from light, or fully covering their front surface with an opaque material, or placing modules face down on a smooth, flat surface.
- Avoid setting the module down with any type of force on any surface, particularly when placing it at a corner.
- To prevent untrained personnel from disconnecting the modules after installed, locking connectors and safety clips must be used in the installation.
- Do not touch electrical terminals or the ends of any wire while installing the module. Do not open electrical connections or unplug connectors while the PV system circuit is under load. Contact with electrically active parts of the modules, such as terminals, can result in burns, sparks and lethal shock whether the module is connected or disconnected.
- Cover all modules in the PV array with an opaque cloth or material before making or breaking electrical connections.
- Broken junction boxes or broken connectors are electrical and laceration hazardous and cannot be repaired. Please contact the installers to remove the broken module from the array and contact the supplier for disposal instructions.
Fire Safety
- Grape Solar’s PV modules are non-explosion-protected equipment and fire rated Class C.
- Building fire safety may be affected by installing a PV system. Improper installation may lead to hazards in the event of fire. Refer to local authority for guidelines and requirements for building or structural fire safety.
- For roof installation, PV modules should be mounted over a fire resistant covering which is rated for the application.
- Do not install modules near equipment or locations where flammable gases can be generated or collected.
- Grape Solar recommends using components such as earth ground fault circuit breakers, fuses and circuit breakers in the PV system for fire prevention.
MODULE INSTALLATION
Installation Site Selection
- The site for PV module installation shall have an environment temperature within Grape Solar’s PV module operating temperature range -40°C to +85°C (-40°F to +185°F).
- The site shall allow all modules to be exposed to sunlight without obstruction all year round (shadows generated by trees or buildings, even partial shading, on the module array will result in reduction of PV system yield).
- The site shall have adequate ventilation of the module backside to avoid heat build-up, which can cause module performance degradation and system yield reduction. For roof mounted systems, at least a 4 inch clearance is required between the module back surface and roof for rear ventilation and module cooling.
- The modules have been evaluated by following UL-1703 standard that can sustain a positive or negative mechanical loading of 30 lbs/ft2 (1600 Pascal). To avoid exceeding the 30 lbs/ft2 mechanical loading limit, site specific loads such as wind and snow should be taken into account.
- The site should not have exposure to extremely corrosive chemicals (e.g. emissions from manufacturing facilities).
Module Orientation & Tilt Angle
- To obtain maximum yield from the PV system, the direction and tilt angle for the modules shall be set to receive the incident sunlight perpendicularly to the module surface. To avoid performance degradation in serial connected module strings, all modules shall have the same orientation and tilt angle.
- To avoid dirt build-up on the glass against the frame edge, low module tilt angle is not recommended. Dirt build-up on the module surface can cause partial shading and degrade module and system electrical performance.
Electrical Connection
- All installations must be performed in compliance with the National Electrical Code (NEC) and any applicable local codes by authorized personnel. If the module is installed in Canada, installation shall be in accordance with CSA C22.1, Safety Standard for Electrical Installations, Canadian Electrical Code, Part 1.
- Modules may be connected in series and/or in parallel to achieve the desired electrical output.When serial connected, all modules must have the same amperage, but the maximum open circuit voltage of the system must not exceed the specified maximum system voltage of the modules. When parallel connected, all modules must have the same voltage.
- Do not use modules with different electrical performance or physical property in the same system.
- To prevent untrained personnel from disconnecting the modules when under load, which may cause serious bodily injury or death, all Grape Solar PV modules are equipped with factory-installed PV wires and MC-4 connectors with locking safety clips. Once connected, the connector requires the use of a special tool to disconnect module-to-module connections.
- When making module-to-module connections, the polarities of cables and terminals must be matched. Failure to do so may result in damage to the module and void the module warranty.
- Use cables and wires with adequate cross-sectional areas (min. of 12AWG) and suitable MC-4 connectors which are approved for use at the maximum short-circuit current of the module.
- Over-current device (e.g. fuse or circuit breaker) whose rating is not greater than the value of the protective fuse marked on the back of the module must be serial connected with each module or string of modules when reverse current is anticipated to exceed the value of the module protective fuse.
- The junction box contains factory installed bypass diodes and is not designed to be field accessible or maintainable, and should not be opened under any circumstances. Opening the junction box will void the warranty.
Grounding
- To reduce the possibility of electrical shock and protect the PV system from lightning, all module frames and mounting racks must be properly earth grounded by using grounding hardware that has been UL-1703 certified and in accordance with the National Electrical Code before wiring the circuit.
- If the building at which the PV system is installed is already equipped with exterior lightning protection system, the PV system installation must be integrated in the lightning protection system.
- Each PV module has 2 holes on back frame with grounding sign . Grape Solar recommends the following three methods of grounding the module frame:
- Facing the back of the module, attach an ILSCO GBL-4DBT ground lug to either grounding hole at the back of the module. Place the ground lug on the module frame’s outer surface and in-line lengthwise. Insert a #8-32 x 0.5” stainless steel screw through the ground lug and frame, and secure from behind with a #10 stainless steel star washer and nut. Torque the screw to 25 inch lbs (2.8Nm).
- Use the UL-1703 listed grounding and bonding equipment (KDER), e.g. SOLKlip type 1954381-1 by Tyco Electronics Corp (E69905), or WEEB Type, to provide a reliable grounding connection to the module frame.
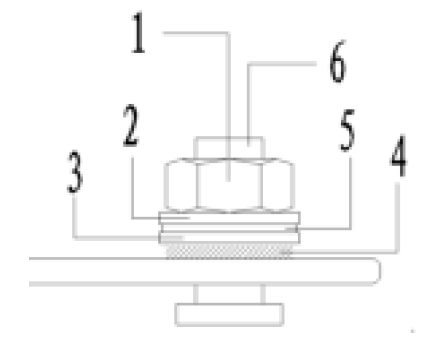
- Use a set of stainless steel grounding and bonding equipment including bolt/nut/cupped washer/flat washer/serrated washer to provide a reliable grounding connection to the module frame (refer to Figure-1). A flat washer is required between serrated washer and Φ2.5mm grounding wire. A cupped washer is required between grounding wire and the nut (with torque less than 4N•m). Grounding wire should be directly connected with the screw.
- The rack must also be grounded unless they are mechanically connected by nuts and bolts to the grounded PV modules. The array frame shall be grounded in accordance with NEC Article 250.

- Stainless steel M5 nut
- Stainless steel cupped M5 washer
- Stainless steel flat M5 washer
- Stainless steel M5 serrated washer
- Grounding lead
- Stainless steel M5 bolt
Mounting
- The modules have been evaluated by UL that can sustain a positive or negative design loading of 30 lbs/ft2 (1600 Pascal). The maximum mechanical load on the module must not exceed 45 lbs/ft2 (2150 Pascal) under any circumstance.
- Each module must be securely fastened at a minimum of 4 points using support frames or mounting kits specialized for PV applications.
- Panels may be mounted at any angle from vertical to horizontal orientation. However, to obtain maximum yield from the PV system, the direction and tilt angle for the modules shall be set to receive the incident sunlight perpendicularly to the module surface.
- For roof mounted systems, at least a 4 inch clearance is required between the module back surface and roof for rear ventilation and module cooling.
- Clearance of 1/24 inch (1mm) or more between modules is required to allow for thermal expansion of the frames.
- Keep the back surface of the module free from any foreign objects or structural elements which could come into contact with the module, especially when the module is under mechanical load.
- To prevent water from entering the junction box, which could result in a safety hazard, modules should not be mounted with the front/top glass facing downward.
- At least a 4 inch clearance between the module frames and structure, or wall, or ground is required to prevent wiring damage and allows air to circulate behind the module.
- PV modules can be mounted to the structure by the following methods:
- Mounting Holes: Secure the module to the structure using the mounting holes. There are 8 mounting holes on module frame which have been evaluated by UL for mounting. Attach ¼ -20 x 0.75” stainless steel screw via each mounting hole with ¼” stainless steel flat washer, and secure from behind with another stainless steel flat washer, local washer and nut. Torque the bolts to 6.3ft lbs (8.5Nm).
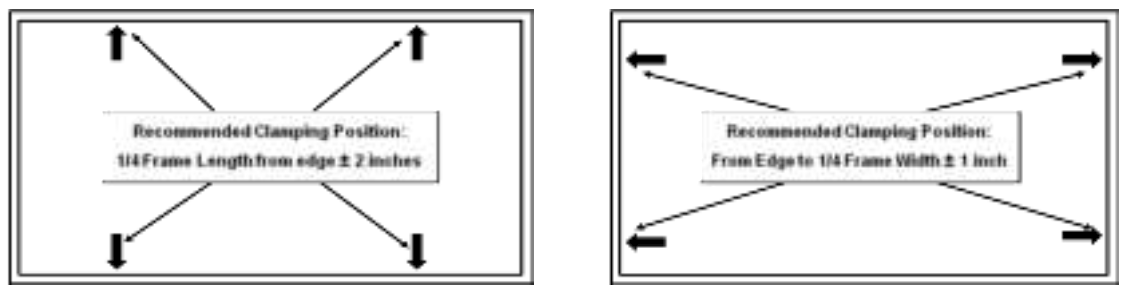
- Pressure Clamps or Clips: Mount the module with the clamps or clips on the module frame. Installers should ensure the clamps are of sufficient strength to allow for the maximum design pressure of the module.
- It is recommended that modules be securely fastened on the long side of the frames, but mounting the module only on the short side is allowed. The maximum mechanical load applied on the module must not exceed 30 lbs/ft2 (1600 Pascal).
MAINTANIENCE
- No routine maintenance is required.
- Grape Solar recommends that periodic inspection of the PV system for tight electrical and mechanical connection and free of corrosion should be performed.
- Periodic cleaning of modules is not required, but is recommended, as periodic cleaning can result in better performance of the PV system, especially in regions with low levels of annual precipitation.
- Do not remove the dirt by scraping or rubbing away from the module front surface when dry as this may cause micro-scratches on the glass and lead to module performance degrading.
- Water can be used for regular washing or rinsing of the module front glass to remove dust, dirt or other deposits.
- To remove ingrained dirt, first rinse off area and let soak for a short period of time (5-minutes). Re-wet and use a soft sponge or seamless cloth to wipe glass surface in a circular motion. Mild detergent or glass cleaner may be used to clean the ingrained dirt, but harsh cleaning materials such as scouring powder, steel wool, scrapers, blades, or other sharp instruments must not be used to clean the module. Use of such materials will void the product warranty.
- Always wear rubber gloves for electrical insulation while maintaining, washing or cleaning panels.
DISCLAIMER OF LIABILITY
Since the use of this safety and installation manual and the conditions and methods of installation, operation, use and maintenance of the modules are not checked or monitored by Grape Solar Inc., Grape Solar assumes no liability for loss, damage, injury or expense arising through improper use or incorrect installation, operation or maintenance.
Furthermore, Grape Solar assumes no responsibility for any infringement of patents or other rights of third parties that may result from use of the module. No license is granted by implication or otherwise under any patent or patent rights.
The information in this Manual is based on Grape Solar’s knowledge and experience and is believed to be reliable; but such information including product specifications (without limitations) and suggestions do not constitute a warranty, expressed or implied. Grape Solar reserves the rights to make changes to the product, specifications or this Manual without prior notice.
Appendix
PV Module Electrical Specification
| Model
Max System Voltage (IEC/UL) Maximum Power Pmax |
GS-Star-100W
600V 100 W (0%, +6%) |
| Cell Type | Poly silicon |
| Voltage at Maximum Power Point Vmpp | 18.0 V |
| Current at Maximum Power Point Impp | 5.56 A |
| Open Circuit Voltage Voc | 21.9 V |
| Short Circuit Current Isc | 6.13 A |
| Module Efficiency (%) | 13.88% |
| Temperature Coefficient of Voc | (-0.32% /ºC) |
| Temperature Coefficient of Isc | (0.04% /ºC) |
| Temperature Coefficient of Pmax | (-0.45% /ºC) |
NOTES: The electrical characteristics are within ±10 percent of indicated values of Isc, Voc, and Pmax under standard test conditions (irradiance of 1kW/m2, AM1.5 spectrum, and cell temperature of 25℃). Photovoltaic modules may produce more current and /or voltage than reported at standard test conditions. Accordingly, the values of Isc and Voc marked on the module should be multiplied by a factor of 1.25 when determining component voltage ratings, conductor ampacities, fuse sizes, and sizes of regulators which are connected to the PV output. Refer to Section 690-8 of the National Electrical Code for an additional multiplying factor of 125 percent (80 percent derating) which may be applicable.
References
[xyz-ips snippet=”download-snippet”]