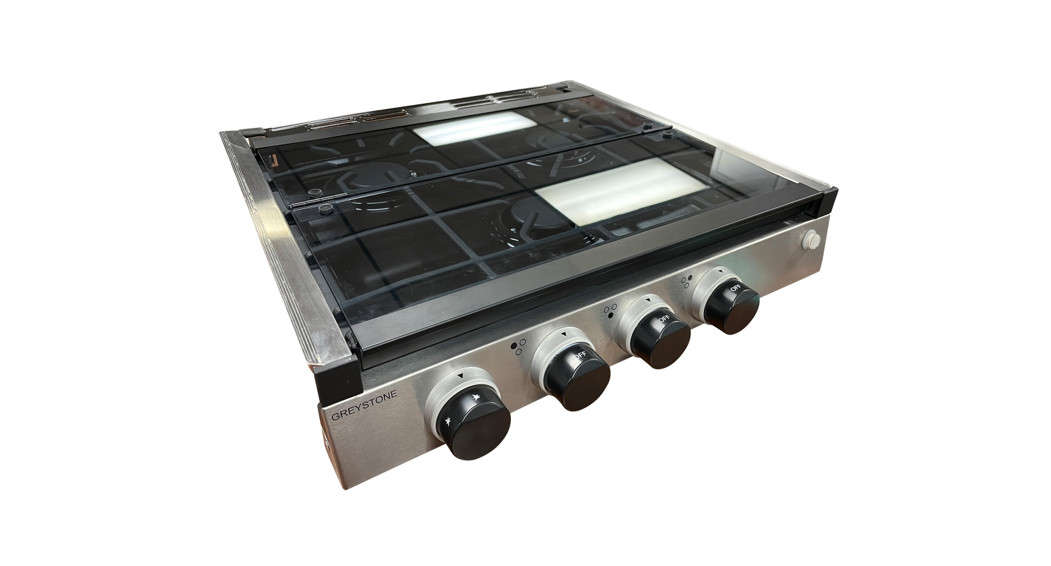
INSTRUCTION MANUALGas HobModels: CF-RVH0B17/CF-RVH0B17B
Getting Started
We appreciate your purchase of the GREYSTONE Gas Hob for RVs. Prior to operating your new appliance, please read this manual carefully. This Instruction manual contains Information for safe use, installation, and maintenance of the appliance.
You will want to keep this manual handy for future reference. Using the hobby following the directions In this manual will help ensure safe use and reduce the risk of injury. Please pass on this manual to future owners of your Hob.
The manufacturer accepts no responsibility for any damage caused by not observing these instructions.
Safety Precautions
WARNING
Warning: If the instructions in this manual are not followed exactly, a fire or explosion may result causing property damage, personal injury or death.
Do not store or use gasoline or other flammable vapors or liquids near this or any appliance.
WHAT TO DO IF YOU SMELL GAS:
- Do not try to light any appliance
- Do not touch any electrical switch
- Do not use any phone in your recreational vehicle
- Clear the recreational vehicle of all occupants
- Turn off the gas supply tank valve(s) or main gas supply
- From a location away from the gas smell, Immediately call your gas supplier for instructions
- If you cannot reach your gas supplier, call the fire department
- Have the gas system checked and leakage source corrected by a qualified installer, service agency, manufacturer of dealer of the gas supplier.
is the safety alert symbol. This symbol alerts you to potential hazards that can result in property damage and/or serious bodily harm or death. All safety messages will follow the safety alert symbol and either the word WARNING or CAUTION. These words mean:
WARNING
Warning: Hazards or unsafe practices COULD result in severe personal injury or death.
Caution
Caution: Hazards or unsafe practices COULD result in minor personal injury
Read the follow all instructions before using this application to’ prevent the potential risk of fire, electric shock, personal injury or damage to the appliance as a result of improper usage of the appliance. Use appliance only for its intended purpose as described in this guide.
If an external electrical source is utilized, the appliance must be electrically grounded in accordance with state or other codes or, in the absence of such codes, with the National Electrical Code (AN51/NFPA 70). Do not attempt to adjust, repair, service, or replace any part of your appliance unless it is specifically recommended in this guide. Other services should be referred to a qualified service technician.
Warning and important safety instructions appearing in this guide are not meant to cover all possible conditions and situations that may occur. Common sense, caution, and care must be exercised when installing, maintaining, or operating the appliance. Always contact the manufacturer about problems or conditions you do not understand.
Safety Instructions
To reduce the risk of tipping the appliance from abnormal usage, the appliance must be secured by a properly installed anti-tip device.
- Remove all tape and packaging before using the Hob. Destroy the carton and plastic bag after unpacking the Hob. Never allow children to play with packaging material.
- Your appliance should be installed by a qualified technician in accordance with state and local laws.
- Never modify or alter the construction of a Hobby removing leveling legs, panels, anti-tip brackets/screws, or any other pant of product.
Children climbing on the hob to reach items could be seriously injured.
WARNING
NEVER use this appliance as a space heater to warm a room. Doing so may result in carbon monoxide poisoning and overheating the hob.
NEVER cover rear vent on the countertop. Never cover an entire rack with materials such as aluminum foil or any other flammable items. Doing so blocks airflow through the hob and may cause carbon monoxide poisoning, explode, or start a fire.
- The appliance and its individual shutoff valve must be disconnected from the gas supply piping system during any pressure testing of that system at test pressures in excess of 1/2 psi(3.5 kPa).
- The appliance must be isolated from the gas supply piping system by closing its individual manual shutoff valve during any pressure testing of the gas supply piping system at test pressures equal to or less than 1/2 psi(3.5 kPa)
- DO NOT TOUCH SURFACE BURNERS, AREAS NEAR THESE BURNERS.
During and after use, do not touch or let clothing or other flammable items touch these areas until they have sufficient time to cool down. Both surface burners may be hot even though flames are not visible and may be hot enough to cause burns.
- Wear proper apparel: Loose-fitting or hanging clothing should never be worn while using this appliance.
- When heating fat or grease, watch it closely. Fat and grease may catch fire if allowed to become too hot. If there is a grease fire, smother the fire with a pan lid, use baking soda, or a dry chemical or foam-type extinguisher. DO NOT USE WATER OR FLOUR.
WARNING
Gas leaks may occur in your system and result in a dangerous situation. Gas leaks may not be detected by smell alone. Gas suppliers recommend you purchase and install UL-approved gas detectors. Install and use in accordance with the manufacturer’s instructions.
Use only dry potholders and do not let potholders touch hot heating burners. Do not use a towel or other bulky doth or towels in place of potholders.
Never heat unopened food containers as the buildup of heat and pressure may cause the container to explode and result in injury.
IMPORTANT: Do not attempt to operate the appliance during a power failure. If the power fails, always turn off the hob because the hob may begin to operate again when power resumes, even if nobody is present. Once power is restored reset the clock.
Instructions for using your cooktop
- Using proper flame size: adjust the flame so it does not extend beyond the edge of utensils. Undersized utensils will expose a portion of the burner flame to direct contact and may result in the ignition of clothes. Proper utensils and flame sizes will improve efficiency, Burners are different sizes for different utensil sizes. The furniture above hobs has the potential risk during hobs working.
- If you use stovetop grill on a sealed gas burner, it will cause incomplete combustion and can result in carbon monoxide poisoning.
- Know which knob controls each surface burner. Place a pan of food on the burner before turning it on, and turn the burner off before removing the pan.
- Always turn the knob to the full LIGHT position when igniting top burners and visually check that burner is lit..
- Then adjust the flame so it does not extend beyond the edge of the utensil.
- Utensil handles should be turned outward and not extend over adjacent surface burners. This wilt help reduce the risk of burns, ignition of flammable materials, and spillage due to unintentional contact with the utensil.
- Never leave surface burners unattended at high heat settings:Boil avers cause smoking and greasy spillovers that may ignite,
- Protective liners: Do not use aluminum foil to line surface burner pans, except as suggested in this manual, Improper installation of these liners may result in a risk of electric shock or fire.
- Do not use the searing grill on the cooktop. Searing grills are not designed for use on the cooktop. Doing so may result in a fire.
- Do not use decorative surface burner covers. If the burner is accidentally turned on, covers will become hot and possibly melt. There may be damage to the cooktop due to overheating and can lead to combustion problems.
- Glazed cooking utensils: Only certain types of glass, glass/ceramic, or other glazed utensils are suitable for hob top use. Avoid the use of glazed utensils whenever possible.
Cleaning Instructions
Clean your hob regularly to keep all parts free of grease that could catch fire. Exhaust fan ventilation hoods and grease filters should be kept clean. Do not allow grease to accumulate on htiodor filter as greasy deposits in the fan could ignite. When you are cooking food under the hood, turn the fan on.
Installation
The installation must conform with state or other codes or, in the absence of such codes and the standard for Recreational Vehicles (ANSIAFPA 1192).
WARNINGInstallation of this appliance must adhere to the written instructions in this manual. No agent, representative, or employee of the manufacturer of GREYSTONE appliances or other person has the authority to change, modify or waive any provision of the instructions in this manual.
Cabinet Cutout Instructions
To ensure proper operation of your hob, suitable cabinets must be used, and cabinets must be leveled, with the bottom of the hob supported.
Notes:
- There must be a ventilation hole in the cabinet for air circulation.
- The minimum vertical distance from the cooking top is 30″.
Using non-combustible materials and construction can reduce distance.
- The maximum depth of cabinets installed above the cooking top is 13″.
- The minimum distance between the floor and bottom of the cutout is 4″. The minimum distance to the bottom of the hob hood is 19.5″.
- The minimum horizontal distance(s) for sides and back of the hob to adjacent vertical combustible walls extending above the top panel:
- 25″ from the side walls
- 9″ from the rear wall
These distances are measured from the center of the appliance.
Hob installation
Once the cabinet has been prepared according to the dimensions wire to the appliance from the upper right-rear corner of the provided and once the gas line is in place: cabinet. (Fig. 4)
- Remove packing material, tape, and any temporary labels from your hob. (Fig. 1)
- Push back the top glass cover assembly a little and lift up to remove it from the hob. (Fig. 2)
- Slide the hob into the cabinet opening. Verify the hob is level from side to side and front to rear. (Fig. 3)
- Connect a gas supply line with a shut-off valve and 5/8- 18UNF connection to the hob through the gas cavity on the upper Left-rear corner of the cabinet. Connect a 12V power supply
- Use four tapping screws on both left and right to secure the hob (Fig. 5)
- +
- Check the pipe fittings for leaks using a soapy solution. Never use a flame. Push to insert the top glass cover assembly into the metal dip and place it into the hob, then pull front a little to lock into place. (Fig. 6 & Fig. 7)
- The hob is completely Installed into the cabinet. (Fig. 8)

Electrical Connection
A model with LED light: Connect the light wires to a 12V DC circuit with a fuse protected and a max rating of no more than 15 amps.
Operation
Lighting Top Burners WARNINGThe top cover must be open when the main burner is in operation. Based on safety considerations, the top burner flame size should be adjusted so it does not extend beyond the edge of the cooking utensil.
Match Lighting:
- Before lighting, check to make sure the control knobs are turned to OFF position
- Make sure the main gas tank valve is open
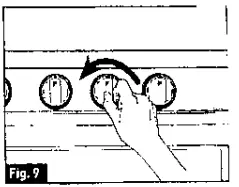
- Turn the appropriate burner knob counterclockwise to the LIGHT position. (Fig. 9)
- IMMEDIATELY strike and place lit, long wooden match or a butane Lighter with extension) through the spaces in the grate near the ports of the burner to light the burner. Repeat steps 3 & 4 to light all burners (Fig. 10)
- Push and turn the burner control knob to adjust the flame ‘ level. (Fig 11)
Electronic Ignition:
- Before lighting, make sure the control knobs are turned to the OFF position.
- Make sure that the main gas tank valve is open.
- Rotate the appropriate burner knob counterclockwise to the LIGHT position. (Fig. 9)
NOTE: Do not attempt to light more than one burner at a time.
- Turn the ignition knob clockwise repeatedly until the burner lights.
To Turn Off:
To extinguish the top burner flame, push and turn the control knob clockwise to the OFF position. Always turn off the gas tank valve when refueling or traveling.
The Burner Flame: Keep your arms and face away from above the cooking area. Flames should appear similar to the good flame shown in the diagram below.

A good flame should be blue with a yellow tip. Some yellow tips on flames up to 1 inch in length are acceptable as long as no carbon or soot deposits appear. If flames are excessively yellow and irregular, the oil residue may not be completely burned off, or the Venturi may be clogged or may not be properly positioned over the holes. Allow the appliance to cool before repositioning the Venturi over the valve and holes.
LED Light
Press the button to manually turn the knob light on/off.
Leak Check:
Always perform a leak test for possible leaks according to the manufacturer’s instructions before any operation. Pressure/Leak test using 11-13.8 WC pressure.
WARNING
Extinguish all open flames. NEVER Leak test when smoking. Do not use the hob until the connection has been leak-tested and does not leak.
- Make sure all control knobs are turned to the OFF position.
- Apply a gas leak detection liquid such as soapy water to the
- Gas leaks will be detected with the presence of bubbles.
- To stop the leak, tighten the loose joint, or replace the faulty part with a replacement part recommended by the dealer.
WARNING
PRODUCT DAMAGE HAZARD
DO NOT cook with the control knob set in the LIGHT position. Damage to the ignition module and burner electrodes may result.
DO NOT use oversized cookware. The pan should not be more than one inch larger than the burner grate. The maximum pan size is a 10-inch skillet. Oversized cookware will cause excessive heat build-up in the appliance top and will result in damage to the burner grate, burner, and cooktop.
DO NOT use a broiler pan, griddle, or any other large utensil which covers more than one [1) top burner at a time. This will create excessive heat which may cause melting, shooting, or discoloration damage to the burner grates, hob top, or utensils.
DO NOT leave an empty utensil or one which has boiled dry, on a hot top burner. The utensil could overheat and damage the utensil or the cooking appliance.
Hob Features
| Optional power | Gas power |
| BTU/HR | Lett and Right Burner: 6500 BTU |
| Front Burner: 8000BTU | |
| Fuel 1Power | propane |
| Inlet Pressure | 10″ WC Min to 13.8″ WC Max |
| Power Input | 12V DC <2 Amp s |
This appliance conforms to the directive: ANSI 221.67a(2012) Rec/ CAN1- 1.16-M791R2011
| 1 | Glass Cover |
| 2 | Grill |
| 3 | Ignition Knob |
| 4 | Top Burner Control Knob |
| 5 | Backlight |
| 6 | Burner |
Troubleshooting
| PROBLEM/SYMPTOM | POSSIBLE CAUSE/SOLUTION |
| Surface burners do not light or do not burn evenly
. |
The surface control knob has not been fully rotated to the LIGHT position. |
| Check to see if the gas valve is open. IF not, open it. | |
| Burners are clogged. Make sure the burner is off. Use a small wire, toothbrush, or needle to clean burner ports and slots. | |
| Low gas level In the tank. Refill or replace the gas tank. | |
| Low battery power. Replace AAA battery which is under igniter cap. | |
| There Is moisture on the burner. With burner off, dry burner completely. | |
| The surface burner flame is yellow or orange instead of blue | Debris may be present in the gas line. Let the burner run for a few minutes to see if the flame changes to blue. |
| Humid air in the home, sometimes caused by running a humidifier, may cause flames to be burn yellow. |
Cleaning and Maintenance
- Make sure all controls are OFF and the cooktop is cool before
- DO NOT use cleaners, bleach, steel wool, or rust removers on the cooktop or burner grates. Only use non-abrasive pads.
- DO NOT obstruct the flow of combustion and ventilation air.
- Keep appliance area clear of combustible materials, gasoline, and other flammable vapors and Liquids.
- Never use a wire brush or metallic item for cleaning burner ports or orifices. The brush may “shed” bristles that may lodge in the orifice or burner ports and cause a or explosion.
- Use warm soapy water only to clean the burner grates, cooktops, painted surfaces, porcelain surfaces, stainless steel surfaces, and plastic items on your cooktop. Do not use gritty or acid-type cleaners.
- DO NOT allow foods containing acids (such as lemon or tomato juice, or vinegar) to remain on porcelain or painted surfaces. Acids may remove the glossy finish. Wipe up egg spills when the cooktop is cool.
- DO NOT wash warm porcelain surfaces. Allow these areas to cool before cleaning. You could burn yourself, or the porcelain could crack.
- Pitting and discoloration will result if spills are allowed to remain for any length of time on stainless steel.
- DO NOT allow spillovers to remain on the burner caps. The caps could become permanently stained.
- When cleaning around the burners, use care to prevent damage to the electrode (if so equipped). If a sponge or cloth should catch the metal igniter electrode, it could damage or break the electrode. If this occurs, the burner will not light.
Exploded-view Drawing

| 1 | Lamp Switch |
| 2 | Knob |
| 3 | LED PCB |
| 4 | ‘igniter Knob |
| 5 | Decoration Ring |
| 6 | knob Holder |
| 7 | Front Burner Valve |
| 8 | Rear Burner Valve |
| 9 | Igniter |
| 10 | Control Panel |
| 11 | Control Panel Holder (Right) |
| 12 | Control Panel Holder (Left) |
| 13 | Side Panel |
| 14 | Decoration Bar Left |
| 15 | Gas-in Pipe Holder |
| 16 | Glass Cover Fixer Front) |
| 17 | Inner Chamber Front Plate |
| 18 | Gas-in Pipe Holder |
| 19 | Regulator |
| 20 | Insulation Plate |
| 21 | Rear Gas-in Pipe |
| 22 | Working Table |
| 23 | Front Pan Support Grill |
| 24 | Glass Cover |
| 25 | Glass Cover Hinge |
| 26 | Rear Pan Support Grill |
| 27 | Glass Cover Holder (Rear) |
| 28 | Chimney Decoration Panel |
| 29 | Glass Cover Axis Holder |
| 30 | Glass Cover Spring |
| 31 | Nut |
| 32 | Fire Distributor |
| 33 | Front Burner Ignition Pin |
| 34 | Mica Sheet |
| 35 | Left Burner Pipe |
| 36 | Rear Plate |
| 37 | Burner Cover |
| 38 | Rear Burner Ignition Pin |
| 39 | Grill Silicon |
| 40 | Burner Holder |
| 41 | Decoration Bar Right |
| 42 | Right Burner Pipe |
| 43 | Front Burner Pipe |
Warranty
Your GREYSTONE appliance is covered by a one-year limited warranty. For one year from your original date of purchase of the original purchaser, GREYSTONE will pay costs for repairing or replacing any parts of this appliance that prove to be defective in materials or workmanship when such appliance is installed, used, and maintained in accordance with the provided instructions.
Exclusions
This warranty does not cover the following:
- Products on which original serial numbers have been removed, altered or cannot be readily determined.
- The product that has been transferred from its original owner to another party or removed outside that USA or Canada.
- Rust on the interior or exterior of the unit.
- Products purchased secondhand.
- Products used commercially.
- Service calls that do not involve malfunction or defects in materials or workmanship, or for appliances not in ordinary household use or used other than in accordance with the provided instructions.
- Service calls to correct the installation of your appliance or to instruct you how to use your appliance.
- Expenses for making the appliance accessible for servicing, such as removal of trim, cupboards, shelves, etc., which are not a part of the appliance when it is shipped from the factory.’
- Service calls to repair knobs, buttons, handles, or other cosmetic parts.
- Surcharges include, but are not limited to, any after-hour, weekend, or holiday service calls, tolls, ferry trip charges, or mileage expenses for service calls to remote areas, including the state of Alaska.
- Damage to the finish of appliance, RV, or home incurred during installation, including but not limited to floors, cabinets, walls, etc.
- Damage caused by services performed by unauthorized service companies, use of parts other than genuine GREYSTONE parts or parts obtained from persons other than authorized service companies, or external causes such as abuse, misuse, inadequate power supply, accidents, fires, or acts of God.
The customer’s sole or exclusive remedy under this limited warranty shall be product or repair or replacement as provided herein. Claims based on implied warranties, including warranties of merchantability or fitness for a particular purpose, are limited to one year or the shortest period allowed by law, but not less than one year. GREYSTONE shall not be liable for consequential or incidental damages such as property damage and incidental expenses resulting from any breach of this written limited warranty or any implied warranties, so these limitations or exclusions may not apply to you. This written warranty gives you specific legal rights. You may also have other rights that vary from state to state.
Keep your receipt to establish the warranty period should service berequired. If service is performed, please obtain and keep all receipts. Product features or specifications as described or illustrated are subject to change without notice.
report this ad
For further information, please contact:Way Interglobal Network, LLC3002 Coast CtElkhart IN 46514(574) 971-4490Hours: Monday- Friday7:30 a.m. -4 p.m. Eastern TimeClosed Saturday- Sunday
[xyz-ips snippet=”download-snippet”]