![]()
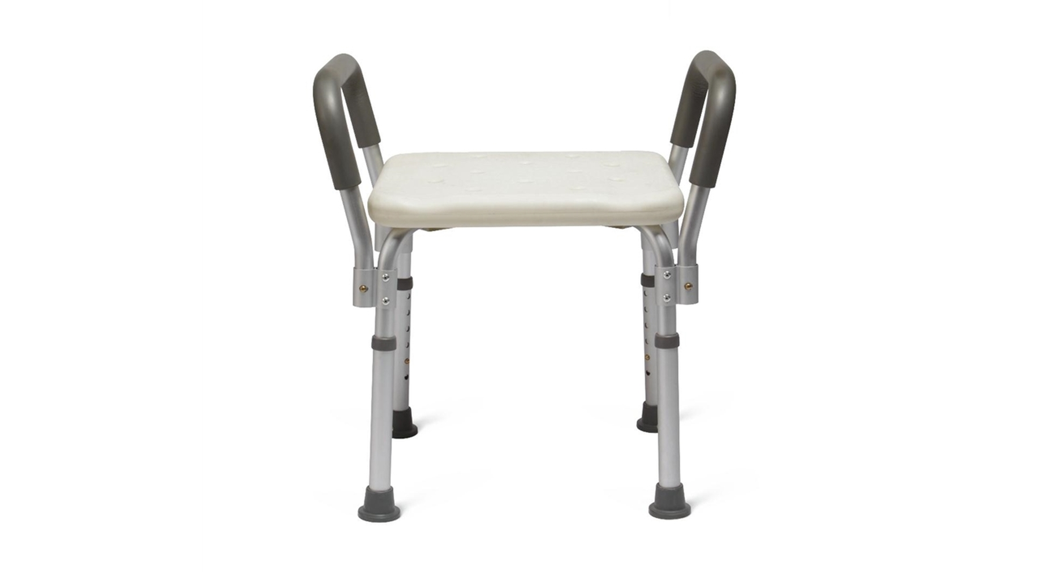
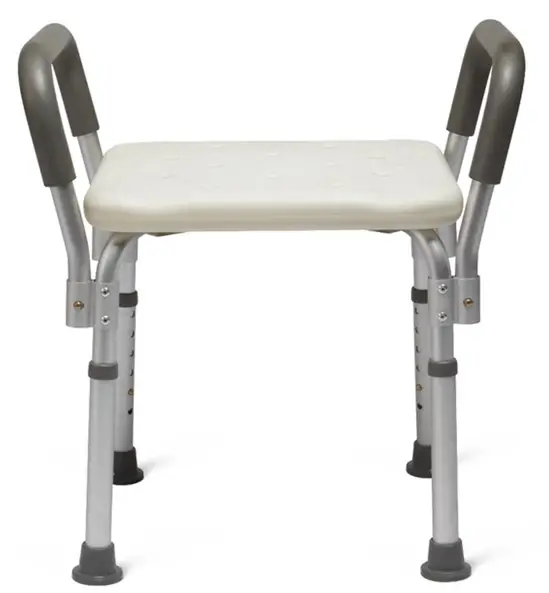
![]() Family-owned. Trusted by hospitals for over 50 years.BATH BENCH WITH ARMSUSER INSTRUCTIONS & WARRANTY
Family-owned. Trusted by hospitals for over 50 years.BATH BENCH WITH ARMSUSER INSTRUCTIONS & WARRANTY
 REF MDS89740RWAREF MDS89740RWAHNot Made With Natural Rubber Latex.LIFETIMELIMITED WARRANTY
General Warnings
To ensure the safe installation, adjustment, and operation of the Bath Bench, these instructions MUST be followed.FAILURE TO FOLLOW INSTRUCTIONS MAY RESULT IN SERIOUS INJURY TO THE USER OR DAMAGE TO THE PRODUCT.If you are unable to understand these warnings, cautions, and instructions, contact a healthcare professional or dealer before attempting to use this equipment.Warnings:![]() Prior to each use check to assure that all screws, joints, and fittings on the bath bench are tight.
Prior to each use check to assure that all screws, joints, and fittings on the bath bench are tight.![]() DO NOT place bath bench on uneven surfaces.
DO NOT place bath bench on uneven surfaces.![]() DO NOT use if wobbly, unstable, or not level.
DO NOT use if wobbly, unstable, or not level.![]() DO NOT exceed the user weight capacity of 350 lbs (159 kg).
DO NOT exceed the user weight capacity of 350 lbs (159 kg).![]() DO NOT stand on the bath bench.
DO NOT stand on the bath bench.![]() DO NOT twist or turn while seating on the bath bench, this may cause damage to the frame.
DO NOT twist or turn while seating on the bath bench, this may cause damage to the frame.![]() DO NOT use the bath bench for anything but its intended purpose.
DO NOT use the bath bench for anything but its intended purpose.![]() DO NOT Do not adjust the leg extensions while seated on the bench.
DO NOT Do not adjust the leg extensions while seated on the bench.![]() When transferring in and out of the unit, evenly distribute weight between the arm supports.
When transferring in and out of the unit, evenly distribute weight between the arm supports.![]() Use the arm supports only for assistance.DO NOT attempt to use the arms to support full body weight.√Check tips for rips, cracks, or wear. If these conditions exist, DO NOT use the bath bench and replace the tips immediately.√Check the bench for cracks or ruptures in the plastic. If you have concerns, contact Medline at 1-800-633-5463.√Check that all push buttons are fully protruded from the mainframe through the leg extensions and are properly engaged.√Ensure all four legs are adjusted evenly and are free of any obstructions prior to use.
Use the arm supports only for assistance.DO NOT attempt to use the arms to support full body weight.√Check tips for rips, cracks, or wear. If these conditions exist, DO NOT use the bath bench and replace the tips immediately.√Check the bench for cracks or ruptures in the plastic. If you have concerns, contact Medline at 1-800-633-5463.√Check that all push buttons are fully protruded from the mainframe through the leg extensions and are properly engaged.√Ensure all four legs are adjusted evenly and are free of any obstructions prior to use.
Parts Listing
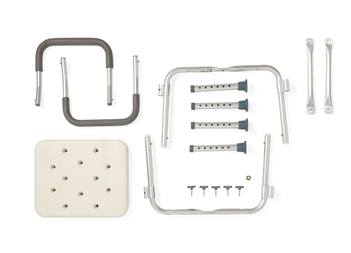
Ensure that you have all of the necessary components before assembling your bath bench.If any parts are missing, DO NOT USE, please contact Medline at 1-800-633-5463.
| Part Identification | Part Description | Quantity |
| A | Bench | 1 |
| B | Aluminum Main Frames | 2 |
| C | Aluminum Extension Legs | 4 |
| D | Padded Arm Rests | 2 |
| E | Hand Screws | 5 |
| F | Curved Washer | 1 |
| G | Reinforcement Bars | 2 |
Assembly Instructions
- Place the seat bench upside down on top of a raised flat surface (Figure 1).
- Insert the mainframe with an “A” imprinted on it into the indentation on the underside of the bench with an “A” imprinted on it (Figure 2).
- Insert the mainframe with a “B” imprinted on it into the indentation on the underside of the bench with a “B” imprinted on it (Figure 2).
- Secure the center cross-section using the curved washer and a hand screw (Figure 2).

- Place the reinforcement bars across mainframes labeled “A” and “B”. Insert a hand screw through each end of the reinforcement bar (Figure 3).
- Insert a leg extension piece on all four legs of the mainframe (Figure 4A).
- Depress the pushbutton and adjust each leg extension to the same height on all four legs of the mainframe. Check that all pushbuttons fully protrude from the mainframe (Figure 4B).
- Stand the chair upright.
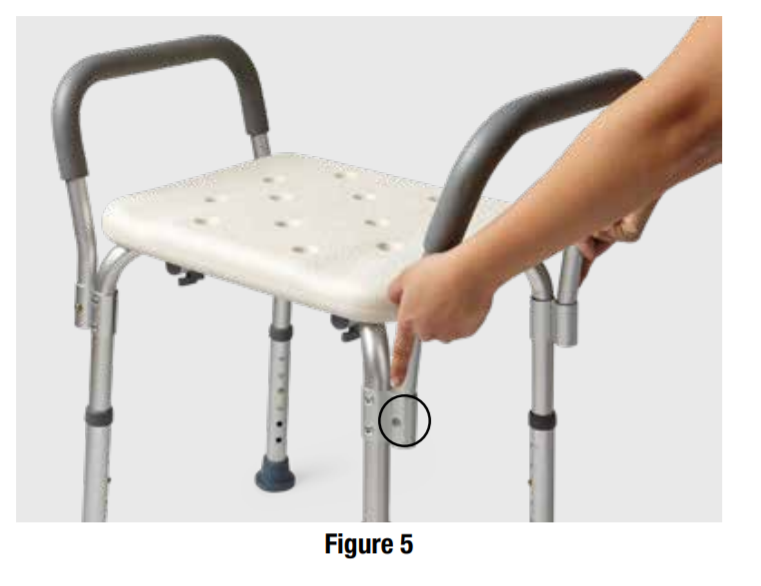
- Insert an armrest on each side of the seat bench. Ensure the curved bar of the armrest extends outward from the bench (Figure 5).
- Depress the pushbutton and check that the pushbutton protrudes fully (Figure 5).


Adjusting the Bench to the Proper Height:
- While standing in front of the assembled bench, as if preparing to sit, the back of the user’s knees should touch the front side of the seat bench. This should allow the user’s feet to be firmly on the floor while properly seated.
- Adjust the leg extensions as needed.
- Ensure all four tips rest evenly on the floor.
Maintenance
- Prior to use:
- Inspect the bath bench for damaged or loose components, and ensure that all parts are secure.
- Check that all four legs are adjusted evenly.
- Check the tips on the leg extension for rips, cracks, or wear.
- Check the bench and back seat for cracks or ruptures in the plastic.
- Clean with regular household cleaning products, use a non-abrasive cleaner with warm water. DO NOT use abrasive powders or scouring pads.
NOTE: If any part or mechanism appears to be unsafe or damaged, DO NOT USE THE PRODUCT. If you experience problems, please contact Medline at 1-800-633-5463.
LIMITED WARRANTY
Your Medline product is warranted to be free of defects in materials and workmanship for the duration of use by the original purchaser. This device was built to precise standards and carefully inspected prior to shipment. This limited warranty is an expression of our confidence in the materials and workmanship of our products and assures years of convenient, dependable service. In the event of a defect covered by this warranty, we will, at our option, repair or replace the device. This warranty does not cover device failure due to owner misuse or negligence, or normal wear and tear.The warranty does not extend to non-durable components, such as rubber accessories, which are subject to normal wear and replacement.
![]()
![]() Medline Industries, Inc.Three Lakes Drive,Northfield, IL 60093 USA
Medline Industries, Inc.Three Lakes Drive,Northfield, IL 60093 USA
| Medline United States1-800-MEDLINE (633-5463)www.medline.com [email protected] | Medline Canada1-800-268-2848www.medline.ca[email protected] | Medline Mexico1-800-831-0898http://www.medlinemexico.com[email protected] |
© 2021 Medline Industries, Inc.Medline is a registered trademark of Medline Industries, Inc.Guardian is a registered trademark of Medline Industries, Inc.Some products may not be available for sale in Mexico or Canada.Please contact your Account Representative for additional information.We reserve the right to correct any errors that may occur within this manual.MDS89745RA (PIC-00303)Rev: 03/15/2021
References
[xyz-ips snippet=”download-snippet”]