GVMLED GVM-7SM Mini LED On-Camera Bicolor User Manual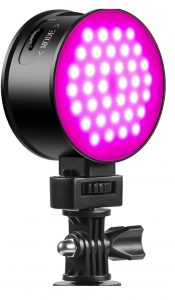
Product Introduction
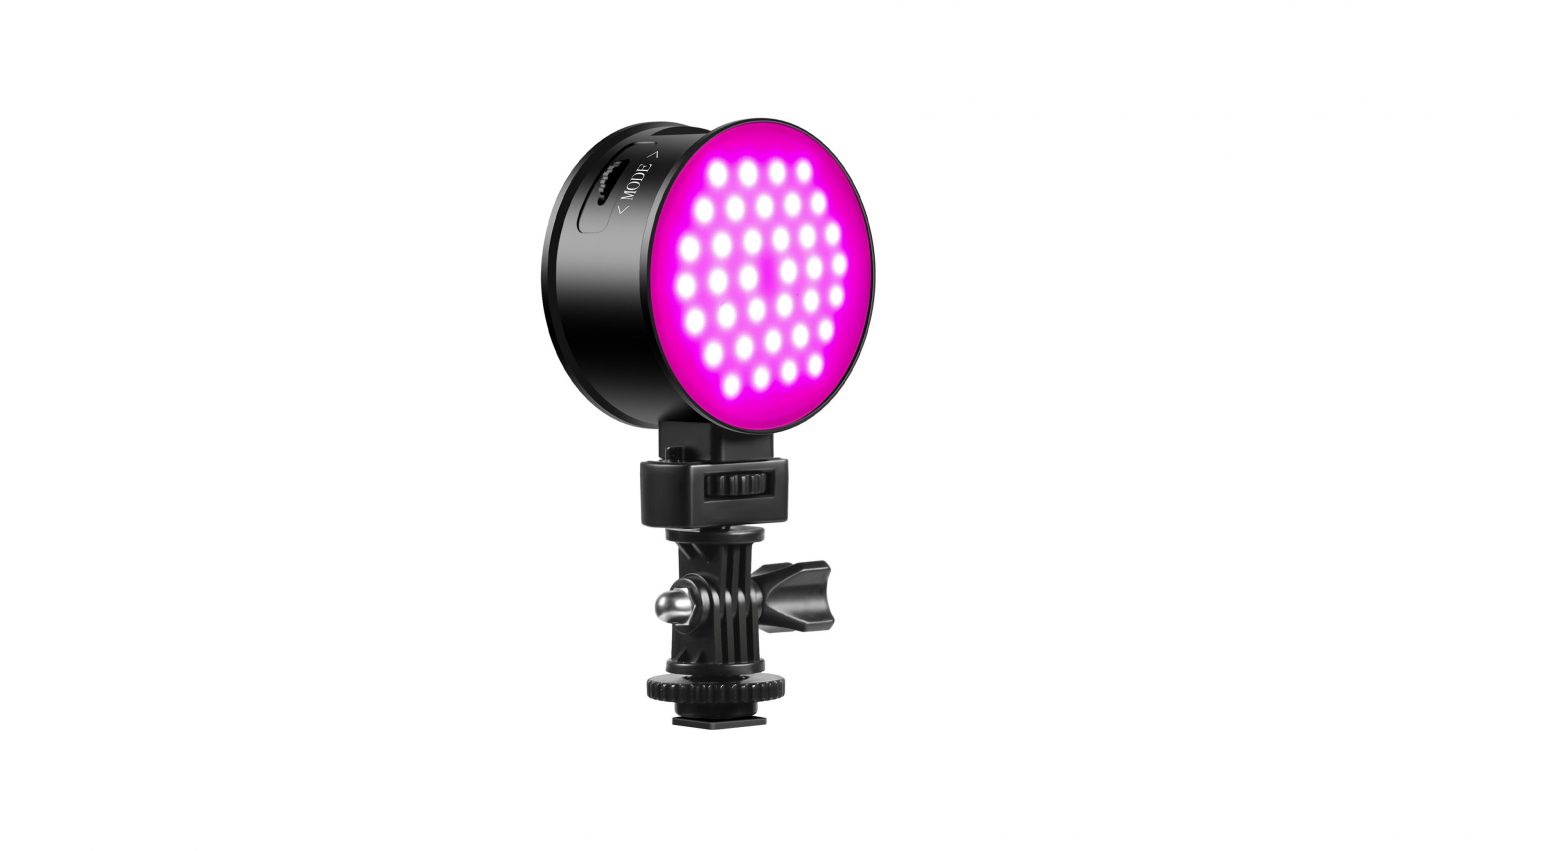
Welcome to “GVM-7SM”. This product is specially designed for senior photography enthusiasts. The product is suitable for live / outdoor / studio photography, and also for YouTube video shooting. The main features of the product are:
- Step-less adjustable RGB color and dual color temperature feature, brightness I color temperature / hue I color purity can be controlled at will, color range 2700K – 6500K, with 124 LED lamp beads, which is helpful to restore and enrich the color of objects and provide you with natural and vivid shooting effect.
- App intelligent control system, which can be controlled by your intelligent mobile device.
- With an OLED screen display and a stable system, and comes with a soft light board to make the light softer, allowing you to easily and casually shoot the desired results.
- Small size and light weight, and built-in battery power supply. It is very portable for outdoor shooting.
- Can simulate 8 kinds of scene lights: Lightning, Police Car, Candlelight, TV, Bad LED Bulb, Party, Disco, Paparazzi.
We believe that once using our product correctly, you can make huge progress when shooting. Before using the product, you are strongly recommended to read the instructions below carefully.
DISCLAIMERS
- Before using this product, please read the instructions carefully and make sure use the product correctly. If you don’t obey the instructions and warnings, you maybe cause harm to yourself and the people around, or even damage the product and other things around.
- Once you use this product, you are deemed to have read the disclaimer and warning carefully, understand and acknowledge all the terms and contents of this statement, and promise to take full responsibility for the use of this product and possible consequences.
PRECAUTIONS
- Please use the matching power adapter or lithium battery with the same specification to power the product. Do not use power adapter with different output voltage parameters.
- The product is not waterproof, please use it in rainproof environment.
- The product is not anti-corrosion, therefore do not let the product touch any corrosive liquid.
- When using the product, make sure the product is put firmly and prevent from falling and damage.
- If the product will not be used for a long time, please switch off the power to reduce energy loss.
PRODUCT PARAMETER
- Brand : GVM
- Product Name : Double-sided
- Photography LED Light Product Type : Photography Fill Light
- Product model : GVM-7SM
- Product material : Aluminum Alloy + PVC
- Lamp beads quantity : 124
- Color rendering index :
- Color temperature : 2700K-6500K Hue : RGB 0° -360°
- Brightness : 1200Iux/0.5m, 6001ux/lm
- Light adjustment method : Step-less adjustment
- Features: Bluetooth APP Connection, High CRI LED Beads, OLED Screen, Multiple Scene Modes
- Power : 7W
- Voltage : DC5V
- Power supply mode : DC5V Input & Battery
- Battery capacity : 3.7V/ 3000mAh
- Product weight : 0.25KG
- Product size ( mm ): 80’106.42
- Cooling : Natural heat dissipation
- Commodity origin : Huizhou , China
PRODUCT STRUCTURE ANALYSIS
CCT light-emitting surfaces:Dual color temperature LED lamp beads
This light has CCT and RGB two light-emitting surfaces, and both s des cannot be lighted up at the same time. One side is lighted according to the mode and scene.
INSTALLATION METHOD
- Fully charge the lamp firstly (charger current>2A), and the screen can display the battery level after power on.

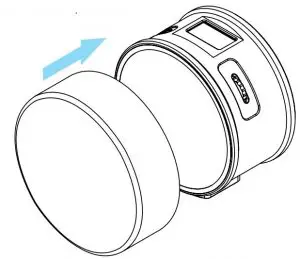
- You can choose to install an external diffuser according to your needs.The installation steps are as follows
- You can choose to install the supplied hot shoe bracket or small head according to your needs. The installation steps are as follows:
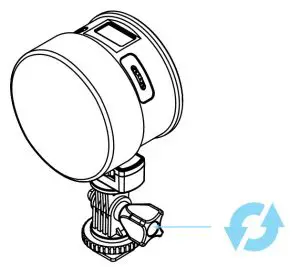
- Loosen the angle locking knob of the small pan-tilt, you can adjust the angle of the small pan-tilt, and tighten the angle locking knob after adjusting the angle.
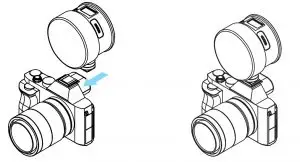
- Install it on the camera as shown below.Hot shoe bracket installation steps
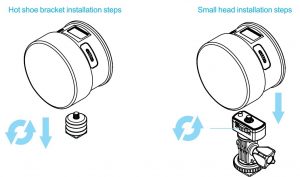
Small head installation steps

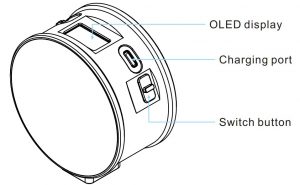
DESCRIPTION OF PRODUCT CONTROL KEYS
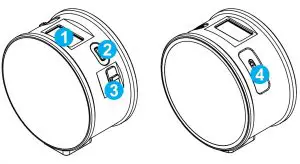
- OLED display: Display current power, mode, parameters, scenes etc
- Charging line interface
- Power switch
- Compound knob:
- Long Press-Switch mode: CCT / HSI / EFFECTShort Press-Switch the adjustable parameters in current mode Turn-Adjust the currently selected parameter
FUNCTION & INSTRUCTION FOR USING
- OLED display::Display current power, mode, parameters, scene, etc.
- Two methods of controlling lightControl the light through compound knob;Control the light through APP;
- Modes
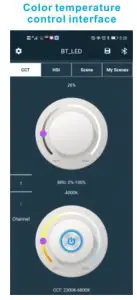
Long press composite knob to switch modes: CCT / HSI / EFFECT; CCT :: Dual color temperature mode, adjustable brightness and color temperature.
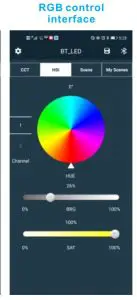
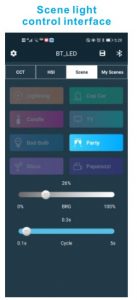
HSII :: RGB color light mode, adjustable brightness, hue and color purity. EFFECT :: Scene light mode. You can select scenes and adjust the parameters of the current scene. There are 8 scenes: Lightning, Police Car, Candle, TV, Bad Bulb, Party, Disco, Paparazzi
- Adjust brightness (BRG): range 0%~100%
The brightness can be adjusted in all modes. Short press the composite knob to select the brightness (BRG) → turn the knob to adjust the brightness.Connect to APP and adjust brightness through APP.
- Adjust color temperature (CCT): range 2700K~6500K
Long press the composite knob to switch to CCT mode → short press the composite knob to select color temperature (CCT) → turn the knob to adjust the color temperature.Connect to APP and adjust the color temperature through APP.
- Adjust HUE: range 0° ~ 360°
Long press the composite knob to switch to HSI mode → short press the composite knob to select hue (HUE) → turn the knob to adjust the hue. Connect to APP, adjust hue through APP.
- Adjust SAT: range 0%~100%
Long press the composite knob to switch to HSI mode → short press the composite knob to select color purity (SAT) → turn the knob to adjust color purity.Connect to APP, adjust hue through APP.
- Adjustment scene effect
Long press the composite knob to switch to EFFECT mode → short press the composite knob to select FX → turn the knob to select the scene → short press the composite knob to select the parameter to be adjusted → turn the knob to adjust the parameter.Connect to APP, select and adjust scene light through APP.
APP CONNECTION AND APP CONTROL
Scan the QR code on the back of the manual to download the APP
Turn on the video light and open the “GVM_LED” application software on the phone ( The phone needs to turn on Bluetooth and GPS), then enter the Bluetooth’s search interface → Find the Bluetooth named “BT_LED” and connect → Waiting for connection → After connection successfully, it will automatically enter APP control interface. At this time, the video light have been connected and you can control the light through APP.
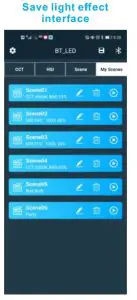
You can save 6 custom light effects in “My Scenes”. After setting the light effect parameters → click the “ ![]() ” icon in the right corner → pop up to the “Save Current Scenes” small window→ click “OK”. This light effect can be found in “My Scenes” at this time.
” icon in the right corner → pop up to the “Save Current Scenes” small window→ click “OK”. This light effect can be found in “My Scenes” at this time.
USE AND PRESERVATION
Do not put the product in a highly humid, strong electromagnetic field, direct sunlight, high-temperature environment. If not use the product for a long time, disconnect the power.
Clean : Please do not clean during charging. And use wet cloth rather than any detergent or soluble liquid, avoiding damaging the surface layer.
Power: Ensure that the power supply is within the required range of use, too high or too low will affect the work. The built-in battery is not removable.
Repairing: If there is fault or performance degradation, do not unpack the shell by yourself, avoiding damage the machine and lose the right of maintenance. When there is a fault, do not hesitate to contact us, and we will do our best to deal with the problem.
Accessories Please use the accessories provided by manufacturer and approved ones, in order to maximize the performance.
Guarantee Do does not modify the product, or you will lose the right of maintenance
SIMPIE FAULTS AND TROUBLESHOOTING
| Phenomenon | Check the product | Troubleshooting |
| Light indicator does not light up. | Check i f the battery is out of power. |
Use the light after charging it. |
| When the light is turned on, the display and lights are not on. | Check if the light is “turned off” by mobile APP. | Switch the ” ON/ OFF” button on the l ight again. |
| APP can’t connect / cannot be controlled | Check if the Bluetooth connection is successful | Normal steps:
① Turn on Bluetooth and GPS on the mobile phone; ② Open the APP, search and connect to the Bluetooth BT_LED |
| Color cannot b adjusted | Check whether the color purity e SAT value is too low or 0; the color purity value is 100, the color difference is the most
obvious. |
Increase the color purity SAT value in HSI mode |
PACKING LIST
| N a m e | Q u a n t i t y |
N o t e s |
|||||
| GVM- 7SM | |||||||
| Photography Lights | 1 | ||||||
| Charging Cable | 1 | ||||||
| External Diffuser | 1 | ||||||
| Small Head | 1 | ||||||
| Hot Shoe Bracket | 1 | ||||||
| User Manual | 1 |
 GVM Official
 Facebook
 Download App

References
[xyz-ips snippet=”download-snippet”]