![]()

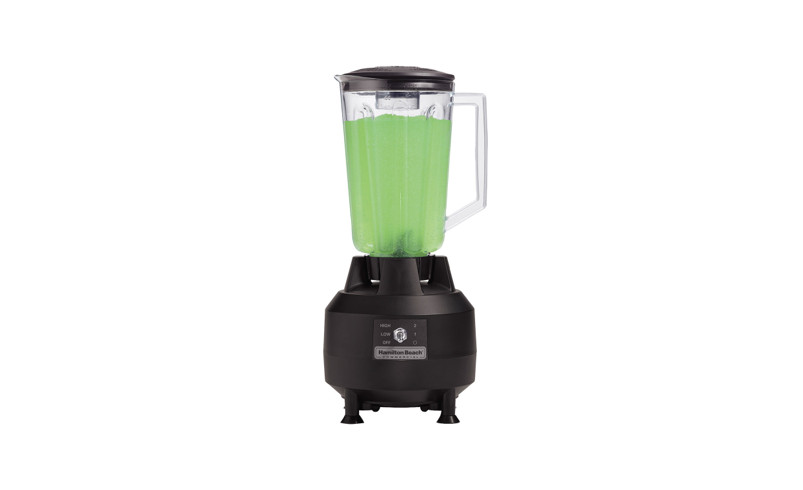
908TM Series Model HBB908ROperation Manual OriginalFor more Good Thinking® visit hamiltonbeachcommercial.com
Blender Safety
IMPORTANT: This operation manual should be reviewed with all equipment operators as part of your operator training program. Keep manually available in the work area for users’ easy reference.
IMPORTANT SAFETY INSTRUCTIONSWARNING When using electrical appliances, basic safety precautions should always be followed to reduce the risk of fire, electric shock, and/or injury to persons, including the following:
- Read all instructions.
- This appliance is not intended for use by persons with reduced physical, sensory, or mental capabilities, or lack of experience and knowledge, unless they are closely supervised and instructed concerning use of the appliance by a person responsible for their safety.
- This appliance shall not be used by children. Keep the appliance and its cord out of reach of children.
- Close supervision is necessary when any appliance is used near children. Children should be supervised to ensure that they do not play with the appliance.
- Plug into a grounded 3-prong electrical socket.
- Do not remove ground prong.
- Do not use an adapter.
- Do not use an extension cord.
- To protect against risk of electrical shock, do not put cord, plug, base, or motor in water or other liquid.
- Do not spray the base with a high-pressure spray gun.
- Turn the appliance OFF ( ), then unplug from outlet when not in use, before putting on or taking off parts, and before cleaning. To unplug, grasp the plug and pull from the outlet. Never pull from the power cord.
- Avoid contact with moving parts.
- Do not operate any appliance with a damaged supply cord or plug, or after the appliance malfunctions or has been dropped or damaged in any manner. Supply cord replacement and repairs must be conducted by the manufacturer, its service agent, or similarly qualified persons in order to avoid a hazard. Call the provided customer service number for information on examination, repair, or adjustment.
- Do not blend hot liquids.
- Do not use outdoors.
- Do not let cord hang over edge of table or counter or touch hot surfaces, including stove.
- Keep hands and utensils out of the jar and away from the cutting blade, while blending or chopping food, to reduce the risk of severe personal injury and/or damage to the blender or available attachments (attachments may not be provided with blender). A rubber spatula may be used but must be used only when blender is not running.
- To prevent damage to blender, jar, or cutter assembly, DO NOT move or shake blender while in operation. If blending action stops during operation, turn blender OFF, remove jar from base, remove jar lid, and use a thin rubber spatula to push mixture toward cutters.
- Blades are sharp; handle carefully– especially when emptying or cleaning the blender jar.
- Inspect jar and cutter assembly daily. Do not use broken, chipped, or cracked jar. Check cutter for wear, nicks, or broken blades. Do not use broken or cracked cutting blades.
- If cutter assembly blades are loose, discontinue use immediately and replace cutter assembly. Do not attempt to repair or tighten the blade(s).
- Always operate blender with lid in place.
- Do not use appliance for other than intended purpose.
- Do not leave blender unattended while it is operating.
- Check that the appliance is OFF (
 ) before plugging cord into wall outlet. To disconnect, turn the control to OFF (); then remove plug from wall outlet. To unplug, grasp the plug and pull from the outlet. Never pull from the power cord.
 - CAUTION! In order to avoid a hazard due to inadvertent resetting of the thermal cut-out, this appliance must not be supplied through an external switching device, such as a timer, or connected to a circuit that is regularly switched on and off by the utility.
SAVE THESE INSTRUCTIONS
Safety Alert Symbols
The following safety alert symbols are used throughout this manual to alert you to the safety hazards described below.
Your safety and the safety of others is very important.We have provided many important safety messages in this manual and on your appliance. Always read and obey all safety messages.![]() This is the safety alert symbol. It is used to alert you to potential physical injury hazards. Obey all safety messages that follow this symbol to avoid possible injury or death. All safety messages will be preceded by the safety alert symbol and the word “WARNING” or “CAUTION.” These words mean:
This is the safety alert symbol. It is used to alert you to potential physical injury hazards. Obey all safety messages that follow this symbol to avoid possible injury or death. All safety messages will be preceded by the safety alert symbol and the word “WARNING” or “CAUTION.” These words mean:
![]() WARNING indicates a hazardous situation which, if not avoided, could result in death or serious injury.
WARNING indicates a hazardous situation which, if not avoided, could result in death or serious injury.
![]() CAUTION indicates a hazardous situation which, if not avoided, could result in minor or moderate injury.
CAUTION indicates a hazardous situation which, if not avoided, could result in minor or moderate injury.
All safety messages will identify the hazard, tell you how to reduce the chance of injury, and tell you what can happen if the instructions are not followed.
![]() WARNING
WARNING![]() Electrical Shock Hazard Disconnect power before cleaning blender base. Failure to follow these instructions can result in death or electrical shock.
Electrical Shock Hazard Disconnect power before cleaning blender base. Failure to follow these instructions can result in death or electrical shock.![]() WARNING
WARNING![]() Electrical Shock Hazard Plug into a grounded outlet. Do not remove ground. Do not use an adapter. Do not use an extension cord. Failure to follow these instructions can result in death, fire, or electrical shock.
Electrical Shock Hazard Plug into a grounded outlet. Do not remove ground. Do not use an adapter. Do not use an extension cord. Failure to follow these instructions can result in death, fire, or electrical shock.
![]() WARNING
WARNING![]() Cut Hazard Always place lid on jar when blending. Do not put hands, spoons, or other utensils in jar when blending. Failure to follow these instructions can result in broken bones, cuts, or other injuries.
Cut Hazard Always place lid on jar when blending. Do not put hands, spoons, or other utensils in jar when blending. Failure to follow these instructions can result in broken bones, cuts, or other injuries.
SanitizingSanitize using 1 Tablespoon (15 ml) of household bleach per 1 gallon (3.8 liters) of clean, cool water (60°F/16°C), mixed according to instructions on bleach.
- Fill jar to maximum volume line with sanitizing solution, replace lid and run on LOW speed for 2 minutes. Empty jar.
- Wipe exterior with soft cloth dampened with sanitizing solution.
- Immerse lid in sanitizing solution for 2 minutes.
- Place empty jar on base and run on HIGH speed for 2 seconds to remove any moisture from cutter assembly.
- When ready to use, rinse with clean water.
Technical ServicesFor assistance or replacement parts, call or email Technical Services:USA, Canada: 866-285-1087 or +1-910-693-4277,[email protected]Mexico: 800 71 16 100, [email protected]APAC Region: +86-400-930-2722, [email protected]hamiltonbeachcommercial.com
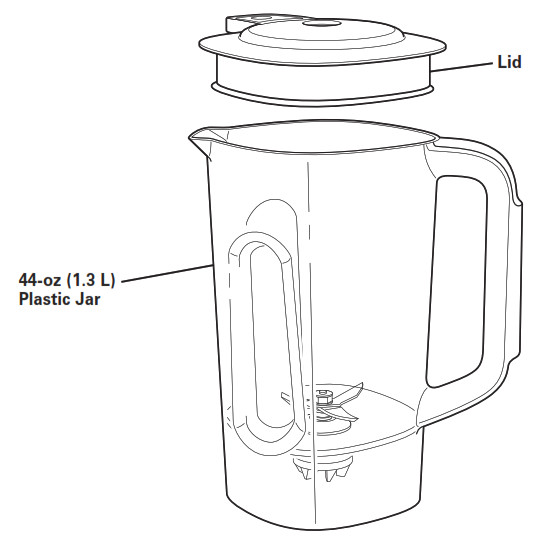
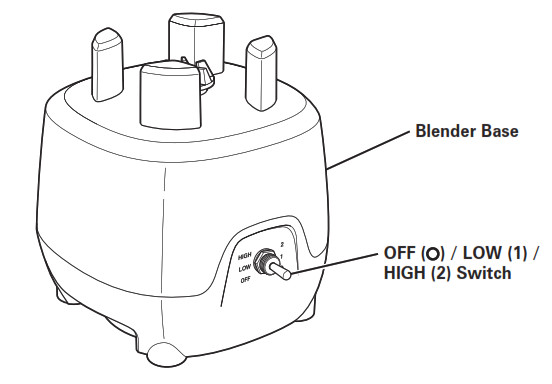
Parts and Features
NOTE: Blender is not designed to crush large ice cubes. Small ice cubes made in most ice makers or crushed ice may be added to liquid ingredients in Blender to make daiquiris or similar drinks.
 Blender Operation – Quick Start Guide
- Read Important Safety Instructions and Warnings before use.
- Place Blender on a dry, level surface.
- Make sure power switch is in OFF () position. Plug Blender into a grounded electrical outlet.
- Place Jar on Base with ingredients and Lid in place.
- Move power switch to LOW (1) or HIGH (2) position.
Operating the Blender
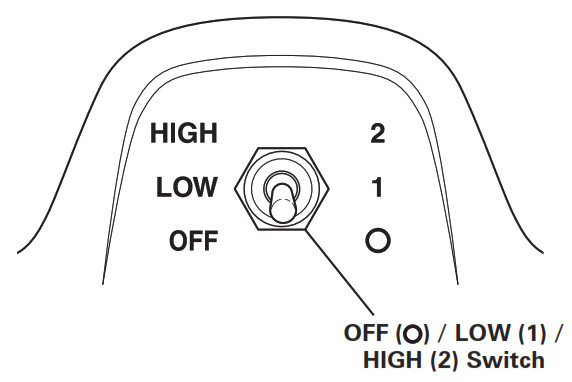
ControlsSwitch on front panel allows you to control Blender for precise blending requirements. OFF ( )/LOW (1)/HIGH (2) switch will turn Blender on for continuous operation at Low or High speed or OFF.
Using the BlenderBefore you use Blender for first time, wash Jar and Lid. Refer to “Care and Cleaning” on page 6. Do not put Jar in dishwasher.To operate Blender, proceed as follows:
- Place Blender on a clean, dry, level surface. Make sure that OFF/LOW/HIGH switch on control panel is set to OFF ().
- Plug Blender into an electric outlet.
- Place ingredients to be blended into Jar.
- Place Jar onto Base. Make sure it rests securely on Base.
- Place Lid on Jar.
- Move OFF/LOW/HIGH switch to desired speed.
- When blending is complete, set OFF/LOW/HIGH switch to OFF ().Do not remove Jar from Base until unit has stopped completely.
Filling the JarWhen filling Jar with ingredients, follow these recommendations:
- Use a sufficient amount of liquid to ensure that mixture is fluid and free-running at all times. Pour liquid into Jar FIRST.
- Cut solid ingredients into pieces that are no bigger than a 1″ (25-mm) cube.
- Add ingredients to Jar in batches. Do not blend maximum volume all at once.
- Do NOT overfill Jar with ingredients. This may prevent Blender from processing ingredients properly. Process dense foods or thick mixtures in small batches, and remember that volume of product normally increases during processing.
Blending TechniquesIcy Drinks – Do not use Blender to crush large ice cubes. Blender is not designed for this. Small ice cubes or crushed ice is recommended. Pour in liquid; then add ice. Cover. Set speed at HIGH (2) and process until desired consistency is reached. Chunks of frozen fruit can be added to milk or fruit juice to produce a sherbet or slush.
Care and Cleaning
General CleaningDo not allow food residue to dry on any part of Blender. Wash and rinse Jar, and Base after each use, or whenever it will not be used again within 1 hour, as follows:
- Remove Jar from Base, and then remove Lid. Add cleaning solution to Jar. Use a washing solution of hot water (less than 115°F/46°C) and a nonsudsing detergent. Use recommended amount of detergent.
- Scrub and flush out Jar. Empty Jar.
- Fill Jar 1/4 full with fresh washing solution and place it on Base.
- Replace Lid on Jar and run Blender on HIGH (2) speed for 2 minutes.
- Repeat Step 3 using clean rinse water (95°F/35°C).
- Wipe down Jar and Lid with a soft cloth or sponge, dampened with fresh washing solution.
- Wipe Base with a damp cloth or sponge. Base contains electrical components; do not immerse in water. Do not use a high-pressure washer or use a dishwasher to clean Base.
Maintenance
Inspect Blender and its various parts and replace as follows:
| Daily |
Unplug Blender, remove Jar from Base, and then inspect Jar and cutter assembly for wear, nicks, and broken or loose blades. Replace if necessary. If blades are loose, discontinue use immediately and replace blades. Do not attempt to repair or tighten cutter assembly. See “Technical Services.” |
| Weekly | Unplug Blender, and then inspect power cord insulation and power plug for cracks. See “Technical Services.” |
| Quarterly | Replace Jar as needed if inspection finds wear, nicks, or broken or loose blades. See “Technical Services.” |
Troubleshooting
| Problem | Solution |
| Blender fails to start, or stops while it is running and cannot be restarted. |
• Check to see if unit is securely plugged into an electrical outlet.• Check to see if fuse for electrical outlet has blown or if a circuit breaker has tripped.• If motor stops during operation due to overheating, unplug and allow unit to cool down for 15 minutes. Plug Blender back in after 15 minutes to resume normal operation. |
| Ingredients will not mix properly. |
• Check to see if enough liquid has been added to ingredients. Mixture should be fluid and free-running at all times.• Solid pieces are too large. Pieces should not exceed 1″ (25-mm) cubes.• Jar is too full. Do not fill past highest graduation marking.• Blades are not sharp or are damaged. Inspect Jar and cutter assembly daily. Replace Jar and cutter assembly as needed if inspection finds wear, nicks, or broken or loose blades. See “Technical Services.”• Check to see if cutter assembly is installed properly.• Select speed to create a fluid blend. |
Notes :
![]()
4421 Waterfront DriveGlen Allen, VA 23060hamiltonbeachcommercial.com
[xyz-ips snippet=”download-snippet”]