Harley Benton 410584 Solder-Free Patch Cable Kit
Quick Start Guide
This quick start guide contains important information on the safe operation of the product. Read and follow the safety advice and instructions given. Retain the quick start guide for future reference. If you pass the product on to others please include this quick start guide.
Safety instructions
Intended use This product is used to assemble audio cable for pedalboard cabling. Any other use or use under other operating conditions is considered to be improper and may result in personal injury or property damage. No liability will be assumed for damages resulting from improper use.
 Danger for childrenEnsure that plastic bags, packaging, etc. are disposed of properly and are not within reach of babies and young children. Choking hazard! Ensure that children do not detach any small parts from the product. They could swallow the pieces and choke!
 Risk of cuttingWhen handling the cable cutter, ensure sufficient distance between your fingers and the cable blade.
Where to use the productNever use the product
- in conditions of extreme temperature or humidity
- in extremely dusty or dirty areas
- at locations where the unit can become wet
General handling
- To prevent damage, never use force when handling the product.
- Never immerse the product in water. Just wipe it with a clean dry cloth. Do not use liquid cleaners such as benzene, thinners or flammable cleaning agents.
Features
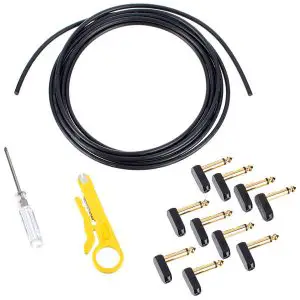
- 3 m audio cable for excellent signal flow at low capacity for maximum transparency, set-up: 7 × 0.15 mm² copper conductor, semi-conducting PVC and a braided copper/aluminum shielding
- 10 angled extra slim metal plugs (6.35 mm jack)
- 1 cable cutter
- 1 Phillips screwdriver
Cutting cable
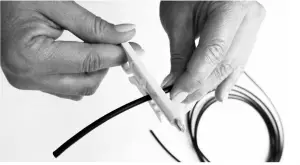
- Determine the required cable length.
- Place the cable in the second opening of the cable cutter.
- Keep the cable cutter at a precise right angle to the cable.
- Turn the cable cutter around the cable five times.→ The cable is cut at the intended location.
Connect the plug
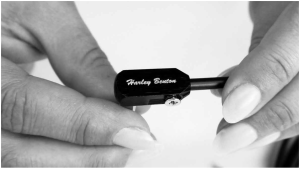
- Ensure that the cut edge of the cable is straight and clean.
- Loosen the Phillips screw on the jack plug, but do not unscrew it all the way.
- Guide the cable end to the stop (about 10 mm deep) into the jack plug.
- Tighten the Phillips screw tight again.→ Due to the special design of the plug, the wires and the shielding of the cable are electrically and mechanically sturdily connected with the jack plug.
 For the transport and protective packaging, environmentally friendly materials have been chosen that can be supplied to normal recycling. Ensure that plastic bags, packaging, etc. are properly disposed of. Do not just dispose of these materials with your normal household waste, but make sure that they are collected for recycling. Please follow the notes and markings on the packaging.
 This product is subject to the European Waste Electrical and Electronic Equipment Directive (WEEE) in its currently valid version. Do not dispose of your old device with your normal household waste. Dispose of this product through an approved waste disposal firm or through your local waste facility. Comply with the rules and regulations that apply in your country. If in doubt, consult your local waste disposal facility.
Thomann GmbHHans-Thomann-Straße 1 • 96138 Burgebrachwww.thomann.de[email protected]

References
[xyz-ips snippet=”download-snippet”]


