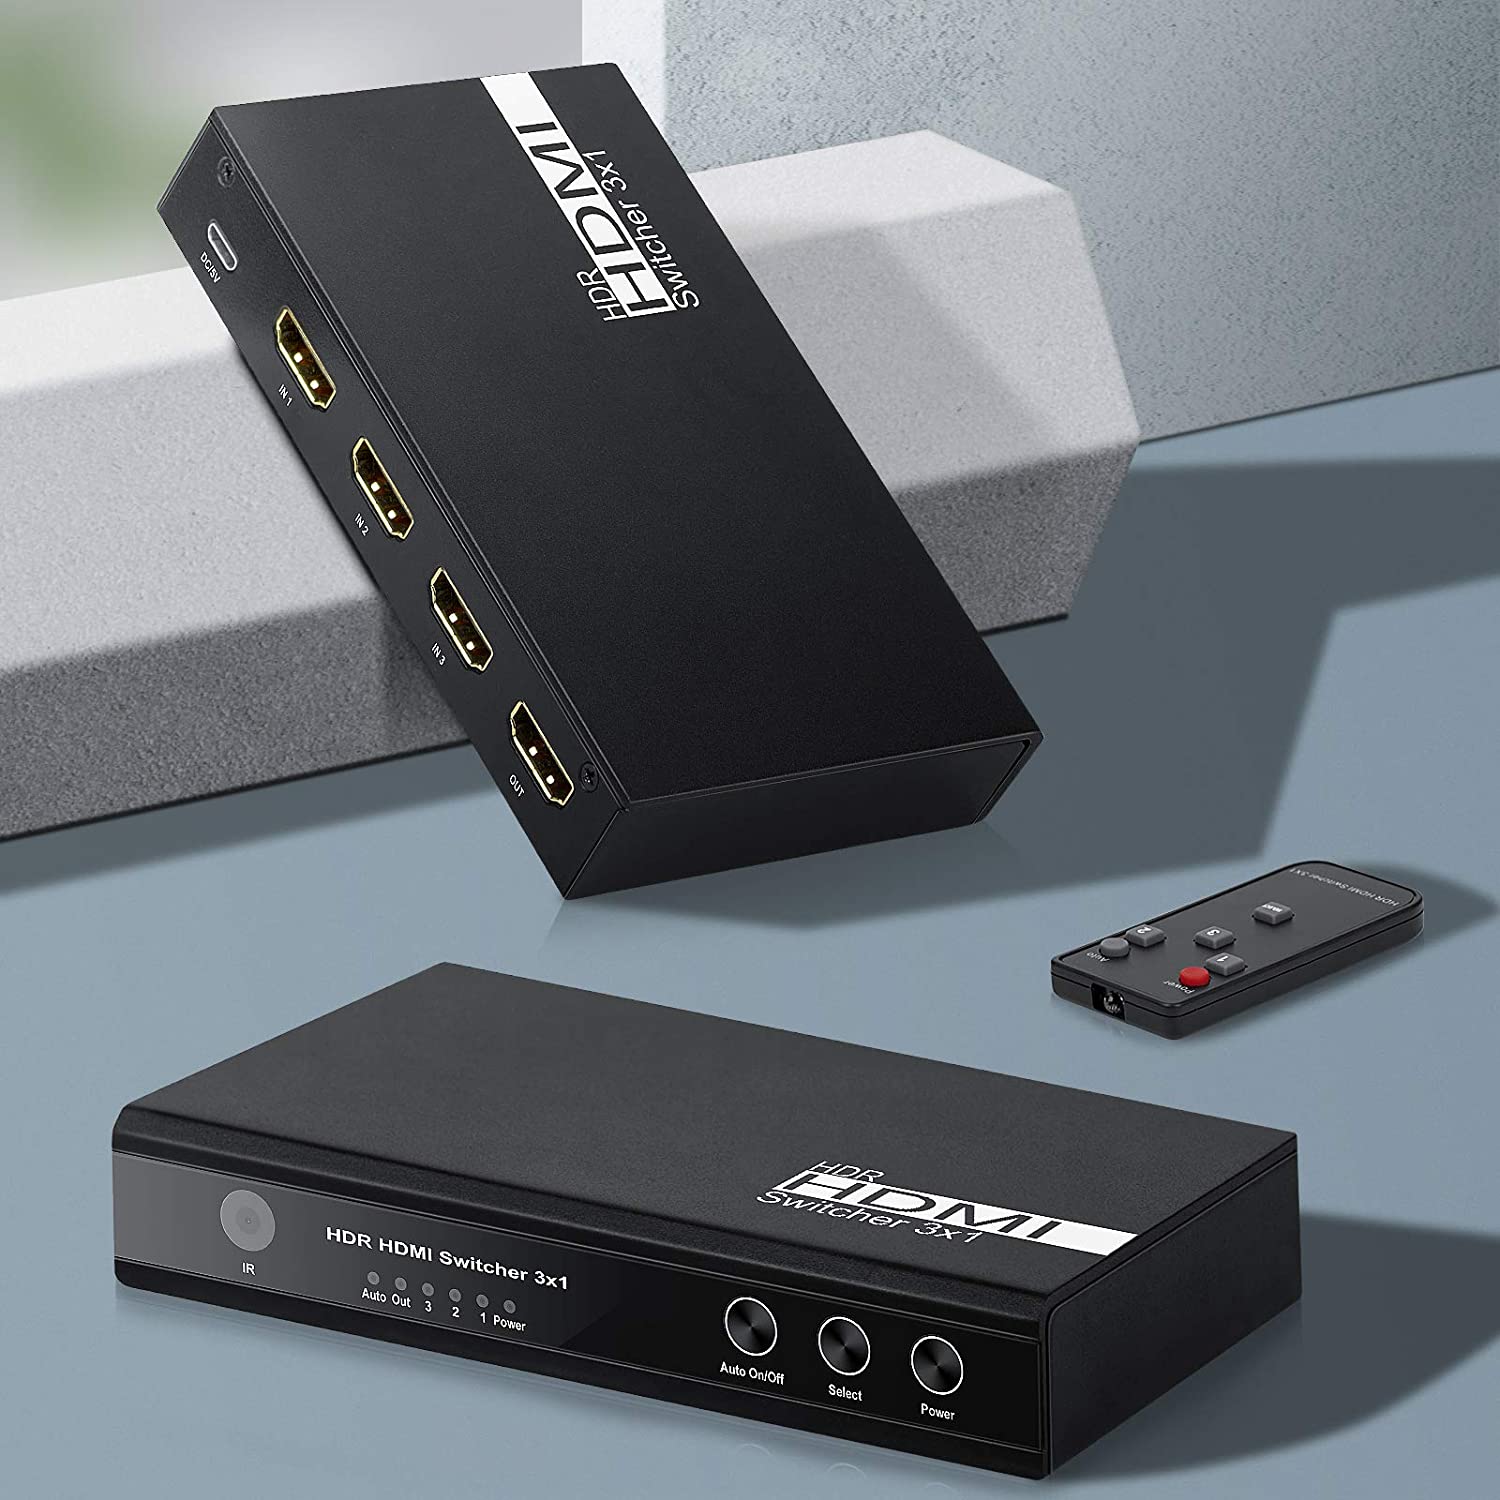
3 Port HDR HDMI Switcher
Introduction
Dear customerThank you for purchasing this product. For optimum performance and safety, please read these instructions carefully before connecting, operating or adjusting this product. Please keep this manual for future reference.Our series of converters, switchers, extenders, matrixes and splitters are designed to make your A/V device use more convenient, more comfortable, more productive and more cost-efficient.
The device can switch five HDMI Inputs to one HDMI Output, It can easily switch five routes of UHD Source to any one UHD display or projector.
Our devices offer solutions for noise, space and security concerns, data center control, information distribution, conference room presentation, school and corporate training environments.
Feature:
- Five HDMI Inputs switch to one HDMI Output
- Support UHD signal input and output.
- Support Remote control and HDMI auto switch.
- Support Auto Switch Turn On & Turn Off
- Hidden Indicate Light brings the new using experience
- Total All New Simple Outlook Design
- In HDMI UHD resolution, HDMI Input and Output distance can be up to 5m using the AWG26 standard HDMI Cable. In other HDMI resolution, HDMI Input and Output distance can be up to 8m using the AWG26 standard HDMI Cable.
- Easy-Install
Accessories Content:
- Manual
- Remote
- USB to DC 5.5mm Power cable
Physical Connect Port: 
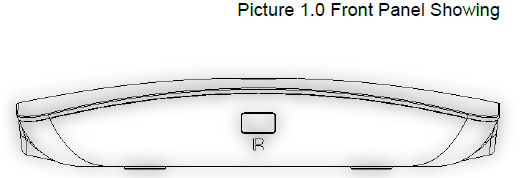
R: Remote IR Window Port.
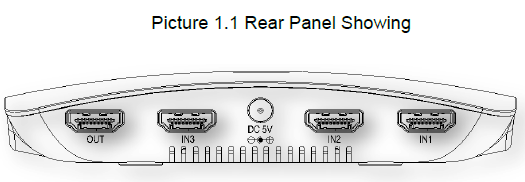
IN1, IN2, IN3: HDMI Input One, Two, Three, PortDC 5V: 5V DC PortOUT: HDMI Output Port
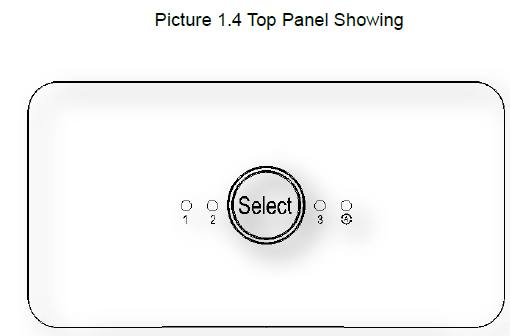
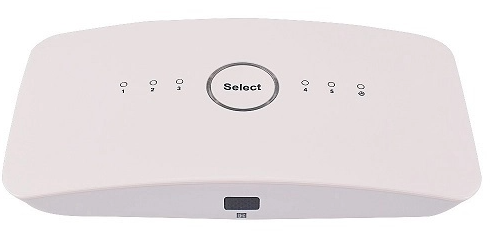
1, 2, 3: HDMI Input Channel One Two Three Four Five LED Status Light
Auto Switch function Status Light, When light goes bright, The function is open.Select: HDMI input channel select button.
Remote Button Function Showing

Standby Button/Start Button: When the device is working normally, if press the button, the device will go into Standby state and the matched Led Light will go dark; if press again, the device will go into Start state and the matched led light will go bright.
Auto Switch Turn On/Turn Off Button: The device Auto Switch is default at Active state, if press the button, the Auto Switch will be turned off; if press again the button, the Auto Switch will be turned on.1, 2, 3, 4, 5: HDMI Input Channel Switch Button. When you press the “1” Button, the device will goes to the matched input 1 channel.
* Pls take out the film at the rear of the remote before you use. Pls insert the film to remote rear if you do not use the remote for long time.
Connection and Operation:
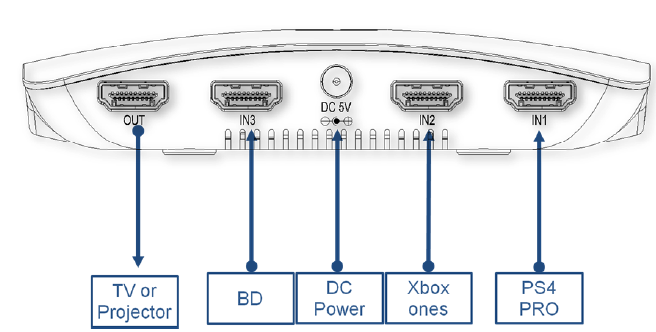
- To use HDMI Cable to connect the HD Source with the HDMI Input port of device.
- To use HDMI Cable to connect the HDMI Output port of device with the Display.
- To use the USB 2.0 TO DC 5.5MM power cable to connect the DC5V Port of the device with USB Power source like TV or USB Power Docking.
- Then press again the Select Button at device or press the button at remote to operate the device.
Spec:
HDMI Resolution……………24/50/60fs/2160P/1080P/1080i/720p/576p/576i/480P/480iDeep Color …………24/30/36bit/1080P/1080i/720p/576p/576i/480P/480i,24bit/2160PHDMI In/Out Supported Audio Format…………………DTS-HD/Dolby-trueHD/LPCM7.1/DTS/Dolby-AC3HDMI Channel Max Bandwidth………………………………………………………600MHzInput / Output DDC signal…………………………………………………….… 5Vp-p(TTL)Remote Control distance……………………………………………………………………≥4mHDMI Input Cable Length……………….…………..…≤5m AWG26 HDMI standard cableHDMI Output Cable Length……………………..….….≤5m AWG26 HDMI standard cableMax Working Current…………………………………..……………………..…………600mAWorking Temperature Range………………………………………..……………(-0 to +40℃)Working Humidity Range……………………….……..…5 to 85%RH(No Condensation)
Notes:
Pls use the machine as the instruction listed to keep the long use lifetime of the machine.
- The machine should be placed at the spot far from the Damp, High-Temperature, Dusty, Erosive, and oxidative environment.
- All parts will be free from the strong shake, hit, fall.
- Touching the power adaptor with the wet hands is prohibited.
- Pls hold the power adaptor head and do not pull the power cord when cut off from the socket.
- Pls turn the power off when the machine is not used for long time.
- Pls do not open the cover and do not touch the inside parts.
- Pls use the original factory power adaptor.
- It does not support the conversion between DVI and HDMI signal Pls use your signal source and display following the correct process.
Before power on, pls check the connection line carefully. And make sure that all interfaces are normally connected. The common trouble shooting way shows below:
| Serial NO | Trouble Description | Cause and Ways to deal with |
| 1 | Non-Power-Connected | 1、Check the HD Source is truly and correctly inserted. 2、Check the HD Source is in on status. |
| 2 | No Picture | 1、Pls to make sure that the TV is on and has been connected with the machine,.
2 、 To check if the signal source is on and well connected. 3、Check the system connection quality. |
| 4、Check if the line is all good quality. 5、Check the cable quality. | ||
| 3 | Obscure Picture | 1、To try again to connect the cable to be free from the unsuccessful connection.
2、HDMI Cable Quality |
| 4 | No sound | 1、Please confirm the setting position of audio mode switch |
| 5 | Remote | 1、Pls check if the film that stops the current has been taken out.
2、To check if the remote battery is working well. |
[xyz-ips snippet=”download-snippet”]