![]()
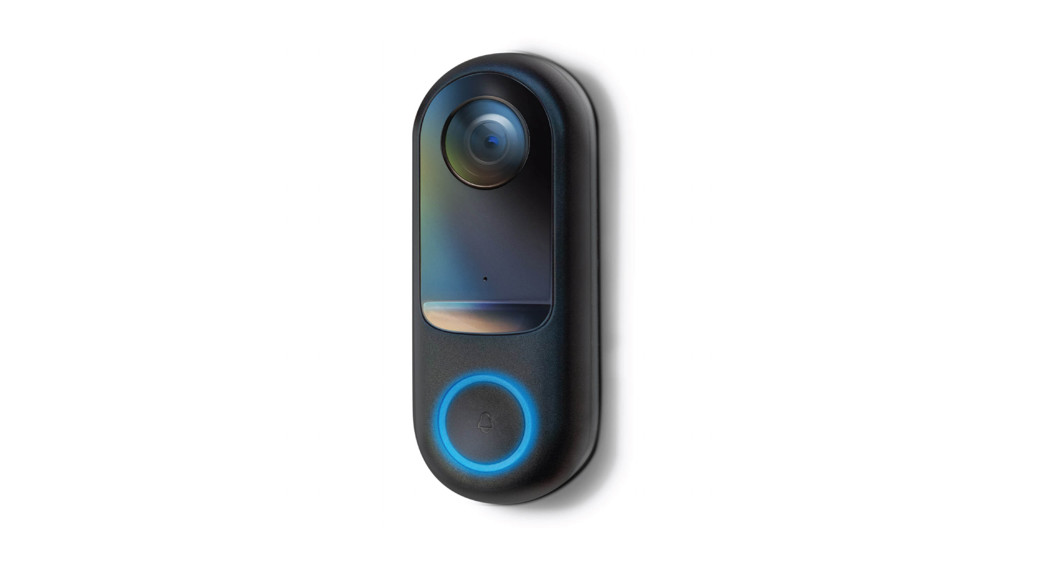
Smart Wireless Doorbell CameraQUICK START GUIDE![]() the bright way to do home security.
the bright way to do home security.
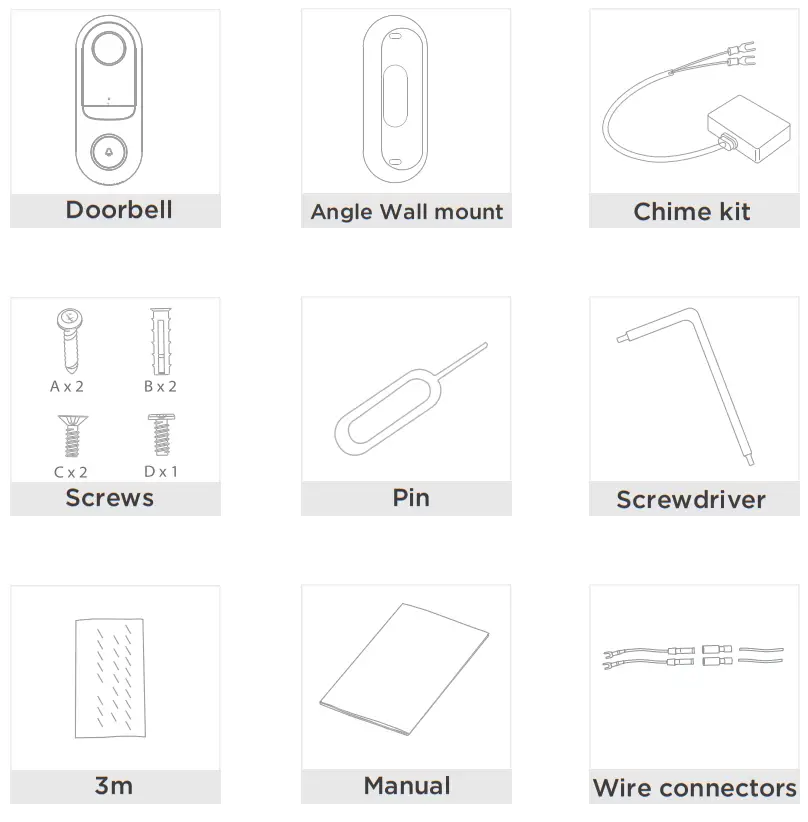
What’s in the box
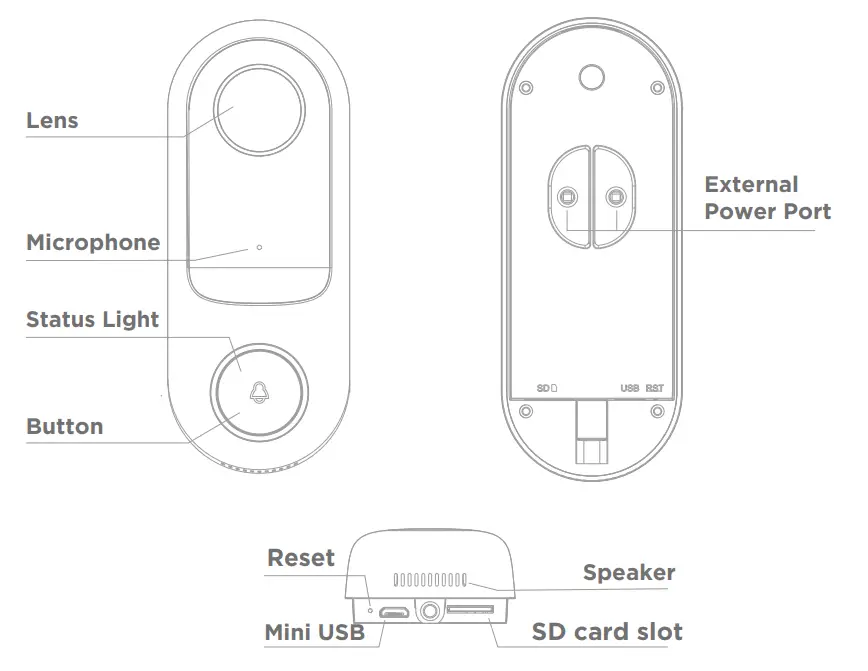
Description
Doorbell button Press the button to activate the doorbell
| Power | AC 12V~24V/ 60Hz |
| Status light |
|
| Microphone | Captures sound for your video |
| SD card slot | Supports local SD Card storage (Max.128G) |
| Reset | Press and hold for 5 seconds with a pin to reset the doorbell.(this does not unbind the doorbell from the app account) |
Install
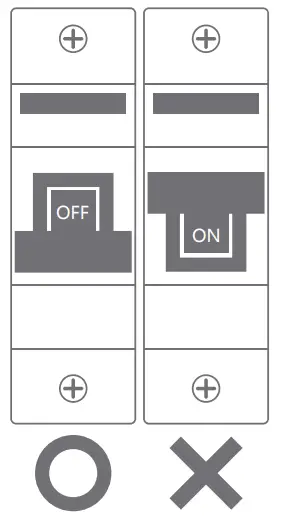
- First, turn off the power breaker at your fuse box for your existing doorbell and mechanical chime. Ring your doorbell again to confirm it is now off.

- Mode 1 Doorbell General Installation
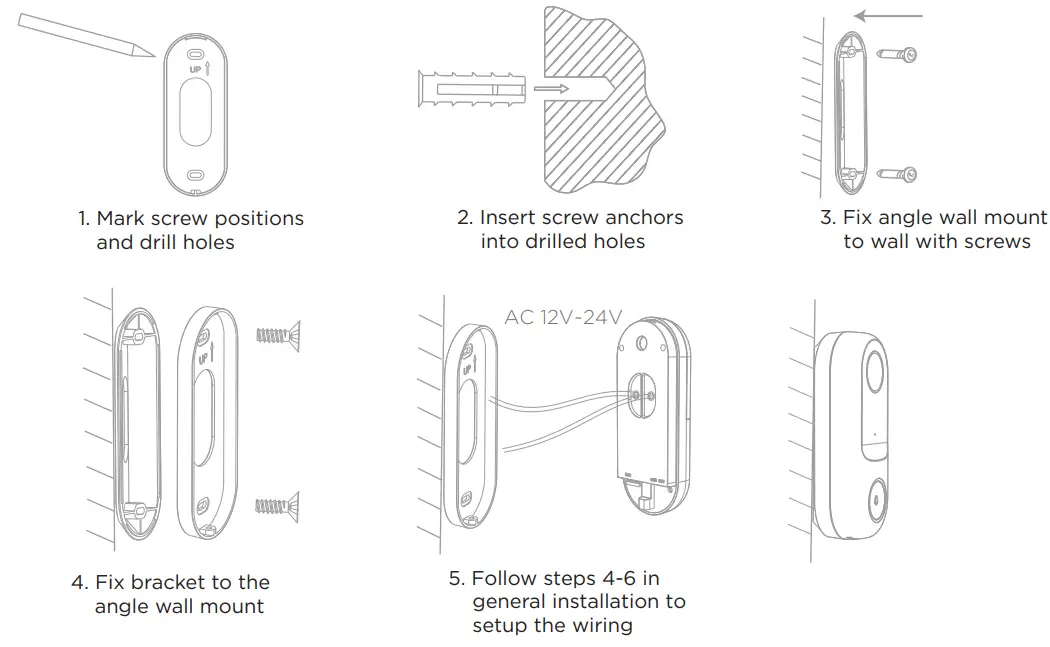
- Angle wall mount + bracket + doorbell installation
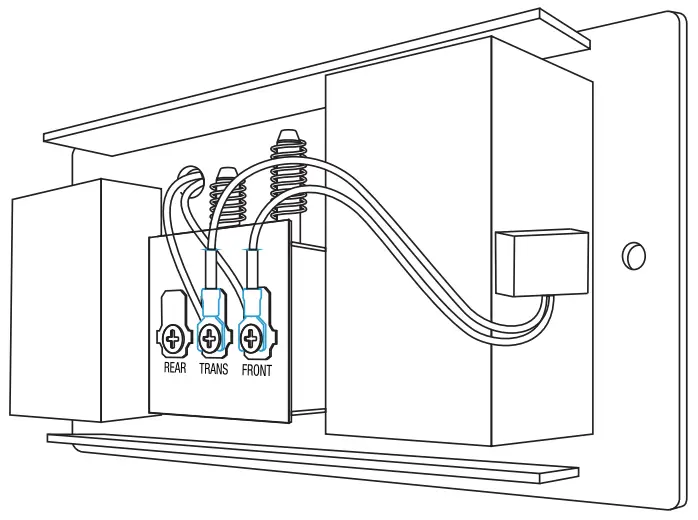
- Mechanical chime installationFind your mechanical chime that produces the sound when your doorbell is pressed. It may (or may not) be mounted immediately inside your front door. Remove the cover.
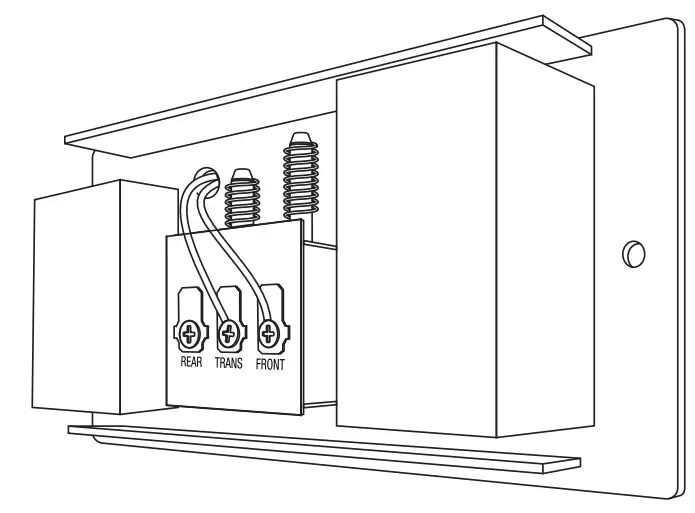
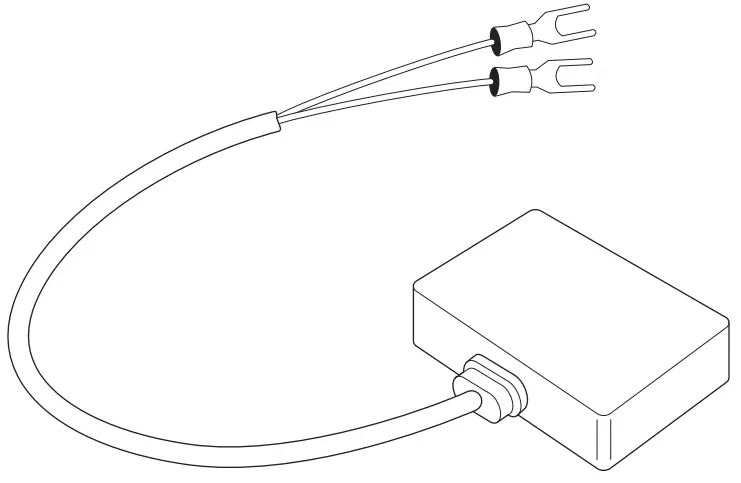
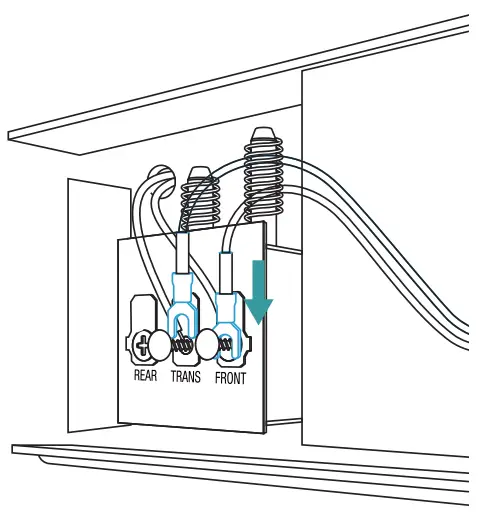
- Locate the chime kit included in the smart doorbell’s packaging and the terminals on the inside of the chime. Connect one of the chime kit’s prongs to the transformer terminal (usually labeled Trans, T, AC, or 0). Connect the other prong to the chime’s front terminal (usually labeled front, F, 1, or C1). Either prong on the chime kit can be connected to either terminal on the chime.
-
Using the included double-sided tape, affix the chime kit to your chime wherever there is space and replace the cover. Be careful not to interfere with any of the chime’s moving parts. Ensure that the chime kit and wires DO NOT interfere with the mechanical parts of the chime. Mount on the outside of the chime if there isnot enough room to mount inside, and replace your chime’s cover.
- Turn the power back on at your breaker for the doorbell and chime. The indicator light on the doorbell should be flashing red to show it is ready to sync with the app.
Connect
DownloadHome Zone App is available for both iOS and Android OS. Search the name ‘Home Zone smart’ in the App Store or Android Market.

Set up Router
This device only supports 2.4GHz frequency and does not support 5GHz.Please ensure the router is set for the 2.4GHz band before connecting your device to the router.Placing your mobile device and camera close to the router during setup can speed up the configuration process.

Registration process
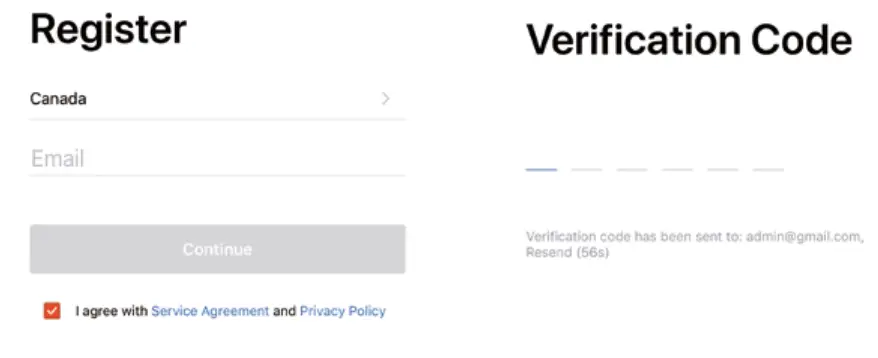
Step 1Open the Home Zone App, click “Register”, read the “Privacy Policy” and click “Agree”.
Step 2|Input a legal and valid Email address and click “Continue”. Input Verification Code, then log in to the App.
QR Code Configuration
Getting Started
- Please follow the instructions and make sure the passwords are inputted correctly.
- If the device has already been added to an account, be sure the device is removed from the previous account first before pairing to the new account.
Process
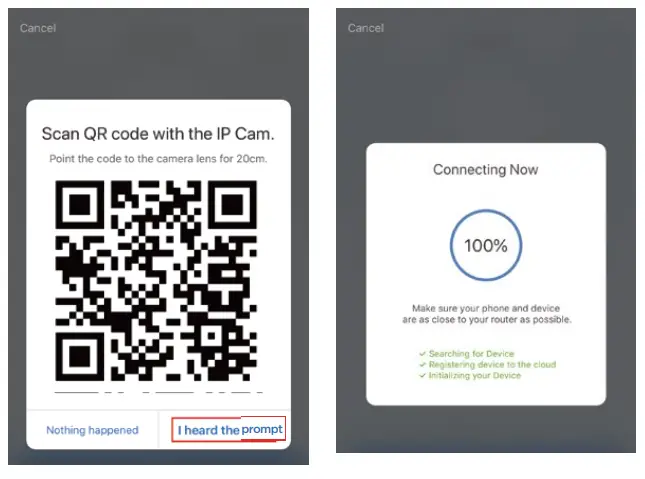
Step 1Open the App, click “+” on the top right corner, or “Add Device”.
Step 2Select “Smart doorbell”. Power the device on and make sure the red light indicator is flashing quickly. If the red light indicator light is not flashing quickly, reset the device using the included pin.
Step 3Input WiFi password and click “Confirm”, scan the QR code with the camera.
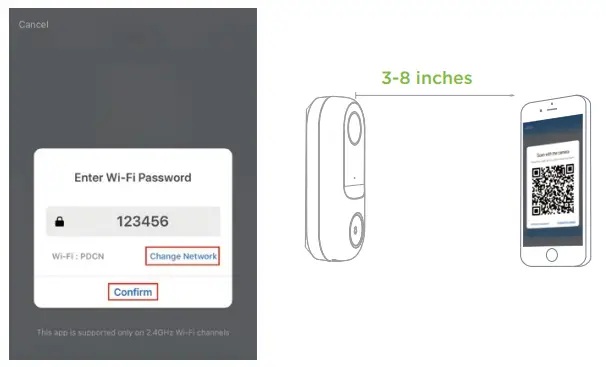
Step 4Click “I heard the beep” when the device makes the prompt noise and waits for the connection to complete. The indicator light on the camera will be solid blue once the pairing is complete.
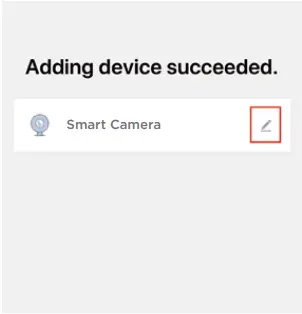
Step 5Once complete, you can edit the device name on the App and access the device menu.
FAQ
Q: The device cannot be previewed properly.A: Check whether the network is normal and place the camera closer to the router. Reset the device and add again if the problem persists.
Q: Why is it still in the list of devices after resetting?A: Resetting the device only resets the network configuration of the camera. Remove the device through the App menu to remove the device from the App account.
Q: How do you connect the camera to another router?A: First remove the device on the App. Reset the device by pressing the reset button with the pin and then configure the device again by the App.
Q: Why doesn’t the device identify the SD card?A: It is recommended to insert the SD card when the device is powered off. Check whether the SD card format is FAT32 and if the card can be recognized by another device.
Q: Why can’t I receive App notifications on my mobile device?A: Please confirm that the App is running properly on the phone and the notifications have been enabled for the App on the mobile device.
Functions
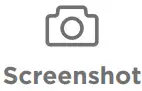 |
Save screenshots of live view to mobile device |
 |
Save recordings of live view to mobile device |
 |
Enable microphone for one-way or two-way talk |
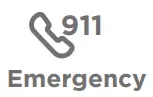 |
Dial 911 for emergencies |
|
View saved recordings on local storage
(Requires Micro SD Card) |
 |
Customize activity detection settings. |
 |
Subscribe to the cloud storage package. |
FCC
This device complies with Part 15 of the FCC Rules. Operation is subject to the following two conditions: (1) this device may not cause harmful interference, and (2) this device must accept any interference received, including interference that may cause undesired operation.
This device complies with FCC Part 15 of FCC Rules.Warning: Changes or modifications to this unit not expressly approved by the party responsible for compliance could void the user’s authority to operate the equipment.
NOTE: This equipment has been tested and found to comply with the limits for a Class B digital device, pursuant to Part 15 of the FCC Rules. These limits are designed to provide reasonable protection against harmful interference in a residential installation. This equipment generates, uses, and can radiate radio frequency energy and, if not installed and used in accordance with the instructions, may cause harmful interference to radio communications.However, there is no guarantee that interference will not occur in a particular installation. If this equipment does cause harmful interference to radio or television reception, which can be determined by turning the equipment off and on, the user is encouraged to try to correct the interference by one or more of the following measures:
- Reorient or relocate the receiving antenna.
- Increase the separation between the equipment and receiver.
- Connect the equipment into an outlet on a circuit different from that to which the receiver is connected.
- Consult the dealer or an experienced radio/TV technician for help.
Register & Subscribe today to protect your investment and join our email list!![]()
Scan below for the link:
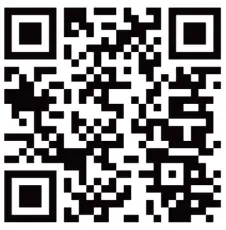 homezonesecurity.com[email protected]US: +1 888-782-5618
Why Register?
- Receive your extended warranty
- Get professional warranty support
- Be the first to hear the latest product news.
- Get exclusive deals delivered to your email.
Get exclusive offers and deals when you subscribe!
report this adThank you for choosing Home Zone Security! We are here to support you every step of the way.Please be sure to contact our customer support for troubleshooting and register your product for additional benefits. Products must be sold by an authorized reseller or distributor to be valid.
References
[xyz-ips snippet=”download-snippet”]