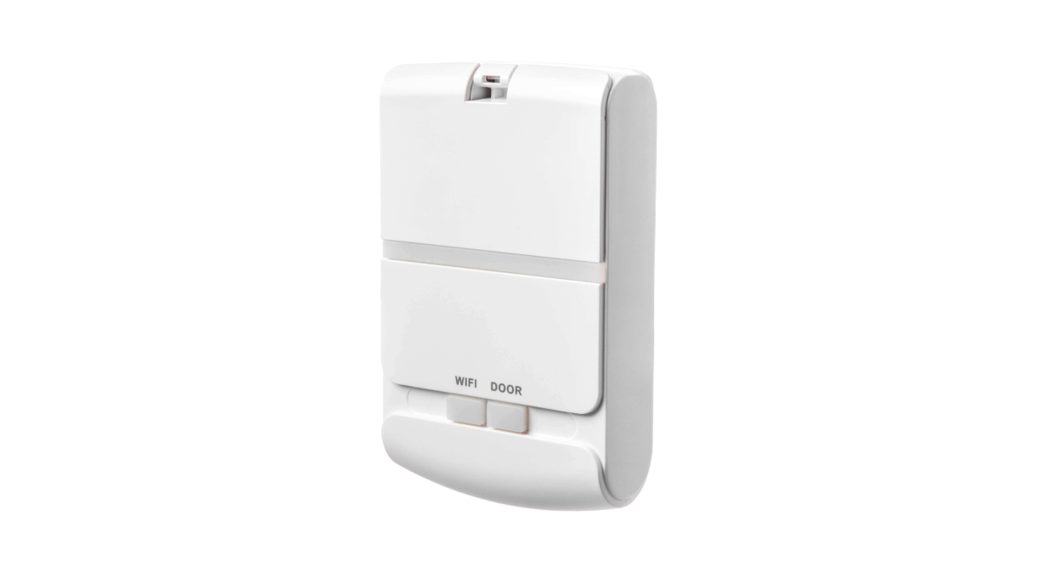
Smart Wireless Garage Door OpenerES06567G For sectional door onlyUSER MANUAL
 |
 |

BEFORE YOU START
Confirm the following before Installation (Very Important):
 WI-Fl SIGNAL
You must have a strong. 2.4GHZ Wi-Fi signal in your garage that uses • WPA or WPA2 security.
![]() SAFETY WARNING
SAFETY WARNING
Before Installation, please turn off the power of the garage door opener to reduce the risk of Injury.
 DOOR TYPYour garage door must be a sectional garage door.
COMPATIBILITY
Make sure that your garage door opener is compatible with our product first
Please contact us to receive a compatible garage door opener model list.You can also verify the compatibility directly using the following steps:
- Make sure your garage door has a wall-mounted button. find the terminals which connect to your wall-mounted button:
- Take a wire with both ends sbipped or a plier and put each end to the same terminals as the wall button wires are connected to (See the figure below). By doing so, if your door activates, then your door opener is compatible with our device. If the door does not activate. then the opener Is not compatible by
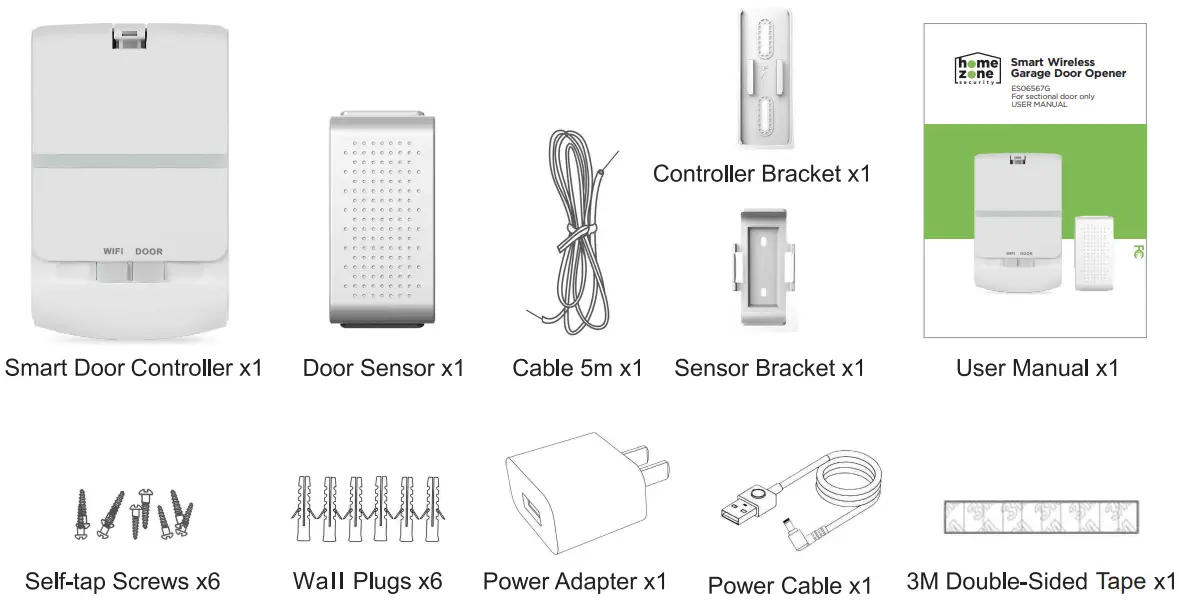
PACKAGE CONTENTS
– Smart Door Controller xl– Door Sensor xl– Power Adapter xl– Power Cable xl– User Manual xl– Controller Bracket xl– Sensor Bracket xl– Cable 5m xl– Wa I l Plugs x6– 3M Double-Sided Tape xl– Self-tap Screws x6
SPECIFICATIONS
Model: ES06567G
Operating temperature: -13 to113°F (-25°C to 45°C)Controller operating voltage: AC100-240V 50/60HZWi-Fi: 2.4GHz IEEE 802.11 b/g/nSystem : iOS 8.0 or higher, Android 4.1 or higher
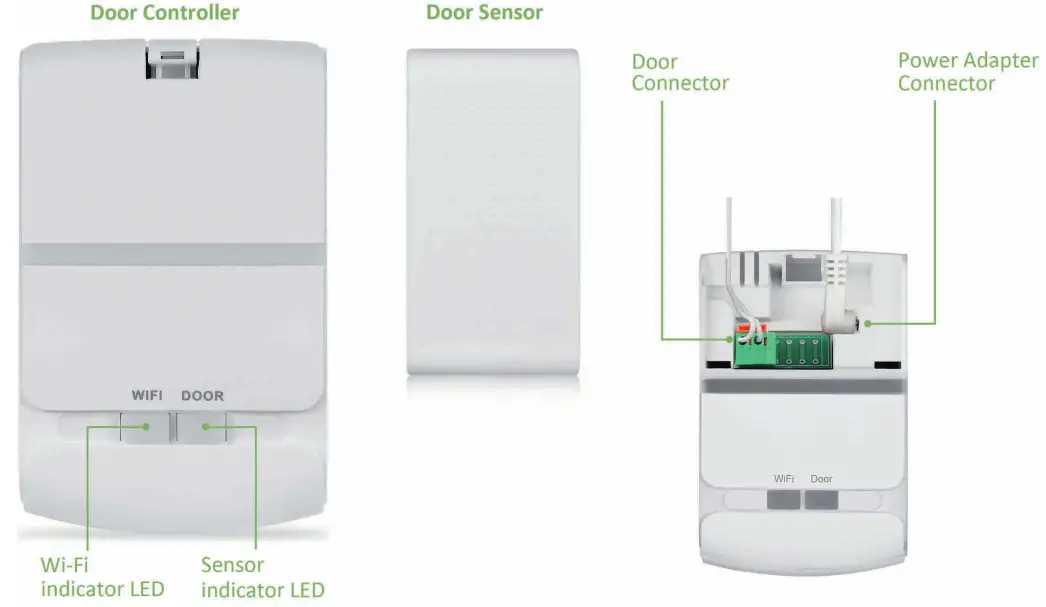
WI-Fl INDICATOR LED STATE
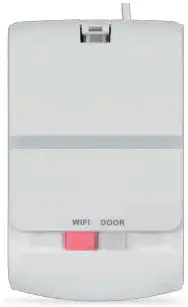
RED — blinking rapidly (2 times per second)Wi-Fi not configured. Controller is in smart mode and ready to pair to Wi-Fi and Home Zone Smart APR.
RED — blinking slowly (once every 2 seconds)Wi-Fi not configured.Controller is in AP mode and ready to pair to Wi-Fi and Home Zone Smart APR
GREEN—solidThe smart garage door controller is connected to Wi-Fi and the Home Zone Smart APP is ready.
GREEN — bl InkingWI-Fi configured, but Internet may be offline — check your router or the Wi-Fi password.
Note:Pressing and holding the Wi-Fi button will reset the Wi-Fi configuration.
SENSOR INDICATOR LED STATE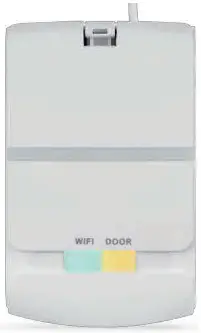 YELLOW — off
The controller Is not ready for pairing the door sensor.
YELLOW — blinkingThe controller Is ready for pairing the door sensor.
YELLOW — solidThe controller is paired with the door sensor.
Now to pair the controller with the door sensor
Follow the next steps to pair the sensor with controller:
- Press and hold tho door button for 3 seconds it the sensor indicator LED is oil the sensor indicator LED will bknk yellow.
- Place the sensor horizontally on a flat plane near the controller, and then flip the sensor vertically, after approx. 24 seconds, the sensor indicator LED will be said yellow which means the controller is paired with the sensor.
How to remove the pairing
- Confirm the sensor indicator LED is solid yellow.
- Press and hold the door button for 3 seconds, it will blink yellow showing the pairing been removed.
INSTALLATION
APP setup

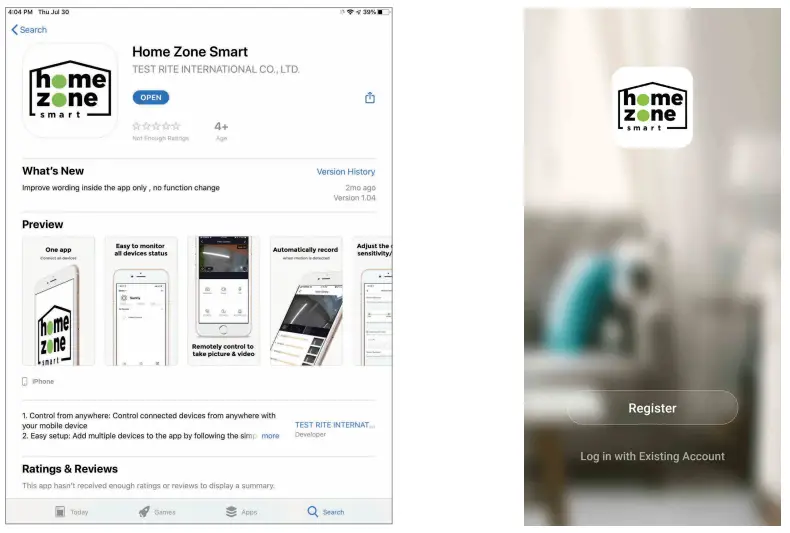
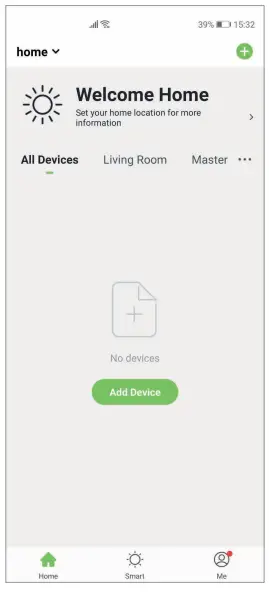
- Get the APP and Create an account.Download the Home Zone Smart’ APP to your smartphone from App Store or Google Play.
- Launch the APP from your smart phone and Create an account.
- Follow the on-screen instructions.
Add smart garage door opener to Home Zone Smart APP (Configure Wi-Fi)
- Connect the adapter cable to the controller, and plug the power adapter into a power outlet.
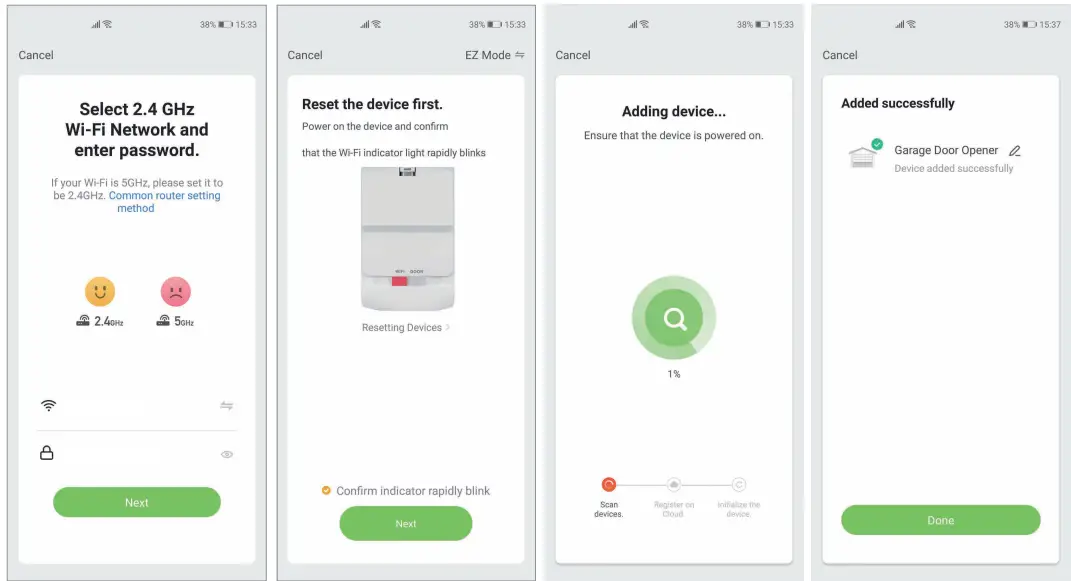
- The Wi-Fi indicator LED flashes green 3 times then red and blinks quickly.
 Note: if the Wi-Fi indicator LED is not blinking then you need to reset the device’s pairing mode by pressing and holding the Wi-Fi pairing button for 3 seconds.When it is flashing RED rapidly it is ready to be paired with the APP.
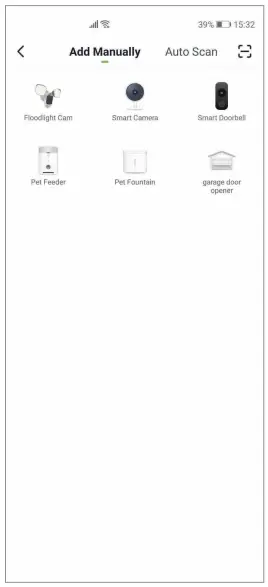
 - Open the Home Zone Smart APP, tap ‘Add Devices’ (if empty room) or ‘+’ to add your smart garage door opener.
- Select “Garage Door Opener”;
- Enter your home Wi-Fi password, then click “next”, connection will now begin.
- Once connected you should see the message ‘Added successfully and the light on the controller should be solid GREEN (See right figure). You can click on the pen to change the device name then press tone’.
Pair the sensor with the controller
BEFORE INSTALLING SENSOR. Please check if the sensor is working properly. Open the Home Zone Smart APP and select the garage door opener.
- Pair the sensor with controller. Confinn the sensor Indicator LED is solid yellow after paring. See ‘How to pair the controller with the doer sensor’.
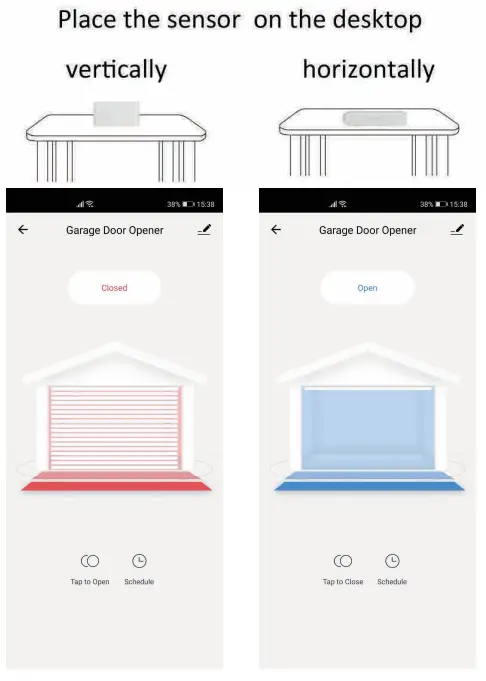
- Flip the sensor 90 degrees and after approx. 15-20 seconds, the app should show the correct state according to the direction of the door sensor. See the left figure:
Note:
- When the device is online. it can be controlled.
- When the device Is offline, it displays ‘offline” and cannot be remotely powered on.
- The garage door opener does not support 5GHz networks, ensure your VA-Fl Is 2AC,Hz.
If the sensor Is not working properly or you cannot connect the controller to the Home Zone Smart APP, please contact with us for troubleshooting and for full InstruNions.
Installation
Note: Please power off your garage door opener before installing the device.
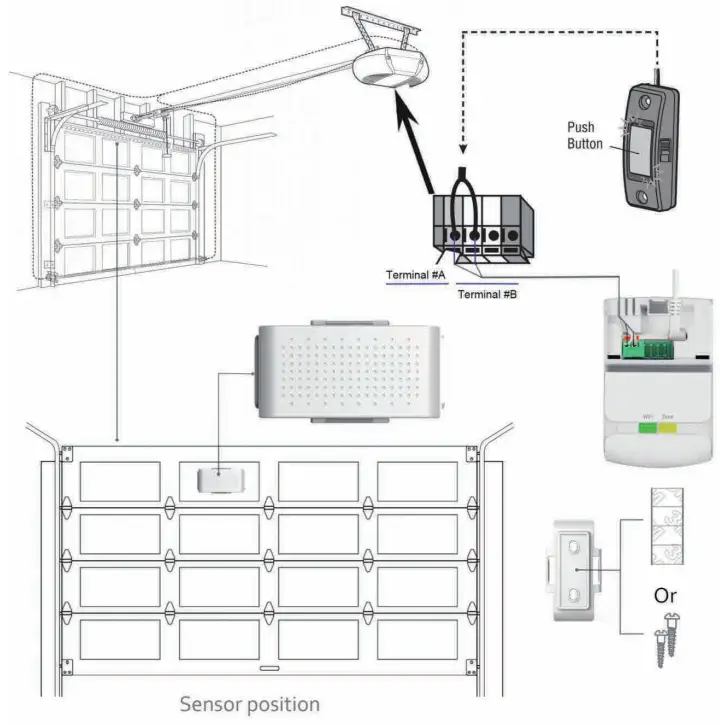
- Connect controller to your garage door opener with the wire cable 1) Connect the cables of the controller to your garage door opener terminals Connect to the same terminals that your wall button is using. If you have a wall button installed, twist the wall button cabel and the controller wires together and insert into the terminals.
- Find a suitable area to place the controller bracket by using self-screws or ties, then push the controller into the controller bracket.How to fix the controller? Step 1 or step 2.
 How to fix the controller? Step 1 or step 2.
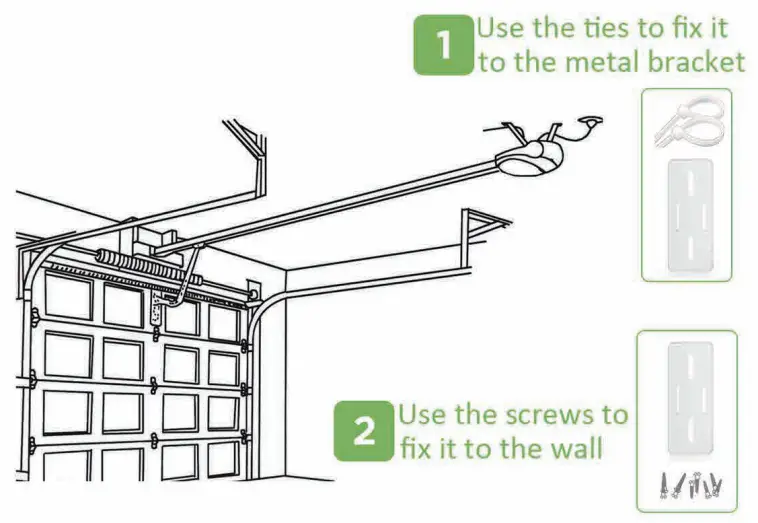
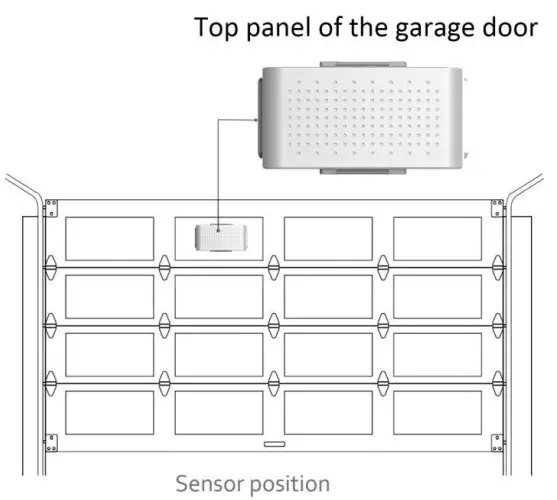
Install Door Sensor
- Close your garage door.
- Clean an area on the top panel of the garage door where the sensor will be attached.
- Remove the double-sided tape and press into place. You can also use Self-tap Screws to install the sensor.Note: The door sensor will only work if mounted to the top panel of your garage door. Any other placement will cause incorrect state.
TestOpen or close the garage door 3 to 5 times, and check the state on your APP.
TROUBLESHOOTING
Garage door does not open or close from the APP, but it works normally from the wall-mounted garage door opener and remote control.
- Make sure that your intemet is working.
- Make sure that the controllers Wi-Fi indicator LED is on (if the LED is not solid green, the controler is not connected to Wi-Fi).
- Make sure that the motor control cable is connected to the garage motor terminal Inspect the cable for any sign of cuts or damage and replace if needed.
- Make sure that the motor control cable is connected securely to the controller.
- Restart the APR.
The controller does not connect to my Wi–Fi network.
- Connect your mobile phone to the same Wi-Fi network that you want to use, then hold your mobile phone near the controller. Check your Wi-Fi status on your mobile If the signal strength is weak, the connection may be failed. To improve your Wi-Fi signal, you can move the router closer to the garage or install a Wi-Fi extender midway between the controller and your Wi-Fi router.
- Make sure that you are using a 2.4GHz network. Some routers have only their 5GHz network on by default. Use your router’s setup process to enable the 2.4GHz
- Make sure that the security option on your router is set to WPANVPA2.
- Move the controller inside your home close to your Wi-Fi router and set up its Wi-Fi there, then move it back to the garage and check to see if Wi-Fi is re-established. If green LED blinks after a minute from power-up, the Wi-Fi signal in the garage is weak and will need a Wi-Fi extender.
- If you are using the controller in a detached garage, you will need to install a Wi-Fi extender to boost the signal in the garage.
- If the LED indicator blinks green, it means the Wi-Fi password was incorrect or there is an issue with the connection.
The APP operates the door, but it does not show the door status correctly.
- Make sure that the sensor is mounted to the door securely. The position is very important.
- Re-pair the sensor with controller, if the sensor can be re-paired with the controller, it means the sensor is working, otherwise please take out of the sensor, open the shell to replace the battery.
- In low temperature environment (lower than -10°C), the battery of the sensor may not work. The battery model of the sensor is CR2450.
FCC
This device complies with Part 15 of the FCC Rules. Operation is subject to the following two conditions:
- this device may not cause harmful interference, and
- this device must accept any interference received, including interference that may cause undesired operation.
This device complies with FCC Part 15 of FCC Rules.Warning: Changes or modifications to this unit not expressly approved by the party responsible for compliance could void the user’s authority to operate the equipment.
NOTE: This equipment has been tested and found to comply with the limits for a Class B digital device, pursuant to Part 15 of the FCC Rules. These limits are designed to provide reasonable protection against harmful interference in a residential installation. This equipment generates, uses and can radiate radio frequency energy and, if not installed and used in accordance with the instructions, may cause harmful interference to radio communications. However, there is no guarantee that interference will not occur in a particular installation. If this equipment does cause harmful interference to radio or television reception, which can be determined by turning the equipment off and on, the user is encouraged to try to correct the interference by one or more of the following measures:
- Reorient or relocate the receiving antenna.
- Increase the separation between the equipment and receiver.
- Connect the equipment into an outlet on a circuit different from that to which the receiver is connected.
- Consult the dealer or an experienced radio/TV technician for help.
Register & Subscribe today to protect your investment and join our email list!
Scan below for link: http://homezonesecurity.com/warranty
homezonesecurity.com[email protected]US: +1 888-782-5618
Why Register?
- Receive your extended warranty
- Get professional warranty support
- Be the first to hear the latest product news.
- Get exclusive deals delivered to you email.
Get exclusive offers and deals when you subscribe!
 report this ad
Thank you for choosing Home Zone Security! We are here to support you every step of the way.
Please be sure to contact our customer support for troubleshooting and register your product for additional benefits. Products must be sold by an authorized reseller or distributor to be valid.
References
[xyz-ips snippet=”download-snippet”]