User Manual
![]()

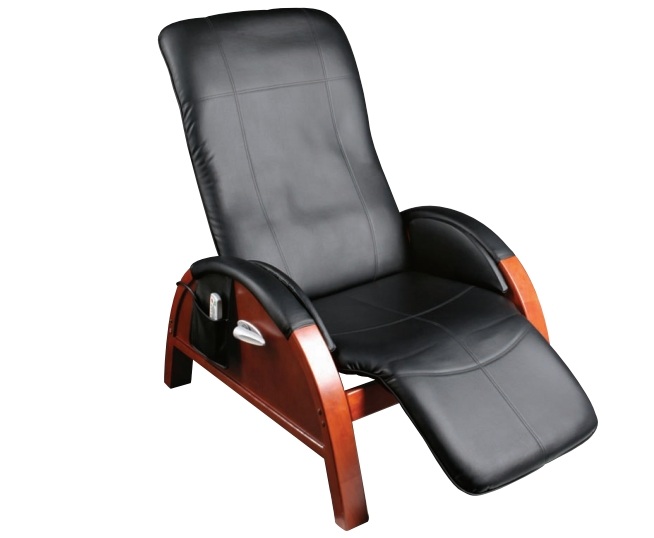
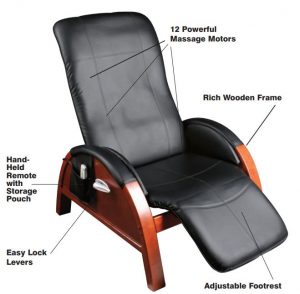
Homedics AG-4000TL Destress Spa Recliner
 A NOTE FROM TONY LITTLE
My commitment is to you the customer and always will be. I will always do my best to bring you innovative, useful, quality of life enhancing products that cover all categories of health fitness and wellness.
Enjoy life, Believe in Yourself and Always Go For It!

IMPORTANT SAFEGUARDS
WHEN USING ELECTRICAL PRODUCTS, ESPECIALLY WHEN CHILDREN ARE PRESENT, BASIC SAFETY PRECAUTIONS SHOULD ALWAYS BE FOLLOWED, INCLUDING THE FOLLOWING:
READ ALL INSTRUCTIONS BEFORE USINGDANGER – TO REDUCE THE RISK OF ELECTROCUTION:
- ALWAYS unplug the appliance from the electrical outlet immediately after using andbefore cleaning.
- DO NOT reach for an appliance that has fallen into water. Unplug it immediately.
- DO NOT use while bathing or showering.
WARNING – TO REDUCE THE RISK OF BURNS, ELECTROCUTION, FIRE OR INJURY TO PERSONS:
- An appliance should never be left unattended when plugged in. Unplug from outlet whennot in use and before putting on or taking off parts or attachments.
- Close supervision is necessary when this appliance is used by, on or near children, invalids or disabled persons.
- Use this appliance only for its intended use as described in this manual. Do not use attachments not recommended by HoMedics; specifically any attachments not providedwith the unit.
- NEVER operate this appliance if it has a damaged cord or plug, if it is not working properly, if it has been dropped or damaged, or dropped into water. Return it to HoMedics Service Center for examination and repair.
- NEVER use pins or other metallic fasteners with this appliance.
- Keep cord away from heated surfaces.
- NEVER use while sleeping or fall asleep while using the massager.
- NEVER drop or insert any object into any opening.
- DO NOT operate where aerosol (spray) products are being used or where oxygen is being administered.
- DO NOT operate under a blanket or pillow. Excessive heating can occur and cause fire, electrocution or injury to persons.
- DO NOT carry this appliance by supply cord or use cord as handle.
- To disconnect, turn all controls to the “OFF” position, then remove plug from outlet.
- This appliance is designed for household use only.
- This appliance is designed for personal, non-professional use only. This appliance should be used only for personal, nonprofessional uses.
Please Note: Hands and fingers should rest comfortably on top of arm rests. When moving the recliner between resting positions, fingers can be pinched if placed into the areas of the leg noted on the yellow caution sticker. (See yellow caution sticker on recliner legs.)
SAVE THESE INSTRUCTIONSCaution—Please read all instructions carefully before operating.
- This product is not intended for medical use. It is intended only to provide a luxurious massage.
- If you have any concerns regarding your health consult your doctor before using this product.
- Individuals with pacemakers should consult a doctor before use.
- NEVER leave the appliance unattended, especially if children are present.
- NEVER cover the appliance when it is in operation.
- DO NOT use this product for more than 60 minutes at a time.
- Extensive use could lead to the products excessive heating and shorter life. Should this occur, discontinue use and allow the unit to cool before operating.
- NEVER use this product directly on swollen or inflamed areas or skin eruptions.
- DO NOT use this product before bed. The massage has a stimulating effect and can delay sleep.
- NEVER use this product while in bed.
- This product should NEVER be used by any individual suffering from any physical ailment that would limit the user’s capacity to operate the controls.
- This product should never be used by any individual suffering from any ailments that would limit or altogether inhibit the user’s capacity to feel or have any sensation in the body part that the product is being used on.
- This unit should not be used by children or invalids without adult supervision.
Important Notice: If you experience any type of distortion or noise interference when turning the unit to the ON position, immediately turn the unit off. Wait a few seconds before turning the unit on and distortion/interference should be eliminated.
Easy to Follow Guide to Chair Assembly
1. Assembly Instructions/Components:
Carefully remove all contents from packaging and inspect the product to make sure all components of the recliner have been received. These should include:
- Left side frame A
- Right side frame with hand control pouch B
- Crossbars (2) C
- Back and leg frames D E
- Bolt caps/nuts and washers (8) F
- Large bolts (8) G
- Wrenches (3) H
- AC adaptor I
- Wood caps JSee Figure 1.
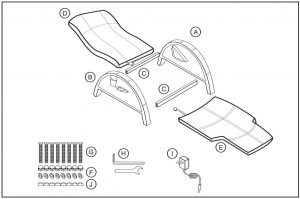
Figure 1
2. Assemble Chair Base
Figure 2A
- Attach both crossbars to the left frame. Make sure to match the corresponding number on the crossbar to the number on the frame.
- Insert the large bolts and tighten partially with the Allen wrench.

Figure 2A
Figure 2B/3
- Attach both crossbars to the right frame, matching the corresponding numbers.
- Insert the large bolts and tighten partially with Allen wrench.

Figure 2B
3. Attach Seat/Leg Frame to Base

Figure 3
Figure 4
- On a soft or carpeted surface turn frame upside down.
- Slide Seat frame under the crossbar. Align the Seat frame with pre-attached bolts to the frame, be sure to match the corresponding numbers.
 Figure 4
Figure 5/5A
- Place a washer and nut on each bolt to secure the seat to the Seat to Chair Base. Use wrench to tighten partially.

Figure 5

Figure 5A
4. Attach Back Frame to Base
Figure 7A/7B/8
- Flip chair back into the regular position.
- Slide the Back of the chair into the frame, matching the corresponding numbers.

Figure 7A
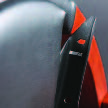
Figure 7B
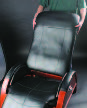
Figure 8
Figure 9
- From the back side add washer and screw on all bolts to secure the Back to the Chair Base.
- Completely tighten all nuts and bolts on the entire chair.
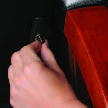
Figure 9
5. Final Steps Figure 10
- Firmly insert the connector from the bottom of the back cushion to the connector on the seat cushion as shown in Figure 10.
Figure 11
- Install Wood Plugs into each of the Bolt Holes.
- Remove number stickers from chair frame.
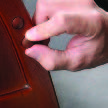
Figure 11
Instructions for Inversion Massage Recliner Use
Your Inversion Massage recliner is designed to provide relaxation in a variety of positions utilizing the easy lock levers on each side of the armrests. The ideal position for optimum relaxation is one in which the feet are above the heart.
NOTE: The Spa Inversion Massage recliner design has a weight limit of 350 pounds. Persons exceeding this body weight should not use this recliner.
- Before sitting in the Inversion Massage recliner, be sure it is in the complete upright position by unlocking the levers and pulling the backrest forward until it stops.
- Lock the recliner into the upright position by pushing the levers forward toward the footrest.
- Sit in the chair, unlock the recliner levers, and lean back slowly. Sitting all the way back in the seat will make it easier to recline. To adjust the angle of the chair, hold on to the armrests and lean back or forward until you reach the desired position. Lock the position into place by pulling the levers back towards your head.
- The footrest may be raised by pulling it upward. Each position will sound with a click. To lower the footrest, raise it until it stops and then push it back towards the floor.
- Before getting out of the Spa Inversion Massage recliner, be sure to return it to its full upright position and lock into place.
- Stand up using the armrests for support.
Tip: To help you recline, slowly raise your hands above your head and lean back. Lock in your desired position with the easy lock levers. To sit upright, unlock the levers and move hands slowly towards your knees while leaning slightly forward. This will bring the recliner back to its full upright position.
Power Adaptor InstructionsConnect the adaptor jack to the massage cushion’s power receptacle located along the right side of the cushion. Once inserted, plug the other end into an AC power outlet. Use only the AC power adaptor provided with this unit.
AC Power Adaptor InformationYour massage cushion is powered by an attached custom AC home adaptor. Use only the supplied AC home adaptor as other similar-looking adaptors may cause irreparable damage to the unit and will void your warranty.
Massage Cushion and Hand Control Instructions
Press the POWER button once to activate the hand controller. A corresponding LED light will illuminate to indicate the power is ON. To deactivate, press again.
HeatTo activate the heat function, your back must first be pushed against the cushion and the massage function must be on. Once resting comfortably, press the HEAT button once. The L.E.D. above the heat button will light indicating the heat is on.
NOTE: When selecting the heat feature with massaging action, there will be a slight decrease in the strength of the massage output. This adjustment is normal and should not be interpreted as a defect.
Massage StrengthUse this function to customize the intensity of your massage. The intensity will increase with each press of the strength button providing three levels: low (L), medium (M), high (H). To change the intensity from high to low, press the button again.
Massage SpeedUse this function to customize the speed of each massage cycle. The speed will increase with each press of the speed button providing three levels as well; low (L), medium (M), high (H). To change the speed from high to low, press the button again.
Massage Styles and Target Zone OptionsChoose from 8 massage functions. To activate, press the desired function button. You can move from one style to another by simply depressing the button of another style. You can further customize your massage by targeting body zones and varying the speed and intensity within each style.

Automatic Shut Off
The Spa Inversion Massage recliner has been designed for convenience and safety. As a special precaution against falling asleep while using the unit, or leaving the unit on while it is still in operation, we’ve programmed it to automatically stop working 60 minutes after receiving your last command. Any time you change massage functions, the timer will reset. This special feature should not be considered as a substitute for OFF. Always remember to turn your unit off when not in use.
Please Note:For added protection of your unit: When the power is on but no function is selected or only the HEAT function is chosen with no massage function selected, the unit will automatically shut off after 15 minutes.
Maintenance
To Store: Place the hand control into the custom storage pouch which hangs from the right side armrest . Avoid contact with sharp edges or pointed objects which might damage/puncture the fabric.
To Clean: Disconnect massage cushion from power source before cleaning. The massage cushion and hand control may be cleaned with a soft, damp cloth only.
- The massage cushion is not machine washable and must not come into contact with water or any other liquids.
- Do not immerse into liquids to clean.
- Never use abrasive cleaners, brushes, gasoline, kerosene, polish or paint thinner to clean.
- Do not attempt to repair your Spa Inversion Massage recliner. There are no user serviceable parts. For service, send the unit to the HoMedics service address listed in the warranty section.
Frame: Periodically, the frame should be checked to ensure the screws are tight. If the frame is found to be loose, tighten screws with the tools provided.
The Inversion Massage recliner and massage cushion are designed for indoor applications only. Use of this product for outdoor applications may cause irreparable damage and void your warranty.
TWO YEAR LIMITED WARRANTY
HoMedics sells its products with the intent that they are free of defects in manufacture and workmanship for a period of two years from the date of original purchase, except as noted below. HoMedics warrants that its products will be free of defects in material and workmanship under normal use and service. This warranty extends only to consumers and does not extend to Retailers.
To obtain warranty service on your HoMedics product, mail the product and your dated sales receipt (as proof of purchase), postpaid, to the following address:
HoMedics Consumer RelationsService Center Dept. 1683000 Pontiac TrailCommerce Township, MI 48390No COD’s will be accepted.
HoMedics does not authorize anyone, including, but not limited to, Retailers, the subsequent consumer purchaser of the product from a Retailer or remote purchasers, to obligate HoMedics in any way beyond the terms set forth herein. This warranty does not cover damage caused by misuse or abuse; accident; the attachment of any unauthorized accessory; alteration to the product; improper installation; unauthorized repairs or modifications; improper use of electrical/ power supply; loss of power; dropped product; malfunction or damage of an operating part from failure to provide manufacturer’s recommended maintenance; transportation damage; theft; neglect; vandalism; or environmental conditions; loss of use during the period the product is at a repair facility or otherwise awaiting parts or repair; or any other conditions whatsoever that are beyond the control of HoMedics.
This warranty is effective only if the product is purchased and operated in the country in which the product is purchased. A product that requires modifications or adoption to enable it to operate in any other country than the country for which it was designed, manufactured, approved and/or authorized, or repair of products damaged by these modifications is not covered under this warranty.
THE WARRANTY PROVIDED HEREIN SHALL BE THE SOLE AND EXCLUSIVE WARRANTY. THERE SHALL BE NO OTHER WARRANTIES EXPRESS OR IMPLIED INCLUDING ANY IMPLIED WARRANTY OF MERCHANTABILITY OR FITNESS OR ANY OTHER OBLIGATION ON THE PART OF THE COMPANY WITH RESPECT TO PRODUCTS COVERED BY THIS WARRANTY. HOMEDICS SHALL HAVE NO LIABILITY FOR ANY INCIDENTAL, CONSEQUENTIAL OR SPECIAL DAMAGES. IN NO EVENT SHALL THIS WARRANTY REQUIRE MORE THAN THE REPAIR OR REPLACEMENT OF ANY PART OR PARTS WHICH ARE FOUND TO BE DEFECTIVE WITHIN THE EFFECTIVE PERIOD OF THE WARRANTY. NO REFUNDS WILL BEGIVEN. IF REPLACEMENT PARTS FOR DEFECTIVE MATERIALS ARE NOT AVAILABLE, HOMEDICS RESERVES THE RIGHT TO MAKE PRODUCT SUBSTITUTIONS IN LIEU OF REPAIR OR REPLACEMENT.
This warranty does not extend to the purchase of opened, used, repaired, repackaged and/or resealed products, including but not limited to sale of such products on Internet auction sites and/or sales of such products by surplus or bulk resellers. Any and all warranties or guarantees shall immediately cease and terminate as to any products or parts thereof which are repaired, replaced, altered, or modified, without the prior express and written consent of HoMedics.This warranty provides you with specific legal rights. You may have additional rights which may vary from country to country. Because of individual country regulations, some of the above limitations and exclusions may not apply to you.
For more information regarding our product line in the USA, please visit: www.homedics.com
HoMedics Service Center1.800.466.33428:30 – 5:00 p.m. (EST) M–F
Mail To:HoMedicsService Center Dept. 1683000 Pontiac TrailCommerce Township, MI 48390Email: [email protected]
©2006-2008 HoMedics, Inc. and its affiliated companies, all rights reserved. HoMedics® is a registered trademark of HoMedics Inc. and its affiliated companies. All rights reserved.IB-AG4000TLB
Homedics AG-4000TL Destress Spa Recliner Manual – Homedics AG-4000TL Destress Spa Recliner Manual –
Questions about your Manual? Post in the comments!
[xyz-ips snippet=”download-snippet”]