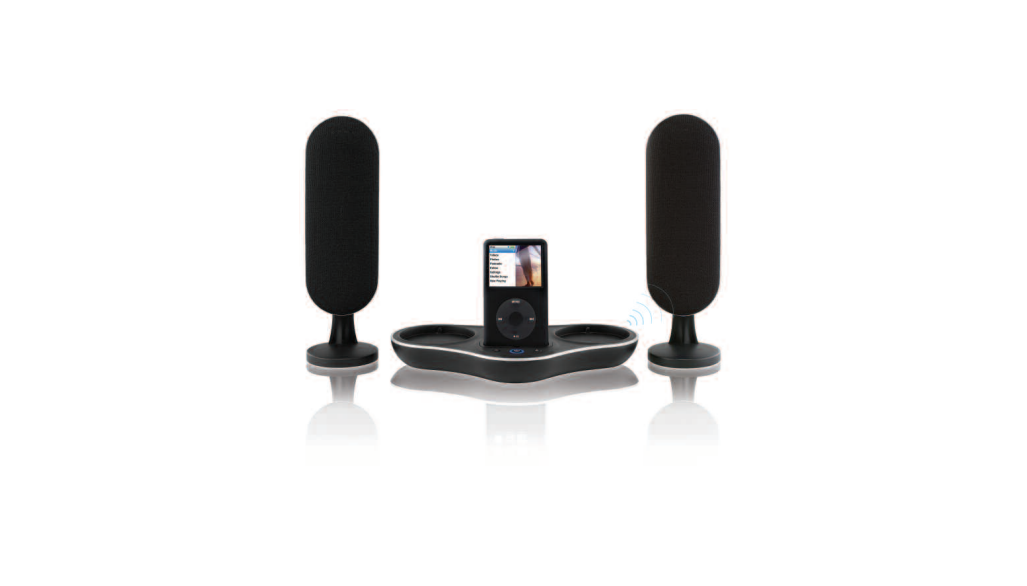
Wireless Speaker SystemSpeaker Dock for iPod
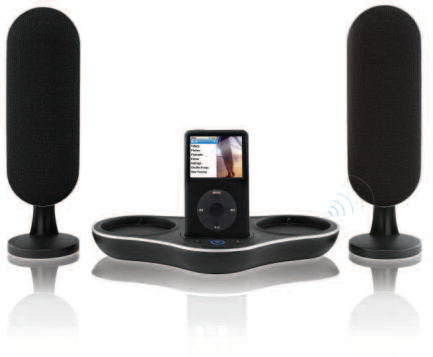
Instruction Manual and Warranty Information
HMDX-S50
Thank you for purchasing the HMDX S50 iPod Speakers. This, like the entire HMDX product line is built with high-quality craftsmanship to provide you years of dependable service. We hope you will find it to be the finest product of its kind.
IMPORTANT SAFETY INSTRUCTIONS:
When using an electrical appliance, basic precautions should always be followed, including the following:
READ ALL INSTRUCTIONS BEFORE USING
DANGER – To reduce the risk of electric shock
- Always unplug the appliance from the electrical outlet immediately after using and before cleaning.
- Do not reach for an appliance that has fallen into water. Unplug it immediately.
- Do not place or store appliance where it can fall or be pulled into a tub or sink.
- Do not place in or drop into water or other liquid.
WARNING – To reduce the risk of burns, fire, electric shock or injury to persons:
- Close supervision is necessary when this appliance is used by or near children, invalids or disabled persons.
- Use this appliance only for its intended use as described in this manual. Do not use attachments not recommended by HMDX; specifically any attachments not provided with the unit.
- Never operate this appliance if it has a damaged cord, plug, cable or housing. If it is not working properly, if it has been dropped or damaged, return it to HMDX Service Center for examination and repair.
- Keep cord away from heated surfaces.
- Never drop or insert any object into any opening.
- Do not operate where aerosol (spray) products are being used or where oxygen is being administered.
- Do not carry this appliance by power cord or use cord as handle.
- To disconnect, remove plug from outlet.
- This appliance is designed for indoor use only. Do not use outdoors.
- Only set on dry surfaces. Do not place on surface wet from water or cleaning solvents.
Caution: All servicing of this product must be performed by authorized HMDX Service Personnel only.
Caution – Please read all instructions carefully before operating.
- Never leave the appliance unattended, especially if children are present.
- Never cover the appliance when it is in operation.
- This unit should not be used by children without adult supervision.
- Always keep the cord away from high temperature and fire.
- Do not lift, carry, hang, or pull the product by the power cord.
- If the adaptor sustains damage, you must stop using this product immediately and contact the HMDX Service Center. (See the warranty section for the HMDX address.)
SAVE THESE INSTRUCTIONS

Getting Started
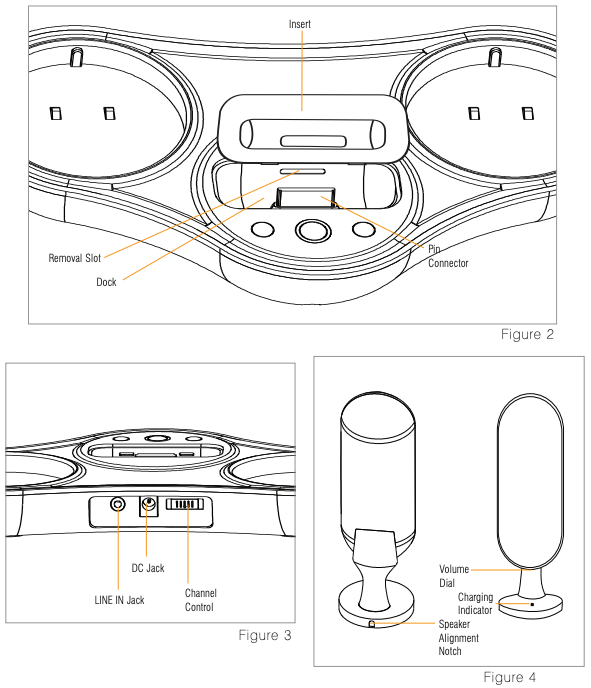
- Attach the DC adaptor to the DC Jack located on the back of the unit. (Fig. 3)
- Plug the cord into 120V household outlet.
Charging your iPod™
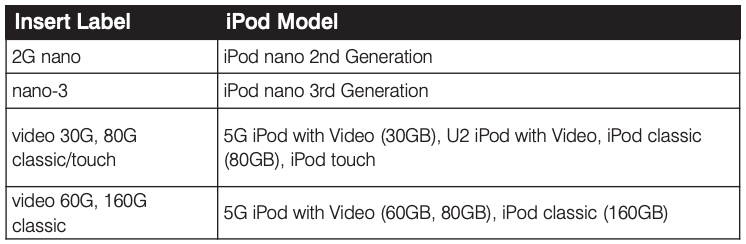
- Select the correct insert for your particular iPod model from the chart below:
 When you want to connect a different size iPod, remove the insert from the dock and replace with the correct size insert. To remove dock insert, place fingernail in slot on insert (Fig. 2) and gently pull up. You must always use the appropriate size insert for your iPod. If you do not find the correct matching dock insert listed above to your iPod model, you may use the dock adapter insert that was included with your original iPod purchase or call HMDX AUDIO Service Center at 1.800.466.3342 to purchase one.Note: Make sure you are using the correct insert for your iPod and that it is properly placed in the dock of the unit. Failure to do so may damage your iPod.WARNING: INSERTS AND PIN CONNECTOR ARE DESIGNED FOR APPLE iPOD MUSIC PLAYERS ONLY. ATTEMPTING TO ATTACH OR FORCE ANY NON-iPOD MUSIC PLAYER INTO ENCLOSED INSERTS OR ONTO THE PIN CONNECTOR WILL DAMAGE AND EVEN DESTROY YOUR DEVICE.
 - Remove your iPod from its case or ‘skin’. Place insert in dock, being sure that the two plastic tabs face the front of the unit. Press insert into place, ensuring it is firmly placed in the dock (Fig. 2). Carefully place your iPod into the docking area so that the pin connector in the dock is fully connected to the pin socket on the bottom of your iPod (Fig. 5). You will hear a “chirp”, indicating that your iPod is properly connected.
- Your iPod will begin charging, until fully charged.Note: Your iPod will charge even if the POWER button is turned off. The unit only needs to be plugged in for the iPod to charge.
- To remove/replace an insert, first remove your iPod then insert fingernail in slot on insert (Fig. 2), and gently pull up.
 When you want to connect a different size iPod, remove the insert from the dock and replace with the correct size insert. To remove dock insert, place fingernail in slot on insert (Fig. 2) and gently pull up. You must always use the appropriate size insert for your iPod. If you do not find the correct matching dock insert listed above to your iPod model, you may use the dock adapter insert that was included with your original iPod purchase or call HMDX AUDIO Service Center at 1.800.466.3342 to purchase one.Note: Make sure you are using the correct insert for your iPod and that it is properly placed in the dock of the unit. Failure to do so may damage your iPod.WARNING: INSERTS AND PIN CONNECTOR ARE DESIGNED FOR APPLE iPOD MUSIC PLAYERS ONLY. ATTEMPTING TO ATTACH OR FORCE ANY NON-iPOD MUSIC PLAYER INTO ENCLOSED INSERTS OR ONTO THE PIN CONNECTOR WILL DAMAGE AND EVEN DESTROY YOUR DEVICE.
Charging your Speakers
You can take your HMDX S50 speakers with you and play your music wherever you want, no wires required!
Line up notch in back of speaker base (Fig. 4) with notch in the charging pad on the base unit (Fig.1). When speaker is placed in recharging cradle properly, an indicator light on the base of speaker will glow red for recharging, or green for fully charged (Fig. 4) The speakers will charge in recharging cradle with the unit plugged in even if the POWER button is turned off.
Note: For best results keep wireless speakers within 150 feet range from the base unit. Some building materials and location of the base unit or wireless speakers can affect transmission quality and range. Try various locations for best results.
Note: It can take approximately 3 hours to fully charge your speakers initially. When fully charged, your speakers will have up to approximately 5 hours of use.
Listening to your iPod
- Press POWER button on base unit. Button will glow blue to indicate base unit is on. (Fig. 1).
- Turn speakers on by rotating volume dial under each speaker clockwise. Dial will click once as you rotate and glow blue to indicate speaker is on. (Fig. 4)Note: Both base unit and speakers need to be turned on to listen to your iPod.
- Press PLAY/PAUSE button on iPod to pause play; press again to resume play.
- Press – or + on base unit to adjust volume. (Fig. 1)
- To turn unit off, press POWER button on base unit. Button will no longer glow blue indicating it is off.
- To turn speakers off rotate volume dial on each speaker counter clockwise until dial clicks once and no longer glows blue.Note: If the speakers have interference or static during play, adjust channel by sliding channel control on back of unit. (Fig. 3). Select from channel 1, 2, or 3 to achieve best sound signal.
Control Volume
You can adjust volume for each individual speaker or adjust volume for both speakers from the HMDX-S50 base unit.
- To adjust volume of each individual speaker, rotate volume dial under speaker until you reach desired volume (Fig. 4). This can be done with the speaker in or out of charging pads.
- To adjust volume of system, use – or + buttons on HMDX-S50 base unit. This can be done with speakers in or out of the charging pads. (Fig. 1)
- For maximum volume rotate volume dial fully clockwise on each speaker, and push + on front of unit until you have maximum volume.Note: When iPod is in dock, volume is controlled through HMDXS50 unit, not by iPod click wheel.
Listening to a non-docking iPod or other portable audio devices
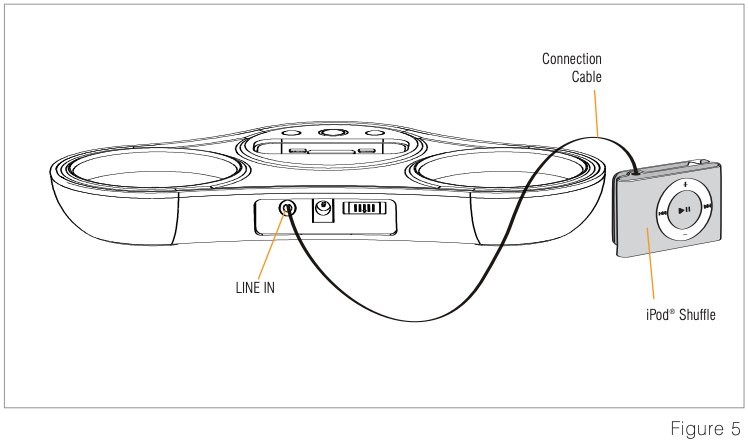
If you are using an iPod without a docking port, other MP3 player, or other portable audio device, you can play it through the unit via the LINE IN jack located on the back of the unit. (Fig. 6)
- Plug one end of the Connection Cable (included) (Fig. 1) into the headphone or line-out jack on your audio device and the other end of the Connection Cable into the unit’s LINE IN jack located on the back of the unit (Fig. 6).
- Press the POWER button on the unit to turn it on (Fig. 1).
- Turn on and play external audio device.
- Press the ‘–’ or ‘+’ button on the unit to adjust volume (Fig. 1).Note: You may need to adjust the volume on external device too.
- To turn unit off, press the POWER button on the front of the unit (Fig. 1).Note: You also need to turn off your external audio device as well.
Maintenance
To Store
You may leave the unit on display, or you can store it in its box in a cool, dry place.
To Clean
Use only a soft dry cloth to clean the enclosure of the unit. NEVER use liquids or abrasive cleaner to clean.
Modifications not authorized by the manufacturer may void user warranty.
Note: This equipment has been tested and found to comply with the limits for a Class B digital device, pursuant to Part 15 of the FCC Rules. These limits are designed to provide reasonable protection against harmful interference in a residential installation. This equipment generates, uses and can radiate radio frequency energy and, if not installed and used in accordance with the instructions, may cause harmful interference to radio communications. However, there is no guarantee that interference will not occur in a particular installation. If this equipment does cause harmful interference to radio or television reception, which can be determined by turning the equipment off and on, the user is encouraged to try to correct the interference by one or more of the following measures:
- Reorient or relocate the receiving antenna.
- Increase the separation between the equipment and receiver.
- Connect the equipment into an outlet on a circuit different from that to which the receiver is connected.
- Consult the dealer or an experienced radio/TV technician for help.
Note: The manufacturer is not responsible for any radio or TV interference caused by unauthorized modifications to this equipment. Such modifications could void the users authority to operate the equipment.
Homedics HMDX-S50 HMDX AUDIO Wireless Speaker System Speaker Dock for iPod Instruction Manual and Warranty Information – Homedics HMDX-S50 HMDX AUDIO Wireless Speaker System Speaker Dock for iPod Instruction Manual and Warranty Information –
[xyz-ips snippet=”download-snippet”]