
BODY BASICS
WC-200Instruction Manual and Warranty Information1 year limited warranty
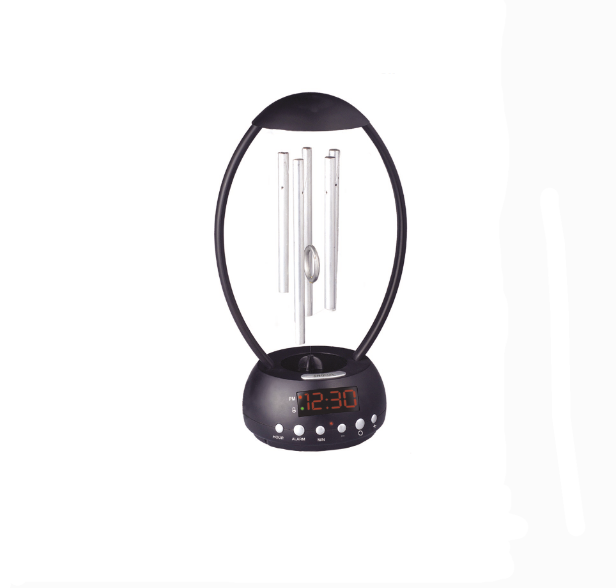
Bring the melodic sounds of outdoor wind chimes indoors.Thank you for purchasing the HoMedics EnviraScape Indoor Tranquil Wind Chimes. This, like the entire HoMedics product line, is built with high-quality craftsmanship to provide you with years of dependable service. We hope that you will find it to be the finest product of its kind.EnviraScape enables you to create an all-encompassing environment with sound. The sound enhances your environment and promotes relaxation. Only EnviraScape offers you the luxury of these vital benefits while its creative design adds beauty to any indoor environment.
IMPORTANT SAFETY INSTRUCTIONS:
When using an electrical appliance, basic precautions should always be followed, including the following:READ ALL INSTRUCTIONS BEFORE USINGDANGER – To reduce the risk of electric shock:
- ALWAYS unplug the appliance from the electrical outlet before cleaning.
- DO NOT reach for an appliance that has fallen into the water. Unplug it immediately.
- DO NOT place or store an appliance where it can fall or be pulled into a tub or sink. DO NOT place in or drop into water or other liquid.
- WARNING – To reduce the risk of burns, fire, electric shock, or injury to persons:
- Close supervision is necessary when this appliance is used by or near children, invalids, or disabled persons.
- Use this appliance only for its intended use as described in this manual.DO NOT use attachments not recommended by HoMedics; specifically, any attachments not provided with the unit.
- NEVER operate this appliance if it has a damaged cord or plug. If it is not working properly, if it has been dropped or damaged, return it to HoMedics Service Center for examination and repair.
- Keep the cord away from heated surfaces.
- NEVER drop or insert any object into any opening.
- DO NOT operate where aerosol (spray) products are being used or where oxygen is being administered.
- DO NOT operate under blanket or pillow. Excessive heating can occur and cause fire, electrical shock, or injury to persons.
- DO NOT carry this appliance by supply cord or use cord as a handle.
- To disconnect, remove the plug from the outlet.
- This appliance is designed for indoor use only. DO NOT use outdoors.
SAVE THESE INSTRUCTIONS
Caution – Please read all instructions carefully before operating.
- NEVER cover the appliance when it is in operation.
- This unit should not be used by children without adult supervision.
- ALWAYS keep the cord away from high temperature and fire.
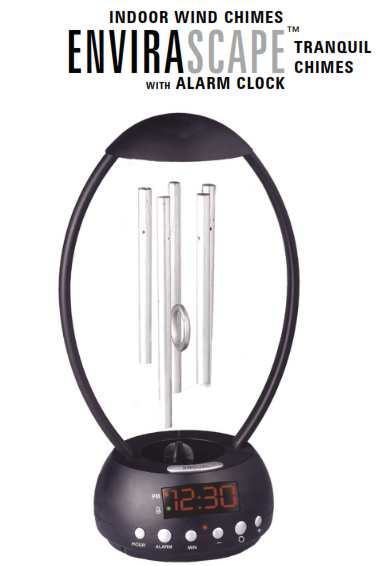
Tranquil Chime Features
- Alarm clock with two wake options, wake to Windchimes or wake to Beep tone
- Programmable, fan-driven chimes
- Easy-to-read large LED clock display
- Convenient, easy-to-use control, including Snooze function
- 30-minute shut-off for Alarm
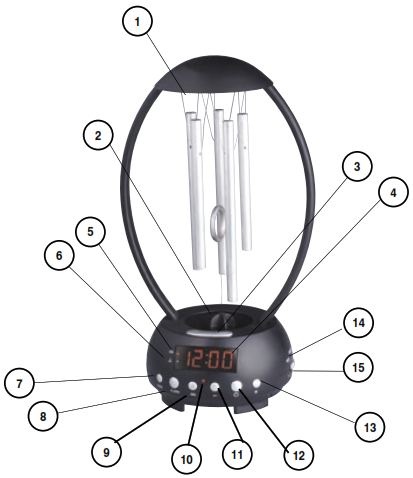
- Chimes
- Fan – simulates the sound of natural wind
- Snooze Button – to stop the alarm for 10 minutes to allow for more sleep (can be used 6 times)
- LED Illuminated Clock Display – view the current time and the alarm time
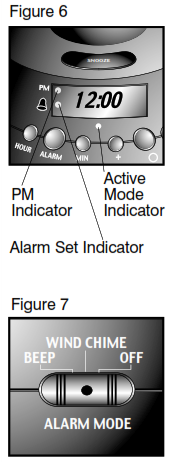
- PM Indicator – a red LED illuminates in the PM hours
- Alarm Set Indicator – a green LED illuminates when the alarm is set
- Hour Set – to adjust the hours for clock and alarm times
- Alarm Set – to set/review the alarm time
- Minute Set – to adjust the minutes for clock and alarm time
- Active Mode Indicator – a red LED illuminates when the alarm is sounding or in snooze mode, or if the Chime feature is on.
- Increase Button – increases the amount of time (frequency) that the chimes will ring
- • Chime – turns the chimes on and off• 24 Hour Alarm re-set button (snooze mode) – Re-sets the alarm for the next day once the user has already used the snooze button and the alarm is no longer soundingNOTE: If you wish to then use the chime feature once you have re-set the alarm simply press the button a second time to activate the chimes
- Decrease Button – Reduces the amount of time (frequency) that the chimes will ring
- Alarm Mode• Beep – to activate beep tone for alarm setting• Windchime – to activate gentle chiming for alarm setting (The chiming will be constant ONLY in Alarm Mode.)• Off – to turn off the alarm
- Adapter Receptacle – for AC power supplyNote: While alarm is sounding, any button can be pressed to stop alarm and re-set for next day. This will be confirmed by the illuminated Alarm Set Indicator (#6).
Assembly Instructions
- Unpack the product. (See Figure 1 for contents)
- This unit is powered by an AC adapter, which is included. The chimes and clock will ONLY operate if the adapter is used.
- The battery compartment is designed only to provide a MEMORY BACK-UP for the clock and alarm settings. 2 “AA” alkaline batteries (not included) should be inserted into the compartment if memory back-up is desired (in the event of power outages or if the unit is unplugged). However, the time will not be illuminated on the clock display. As soon as the power supply returns, the display will indicate the correct time.NOTE: Batteries must be installed in order for clock memory back-up to operate. In the event of a power failure or disconnection, if batteries are not installed, the clock and alarm will need to be reset when power is restored.
- To connect the AC adapter, connect the receptacle end to the bottom of the unit then insert the adapter plug into a 120V household outlet. (Figure 2)
- To install batteries, remove the compartment cover by pressing on the tab and pushing it down in the direction of the “open” arrow. Insert 2 “AA” alkaline batteries into the compartment on the bottom of the unit following the diagram. (Figure 3) Replace cover and snap into place.NOTE: It is recommended that the batteries remain installed while the adapter is being used. This unit has a battery back-up memory-saving feature that saves time for the clock and alarm settings. If you wish to unplug the unit this feature will only work if the batteries are installed. If you wish to change the batteries this feature will only work if the adapter is plugged in.
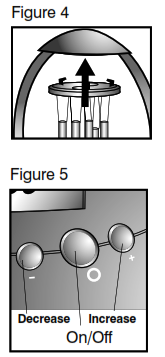
- To hang chimes, line up the 3 hooks on the top of the chimes with the holes on the underside top of the stand. (Figure 4) Insert and twist to secure in place.

Instructions for Chime Use
- First press the “O” button on the control panel to turn chimes on. (Figure 5) The Active Mode Indicator will illuminate to indicate that it is on.NOTE: Once the chimes are turned on, the fan will operate on and off to simulate the randomness of natural wind. The random length and frequency of the fan will allow the chimes to create everchanging tones for a peaceful and harmonious environment.
- Press the “+” or “-” buttons on control panel to increase or decrease the amount of time (frequency) between the chimes. (Figure 5)
- Press the “O” button again to turn off the chimes. The Active Mode Indicator will no longer be illuminated, indicating that it is off.NOTE: The chimes have an auto shut off feature and will stop chiming after 60 minutes.
Setting the Clock
1. Press the HOUR button until you reach the correct hour. NOTE: A red LED light (PM indicator) will appear in the upper left hand corner of the clock face during the PM hours. Be sure to set the time for the correct 12-hour period – AM (morning) or PM (evening). (Figure 6)2. Press the correct MIN button until reaching the correct minute.
Setting and Using the Alarm
- Press the ALARM button. The displayed time will begin to flash. You are able to set the desired alarm time ONLY while it is flashing.NOTE: Flashing will only continue for 2-3 seconds. Once flashing stops, the desired time can no longer be set. Therefore, press the alarm button again and flashing will restart. Continue setting the time.
- Press the HOUR button until reaching the desired hour.NOTE: The PM indicator also applies to the alarm. Be sure when setting the alarm, you are setting it for the correct 12-hour period.
- Press the MIN button until reaching the correct minute.
- To activate the alarm move the ALARM MODE switch from the OFF position to one of the two modes, Beep or Windchime. (Figure 7) Choose WINDCHIME to be gently awakened by the sound of continuous chiming. Choose BEEP to be awakened from a deep sleep.NOTE: The Alarm Set Indicator, a green LED, will appear on the clock display next to the alarm symbol (Figure 6) to indicate the alarm is set.
- The chiming or beeping of the alarm can be turned off by pressing ANY button on the unit, except for Snooze button. Alarm clock will automatically reset for the next day and will be indicated by the green LED light in the clock display. (Figure 6)
- The entire alarm system can only be turned off by shifting the Alarm Mode switch into the (Off) position. (Figure 7); which is confirmed by the corresponding green LED display (Alarm Set Indicator) which will also turn off. (Figure 6).
Using the Snooze Feature
When the alarm sounds (Beep or Windchime), the red LED light will appear under the clock display (Figure 6) the alarm mode indicator, to indicate the alarm is on – meaning the alarm is going off or is in Snooze mode. You may extend your sleep time by pressing the SNOOZE button located on the top of the base above the clock display (Figure 6). The alarm will then stop and wait 10 minutes before sounding again. The Snooze feature can be used up to 6 times, or an hour, to extend your sleep time. NOTE: After snooze button has been pressed at least once, you may press the “O” button (Alarm 24 hour reset button) to reset the alarm for the next day. NOTE: The alarm clock has an auto shut-off after 30 minutes of constant ringing.
ONE YEAR LIMITED WARRANTY(Valid in the USA only)HoMedics, Inc., guarantees this product free from defects in material and workmanship for a period of one year from the date of purchase, except as noted below.This HoMedics product warranty does not cover damage caused by misuse or abuse; accident; the attachment of any unauthorized accessory; alteration to the product; or any other conditions whatsoever that are beyond the control of HoMedics. This warranty is effective only if the product is purchased and operated in the USA. A product that requires modification or adaptation to enable it to operate in any country other than the country for which it was designed, manufactured, approved, and/or authorized or repair of products damaged by these modifications is not covered under warranty. HoMedics shall not be responsible for any type of incidental, consequential, or special damages. All implied warranties, including but not limited to those implied warranties of fitness and merchantability are limited in the total duration of one year from the original purchase date.To obtain warranty service on your HoMedics product, either hand-deliver or mail the unit and your dated sales receipt (as proof of purchase), postpaid, along with check or money order in the amount of $5.00 payable to HoMedics, Inc. to cover handling.Upon receipt, HoMedics will repair or replace, as appropriate, your product and return it to you, postpaid. If it is appropriate to replace your product, HoMedics will replace the product with the same product or a comparable product at HoMedics’ option. Warranty is solely through HoMedics Service Center. Service of this product by anyone other than HoMedics Service Center voids warranty.This warranty provides you with specific legal rights. You may have additional rights which may vary from state to state. Because of individual state regulations, some of the above limitations and exclusions may not apply to you.For more information regarding our product line in the USA, please visit: www.homedics.com
Mail To: HoMedics Consumer Relations Service Center Dept. 168 3000 Pontiac Trail Commerce Township, MI 48390e-mail: Caution: All servicing of this product must be performed by authorized HoMedics service personnel only.
© 2002 HoMedics, Inc. and its affiliated companies, all rights reserved. HoMedics® is a registered trademark of HoMedics, Inc. and its affiliated companies. EnviraScape® and Body Basics® are trademarks of HoMedics, Inc. and its affiliated companies. All rights reserved.IBWC200-A
Homedics WC-200 Indoor Wind Chimes Envirascape Tranquil Chimes with Alarm Clock Instruction Manual and Warranty Information – Homedics WC-200 Indoor Wind Chimes Envirascape Tranquil Chimes with Alarm Clock Instruction Manual and Warranty Information –
[xyz-ips snippet=”download-snippet”]