
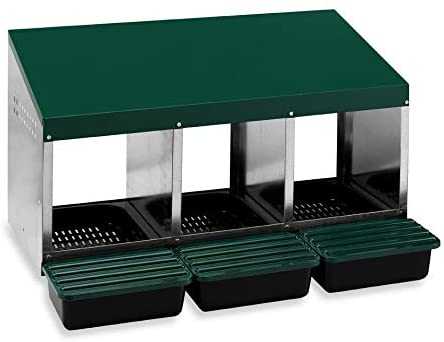
Homestead ESSENTIALS Roll Out Nesting Box 3 Compartment
Assembly Components:
| CONTENTS: | ACCESSORY BAG: | TOOLS NEEDED: | |
| 1. Roof (1) | 6. Basket Top (1) | Screw DIN 84 M5x8 (16) | Screwdriver |
| 2. Right Side Panel (1) | 7. Basket Stop (1) | Nut DIN 934 M5 (16) | |
| 3. Left Side Panel (1) | 8. Plastic Basket (3) | Threadhed Washer (3) | |
| 4. Right Division (1) | 9. Basket Lid (3) | Nylon Plug 8 mm (3) | |
| 5. Left Division (1) |
ASSEMBLY AND INSTALLATION INSTRUCTIONS
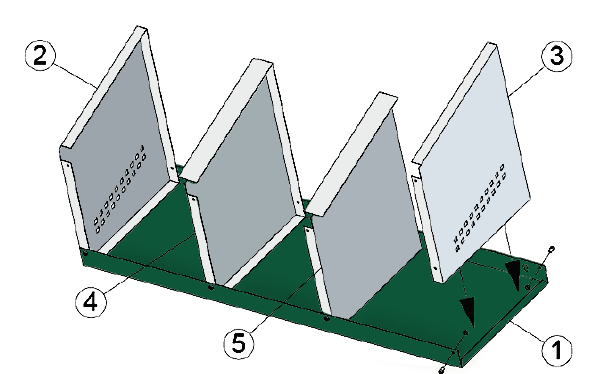 FIGURE 1
Place the roof upside down on a flat surface. Align panels and dividers with screw holes on the roof. Place panels and dividers with the concave side facing inwards. Secure each panel and divider in place with the screws and nuts provided.NOTE: Panels are differentiated from dividers by the ventilation holes on the side.
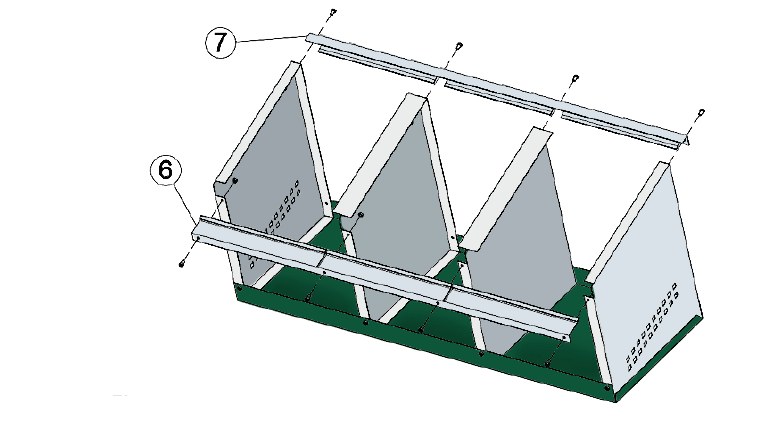
FIGURE 2
- Once the panels and dividers are secure, next attach the basket stops and basket top. Slide the basket stops on the shorter side of the panels, secure with screws and nuts provided. NOTE: There should be a gap between the basket stops and the bottom lip of the panels.
- On the long side of the panels, slide the basket top and secure with screws and nuts provided.NOTE: The flat edge of the basket top will rest underneath the bottom lips of the panels and dividers.
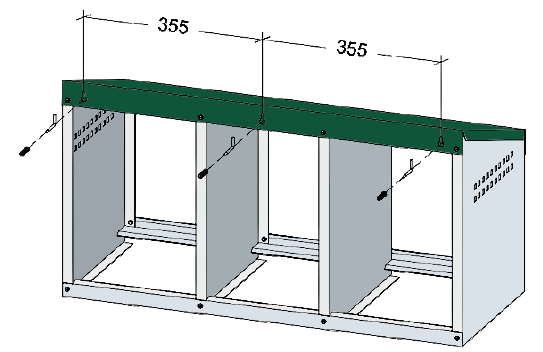
FIGURE 3
The foundation is now secure, flip so the roof is facing up. Mount the nesting box to a sturdy wall using wall plugs and hooks provided.
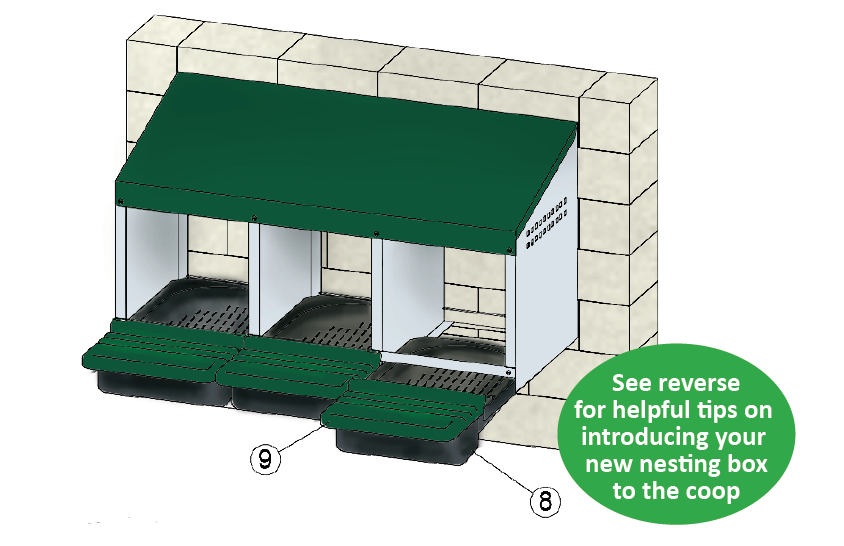 FIGURE 4
Lastly, clip the basket lids onto the nest basket. Once secured, slide the nest baskets between the basket stops and the bottom lip of the panels. Slide the nest baskets to the back of the nesting box, flush against the back of the basket top. NOTE: The nest baskets should sit between the side edges of the basket top.
INTRODUCING YOUR NEW NESTING BOXES TO THE COOP
If you are introducing these nesting boxes to a new coop or replacing old nesting boxes, you may notice that your hens don’t take to their new surroundings and begin laying on the floor or other places you don’t want. This is a completely normal and common issue. Your hens simply need to be trained to use the new nesting boxes.
TIPS FOR TRAINING HENS TO USE NESTING BOXES:
- Nest eggs (aka fake eggs)Place fake eggs in some of the nesting boxes to give your hens a hint that this is the place to lay their eggs. Don’t forget to mark your fake eggs so they don’t end up mixed in with the real eggs you collect.
- Add some nesting materialIf you are transitioning from another nesting box, then it can be useful to place a small amount of the nesting material you previously used inside these trays. Although they do not need any material, they will still roll the eggs forward if using a thin layer of straw, shredded paper or a thin nesting pad. Your hens will be familiar with the material from their previous nesting boxes and it will help them understand these nesting boxes are a safe space for them to lay. Once your hens are comfortable laying in the new nesting boxes then you can remove the nesting material.
- Be patientYour hens are smarter than you may think, they will eventually figure out the nesting boxes are a safe space for them to lay. It only takes one to understand the new nesting boxes is where they should lay and the others will follow.
If you have any other questions about introducing your nesting boxes to your coop please contact us at:Phone: (888) 529-9233 • Email: [email protected]Or visit our blog: https://peppersway.com/blogs/blog![]()
[xyz-ips snippet=”download-snippet”]