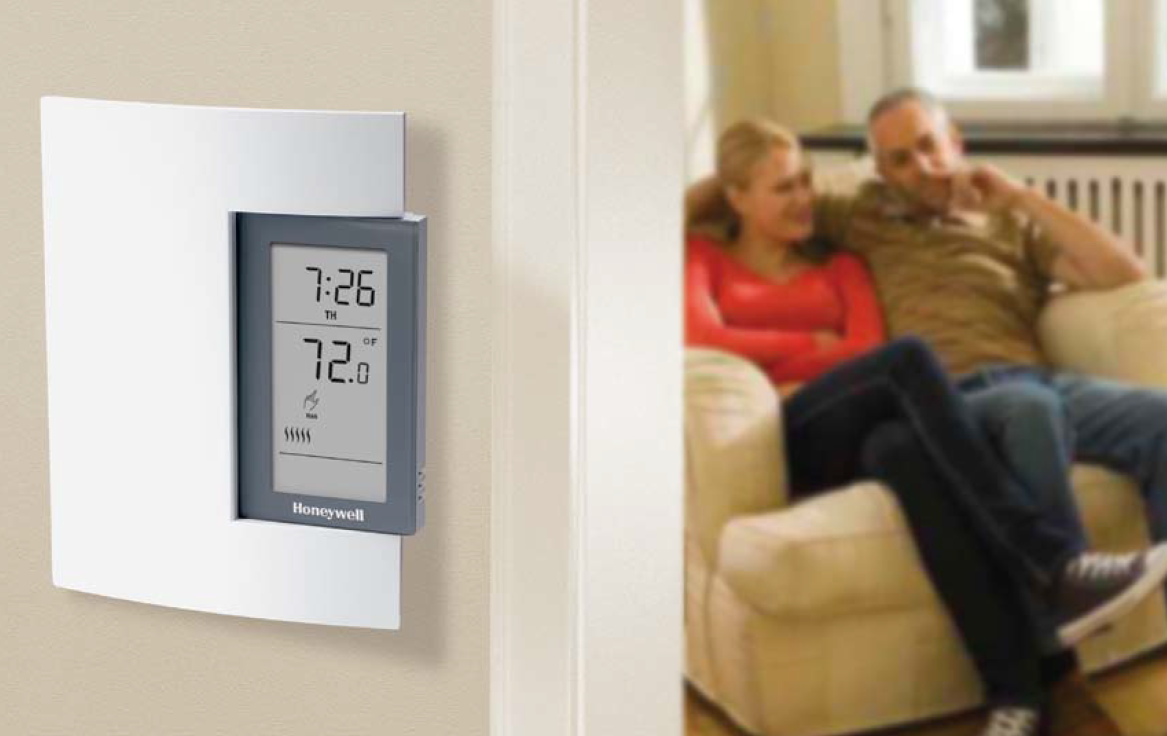
Honeywell Home TL8100A1008 7 Day Programmable Hydronic Thermostat

INSTALLATION INSTRUCTIONS
DESCRIPTION
This thermostat can be used to control the following heating systems:

- gas, oil or electric systems
- hot water heating
- hot air system with no fan control
- millivolt system (e.g., gas fireplace)
- electric heating up to 1200 W @ 240 V max.
TEMPERATURE DISPLAY AND SETTING
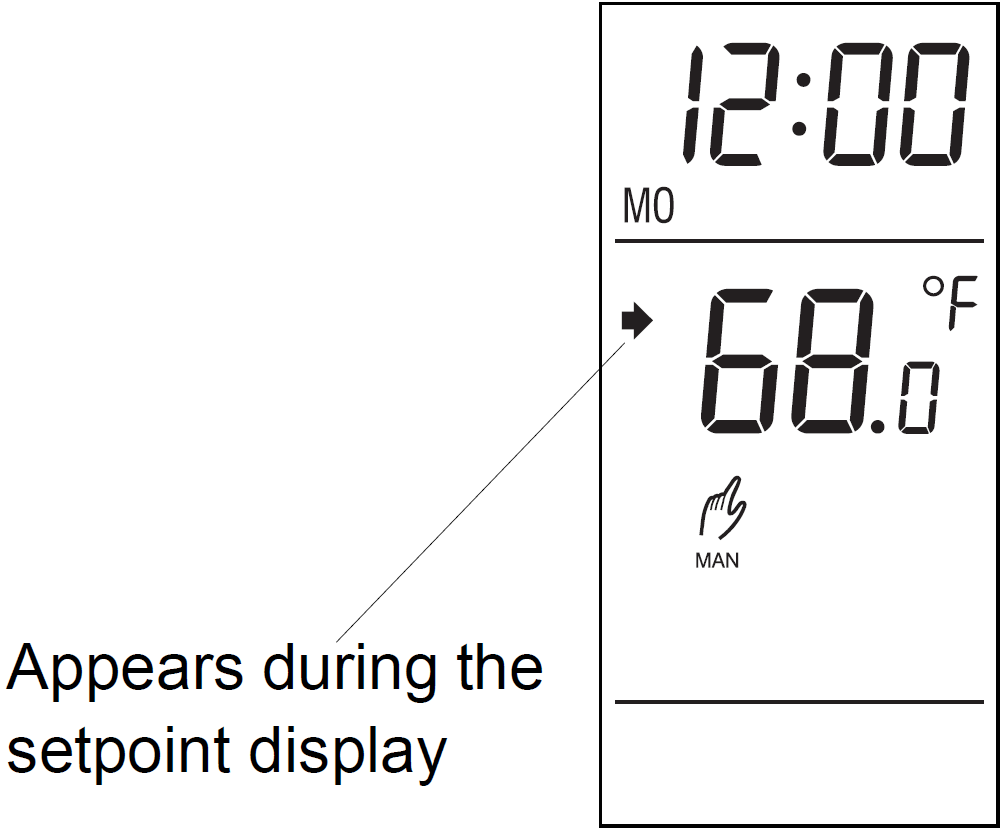
Setpoint Temperature
The thermostat normally displays the measured ambient temperature. To view the setpoint temperature, briefly press either of the buttons. The setpoint temperature will appear for 5 seconds.
To adjust the setpoint, press one of the UP & DOWN buttons until the desired temperature is displayed.
Preset Temperatures
The thermostat has 3 preset temperatures:
|
Preset Temperature |
Default Value |
| Comfort temperature |
68°F (20°C) |
| Economy temperature |
64°F (18°C) |
| Vacation temperature |
50°F (10°C) |
To use a preset temperature: Press the corresponding button. The temperature and the corresponding icon will be displayed.To change a preset temperature:
- Set the desired temperature using the UP & DOWN buttons.
- Press and hold the corresponding button until the icon is displayed on the screen (approximately 3 seconds).
SET THE TIME AND DAY
- Set the time, using the HOUR and MINUTE but-tons.
- Set the day, using the DAY button.
AUTOMATIC MODE
Use automatic mode if you want the thermostat to follow the programmed schedule. The thermostat will switch from the Comfort temperature to the Economy temperature, or vice versa according to the schedule.
 To use the automatic mode, press the Manual/Auto button repeatedly until appears on the screen.
Temporary Bypass
You can bypass the temperature setpoint of the current period when the thermostat is in Automatic mode.To do so, press one of DOWN & UP button until the desired temperature is displayed or select a preset temperature by pressing the corresponding button.You can cancel the bypass, by pressing the Manual/Auto button twice, before it cancels automatically at the start of the next period.
Schedule Programming
You can program up to 4 periods in a day. The Comfort temperature is used in periods 1 and 3 and the Economy temperature is used in periods 2 and 4. The start time of each period can be different for each day of the week.For each day, enter the time you wake up (period 1), the time you leave for work (period 2), the time you return home (period 3) and the time you go to sleep (period 4):
|
Period |
Associated Temperature |
Time |
|
1 |
Comfort |
Wake up |
|
2 |
Economy |
Leave home |
|
3 |
Comfort |
Return home |
|
4 |
Economy |
Sleep |
NOTE: For periods 1 and 3, set the start time earlier by at least 15 minutes for every 2°F (1°C) that the temperature needs to rise. For example, if you lower the temperature by 6°F (3°C) at night and you wake up at 7:00 a.m., set period 1 to 6:15 a.m.
- Press Program to enter the programming mode. The thermostat will display MO (Monday) and PROG 1 (period 1).
- To select another day, press Day.
- NOTE: To select all 7 days, hold Day for 3 seconds. When all 7 days are selected, the start time of the period being displayed will be the same every day.
- To select another period, press Program.Press Hour and Min to set the start time for the displayed period. If you want the thermostat to skip a period, press Clear, the time display of the displayed period becomes–:–.
- Press Manual/Auto to exit.
NOTE: If you do not press any button for 60 seconds, the thermostat will automatically exit the programming mode and save any changes made.
MANUAL MODE
In manual mode, the programmed schedule is not followed. Use this mode if you wish to set the temperature manually or maintain the same temperature all the time.To use the manual mode, press the Manual/Auto button repeatedly until the hand icon appears on the screen.
Press one of DOWN & UP buttons until the desired temperature is displayed or select a preset temperature by pressing the corresponding button.
VACATION MODE
In Vacation mode, the thermostat is set to the Vacation temperature. There are 2 ways to place the thermostat in Vacation mode.

- Press on the thermostat.
- From the remote control system or home automation system.
NOTE: The Vacation mode can only be deactivated remotely if it has been activated remotely.
BATTERY REPLACEMENT
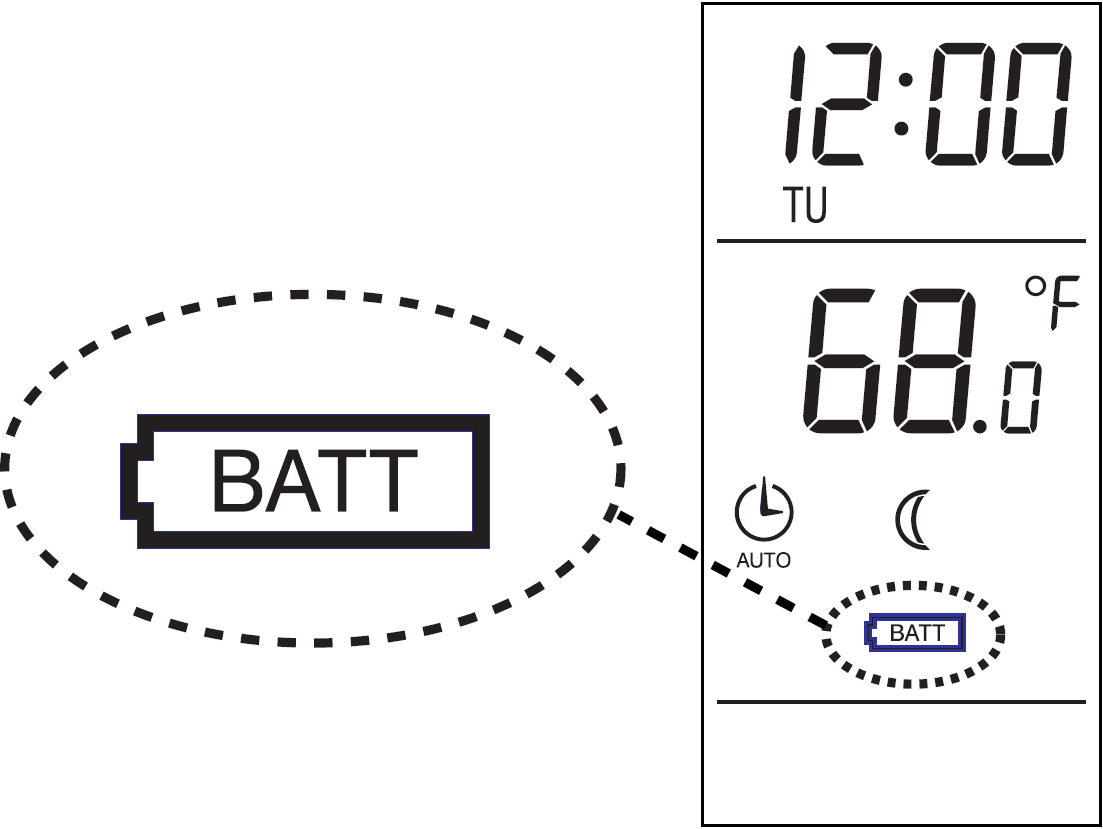
The time and programming are saved for the first 15 seconds when the batteries are removed.
SPECIFICATIONS
- Max. Resistive Load: 5 A @ 24 VDC / 120 VAC / 240 VAC
- Max. Inductive Load: 2 A @ 24 VDC / 120 VAC / 240 VAC (P.F.= 0.4) Compatible with millivolt system
- Remote Input: 12 VDC, ± 10 %, 2.5 mA
- Temperature Setpoint Range: 40 °F to 85 °F (5 °C to 30 °C)
- Temperature Display Resolution: 0.1 degree Operating temperature: 32 °F to 122 °F (0 °C to 50°C), 95 % R.H.
- Storage Temperature: -4 °F to 122 °F (-20 °C to 50°C)
- Certifications: CE, c UL us
- Protection Index: IP 40
WARRANTY
Honeywell warrants this product, excluding battery, to be free from defects in the workmanship or materials, under normal use and service, for a period of five (5) years from the date of purchase by the consumer. If at any time during the warranty period the product is determined to be defective or malfunctions, Honeywell shall repair or replace it (at Honeywell’s option).If the product is defective,
- return it, with a bill of sale or other dated proof of purchase, to the place from which you purchased it, or
- call Honeywell Customer Care at 1-800-468-1502. Customer Care will make the determination whether the product should be returned to the following address: Honeywell Return Goods, Dock 4 MN10-3860, 1885 Douglas Dr N, Golden Valley, MN 55422, or whether a replacement product can be sent to you.
This warranty does not cover removal or reinstallation costs. This warranty shall not apply if it is shown by Honeywell that the defect or malfunction was caused by damage which occurred while the product was in the possession of a consumer.Honeywell’s sole responsibility shall be to repair or replace the product within the terms stated above. HONEYWELL SHALL NOT BE LIABLE FOR ANY LOSS OR DAMAGE OF ANY KIND, INCLUDING ANY INCIDENTAL OR CONSEQUENTIAL DAMAGES RESULTING, DIRECTLY OR INDIRECTLY, FROM ANY BREACH OF ANY WARRANTY, EXPRESS OR IMPLIED, OR ANY OTHER FAILURE OF THIS PRODUCT. Some states do not allow the exclusion or limitation of incidental or consequential damages, so this limitation may not apply to you.THIS WARRANTY IS THE ONLY EXPRESS WARRANTY HONEYWELL MAKES ON THIS PRODUCT. THE DURATION OF ANY IMPLIED WARRANTIES, INCLUDING THE WARRANTIES OF MERCHANTABILITY AND FITNESS FOR A PARTICULAR PURPOSE, IS HEREBY LIMITED TO THE FIVE-YEAR DURATION OF THIS WARRANTY. Some states do not allow limitations on how long an implied warranty lasts, so the above limitation may not apply to you.This warranty gives you specific legal rights, and you may have other rights which vary from state to state.If you have any questions concerning this warranty, please write Honeywell Customer Relations, 1985 Douglas Dr, Golden Valley, MN 55422 or call 1-800-468-1502. In Canada, write Retail Products ON15-02H, Honeywell Limited/Honeywell Limitée, 35 Dynamic Drive, Scarborough, Ontario M1V4Z9.
CUSTOMER ASSISTANCE
If you have any questions about the operation of your thermostat, please go to http://yourhome.honeywell.com, or call Honeywell Customer Care toll-free at 1-800-468-1502.
CAUTIONElectronic Waste NoticeThe product should not be disposed of with other household waste. Check for the nearest authorized collection centers or authorized recyclers. The correct disposal of end-of-life equipment will help prevent negative consequences for the environment and human health.FCC statement at: https://customer.resideo.com/en-US/support/residential/codes-and-standards/FCC15105/Pages/default.aspx
Resideo Technologies, Inc.1985 Douglas Drive North, Golden Valley, MN 554221-800-468-1502
![]()
[xyz-ips snippet=”download-snippet”]