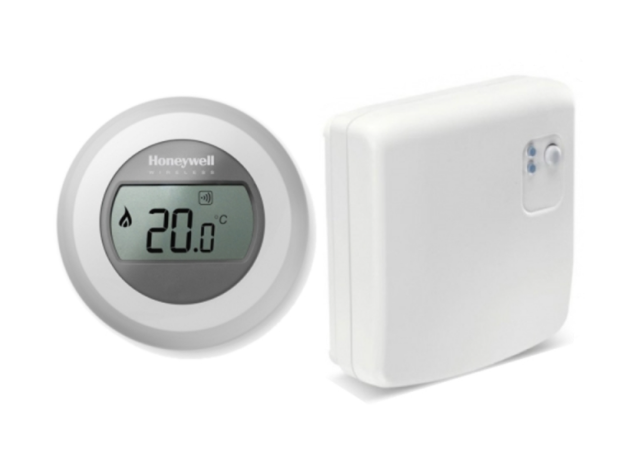
Honeywell Home Y87RF Single Zone Thermostat
Setting your room temperature
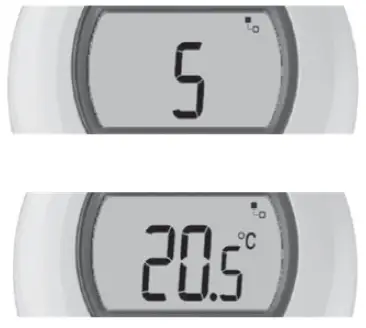
Your current room temperature is shown in the display. To set the temperature you want, just turn the dial right to increase and left to decrease. Each ‘click’ as the dial turns represents a 0.5º change.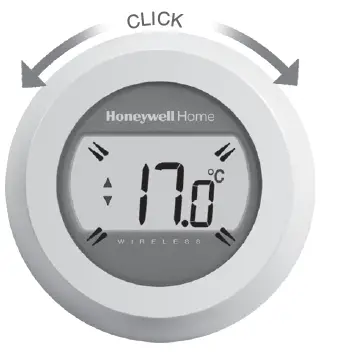
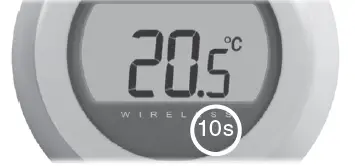
After five seconds the current room temperature will be displayed once again. The thermostat will then try to maintain your set temperature as accurately as possible. You can check your set temperature by turning the dial one ‘click’ to the left or right. The set temperature will flash up for a few seconds, before returning to display the room temperature again.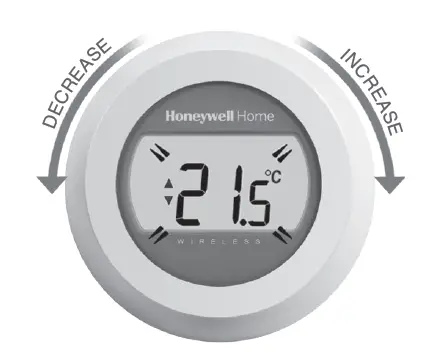
Night-time temperature reductionOvernight, or if you are out, it is best to set the thermostat to a lower temperature, as it will save you energy. In general a reduction of 5°C is recommended, but this will depend on your heating system and the amount of insulation in your home.
Replacing the batteries
Your batteries should be replaced when the symbol is displayed. To do this, separate the thermostat from the wiring plate and insert 2 new AA alkaline batteries in place of the empty ones. Then reattach the thermostat to the wiring plate.
Getting to know your display
Set Temperature IndicatorMeans the figure on the screen is your set temperature, rather than your current room temperature.Heating onMeans there is a requirement for some heating, so your boiler should either be on or cycling on/off.Boiler Relay ConnectionMeans your thermostat is successfully connected to your Boiler Relay.Internet Gateway Connection (optional)Means your thermostat is successfully connected to your Internet Gateway.
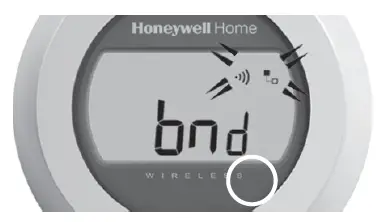
Binding your thermostat to a RFG100 Internet Gateway
If you want to be able to operate your Single Zone Thermostat remotely or add scheduling then you will need to use the RFG100 Internet Gateway (sold separately) and bind the thermostat to it. To do this, please follow the full installation instructions in the RFG100 box, and at the relevant binding stage follow these steps to connect your thermostat:
- Touch and hold the right-hand touch zone for about 10 seconds to activate the binding screen.

- Briefly touch the right-hand touch zone once again to send the binding signal. The and symbols will flash until binding is successful.
- With good reception, the green LED on the Gateway will then light up to confirm successful binding.
- After binding, the strength of the signal between the devices will appear on the thermostat for a few seconds. 1 equals the lowest strength and 5 the highest. Then the normal screen will be shown, including a symbol to confirm the Gateway and the thermostat are now connected.
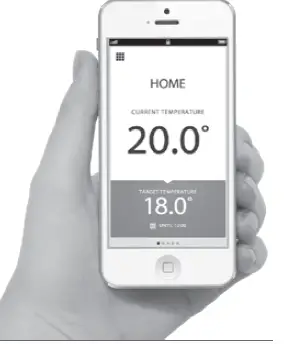
- Please refer to your Gateway instructions to learn how to create your online account and download our smartphone app.

Troubleshooting
Low batteriesIf you see this battery icon then you need to replace the batteries right away. See overleaf.No power to the thermostatIf the thermostat screen is blank after initial installation, then check the protective tab has been removed from the batteries. Otherwise, try replacing the batteries.RF communication errorIf these icons are flashing, then there may be an issue with the signal from the Boiler Relay. First check there is mains power to the Boiler Relay. If this does not resolve the problem, consult your installer.Defective thermostatIf this icon is displayed then the thermostat is no longer functioning and will need to be replaced.
For support:Resideo 200 Berkshire PlaceWinnersh Triangle, Berkshire RG41 5RPhone: 0300 130 1299
© 2020 Resideo Technologies, Inc. All rights reserved. The Honeywell Home trademark is used under license from Honeywell International Inc. This product is manufactured by Resideo Technologies, Inc. and its affiliates.
References
[xyz-ips snippet=”download-snippet”]