Honeywell CIPerTM Model 30 Controller User Guide
Disclaimer
The material in this document is for information purposes only. The content and the product described are subject to change without notice. Honeywell makes no representations or warranties with respect to this document. In no event shall Honeywell be liable for technical or editorial omissions or mistakes in this document, nor shall it be liable for any damages, direct or incidental, arising out of or related to the use of this document. No part of this document may b reproduced in any form or by any means without prior written permission from Honeywell.
Copyright © 2021 HONEYWELL International, Inc. All rights reserved.
Quick Commissioning
The CIPer 30 controllers ship from the factory with a default static IPV4 Address of 192.168.1.160. When installing them on the network with the default IPV4 address there will be an IPV4 address conflict. with this conflict you will not be able to communicate to any CIPer 30 on the network utilizing the IPV4 Address.
To prevent the CIPer 30 controller from having an IP Address conflict in many Integrators. It is advised to use the Niagara Serial Shell function to set the correct IP Address prior to installation on the network.
While this works it can be labor intensive when working with large quantities of controllers. This document provides a guideline to using IPV6, EUI-64, and Link Local as an alternative method of addressing CIPer 30 controllers to reduce labor and simplify installation.
The CIPer 30 controller will auto assign itself a unique IPV6 Link-Local address. This IPV6 Linc-Local address can be used to communicate to the CIPer 30 controller. Therefore, it is not required to connect to each CIPer 30 controller individually and modify the IPV4 address prior to installation onto the Network. The CIPer 30 controller can be installed directly out of the box to the network without any additional address configuration.
![]() NOTE
NOTE
- When installing the CIPer 30 controller it is important to record the CIPer 30 controller MAC address.
- The MAC address is located on the back of the CIPer 30 controller so should be recorded prior to mounting.
- The MAC address will be used to determine the IPV6 Network Address for the CIPer 30 controller.
CIPer 30 Quick Installation and Connection.
This section outlines the steps to reduce time when addressing CIPer 30 controllers. See the Additional Background Information section below for more detail on how this process works.
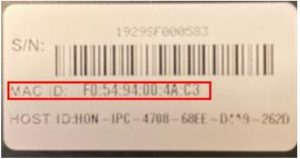
- Before mounting the record, check MAC address of the CIPer 30 controller. The MAC address is located on the bottom of the controller (MAC ID = F0-54-94-00-4A-C3).
- After mounting make the physical Network connections to the CIPer 30.
- If deploying RSTP leave the Loop open for now.
- Yes, there will be an IPV4 network IP address conflict.
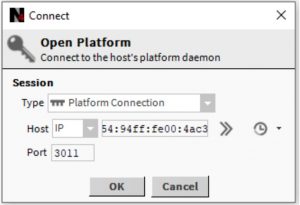
- Determine the CIPer 30 IPV6 Link Local address.The Link Local Address will always be fe80::f254:94ff:fe plus the last 6 digits of the MAC Address.Example: If the MAC Address was F0-54-94-00-4A-C3 the Linc Local Address would be fe80::f254:94ff:fe00:4ac3.
- Verify your PC’s Ethernet Adapter has IPV6 enabled and it is set to obtain an IPV6 address automatically.
 NOTE
NOTE
- This is the default for most PC’s.
- Your PC should be auto assigned a Link Local Address.
- Connect your Workbench PC to the CIPer 30 LAN.
- Make a Platform connection using the CIPer 30 Link-Local address.All Platform Tools should be accessible.
- Enable Station Auto – Start and Start the Station in the Application Director.
 All Platform Tools should be accessible.
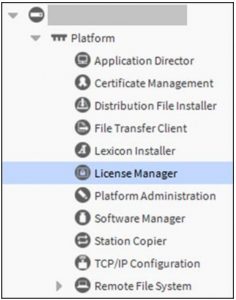
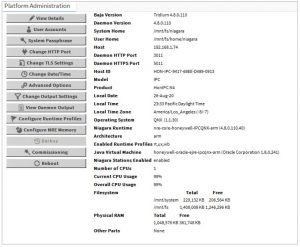
Following option available in the Application Director:
- TCP/IP Configuration Tool – Use the Platform TCP/IP Configuration tool to set a Static IP Address or Enable DHCP.
- Station Copier Tool – Use the Station Copier Tool to install an alternative station.
- Niagara Provisioning Service – Use the Niagara Provisioning Service to install the stations and update Firmware and Software.
- Commissioning Wizard – Use the to update Firmware and or Software.
- Use the IPV6 Link Local address and the Niagara Provisioning Service to modify IP Address’s.
CIPer 30 MAC Address
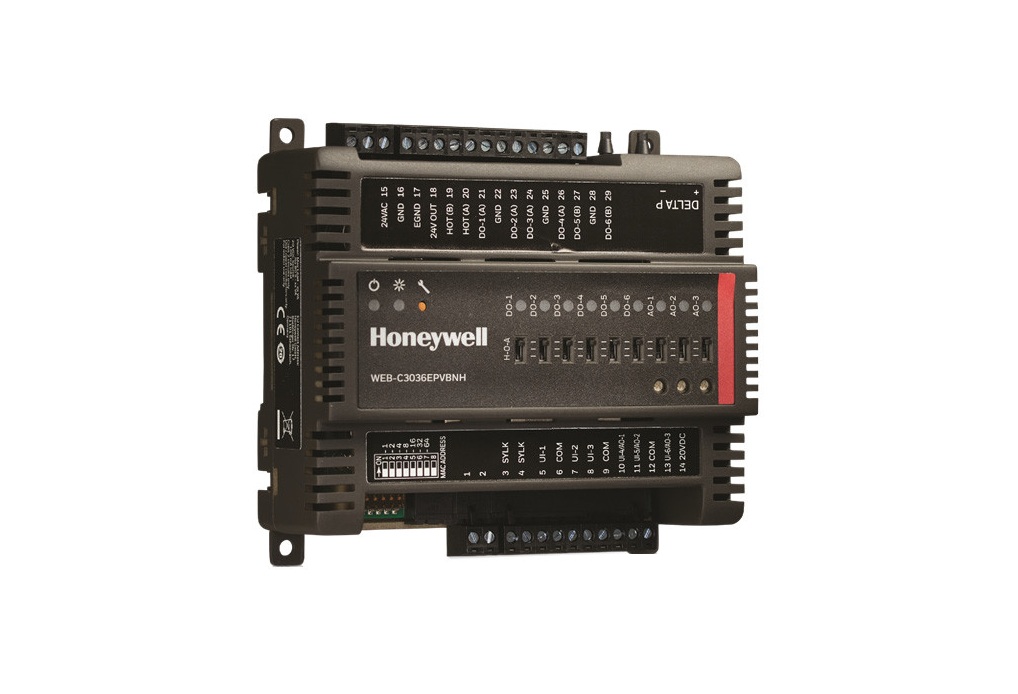
The CIPer 30 controller ships from the Factory with a Universally Administered Media Access Control (MAC) address. This address is unique for every CIPer 30 controller and cannot be modified.
The MAC Address is comprised of 48 bits broken down into 6 hexadecimal octets. The first 3 octets of the MAC Address comprise the Organization Unique Identifier (OUI). The OUI for the CIPer 30 is F0-54-94 and will be the same for every controller. The last 3 octets of the MAC Address are the unique identifier for the controller.
Example: MAC ID: F0-54-94-00-4A-C3
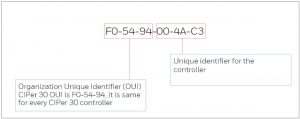
- CIPer 30 OUI: F0-54-94
- Unique Identifier: 00-4A-C3
The CIPer 30 MAC address can be determined by the address decal located on the bottom of the controller. CIPer 30 MAC decal:
CIPer 30 IPV6 Address
The CIPer 30 controller ships from the factory with IPV4 enabled and IPV6 disabled. Even though IPV6 is disabled the CIPer 30 will still be assigned an IPV6 Link-Local Address.
The IPV6 Address is 128 bits broken down into 8 groups of 16 bits written in Hexadecimal.
- IPV6 Address Format: fe80:0000:0000:0000:f254:94ff:fe00:4ac3
![]() NOTE
NOTE
When there are more than 1 group of Zeros in series the Zeros may be omitted by using a double colon.
IPV6 Address (omitted zeros) fe80::f254:94ff:fe00:4ac3
Typically, the first 4 groups comprise the IP Network Address and the second 4 groups comprise the IP Unique Host Identifier.
- IP Network Number: fe80:0000:0000:0000 or just fe80::
- IP Host Identifier: f254:94ff:fe00:4ac3
![]() NOTE
NOTE
An fe80 IP network address is a non-routable network address and indicates that the IPV6 address is a Link-Local Address that has automatically been derived and assigned internally by the CIPer 30 controller.
EUI-64 (Extended Unique Identifier)
The process used to assign the IPV6 Link-Local Address is EUI-64 (Extended Unique Identifier)
EUI-64 (Extended Unique Identifier) is a method we can use to automatically configure the IPv6 Host Identifier.The CIPer 30 controller will use its MAC address to generate a unique 64-bit Host ID.
The process to generate the Host ID is as follows:
- Split the MAC Address into two parts.
- F0-54-94 – 00-4A-C3
- Remove the first and last hyphens.
- F054-94 – 00-4AC3
- Append FF to the second group and prefix the third group with FE.
- F054-94FF – FE00-4AC3
- Invert the 7th most significant bit.
- Convert the second hex digit of the first hex group to binary.
- F054
- 0 hex = 0000 binary
- Invert the 2nd bit (least significant bit)
- 0000 to 0010
- Convert the binary back to hex.
- 0010 binary = 2 hex
- Insert the new hex number into the first group
- F054 becomes F254
- Convert the second hex digit of the first hex group to binary.
- The Link-Local Host ID will be:
- F254:94FF:FE00:4AC3
- The Full Link-Local IPV6 Address will be:
- FE80::F254:94FF:FE00:4AC3OR
- fe80::f254:94ff:fe00:4ac3 NOTEIPV6 addresses are not case sensitive and lower or upper case may be used.
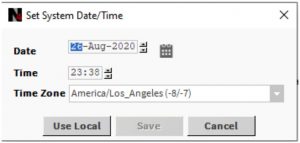
- Set the Date/Time.
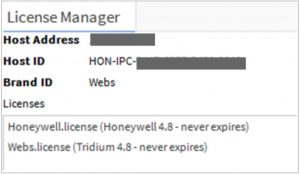
- Go to License Manager and update the License. For more details refer Niagara documentation.
Customer Service
Honeywell Building TechnologiesHoneywell International Inc.1985 Douglas Drive NorthGolden Valley, MN 55422customer.honeywell.com

[xyz-ips snippet=”download-snippet”]