 ToxiRAE 3 QuickStart Guide

![]() RAE Systems by Honeywell 1349 Moffett Park Drive Sunnyvale, CA 94089 USAPhone: 408-952-8200Fax: 408-952-8480Email: [email protected]Web Site: www.raesystems.com
RAE Systems by Honeywell 1349 Moffett Park Drive Sunnyvale, CA 94089 USAPhone: 408-952-8200Fax: 408-952-8480Email: [email protected]Web Site: www.raesystems.com
WARNINGSRead Before OperatingThe User’s Guide must be carefully read by all individuals who have or will have the responsibility of using, maintaining, or servicing this product. The product will perform as designed only if it is used, maintained, and serviced in accordance with the manufacturer’s instructions.CAUTION!Never operate the monitor when the cover is removed. Remove monitor cover and battery only in an area known to be non-hazardous.
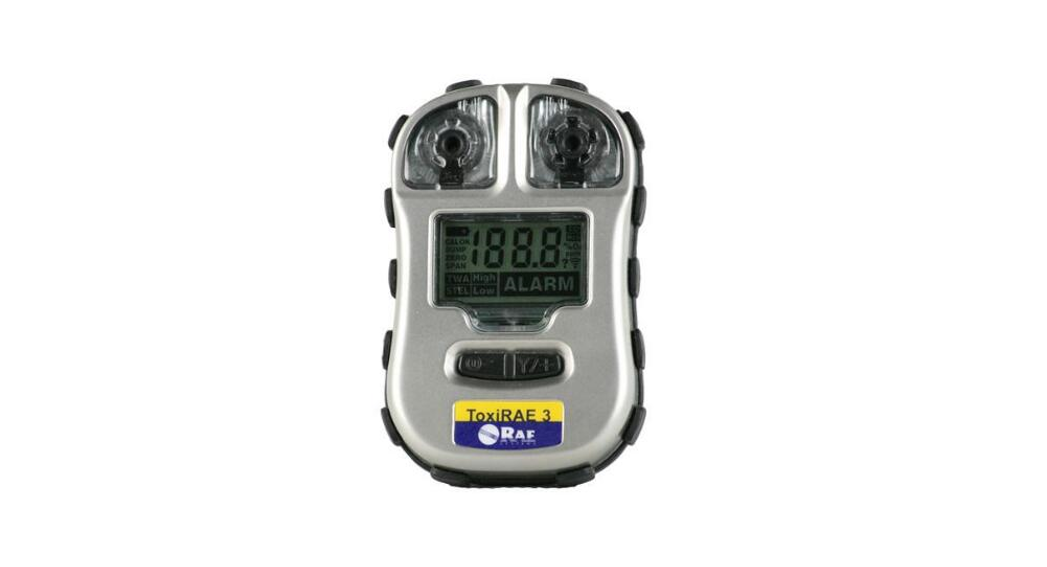
User InterfaceThe ToxiRAE 3’s user interface consists of the display, LEDs, an alarm buzzer, and two keys, [MODE] and [Y/+]. The LCD display provides visual feedback that includes calibration or bump requests, sensor mode, and battery condition.
 Turning The ToxiRAE 3 On
 Turning The ToxiRAE 3 On
Press and hold [MODE]. The display shows “On” and the sensor type, and then alarms and sensors are tested.Note: If the sensor is depleted or does not check out satisfactorily, an error message of “E01” flashes on the display. The ToxiRAE 3 should not be used. (Shut off the ToxiRAE 3 by pressing and holding [MODE] until you see the countdown and the display shows “oFF.”).Once the countdown is complete, a battery icon that indicates battery condition. “OK” is displayed below the battery icon, and the reading is also shown (for example 0 ppm). The ToxiRAE 3 is now in Normal Mode and is ready for use.
Turning The ToxiRAE 3 Off
Press and hold [MODE]. In 2 seconds, a 5-second countdown to shutoff begins. You must hold your finger on the key for the entire shutoff process. If you remove your finger from the key during the countdown, the shutoff operation is canceled and the ToxiRAE 3 continues normal operation.When you see “oFF,” release your finger from the [MODE] key. The ToxiRAE 3 is now off.
Low Battery Warnings
- When the battery’s charge is low, the battery symbol flashes once per second, and “bAt” flashes once per minute. The buzzer and vibrator alarm once per minute.
- When the battery reaches a critically low charge, the battery symbol flashes once per second, and “bAt” flashes once per minute, plus the buzzer sounds once per minute.
- When the battery is dead, the buzzer sounds once per second for the last minute and then shuts off. The display shows “oFF.”
Important! Do not operate the ToxiRAE 3 again until its battery has been replaced.WARNING!To reduce the risk of ignition of hazardous atmospheres, replace batteries only in areas known to be non-hazardous. Consult User’s Guide for battery replacement procedure.Programming ModeThe ToxiRAE 3 must be in programming mode to perform calibrations unless you use AutoRAE Lite.Turn on the ToxiRAE 3. Once it has been through its startup, enter Programming Mode.Note: This is not available in Countdown mode.
- Press and hold both [MODE] and [Y/+] until you see the password screen, “000.”
- Enter the password (the default is 111) by pressing [Y/+] to increase the number, followed by pressing [MODE] to advance to the second digit. Follow this procedure until there are three “1”s.
- Press and hold [MODE] until you see the “Zero Cal?” screen.
Zero (Fresh Air) Calibration
With the ToxiRAE 3 on and in Programming Mode, follow this procedure:
- Press [Y/+]. A countdown starts and “CAL” blinks. This indicates that zero calibration is taking place.
- When the countdown reaches “0,” the display alternates between “0” and “dn” (for “done”). Upon completing a zero calibration, the ToxiRAE 3 automatically advances to the span calibration menu.
Note: Interrupt zero calibration during its countdown by pressing either key. When you do so, the display shows “no.”Span CalibrationConnect the gas cylinder, flow regulator, and Calibration Adapter to the ToxiRAE 3 and start the gas flow. With the ToxiRAE 3 on and Programming Mode, and with the Span Cal menu screen showing:
- Press [Y/+]. A countdown starts and “CAL” blinks. This indicates that span calibration is taking place.
- When the countdown reaches “0,” the display alternates between the concentration in ppm and “dn” (for “done”).
Note: Interrupt span calibration during its countdown by pressing either key. When you do so, the display shows “no.”Bump TestingRAE Systems recommends periodic bump testing.
- Turn on the ToxiRAE 3 in Normal Mode.
- Connect the calibration gas cylinder, flow regulator, and Calibration Adapter to the ToxiRAE 3 and start the gas flow.
- Press [MODE] repeatedly until you see “Bump” flashing in the display.
- Check that the bump gas concentration is the same as the gas cylinder’s concentration.
- Press [Y/+] to start the bump test.
- If the bump test is successful, the screen returns to Normal Mode and resets the bump due to today’s icon on the screen.
Normal Mode Screens
Press [MODE] to step through screens showing STEL, TWA, Peak, and Alarms. Press [MODE] to step through screens showing STEL, TWA, Peak, and Alarms.To clear Peak, STEL, or TWA values, press [Y/+], and you then see “CLr” accompanied by a flashing “?”
- Press [Y/+] to clear the value.
- Press [MODE] to leave the value unchanged
- and advance to the next screen.
In Peak, press [Y/+] twice to clear the Peak.
Using With AutoRAE Lite
To perform bump tests and calibration using an AutoRAE Lite:
- Start the ToxiRAE 3 and press [Y/+] until you see “Ir.”
- Follow the AutoRAE Lite’s instructions for installing a gas cylinder and turning it on.
- Place the ToxiRAE 3 in the AutoRAE Lite’s dock.
- Press “Bump” or “Cal.” on the AutoRAE Lite.
- When the test is completed, remove the ToxiRAE 3. It is now ready for service.
G01-4004-000 Rev C 201409
[xyz-ips snippet=”download-snippet”]