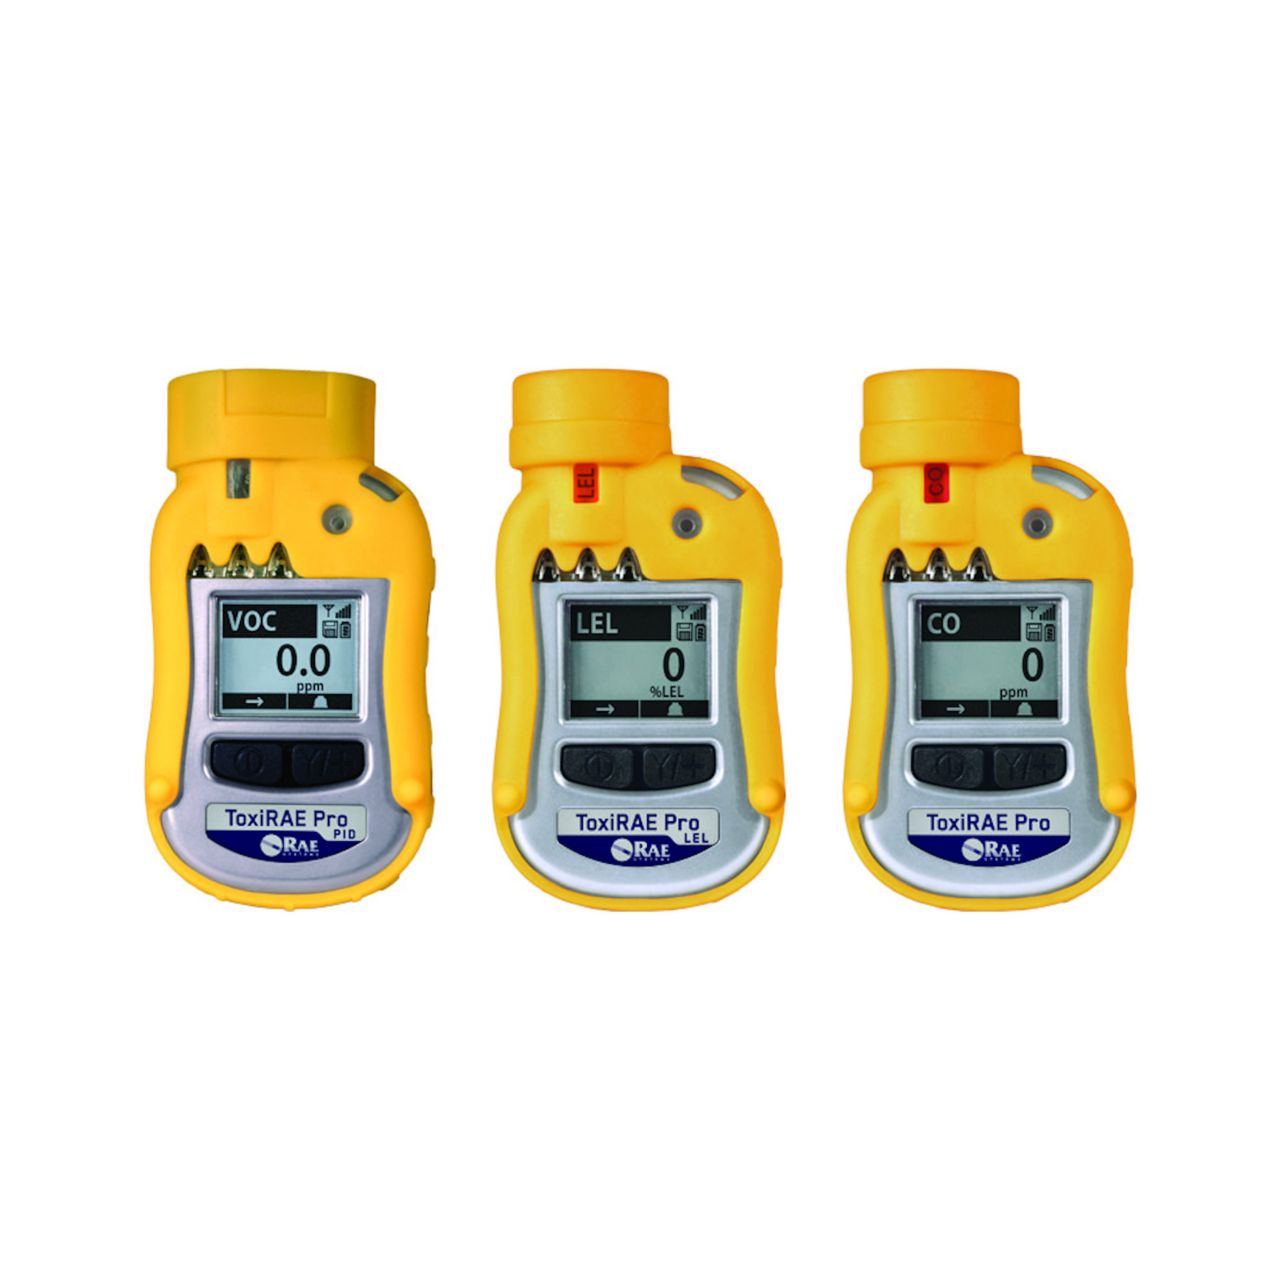
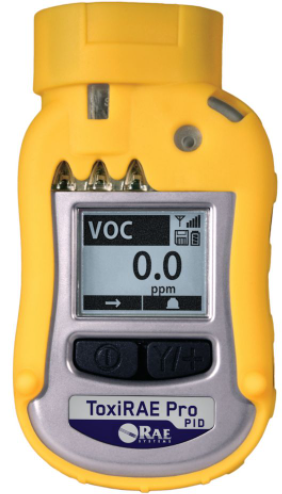
Honeywell ToxiRAE Pro PID
RAE Systems, Inc.1349 Moffett Park Drive.Sunnyvale, CA 94089 USAPhone: 408-952-8200www.raesystems.com
WARNINGS:Read Before OperatingThe ToxiRAE Pro PID User’s Guide must be carefully read by all individuals who have or will have the responsibility of using, maintaining, or servicing this product. The product will perform as designed only if it is used, maintained, and serviced in accordance with the manufacturer’s instructions.
CAUTION: Never operate the monitor when the cover is removed. Remove monitor top cap, rear cover, and battery only in an area known to be non-hazardous.
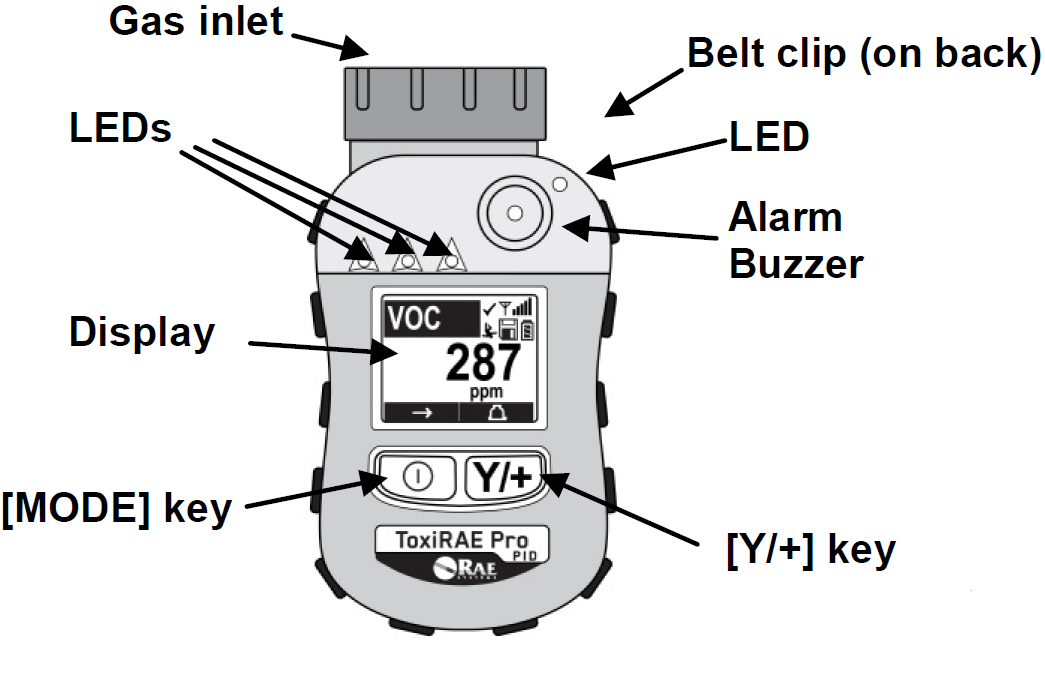
User InterfaceThe ToxiRAE Pro PID’s user interface consists of the display, four LED lights, an alarm buzzer, and two keys, [MODE] and [Y/+]. The LCD displays real-time reading in specified measurement units, sensor type, alarm type (when in alarm, including cal. or bump overdue), Man Down status, battery status, datalog (if on), and radio and connection quality (if available).
Charging The ToxiRAE Pro PIDAlways fully charge the battery before use. Contacts on the bottom of the ToxiRAE Pro PID meet the cradle’s contact pins, transferring power. While charging, the LED on the cradle glows red. When the battery is fully charged, the LED glows green.

Turning The ToxiRAE Pro PID On
Press and hold [MODE] for 3 seconds. During startup, the battery, buzzer, vibration alarm, and LEDs are tested, and then the ToxiRAE Pro PID performs self-testing of its functions. When the main measurement screen appears, the ToxiRAE Pro PID is ready for calibration or use.
Note: If the battery is almost fully discharged, the message “Battery too low! Needs charging. Powering off!” shows in the display and the ToxiRAE Pro PID shuts off. You must charge the battery before you can use the instrument.
Turning The ToxiRAE Pro PID Off
Press and hold [MODE]. A 5-second countdown to shutoff begins. You must continue pressing on the key for the entire shutoff process. If you remove your finger from the key during the countdown, the shutoff operation is canceled and the ToxiRAE Pro PID continues normal operation.When the countdown beeps stop and you see “Unit Off,” release your finger from the [MODE] key. The ToxiRAE Pro PID is now off.
Calibration
The ToxiRAE Pro PID can be automatically bump tested and calibrated using the AutoRAE 2 Test and Calibration Station (refer to its User’s Guide for instructions). Manually calibrate using a fixed-flow regulator (flow rate between 0.5 and 1.0 liters per minute) and the supplied special calibration adapter that covers the gas inlet:
- To begin calibration, connect the zero air or calibration gas cylinder, flow regulator, and calibration adapter to the ToxiRAE Pro PID.
- Enter Programming Mode by pressing and holding [MODE] and [Y/+] simultaneously until the password screen appears.
- Input the 4-digit password. (The default password is “0000.” If you do not know the password, highlight and select “OK.”) Then follow the instructions for zero calibration and span calibration.
Important! After a bump test or calibration, remove the calibration adapter to ensure correct readings.
Zero (Fresh Air) Calibration
The ToxiRAE Pro PID should be zero-calibrated in clean air with 20.9% oxygen. If the ambient air has impurities, a cylinder of clean zero air should be used for zero calibration. With the ToxiRAE Pro PID in Programming Mode and “Zero Calib” highlighted:
- Press [Y/+]. “Apply zero gas…” is displayed.
- Start the flow of the zero gas, if used, and press [Y/+] to start the fresh air or zero calibration.
- The screen says, “Zeroing…” and shows the countdown.
- When done, it says, “Zero is done! Reading = 0.0 ppm” (this reading should be 0.0 ppm or very close to it).
- “Span Calib” is highlighted.
- Shut off the flow of zero air (if used).
- Remove the calibration adapter.
Manual Span Calibration
In Programming Mode, and with “Span Calib” highlighted:
- Press [Y/+]. The screen displays the current (or default) calibration gas and its concentration.
- Press [MODE] if you do not want to change it.
- Press [Y/+] if you do want to change it.If you did not change it, you will see a message like this:
- Cal. Gas:
- Isobutylene
- Span=100ppm
- Apply gas…
- Attach the calibration adapter, and connect the calibration gas cylinder and flow regulator to the ToxiRAE Pro PID, and start the gas flow.
- Press [Y/+] to start calibration.
- Upon completion, “Span is done!” and the reading are shown. Make sure it is within ±10% of the span gas value.
- Remove the calibration adapter.
Bump (Functional) Testing
RAE Systems recommends periodic bump testing to confirm that the sensor is working and that the alarms are functional.With the ToxiRAE Pro PID in Normal Mode:
- Connect the calibration gas cylinder, flow regulator, and calibration adapter to the ToxiRAE Pro PID and start the gas flow.
- Make sure the unit goes into alarm and that the buzzer produces at least two beeps per second, the LED lights flash on and off, and the vibration alarm functions. The display backlight should illuminate and an alarm message should be shown in the display.
- Turn off the gas flow.
- Remove the calibration adapter.
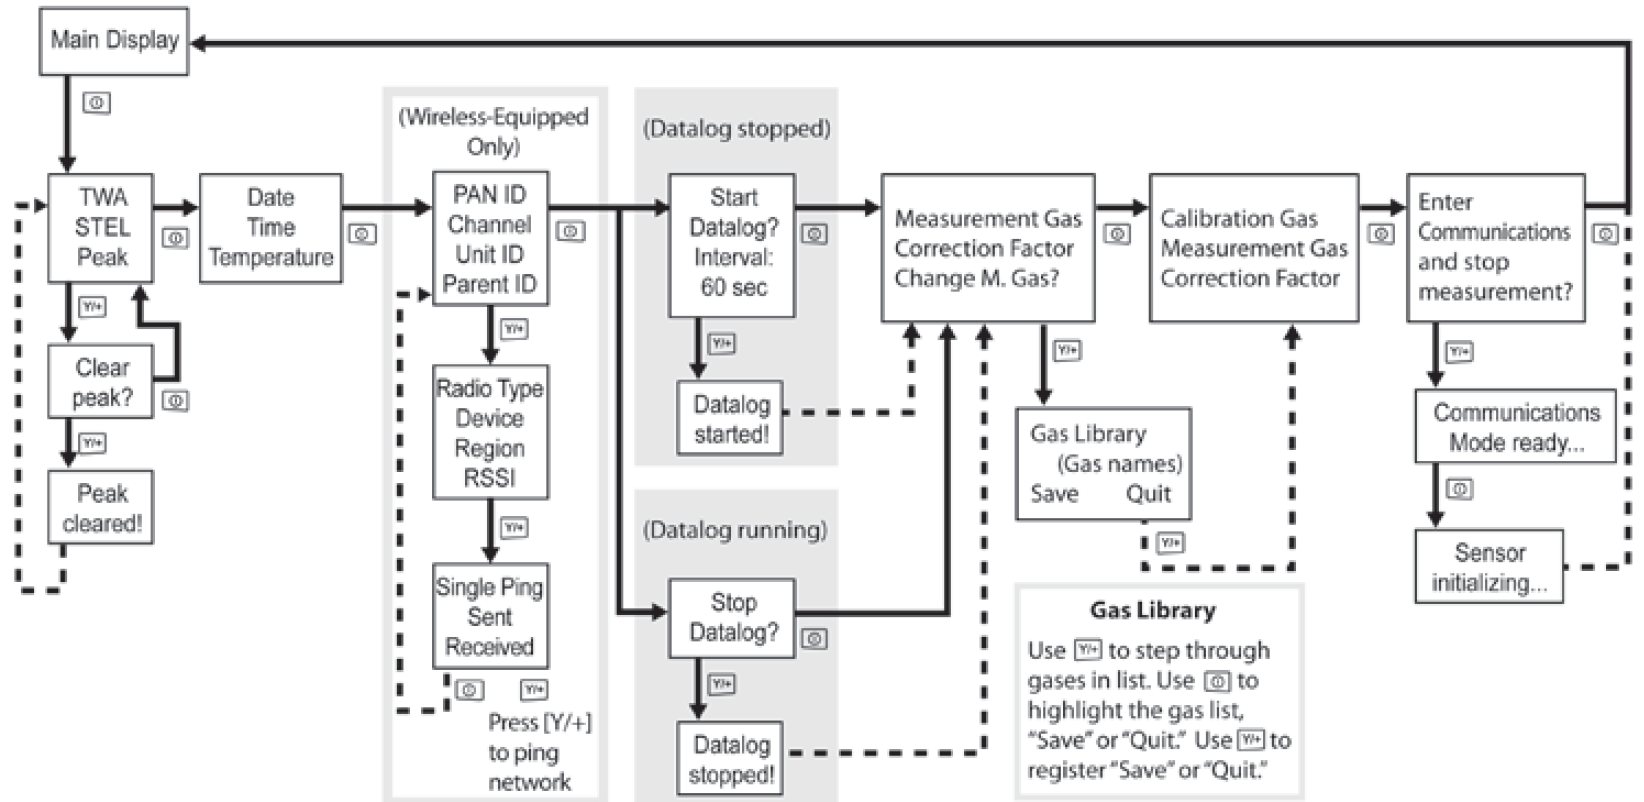
Menu Navigation In Normal Mode
Pressing [MODE] repeatedly allows you to step through the screens as shown here.Note: The gray boxes indicate the datalog functions when datalogging is in Manual mode. When datalogging is in Automatic mode, these screens do not appear. Refer to the User’s Guide for information on selecting Automatic or Manual datalogging.
![]()
[xyz-ips snippet=”download-snippet”]