
HuddleCamHD Camera Ceiling Mount – Small Base

What’s Included
- Qty 1 – Ceiling Mount
- Qty 1 – 1/4-20 mounting screw
- Qty 1 – 10/32 x 1/4” cup point set screw
- Qty 1 – 3/32” long arm hex wrench (for set screw)
- Qty 2 – 1/4” washers


Assembly
Step 1:Screw 1” NPT pipe or pipe nipple to a properly installed mounting plate or pipe flange like that shown below. Tighten until pipe can no longer be tightened with a pipe wrench. If using a 1.5” plate or flange, you must use a 1.5”-1” reducing bushing, like shown below.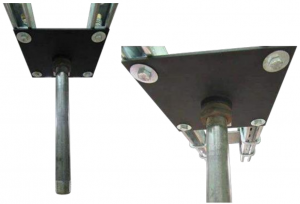
*Notes:Plate/flange, reducer bushing, & 1” NPT pipe or nipple not included.Plate/flange must be installed according to applicable construction codes.
Step 2:Screw mount onto pipe securely, engaging a minimum of ½” of pipe into mount. When aligned to desired location, tighten set screw to 30-36 in-lbs of torque (this is approximately when the set screw will stop moving and the long arm – of the provided wrench – will then only bend).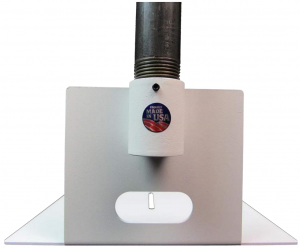
Step 3:Mount camera upright to top of mount or inverted to bottom of mount using included ¼-20 bolt through slot in mount. Use 0-2 of the provided washers as required to make bolt snug, so that camera is held in desired position.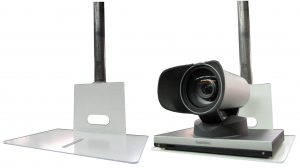
Step 4:Run cabling through pipe or dress to outside of pipe for a clean installation aesthetic

[xyz-ips snippet=”download-snippet”]