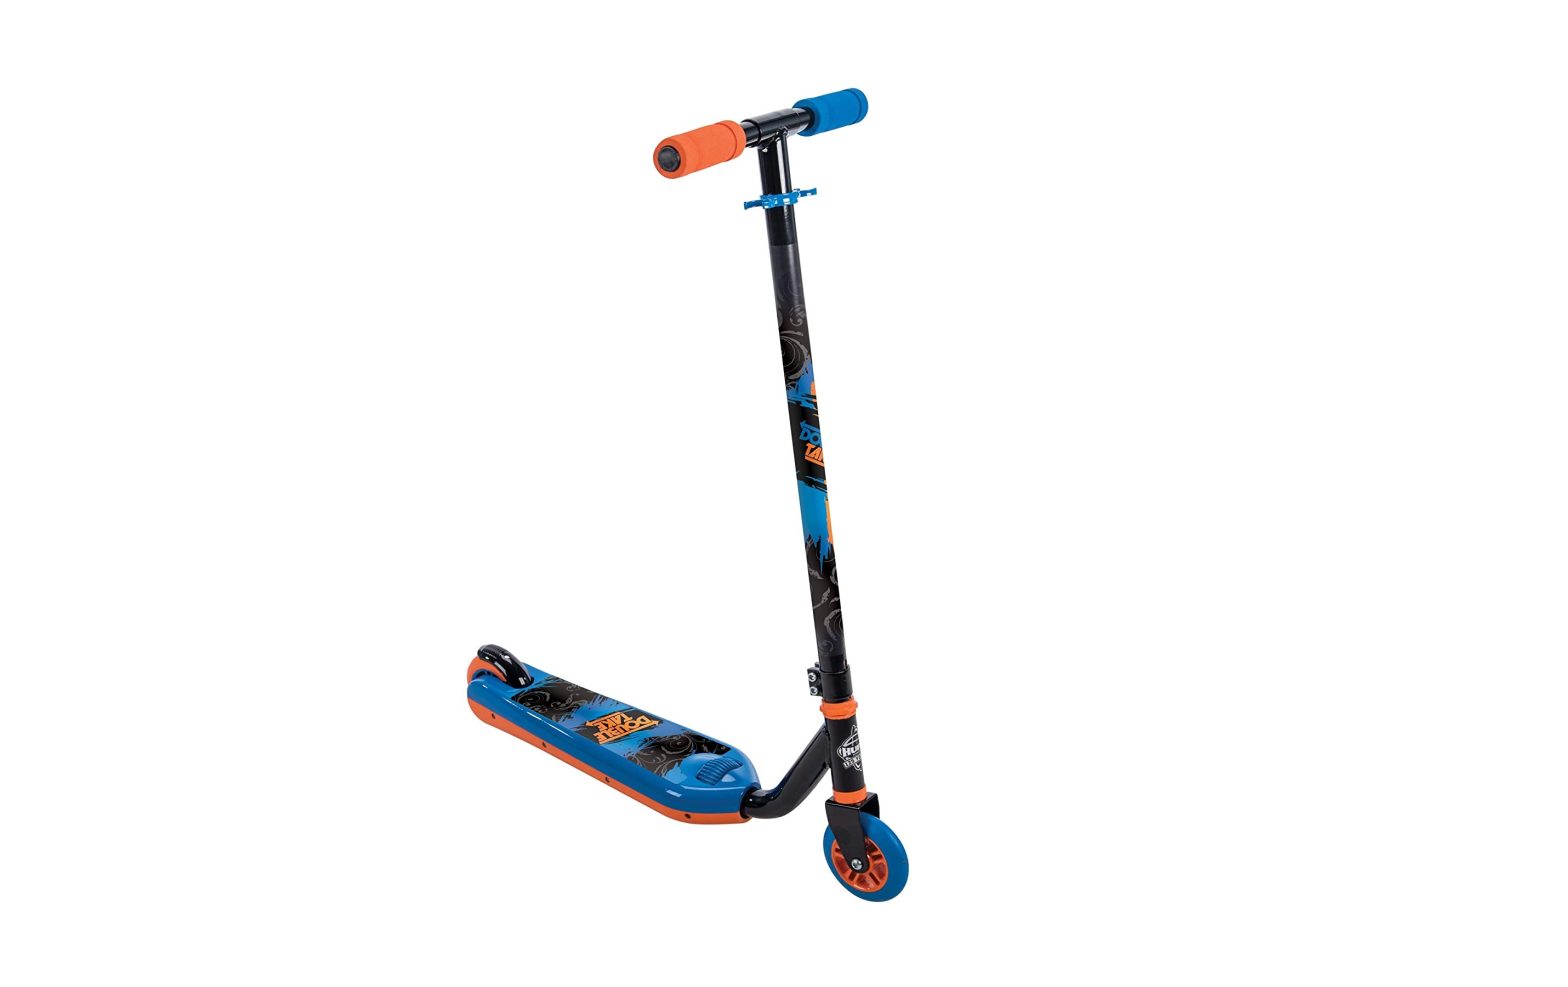
HUFFY 48647 Inline Kids Scooter Owner’s Manual
This manual contains important safety, assembly, operation and maintenance information.Please read and fully understand this manual before operation.Save this manual for future reference .
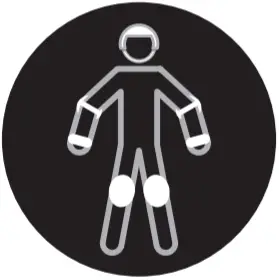 Always wear approved helmet and safety equipment when using this product
Tools Needed
- Allen Wrench (supplied)

![]() WARNINGS:
WARNINGS:
- CHOKING HAZARD: Small parts, adult assembly required.
- To reduce the risk of injury, adult supervision is required. Not suitable for children under 3 years. The user must be 5+ years, and weigh no more than 100lbs (45kgs).
- Avoid sharp bumps, drainage grates, and sudden surface changes. Scooter may suddenly stop.
- Avoid excessive speed associated with downhill rides.
- Watch out for pedestrians.
- Check and secure all fasteners before every ride.
Warnings and Safety
Safety and Warning Information
This product, like all wheeled vehicles, will provide safe, enjoyable transportation and recreation when used and maintained properly . Like bicycling, skateboarding, and in-line skating, riding this product can be dangerous even under the best of circumstances . We do not want you to get hurt . Please follow these safety rules . Keep children away during assembly .
![]() This symbol is important . It is the WARNING symbol . The warning symbol precedes safety instructions . Make sure the child understands these instructions . Failure to follow these instructions may result in injury to the rider or to others, or damage to the product .
This symbol is important . It is the WARNING symbol . The warning symbol precedes safety instructions . Make sure the child understands these instructions . Failure to follow these instructions may result in injury to the rider or to others, or damage to the product .
![]() WARNING TO AVOID SERIOUS INJURY:
WARNING TO AVOID SERIOUS INJURY:
- Adult assembly required . An adult must unfold and fold this product (as equipped). Continuous adult supervision required . Do Not modify the product .
- CHOKING HAZARD: Not suitable for children under 3 years . Contains small parts .
- Keep small loose parts and plastic bags out of the reach of children .
- Not suitable for children under 3 years as foam pieces may break off and pose a choking hazard . Keep small children away when assembling .
- Never use near motor vehicles .
- Never ride with more than one person . Excessive weight may cause a hazardous or unstable condition .
- Protective Equipment must be worn: Always wear safety equipment such as a helmet that meets CPSC (or equivalent standard for your country) with chinstrap securely fastened, knee pads, elbow pads, wrist guards, gloves and shoes .
- Do not use in traffic .
- Do not allow a child to ride the product at dusk, at night or at times of limited visibility .
- Do not allow a child to ride on roadways or alleys .
- Do not allow a child to ride off road, on grass or wet surfaces .
- Never use near streets, swimming pools (or other bodies of water), hills, steps, or sloped driveways .
- For use on smooth paved surfaces only .
- Understand all operating procedures before use .
- Do not tow or pull any objects with the product .
- Do not push or pull a child riding on the product .
- Use with caution, since skill is required to avoid falls or collisions causing injury to the user or third parties.
- Always comply with local laws and regulations .
- If anything does not operate properly, discontinue use .
- Replace worn or broken parts immediately with genuine replacement parts .
- Handlebar hand grip or tube end plugs should be replaced if damaged as bare tubes have been known to cause injury . All products with capped handlebar ends should be checked regularly to ensure that adequate protection for the ends of the handlebars are in place .
- Self-locking nuts and other self-locking fi xings may lose their eff ectiveness when re-used .
- The toy shall be used with caution, since it requires great skill, so as to avoid falls or collisions causing injury to the user and third parties .
- Ensure all locking devices are engaged before each ride
Helmet Warning Information

ALWAYS WEAR YOUR HELMET WHEN RIDING THIS PRODUCT!Always read the user manual that comes with your helmet to make sure it is fitted and attached properly to the wearer’s head according to the fi tting instructions described in the user manual.
Parts Assembly
| # | Description | # | Description |
| 1 | Front Wheel | 8 | Grips (x2) |
| 2 | Front Wheel Axle Hardware | 9 | Steering Tube |
| 3 | Fork | 10 | Steering Tube Clamp |
| 4 | Top and Bottom Fork Bushings | 11 | Deck |
| 5 | Fork Headset Nut | 12 | Fender/Brake |
| 6 | Handlebars (x2) | 13 | Rear Wheel |
| 7 | Handlebar Clip |
Assembly
Assembly Instructions: Assembly Level may vary
NOTES:
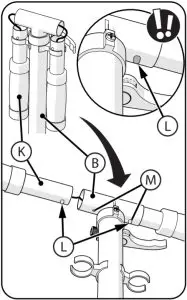
- Clamp A may be pre installed from factory on Handlebar Post B and may need to be loosened before assembly.
- Fork Tube Bushings (C, D) may be pre installed from factory. If not, remove them from the Fork Tube F before assembly
- Insert Short Bushing C into top of Frame Tube E.
- Insert Tall Bushing D into bottom of Frame Tube E.
- Insert Fork Tube F though Frame Tube as shown.
- Install Head Set Nut G fully onto Fork Tube Threads H hand tight.
- Ensure Fork Assembly turns easily and is facing forward as shown.
- Place Clamp A onto Handlebar Post B so that Clamp is even with bottom of Handlebar Post and Slot I is facing backward.
- With Fork Assembly F facing forward, Slide Handlebar and Clamp fully onto Fork Tube Threads H until they are fully seated against the Head Set Nut G.
- With Clamp facing backwards, tighten Screws J evenly and securely so that the Handlebar does not move.
- Insert the Hand Grip Posts K into the Handlebar Post B.
- Ensure the lock buttons L on each Hand Grip Post are fully engaged with the Locking Hole Stops M in each side of the Handlebar Post.
Handlebar Bags/Pads (not all models)
- Attach Handlebar Pad A (if equipped) to Handlebar by opening and placing straight down over handlebar and using Hook & Loop Straps to secure. Fasten securely.
- Attached Handlebar Bag B (if equipped) by securing bag straps around Handlebar/ Bag. Fasten securely.
![]() WARNING: Bag Weight Limit: 5 lbs (2.3 kgs)
WARNING: Bag Weight Limit: 5 lbs (2.3 kgs)
Operation
Flipping the Scooter Deck and Brake
- STEP 1:
- Loosen Thumb Wheel until Deck turns easily.
- STEP 2:
- Rotate Deck 180°
- STEP 3:
- Tighten Thumb Wheel (hand tight) until Deck locks solidly and is level.
- NOTE: Wiggle Deck slightly as you tighten the Thumb Wheel.
- Tighten Thumb Wheel (hand tight) until Deck locks solidly and is level.
- STEP 4:
- Press IN Fender/Brake Lock Button and rotate Fender until it locks in the UP position for riding and braking.
![]() WARNING:Failure to tighten Deck securely can result in serious injury to child.
WARNING:Failure to tighten Deck securely can result in serious injury to child.
Operating the Scooter
Flipping the Scooter Deck and Brake continued:
RIDING: The scooter is operated by placing one foot on the deck and pushing with the other foot.
STEERING: Steering is accomplished by turning the handlebar while leaning slightly into the turn.
BRAKING: With both feet on the deck, use the heel of one foot to press down on Rear Fender to stop Scooter. The secondary stop method is to use the foot used to propel the scooter to stop the scooter.
![]() WARNING:
WARNING:
- Always wear shoes when riding the scooter.
- Brake will get hot from continuous use. Do not touch after braking.
Maintenance
Maintenance and Service
![]() WARNING:
WARNING:
- Inspect the product frequently . Failure to inspect the product and to make repairs or adjustments, as necessary, can result in injury to the rider or to others . Make sure all parts are correctly assembled and adjusted as written in this manual and any “Special Instructions” .
- Immediately replace any damaged, missing, or badly worn parts with original equipment .
- Make sure all fasteners are correctly tightened as written in this manual and any “Special Instructions” . Parts that are not tight enough can be lost or operate poorly . Over tightened parts can be damaged . Make sure any replacement fasteners are the correct size and type .
- Self-locking nuts and other self-locking fasteners may lose their effectiveness when reused .
NOTE: Have a bicycle service shop make any repairs or adjustments for which you do nothave the correct tools or if the instructions in this manual or any “Special Instructions” are notsufficient for you.
Limited Warranty
General
Part or model specifications are subject to change without notice .
- This Limited Warranty is the only warranty for the product . ALL WARRANTIES OTHER THAN STATED HEREIN ARE DISCLAIMED INCLUDING IMPLIED WARRANTIES OF MERCHANTABILITY AND FITNESS FOR A PARTICULAR PURPOSE, TO THE EXTENT ALLOWABLE BY APPLICABLE LAW . ALL LIABILITY FOR INCIDENTAL, PUNITIVE, SPECIAL, OR CONSEQUENTIAL DAMAGES ARE EXPRESSLY DISCLAIMED, TO THE EXTENT ALLOWABLE BY APPLICABLE LAW .
The only uses for this product are described in this manual .Warranty registration is not required .The Limited Warranty extends only to the original consumer and is not transferable to anyone else .
What does this Limited Warranty cover?This Limited Warranty covers defects inworkmanship and materials for all parts of the product except those indicated below as not warranted .
What must you do to keep the Limited Warranty in effect?This Limited Warranty is effective only if:
- Product is completely and correctly assembled .
- Product is used under normal conditions for its intended purpose (see the following section for excluded activities).
- Product receives all necessary maintenance and adjustments .
- Product is used for general transportation and recreational use only .
What is not covered by this Limited Warranty?This product is designed for recreational use only.This Limited Warranty does not cover normal wear and tear, normal maintenance items, or any damage, failure, or loss that is caused by improper assembly, maintenance, adjustment, storage, or use of the product. This Limited Warranty does not extend to future performance.
This Limited Warranty will be void if the product is ever:
- Used in any competitive sport
- Used for stunt riding, jumping, aerobatics or similar activity
- Modified in any way
- Modified with the addition of a motor
- Ridden by more than one person at a time
- Rented, sold, or given away
- Used in a manner contrary to the instructions and warnings in this Owner’s Manual
What will The Manufacturer do?Manufacturer’s sole and exclusive obligation under this Limited Warranty is to repair and/or replace, at its sole option, any covered defect in workmanship or materials .
How do you get service?Contact the Customer Service Department .
- See included list for Customer Contact information .
What rights do you have?This Limited Warranty gives you specific legal rights . You may also have other rights which vary from state to state, region to region .
For how long does this Limited Warranty last?
- When used in this Limited Warranty, the phrase “for life” means for as long as the original consumer owns the product .
All components are warranted for 6 months from the date of purchase. Electronics and Wheels: 90 days.
TECHNICAL SUPPORT
USA
PLEASE – BEFORE RETURNING TO STORE:Contact Huff y Customer Service.We are glad to assist you with any parts or assembly problems you might have!
For Fast Customer Service and email:www.huffybikes.com/contactTo Order Parts:www.huffybikes.com/partsOR TEL: 1 800 872 2453 (US)
CANADA
PLEASE – BEFORE RETURNING TO STORE:Contact Huffy Customer Service.We are glad to assist you with any parts or assembly problems you might have!AVANT DE RETOURNER AU MAGASIN :Call: 1-800-872-2453Or Email: [email protected]Or visit: www.huffybikes.com/global-contacts
For ASSEMBLY Help:
Please REGISTER your Product:
report this adwww.huffybikes.com/home/globalcontact/ for current contact information
References
[xyz-ips snippet=”download-snippet”]