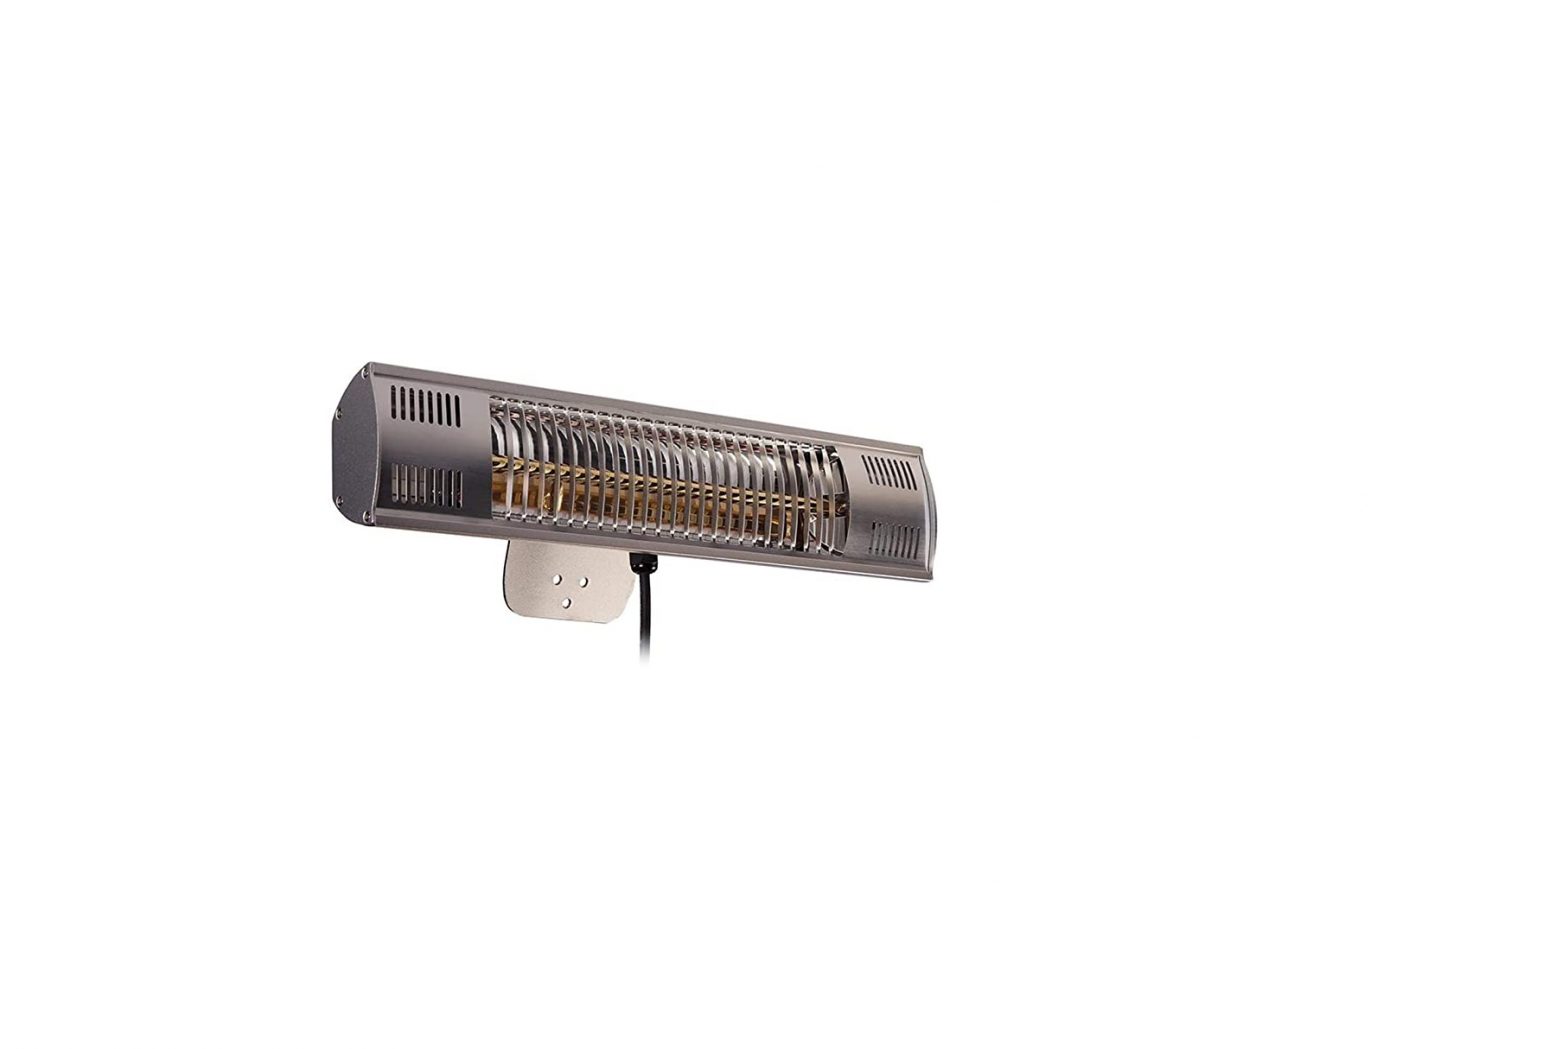
Hyco Outdoor Halogen Infrared Heater Instruction Manual
Overview
Thank you for purchasing a Sun King Quartz Outdoor Halogen Infrared Heater. The Sun King Quartz is ideal for heating outdoor domestic and commercial applications, such as patios, beer gardens and smoking areas.
Key Features
- Allows heating of targeted areas
- Quartz halogen lamps operate at a very high temperature, converting almost all the electrical energy into short wavelength infrared radiation
- Stylish, lightweight aluminium construction
- Silent operation
- Lamps made from high temperature resistant quartz glass lasting an average of 7000 hours
- Low glare gold lamps
- Weatherproof for outdoor use
Please fully read these instructions before commencing installation and follow to ensure that installation and operation are simple and safe.
Important Safety Points
![]() The product should only be connected to a supply that meets the specifications detailed on the rating label.
The product should only be connected to a supply that meets the specifications detailed on the rating label.![]()
![]()
![]()
![]()
![]()
![]()
![]()
![]()
![]()
![]()
![]()
![]()
![]()
![]()
![]()
![]()
![]()
![]()
![]()
![]()
![]()
![]()
![]()
![]()
![]()
![]()
![]()
![]()
![]()
![]()
![]()
![]()
![]()
![]()
![]()
![]()
![]()
![]()
![]()
![]()
![]()
![]()
![]()
![]()
![]()
![]()
![]()
![]()
![]()
![]()
![]()
![]()
![]()
![]()
![]()
![]()
![]()
![]()
![]()
![]()
![]()
![]()
![]()
![]()
![]()
![]()
![]()
![]()
![]()
![]()
![]()
![]()
![]()
![]()
![]()
![]()
![]()
![]()
![]()
![]()
![]()
![]()
![]()
![]()
![]()
![]()
![]()
![]()
![]()
![]()
![]()
![]()
![]()
![]()
![]()
![]()
![]()
![]()
![]()
![]()
![]()
![]()
![]()
![]()
![]()
![]()
![]()
![]()
![]()
![]()
![]()
![]()
![]()
![]()
![]()
![]()
![]()
![]()
![]()
![]()
![]()
![]()
![]()
![]()
![]()
![]()
![]()
![]()
![]()
![]()
![]()
![]()
![]()
![]()
![]()
![]()
![]()
![]()
![]()
![]()
![]()
![]()
![]()
![]()
![]()
![]()
![]()
![]()
![]()
![]()
![]()
![]()
![]()
![]()
![]()
![]()
![]()
![]()
![]()
![]()
![]()
![]()
![]()
Installation
![]()
![]()
![]()
![]()
![]()
![]()
![]()
![]()
![]()
![]()
![]()
![]()
![]()
![]()
![]()
![]()
![]()
- Select a suitable surface that will support the product and accept the wall plugs safely.
- When selecting the heater location, ensure the following minimum distances are maintained: Floor 1.8 m, Wall 0.5 m, Ceiling 0.3 m (see diagram 1).
- Using the mounting holes on the heater bracket and ensuring a horizontal level, mark four holes onto the mounting surface. Using the fixings provided to attach the heater securely to the wall.
- The angle of the heater should be adjusted by loosening the hinged part of the bracket, selecting the angle and then tightening the hinge once again. Ensure the angle is a minimum of 30 from vertical and no greater than 90 (See diagram 2).
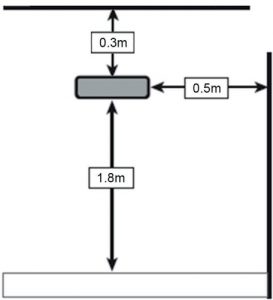

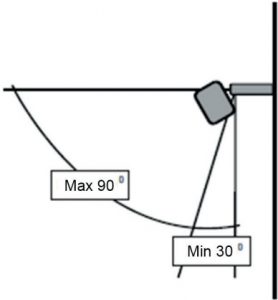

Diagram 2
Electrical Connection
![]()
![]()
![]()
![]()
![]()
![]()
![]()
![]()
![]()
![]()
![]()
![]()
![]()
![]()
![]()
![]()
![]()
![]()
![]()
![]()
![]()
![]()
![]()
![]()
![]()
![]()
![]()
![]()
![]()
![]()
![]()
![]()
![]()
![]()
![]()
![]()
![]()
![]()
![]()
![]()
![]()
![]()
![]()
![]()
![]()
![]()
![]()
![]()
![]()
![]()
![]()
- The steady state current of the heater is 6.5 A but an initial inrush current of many times this value will occur when turned on from cold, for this reason a MCB type 3 is recommended to avoid false tripping.
- The heater is supplied with 1.8 m of heat resistant cable and a 13 amp BS plug. When the heater is connected outside, a weather proof socket is strongly recommended.
- If the heater is connected to the fixed wiring of a property, connection should be made as follows; -Green/Yellow earth wire to terminal marked “E” or Brown/Red live wire to the terminal marked “L” Blue neutral wire to the terminal marked “N”
Cleaning and Maintenance
![]()
![]()
![]()
![]()
![]()
![]()
![]()
![]()
![]()
![]()
![]()
![]()
![]()
![]()
![]()
![]()
![]()
![]()
![]()
![]()
![]()
![]()
![]()
![]()
![]()
![]()
![]()
![]()
![]()
![]()
![]()
![]()
![]()
![]()
- With the unit on a safe flat surface, proceed to remove the hinged bracket 1. and wiring box 2. from the main body of the unit 3.


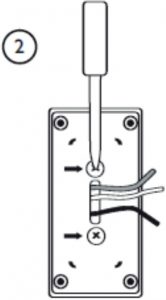

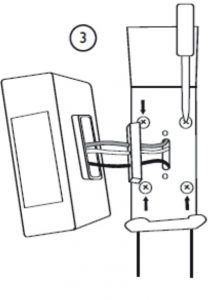

- Remove both side panels from the unit 1. and slide both back panels away and outfrom the main chassis 2.


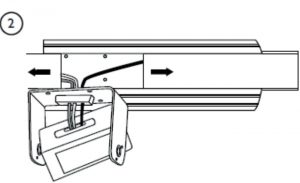
- Removethe live and neutral lamp connections from the terminal block located inside the wiring box.
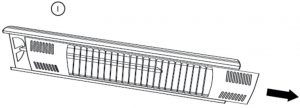
- Remove the front guard by gently sliding out from either end of the heater 1.

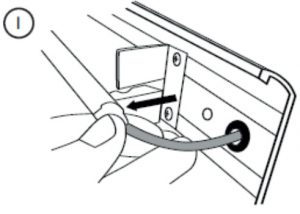
- Remove the lamp from the heater by lifting it out of its holders and clear of the heater. Feed the lamp cables out of the holes to complete the lamp removal 1.

- Take the new lamp and reverse all the steps to replace. If you experience difficulty please consult a professional, or contact Hyco.
Specification
| Supply | 230V ~ 50Hz |
| Power | 1.5 kW |
| Current | 6.5 A |
| Weight | 1.4 kg |
| Ingress Protection | 55 |
| Dimensions | 455W x 100H x 130Dmm |
Guarantee
This product is covered by a standard parts or replacement warranty for a period of 1 year from the date of purchase. If there is a manufacturing defect within the warranty period we will send spare parts, repair and return the unit or, at our discretion, supply a replacement product (excludinglamps). Incorrect installation or failure to follow correct operating and maintenance instructions are excluded. Consequential costs such as labor charges or damage to fittings and surroundings are expressly excluded.
Contact Us
If you experience a problem with this product you should first contact our service department on 01924 225 200 before taking any further action. Experience has shown that issues can often be resolved without the need to return or uninstall the product.
![]()
![]()
References
[xyz-ips snippet=”download-snippet”]

