
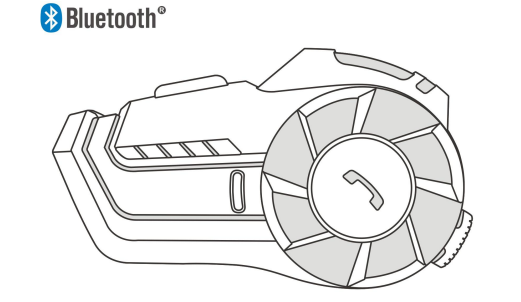
Hysnox HY-01 Bluetooth Headset Intercom User Manual
Introduction
Product introduction
HY-01 is a full-duplex intercom Bluetooth headset for motorcycle riders with the design that enables clear and safe wireless communication during riding. Compatible with all Bluetooth mobile phones and any type of helmet, our products paired with the mobile phones to allow the riders to receive and unplug calls, listen to music, listen to FM radio and receive GPS navigation voice prompts, etc., at the same time, two or three sets of network intercom call.
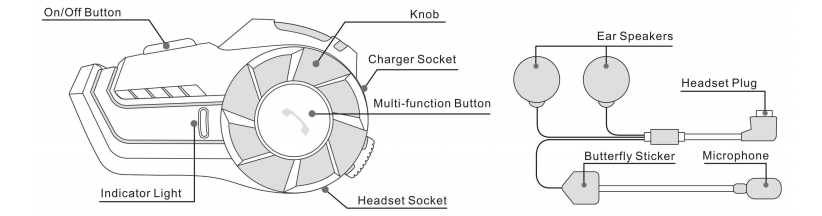
- On/Off Button
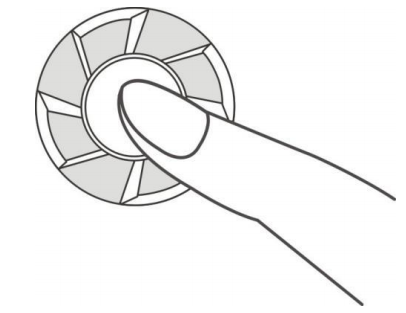
- Knob
- Charger Socket
- Multi-function Button
- Headset Socket
- Indicator Light
- Ear Speakers
- Headset Plug
- Microphone
- Butterfly Sticker
Main Functions
- After paired with a mobile phone, our products can answer incoming calls, reject calls or hang up calls within a visible range of 10 meters;
- Our products can maintain the full-duplex intercom between the helmet Bluetooth headsets at a distance of up to 1000 meters. When the intercom is enabled, the mobile phone is still in the standby state with the highest priority to ensure that no calls are missed;
- Our products have the function of answering calls automatically and support last code redial;
- Our products support FM radio function;
- Our products use the knob to control the previous song and the next song of the mobile phone music, and the multi-function keys control playback and pause;
- Our products can realize automatic switching between mobile phone calls, intercom calls, stereo music and FM radio;
- Our products use DSP to eliminate noise (wind noise) to ensure clear voice quality during high-speed driving;
- The waterproof and sunscreen design of the whole machine is durable, and the waterproof grade reaches IP66.
Package Contents
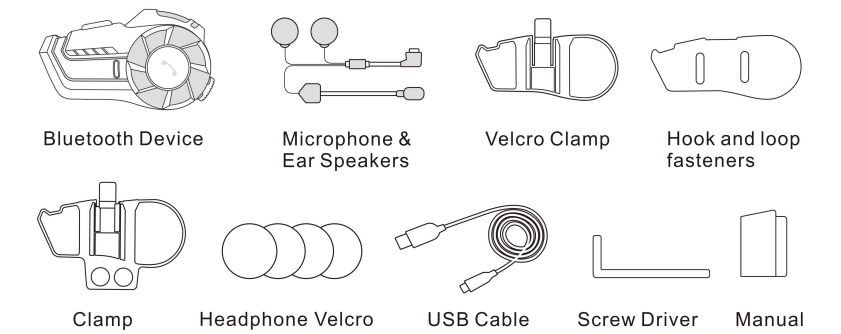
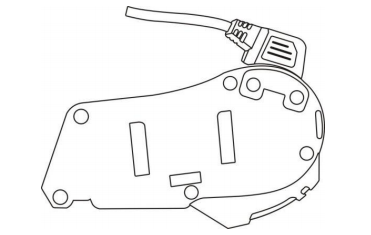
- Bluetooth Device
- Microphone&Ear Speakers
- Velcro Clamp
- Hook and loop fasteners
- Clamp
- Headphone Velcro
- USB Cable
- Screw Driver
- Manual
Installation Procedure
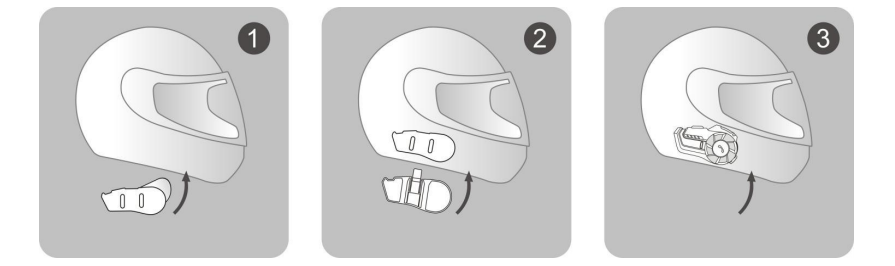
Installation method with plastic clamp
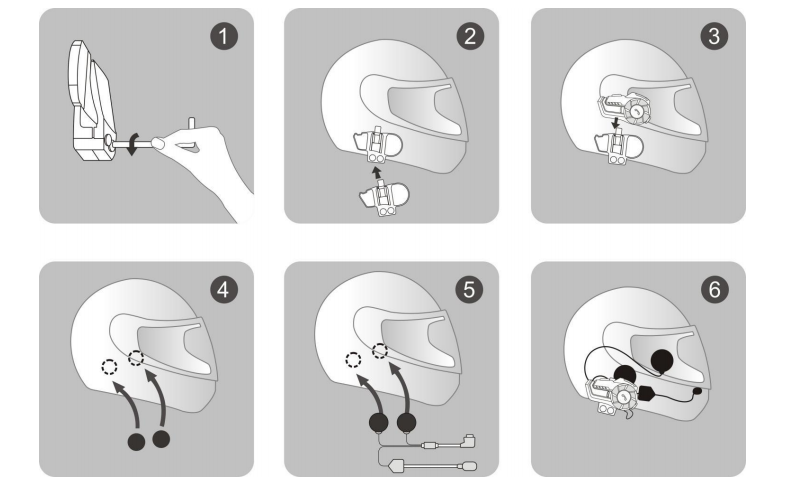
- Loosen the screws on the back of clamp with the provided screw driver.
- Open the lining of helmet, insert the clamp in the proper position on the left of helmet and fasten the screw (overly fastened screw can damage the clamp)
- Slide the receiver down into the slots on the headset clamp mount. Make sure that it is locked in securely.
- Open the lining of helmet (at ear ‘s position), clean the EPS surface and affix the Velcro on with the rough surface.
- Affix the hook surface of earphone to the rough surface of Velcro and properly tidy the helmet lining.
- Insert the headphone plug into the corresponding headphone jack on the receiver to finish the installation.
Installation method with velcro clamp
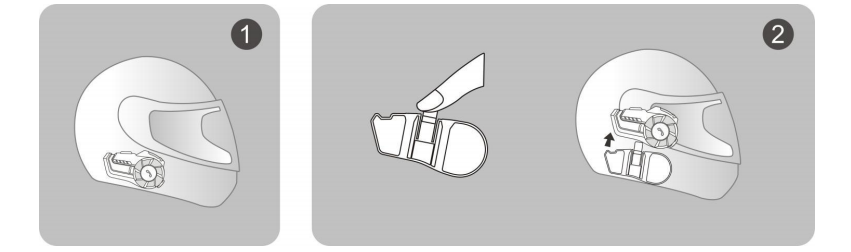
You can directly use the Velcro to mount the bluetooth device on the edge of helmet. See the following pictures.
- Tear off the white paper on velcro and stick the velcro onto clamp&helmet
- Stick the clamp with velcro onto helmet
- Slide the receiver down into the slots on the headset clamp mount. Make sure that it is locked in securely.
Use a screw plug for the headphone cable
Put the earphone cord plug buckle on, then put in two screws, tighten the plug with a screwdriver; if you want to pull out the earphone plug first unscrew the screw with a wrench to remove the buckle, and then pull out the earphone; Do not Pull out the headset directly with brute force.
Quickly remove Bluetooth headset
- Remove the headphone
- Remove the device from clamp (along the arrow direction in fingure)
- Remove the clamp from helmet(along the arrow direction in fingure)
Turning on / off the unit
On: Press the On/Off Button for 3 seconds until you hear a “Di”. The blue light will flash 3 times swiftly and then turn into regular intervals.
Off: Press the On/Off Button for 5 seconds until you hear a “Di”. The blue light will be on for a while and then die out.
Phone Controls
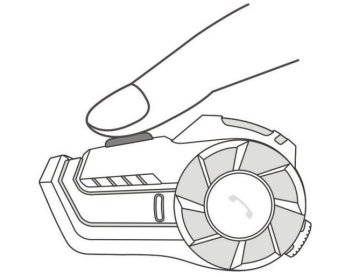
- To answer a call - Briefly press the Multi-function button once.
- Auto receive call - Dependant on the phone the unit will automatically answer the call after 15 seconds of ringing.
- To reject a call - Press the Multi-function button and hold until you hear a “Du” (around 3 seconds).
- To end a call - Whilst call is active Briefly press the Multi-function button once.
- Last number redial - When in standby mode. Press and hold the Multi-function button for 2 seconds until you hear a “Du”.
Note: Depending on the phone some or all of these functions may not work, or operate differently.
Music Controls
- Play / Pause - Briefly press the Multi-function button once.
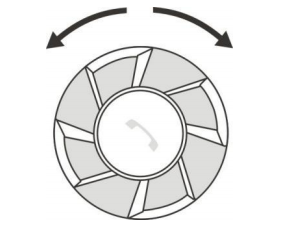
- Next Track - Turn the knob counterclockwise to select the next music.
- Previous Track – Turn the knob clockwise to go back to the previous music.
To Start FM radio
- After turn the unit on, double press the Multi-function button to start FM radio.When there is no call or intercom.
- Slowly turn the knob counterclockwise and clockwise to adjust the station.
- When FM radio is on, double press the Multi-function button to stop FM radio.
Note: In order to make FM radio the best effect, you should pay attention to the following instruction:a: The line of earphone is unfolded.b: Try to listen to the FM radio outside or near the window.
Start/End the Bluetooth Intercom
Start: When the two paired Bluetooth intercom headsets are in standby mode, Briefly press the On/Off button on either one of the two paired devices and a voice prompt will be heard after completing the intercom connection.
End: Briefly press the On/Off button and intercom closes after a “Di” prompt tone
To Adjust the Volume
Rotate the knob counterclockwise and hold it down to increase the volume, rotate the knob clockwise and hold it down to decrease the volume, let go when the volume is adjusted to the right level, and you can hear a “thump” sound when you adjust the volume. Highest or lowest volume.
Note: Depending on the phone some or all of these functions may not work, or operate differently.
Switching mode
- Switch Between Intercom and Music/FM Radio: When in intercom mode, Briefly press the Multi-function button and a “Di” prompt tone can be heard. After, switching between music and FM radio, please refer to “2“.
- Switch Between Music and FM Radio: Double press the Multi-function button to FM Radio. When listening to the FM Radio, double press the Multi-function button to exit FM Radio, then Briefly press theMulti-function button once time to music.
- A. If the intercom headset is also connected to the mobile phone, when there is a phone call, the intercom will automatically disconnect, switch to the mobile phone headset to answer the call, and automatically resume the intercom state after the call ends;B. The operation needs to be effective within a limited distance;C. It takes about 5 seconds to switch back from the mobile phone call state to the Bluetooth intercom state.
Pairing method
Pairing with mobile phone
- Ensure the Bluetooth intercom headset is off and within 1m visible range of the mobile phone to be paired.
- Press down device On/Off button for 8 seconds until you see the red light and blue light flash alternatively, it means device enter pairing status.
- Open the Bluetooth function on your mobile phone.
- Bluetooth on your phone will search the device until you see Hysnox .
- Click Hysnox on your phone, when you see the blue light flashes regularly, it means pairing is successful. (Already paired successfully, you can connect to Bluetooth in standby mode next time)
Pairing between two headsets
- Ensure both devices are off and within 1m visible range of each other.Press down both devices On/Off button for 8 seconds until you see the red light and blue light flash alternatively, both devices enter pairing status.
- Quickly press the On/Off button on either two devices. Then it will search for the other devices for pairing. When the blue light flashes regularly it means pairing is successful.
- At the same time, long press the power button of the two helmet Bluetooth headsets for 8 seconds to enter the pairing mode (red and blue lights flash alternately); short press the power button of any one of the two helmet Bluetooth headsets, the headset will automatically search for nearby helmet Bluetooth Pair the headset device.
- When paired, you do not need to go into pairing mode again. In future you only need to go into standby mode (blue light flashing) on both units and press the button on one of the devices.
Note: When 2 bluetooth devices need to pair for intercom, also need to connect mobile phone, you should following the instruction:
a: Firstly, two bluetooth devices need to pair for intercom successfully, (see the above instruction), then turn off the two bluetooth devices.b: Turn on one of bluetooth devices, also turn on the mobile phone bluetooth, let the mobile phone connect the bluetooth device successfully.c: Turn on the other bluetooth device, next you only need to press the bluetooth device (any one of two is OK) power/intercom button, the two bluetooth devices can intercom now.
Pairing between three headsets
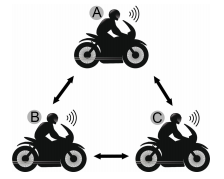
- Firstly, pair two devices A and B as described above.
- Secondly, turn off A and B, pair A and C as described of 6.2.
- Thirdly, turn off C and A, pair B and C as described of 6.2.
- At last turn on A.
- Pressing the On/Off button of A 1 time to call C and 2 times to call B;Pressing the On/Off button of B 1 time to call C and 2 times to call A;Pressing the On/Off button of C 1 time to call B and 2 times to call A.
Note: When two devices are on intercom, you must first press the On/Off button 1 time to exit the intercom, and then switch to another intercom according to the above operation.
Function priority
Level 1: PhoneLevel 2: Bluetooth intercomLevel 3: Music/FM radio
Technical parameters of product
Working distance:1000 metersFrequency:2.4GHzSupports: A2DP and AVRCPSupported Bluetooth Profiles : Bluetooth headset and hands free profiles with automatic detectionOperating Range: Up to 10m for cellphonesBattery Type: Rechargeable lithium polymer 600mAhStand by:Up to 300 hoursTalking Time : Mobile phone talk/listen to music up to 14 hours; intercom up to 12 hours.Charging Time:About 2.5 hoursPower Adaptor:DC5V 1A (Optional)Charging interface:TYPE-C interfaceWorking temperature: 41F-104F (5℃-40℃)Storage temperature: -4F-122F (-20℃~50℃)
Battery and charging instructions
Before using this device, Please charge the headset with charger. Please ensure that the battery is fully recharged when you first time use it. We have provided you with the ability to charge the system via the USB port of your computer or if you are away on a trip, you can use Multi-voltage USB power adapter.
The charging cable has a small USB plug for the headset and the large USB plug for the computer or AC adapter; please observe to correct orientation of the USB plug and socket before inserting
- Insert the USB plug of the charging cable, into the USB small jack of the headset; you can either charging by computer or AC adapter.
- While charging, the red LED on the headset module will flash slowly; When fully charged, the red light will remain on. A normal charge from a low battery will take about 2.5 hours.
Note: if you do not use the headset for a month or more, to protect the Poly-Li battery, please charge the headset at least every month. (The fault damaged by wrong charging will be not guaranteed.
Note
- If you don’t use the headset for one month or more, in order to protect the headset lithium battery, please charge the headset once every two months (the damage caused by incorrect charging will not be guaranteed);
- The suitable storage temperature of this product is -20 to 50 , please do not store in an environment with too high or too low temperature, otherwise it will affect the service life of the product;
- Do not expose this product to open flames to avoid explosion;
- The two screws of the earphone jack plug buckle can be opened and tightened by oneself, and the earphone is fixed. The screws of other mainframes cannot be opened by oneself, so as to avoid the motherboard short circuit or the loosening of other lines of the battery, which will affect the normal use.
[xyz-ips snippet=”download-snippet”]