![]()
![]() Instruction Manual
Instruction Manual
Bluetooth Home Party Speaker with Synchronizing Disco Lights
Thank you for purchasing this Audio System.PLEASE READ THIS USER MANUAL COMPLETELY BEFORE OPERATING THIS UNIT AND RETAIN THIS BOOKLET FOR FUTURE REFERENCE.
WHAT’S IN THE BOX
Contents
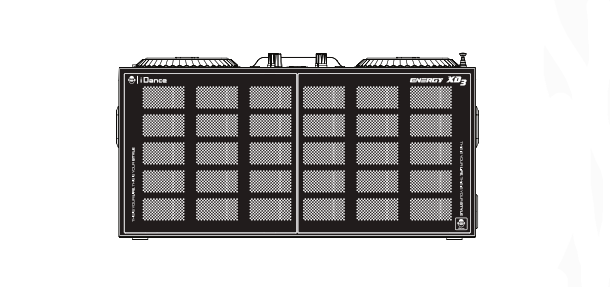
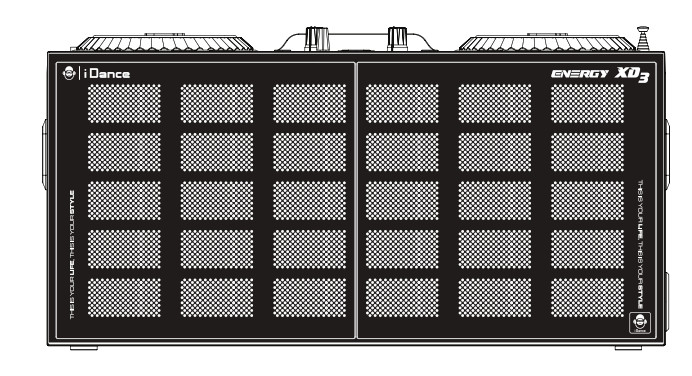
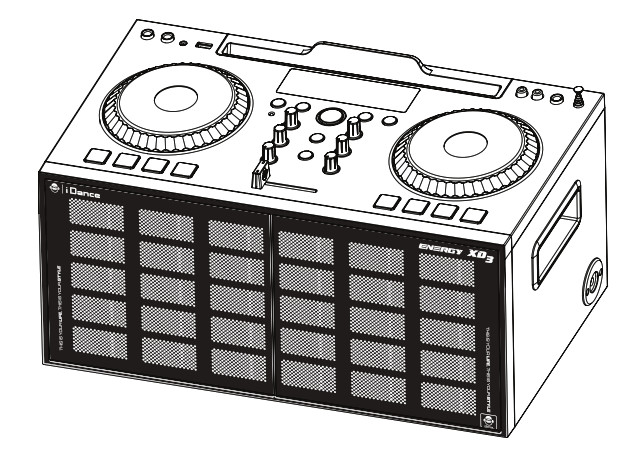
- iDance XD3 main unit

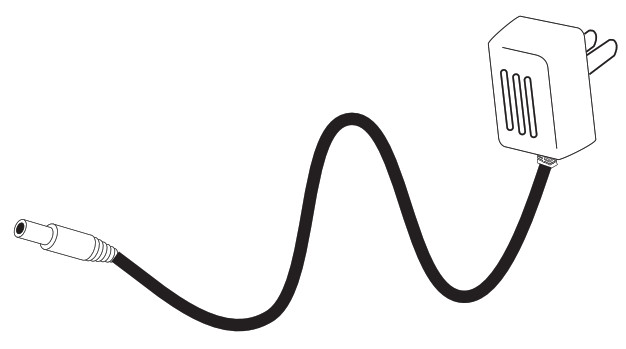
- AC-DC Power Adaptor (10.5V DC)3. Instruction Manual
 3. Instruction Manual
OVERVIEW
The iDance XD3 is a Wireless All-In-One DJ Party Box System with an integrated mixer. It accepts microphone, guitar, line-in audio, and stereo Bluetooth wireless audio up to 10 meters. The XD-3 also includes a built-in FM radio and USB MP3 player. Pair your device easily with only a few simple steps! The XD3 is also embedded with disco party lighting – just turn your music on and everything is ready to go!
You may also record a playback mix directly onto USB using the XD-3’s premium record function. You can record FM radio, your own voice or a guitar too.The XD3 is perfect for DJs, house/pool/yard parties, or for karaoke applications. Take your sound with you wherever you go!Thank you, and congratulations on your choice of iDance’s XD3!
WARNINGS
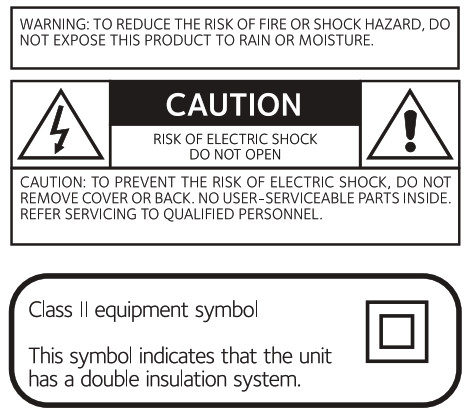
WARNINGPlease do not attempt to open the back cover or power adapter as opening or removing the covers may expose you to dangerous voltage or other hazards, and it will also cause the restricted servicing to be disabled. There are no user servicing components inside.
![]() The exclamation mark inside an equilateral triangle is intended to alert user of the presence of important operating and maintenance (servicing) instructions in the literature accompanying the product.
The exclamation mark inside an equilateral triangle is intended to alert user of the presence of important operating and maintenance (servicing) instructions in the literature accompanying the product.
![]() The lightning flash with an arrowhead symbol inside an equilateral triangle is intended to alert the user of the presence of uninsulated ” hazardous voltage” within the product’s enclosure, which may be of sufficient magnitude to induce a risk of electric shock to persons.
The lightning flash with an arrowhead symbol inside an equilateral triangle is intended to alert the user of the presence of uninsulated ” hazardous voltage” within the product’s enclosure, which may be of sufficient magnitude to induce a risk of electric shock to persons.
FCC AND CANADIAN ICES
This device complies with part 15 of the FCC Rules. Operation is subject to the following two conditions: (1) This device may not cause harmful interference, and (2) this device must accept any interference received, including interference that may cause undesired operation.
This digital apparatus does not exceed the Class B limits for radio noise emissions from digital apparatus as set out in the Radio Interference Regulations of Industry Canada. These limits are designed to provide reasonable protection against harmful interference in a residential installation.
- Reorient or relocate the receiving antenna.
- Increase the separation between the equipment and the receiver.
- Connect the equipment into an outlet on a circuit different from that to which the receiver is connected.
- Consult the dealer or an experienced radio/TV technician for assistance.
IMPORTANT SAFETY INSTRUCTIONS
- Read these instructions.
- Keep these instructions.
- Heed all warnings.
- Follow all instructions.
- Do not use this apparatus near water.
- Clean only with dry cloth.
- Dinostnruocttbioloncsk. any ventilation openings. Install in accordance with the manufacturer’s
- Do not install near any heat sources such as radiators, heat registers, stoves, or other apparatus (including amplifiers) that produce heat.
- Do not defeat the safety purpose of the polarized or grounding-type plug. A polarized plug has two blades with one wider than the other. A grounding type plug has two blades and a third grounding prong. The wide blade or the third prong are provided for your safety. If the provided plug does not fit into your outlet, consult an electrician for replacement of the obsolete outlet.
- Protect the power cord from being walked on or pinched particularly at plugs, convenience receptacles, and the point where they exit from the apparatus.
- Only use attachments/accessories specified by the manufacturer.
- Use only with the cart, stand, tripod, bracket, or table specified by the manufacturer, or sold with the apparatus. When a cart is used, use caution when moving the cart/apparatus combination to avoid injury from tip-over. Portable Cart Warning
- Unplug this apparatus during lightning storms or when unused for long periods of time.
- Refer all servicing to qualified service personnel. Servicing is required when the apparatus has been damaged in any way, such as power-supply cord or plug is damaged, liquid has been spilled or objects have fallen into the apparatus, the apparatus has been exposed to rain or moisture, does not operate normally, or has been dropped.
- The apparatus shall not be exposed to dripping or splashing and no objects filled with liquids, such as vases, shall be placed on the apparatus.
- The battery shall not be exposed to excessive heat such as sunshine, fire, or the like.
- The MAINS plug is used as the disconnect device, which shall remain readily operable.
FEATURES
- AUX line input (3.5mm Stereo Mini Jack)
- Microphone & Guitar input (1/4″ Jack)
- Bluetooth wireless stereo audio streaming
- Support A2DP Profile for most smart phone/laptop
- USB Mp3 Player & Recorder (Support Mp3/WMA/Wav format playback, recording)
- On board jingle sound for your mix
- Disco lighting ready to go
- Built-in FM radio tuner
- Intelligent cross-fader for CUE
- 2 x Big DJ jog wheel for DJ filter and delay FX
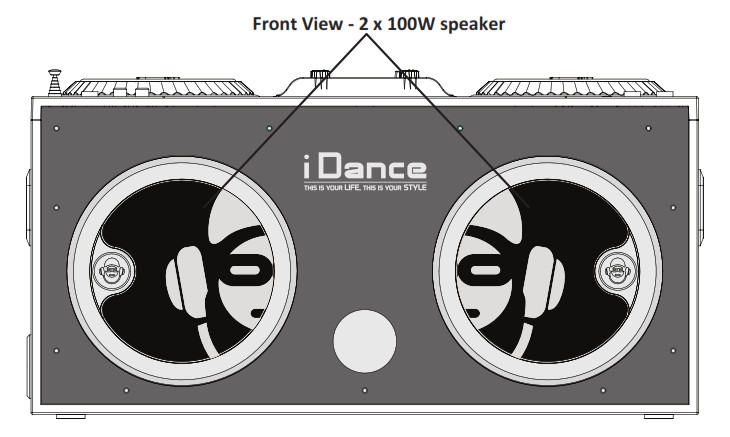
- 2 x 4″ Full range Driver
- 200W MAX Power output
- Smartphone/tablet stand
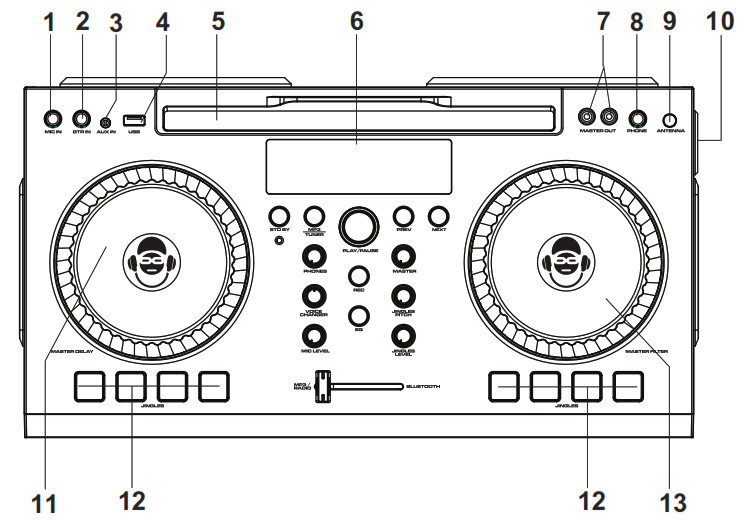
CONTROL LOCATION (1.1)
CONTROL LOCATION (1.2)
- MIC input(1/4” Jack)6.3mm unbalanced jack for microphone input
- GTR input(1/4” Jack)6.3mm unbalanced jack for guitar (or other Hi-Z instrument) input
- Aux-In(mini jack)Connect your music device to this socket with the 3.5mm mini jack cable
- USB InputConnect USB drive (up to 32GB) to this port for MP3/WMA/WAV playback
- Smartphone / Tablet cradleCradle to display your smartphone/tablet.
- LCDShows the status of the XD3.– In MP3 mode, the track title and song index of the song will be shown– In Tuner mode, the channel number and frequency will be shown
- Master Output (RCA)Connect external PA system to this master output for bigger sound. The level of this output is controlled by the master volume knob.
- CUE Phone output (1/4”Jack)Connect a ¼” jack headphone to this output for CUE.Note: The signal of this headphone output is reverse to the cross fader and speaker output, When the cross fader is at “MP3/Tuner”, the Bluetooth signal will be heard on the CUE headphone. When the cross fader is at “Bluetooth”, the MP3/Tuner audio will be heard on the CUE headphone.
- FM AntennaExtend this antenna in Tuner mode and swivel it around to find the best reception.
- DC Jack InConnect the power adapter to power up the XD3 unit.
- DJ DELAY effect jog wheelTurn this jog wheel clockwise to add a DJ delay effect to the master output. Turn the wheel more to increase the delay effect. Note: To turn off the delay effect, turn the Delay jog wheel all the way to the left.
- 8x Jingle PadsPress Jingle Pads to mix the preset jingle sounds to your music. Adjust the pitch and tempo in real time by turning the jingle pitch knob.
- DJ Filter effect jog wheelTurn the jog wheel to add a wide dynamic DJ filter on the master output. Turn clockwise position for parametric Low pass filter (LPF) and counterclockwise for parametric HPF.Note: To return to normal sound, turn the jog wheel back to the middle.The iDance logo on the jog wheel will be straight, as shown here:
CONTROL LOCATION (2.1)CONTROL LOCATION (2.2)

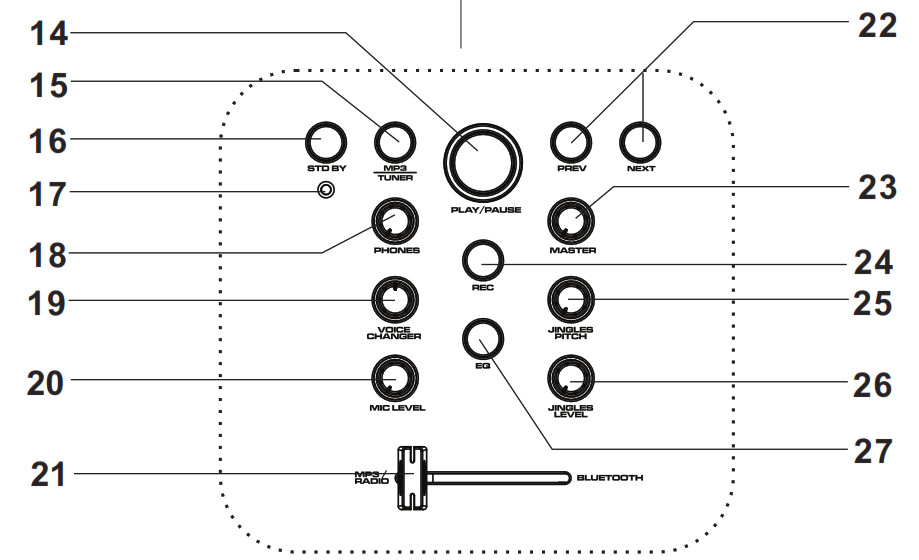
- Play / Pause– In MP3 mode, press to Play/Pause the music– In Tuner mode, press for auto-scanning
- ModePress to change between Tuner and Mp3 mode.
- Standby ButtonPress to turn ON the XD3 or put the XD3 into standby mode. When XD3 is not in use, please put XD3 into standby mode to save energy.
- Stand By IndicatorThe indicator light off – power on. The indicator light on – standby mode.
- Phones volume knobTurn this knob to adjust the CUE headphone output volume.
- Voice ChangerChange your microphone voice into a beast (Low) or kid (Hi) by turning this knob to Hi or Low. Please switch back to Normal for normal microphone voice
- Mic volume knobTurn this knob to turn the microphone volume
- Intelligent Cross FaderMix your music between MP3/Tuner and Bluetooth music. Turn the crossfader to the left for MP3/Tuner, the speakers will put out MP3/Tuner audio while the CUE headphone will be on Bluetooth. Turn the crossfader to the right for Bluetooth, the speakers will put out Bluetooth audio while CUE headphone will be on MP3/Tuner.
- Next / Previous– In MP3 mode, press to select next or previous track.– In Tuner mode, press to select next or previous preset FM channel.
- Master volume knobTurn to adjust the Master output volume. (for speaker and master output RCA)
- RecordPress to record your master mix into a connected USB drive in .wav format.Note: During USB recording, USB playback is disabled and would automatically switch to Tuner mode
- Jingle PitchTurn to adjust the tempo and pitch for the jingles in real-time. Turn clockwise for pitch-up and faster tempo, and turn counterclockwise for pitch-down andslower tempo. Turn the knob back to the middle position to re-turn to the original pitch and tempo.
- Jingle volume potTurn to adjust Jingle mix volume
- EqualizerPress this button to cycle through 8 different preset EQs on Master output for your favorite.
GENERAL OPERATIONS
Power Connection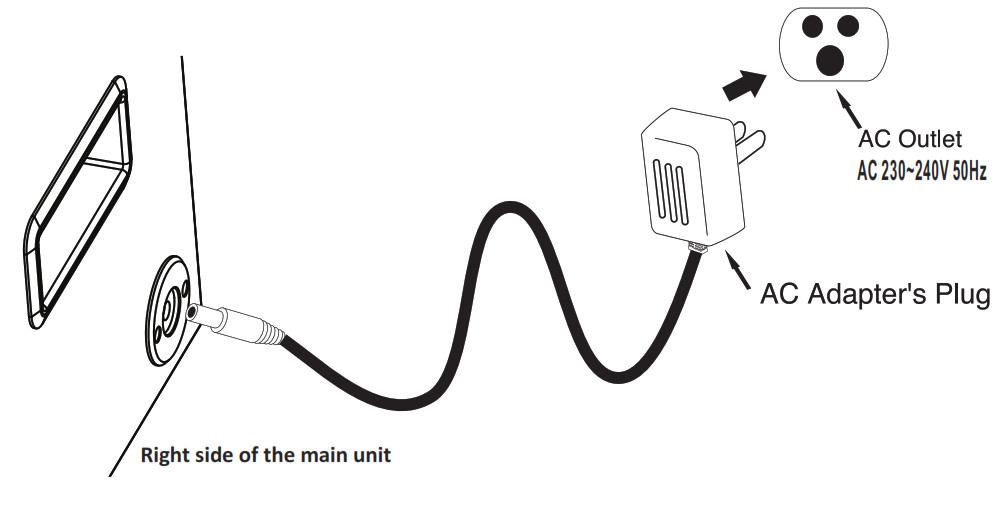 Connecting Bluetooth to your smartphone/tablet
- Press the Standby button to turn on the XD3(XD3 Bluetooth is ready to connect after turning ON)
- On your smartphone / Tablet, turn on Bluetooth and enable device scanning
- When “XD3” shows up on the Bluetooth scan, select it to connect it to your device.
- When both devices are successfully connected, you are ready to play music wirelessly from your device.NOTE: When Bluetooth is NOT connected, the LED ring on Play/Pause button will blink. When Bluetooth is successfully connected, the LED ring on the Play/Pause button will stay ON
Recording into USB drive
- Plug USB drive into the XD3 (Please ensure that the USB drive does not contain other file formats beside MP3/Wav and contain enough capacity around 20MB)
- Press the mode button and change to Tuner mode
- Press “REC” button and start to record your master output mix into USB drive
- Press “REC” button again to stop recording
- A new folder will be created in the USB drive and you may playback via XD3 or computer.
Turning off the DJ lighting
- Press and hold “Play/Pause” button for 2 seconds to turn OFF the DJ lighting effect
- Press and hold “Play/Pause” button for 2 seconds to turn ON the DJ lighting effect again
Listening to MP3 via USB
- Press the Standby button to turn on the XD3.
- If “USB” is not on the LED display, press the Mode button to switch to USB mode.
- Plugin a USB drive that has MP3s stored on it.
- Press the Play/Pause button to start music playback. Press Prev/Next to switch between MP3 tracks.NOTE: Ensure that the Crossfader slider is pushed to the left, at the MP3/Tuner position.
Listening to Tuner
- Press the Standby button to turn on the XD3.
- If “FM” is not on the LED display, press the Mode button to switch to Tuner mode.
- If you are using the Tuner for the first time, press the Play/Pause button to scan for FM stations. The XD3 will automatically save the stations into preset memory. After scanning is complete, the unit will play the first found station.
- Press Prev/Next to switch between station presets.NOTE: Ensure that the Crossfader slider is pushed to the left, at the MP3/Tuner position.
TROUBLESHOOTING
| PROBLEM | POSSIBLE CAUSE AND SOLUTION |
| Noise on speaker output when the microphone is connected and turn on the voice changer. | Make sure your microphone or microphone cable is in good condition, grounded, and shielded. Internal gain of voice processing could cause vibration from poor ground noise |
| Bluetooth cannot connect to XD3 | Make sure no other device from your friend or family is connected to XD3. When XD3 Bluetooth is connected, LED ring on Play/Pause button would stay ON. So make sure XD3 Play/Pause button LED ring is blinking and indicating Bluetooth is ready to connect. Also, make sure your smartphone/tablet is located close to XD3 (<2m) when pairing. |
| Intermittent Bluetooth music streaming | The wireless Bluetooth distance of XD3 is about 7-10m in open area. Below conditions could block you Bluetooth signal and please ensure you would get rid of those:• Metal protection case for your phone/tablet• Metal or wall is blocking in between your phone/tablet and XD3• Another Bluetooth device is working close to XD3 |
| Distortion on recording | XD3 USB recorder is capturing audio signals on master output, please make sure microphone/guitar volume, jingle volume, and master volume are at optimal level and no distortion is heard from speaker. |
| No music from Phone output, and not muting the speaker | XD3 phone output is for DJ CUE monitoring, but NOT for private listening. Please refer to above page E4 for the phone output operation. |
| No sound on selected source | • Ensure that the XD3 is powered ON• Ensure fader control is in the correct position for listening to the desired source• Check the master volume on the XD3• Check the volume level on paired Bluetooth device |
SPECIFICATIONS
| INPUT | FM, USB, Bluetooth, 1/4″microphone, 1/4″guitar, Aux-In |
| Phone output | 1/4″stereo jack |
| LCD Display | ID3, FM frequency, Radio Channel, Radio Channel |
| FM Frequency Range | 87.5-108MHz |
| USB Supported file type | MP3 / WAV |
| Maximum USB size | 32GB |
| USB Recording Format | WAV @ 128kbps |
| Freq. Response | 40Hz ± 3 dB to 16KHz ±6dB |
| THD | 10% |
| S/N | 45 dB |
| Master Output level | 800 mV |
| Speaker size | 4″ inch full range speaker x2 |
| Speaker Power Output | 200W MAX Power output |
All features and specifications are subject to change without notice.Disposal of Old Electrical & Electronic Equipment (Applicable in the European Union and other European countries with separate collection systems).This symbol on the product or on its packaging indicates that this product shall not be treated as household waste. Instead, it shall be handed over to the applicable collection point for the recycling of electrical and electronic equipment. By ensuring this product is disposed of correctly, you will help prevent potential negative consequences for the environment and human health, which could otherwise be caused by inappropriate waste handling of this product. The recycling of materials will help to conserve natural resources. For more detailed information about recycling of this product, please contact your local Civic Office, your household waste disposal service, or the shop where you purchased the product.
[xyz-ips snippet=”download-snippet”]