![]()
![]()
Guitar interfaceUSER MANUAL
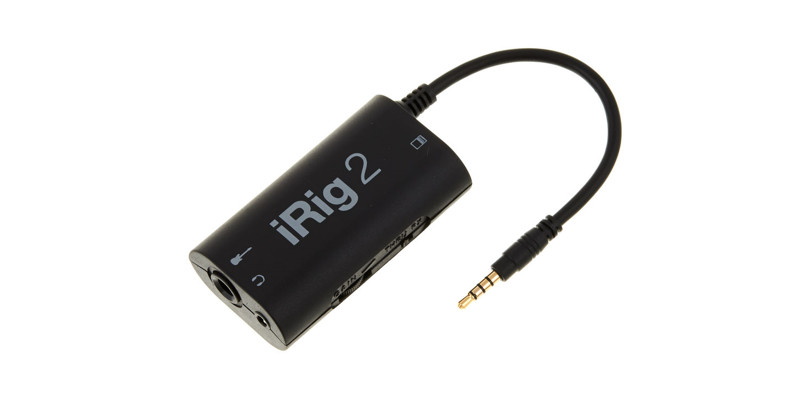
iRig 2
Thank you for purchasing iRig 2. Your package contains:
- iRig 2
- Slot for velcro strip
- Velcro strip
- Quick start guide
- Registration card


iRig 2 is the new and improved version of the groundbreaking and best selling iRig guitar interface. Featuring the powerful sound and streamlined convenience you loved about iRig, it packs essential new features like versatile gain control, a 1/4″ amplifier output into its sleek pocketable enclosure. Its new 1/4″ output jack lets you use iRig 2 with an amplifier as a part of your live rig without the use of an adaptor. iRig 2 features a switch that lets you select between a processed signal and a clean “thru” input signal. This means you can also use your mobile device as a tuner, recorder or other tool while preserving the purity of a 100% analog signal path.
Register your iRig 2
By registering, you can access technical support, activate your warranty and receive free JamPointsTM which will be added to your account. JamPointsTM allow you to obtain discounts on future IK purchases! Registering also keeps you informed of all the latest software updates and IK products. Register at: www.ikmultimedia.com/registration
iRig 2 Overview
- Captive 1/8″ TRRS cable
- 1/4″ TS amplifier output
- THRU-FX switch
- Input level control
- 1/8″ stereo headphone out
- 1/4″ TS instrument input
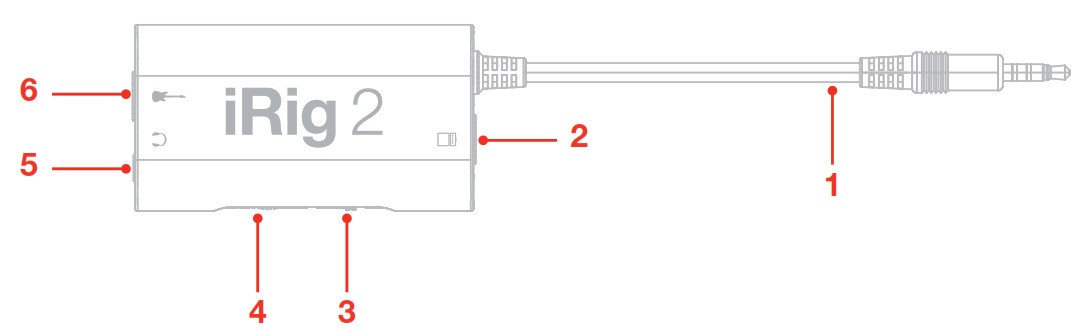 Captive 1/8″ TRRS cable
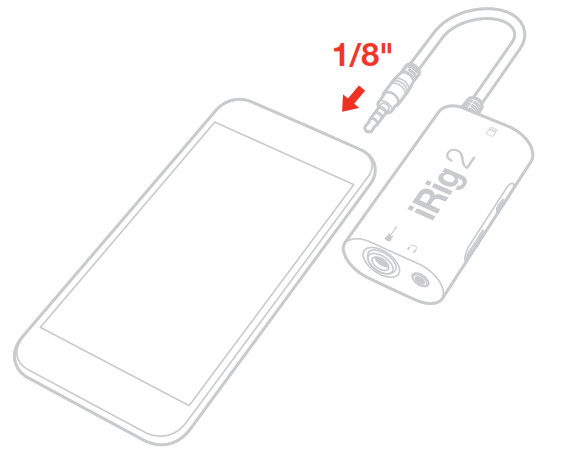
Installation and setup
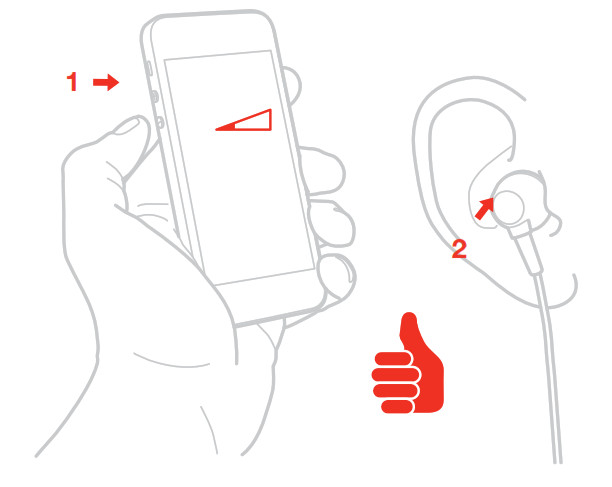
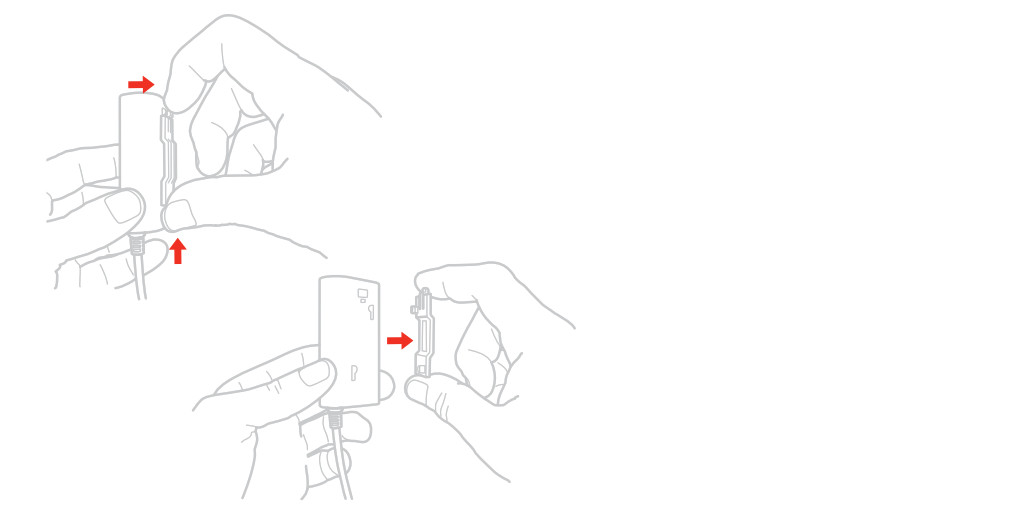
- Plug your iRig 2 into your device.
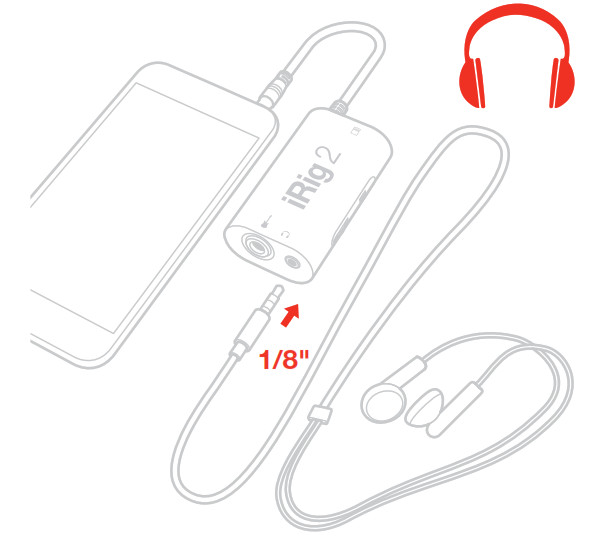
- Plug your headphones or earbuds into iRig 2.
- Lower the volume of your device by using the volume buttons.
- Put your headphones on.
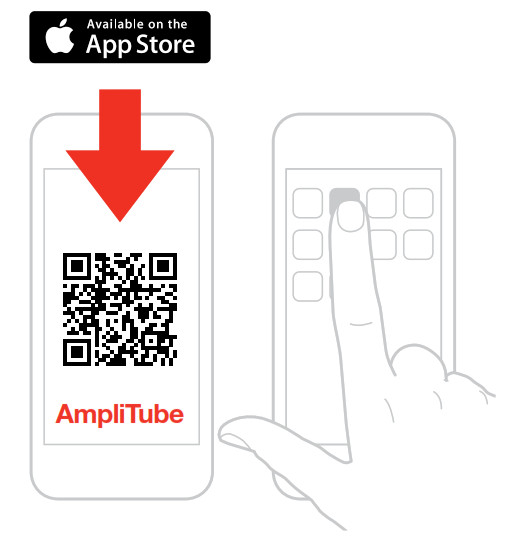
- Download and launch AmpliTube.http://www.ikdownloads.com/irig2?SRC=QRWARNING: Permanent hearing loss may occur if earbuds or headphones are used at high volume. You can adapt over time to a higher volume of sound, which may sound normal but can be damaging to your hearing. Set your device volume to a safe level before that happens. If you experience ringing in your ears, reduce the volume or discontinue use of earbuds or headphones with your device.
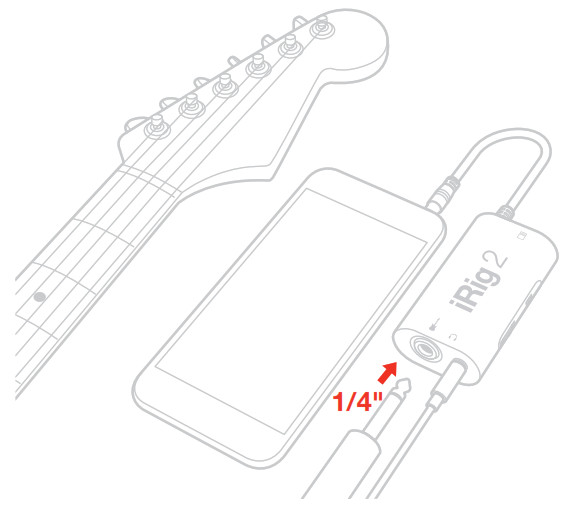
- Connect your guitar, bass or other mono instruments to the 1/4″ TS input jack on iRig 2.
- Adjust the input level with the thumbwheel.NEVER turn the “NO FEEDBACK” option OFF in the AmpliTube app SETUP page when using headphones or earbuds, to avoid possible feedback. NEVER plug or unplug your headphones when AmpliTube is open and running.
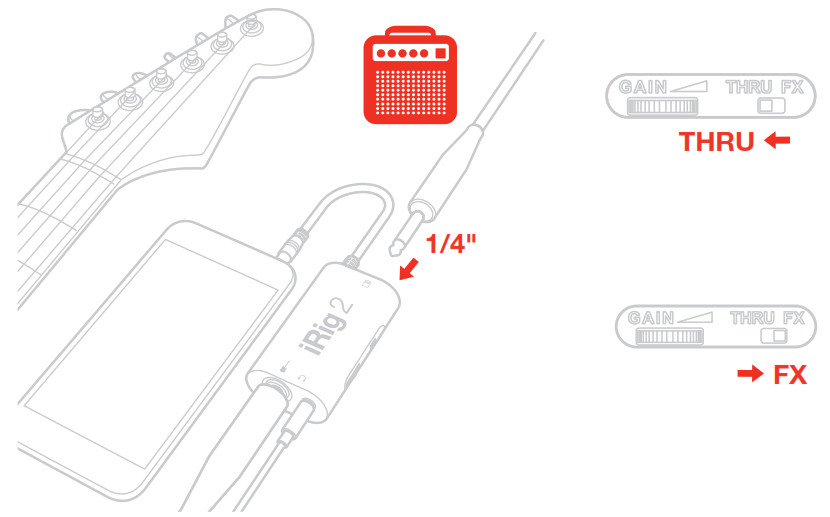
- Connect an external amplifier to the 1/4″ TS Amplifier output jack on iRig 2 and select the behavior of this output via the THRU-FX switch. THRU 1/4″ FX
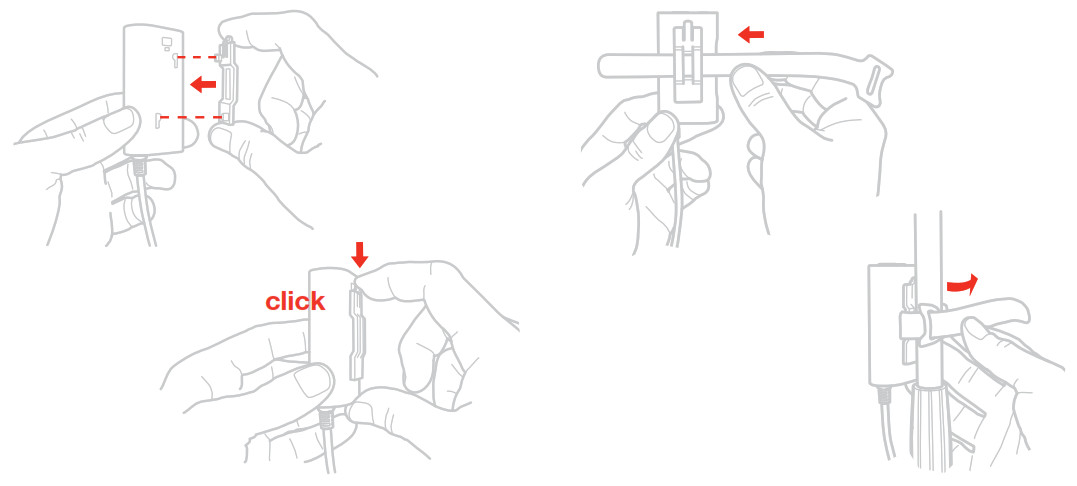
- If needed, connect the detachable velcro-slot to the back of iRig 2 and fix it to any stand or pole with the velcro strap.

Using iRig 2 with mixers, speakers or amplifiers
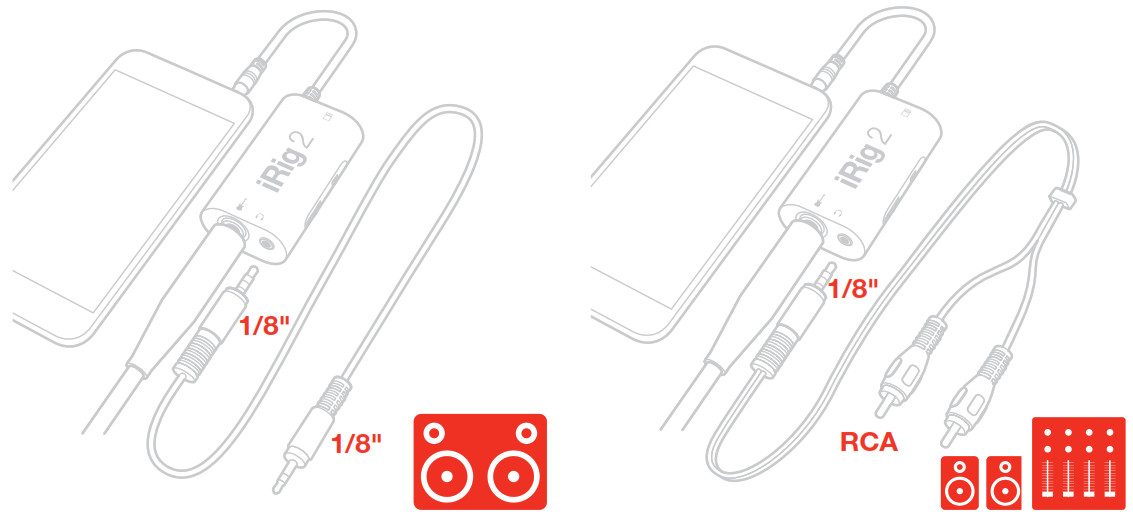 Amplifier output jackIf needed you can connect an external amplifier to iRig 2. This is possible thanks to the “Amplifier output jack”, that allows you to send the processed signal (i.e. from a rig inside your mobile device) or a direct unprocessed signal, back out to an instrument amplifier or other unbalanced input.
THRU-FX switch
This switch allows you to select the type of output that is sent thru the “Amplifier output jack.” When this switch is set to THRU, the “Amplifier output jack” carries the same signal that is sent to the instrument input. This mode is typically used to send the instrument signal, that is plugged into the Instrument jack, back out to an instrument amplifier or other unbalanced input. This lets you plug your favorite amplifier into the “Amplifier output jack” and, at the same time, connect iRig 2 to your mobile device that runs, for example, a tuner app or your favorite recording app. The headphone out lets you easily listen to the output of your device.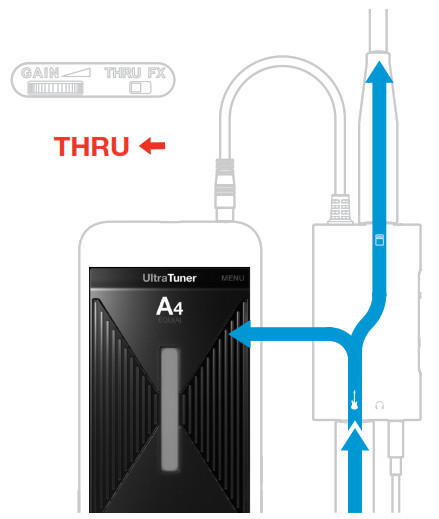 When this switch is set to FX, the “Amplifier output jack” carries the signal (processed) that’s coming from your mobile device and sends it back out to an instrument amplifier. This lets you process your instrument inside your favorite app and then out back to an – for example – amplifier’s clean channel. The headphone output lets you conveniently monitor the signal coming from your device.
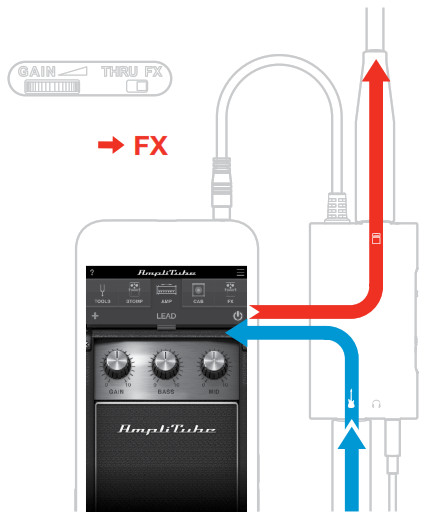
Setting input level
You can adjust the input level of your instrument via the dedicated thumbwheel. To increase the input level rotate the thumbwheel control toward the TRRS captive cable. To decrease the input level rotate the thumbwheel control toward the 1/4″ instrument input jack.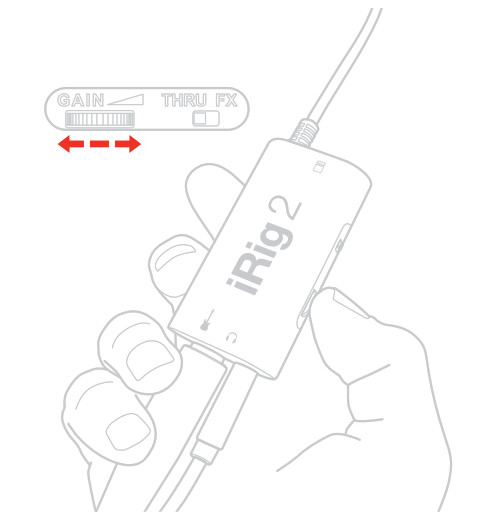 For the best sound, adjust the input level so that it’s as high as possible while still retaining a “clean” sound that’s not distorted or overloaded.
- If the input level is set too low you will have noise in your signal.
- If the input level is set too high you will have a distorted signal.
Stand adapter
You can fix iRig 2 to any microphone stand or pole via the included clip and velcro strip.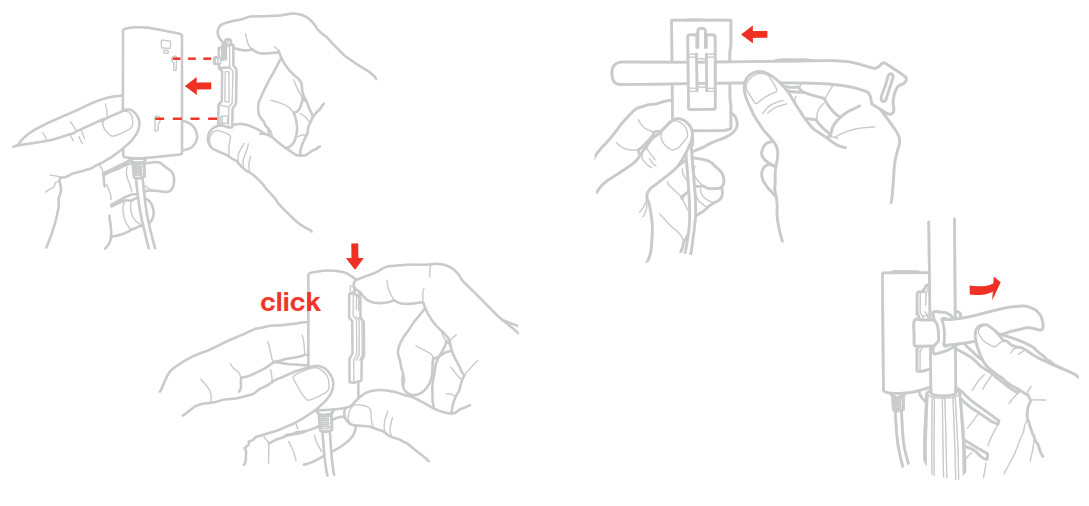
Specifications
- – Instrument input: unbalanced, Hi-Z, TS 1/4″ Jack, Tip: signal / Shield: ground
- Instrument input impedance: 380 kOhms
- Amplifier output: unbalanced, TS 1/4″ Jack, Tip: signal / Shield: ground
- Headphone output: 1/8″ stereo headphone output
- Frequency response: 20Hz-20kHz
- Size (without cable): 72mm x 39mm x 21mm (2,83″ x 1,53″ x 0,82″)
- Weight: 43g (0,0948lb)
Warranty
Please visit: www.ikmultimedia.com/warrantyfor the complete warranty policy.
Support and more info
www.ikmultimedia.com/supportwww.irig2.comApple is not responsible for the operation of this device or its compliance with safety and regulatory standards.
iRig® 2, AmpliTube®, iRig® Recorder, VocaLive®, SampleTank® are trademarks property of IK Multimedia Production Srl. iPad, iPhone, iPod touch, Retina and Mac are trademarks of Apple Inc., registered in the U.S. and other countries. iPad Air, iPad mini, and Lightning are trademarks of Apple Inc. All other trademarks are property of their respective owners.
References
[xyz-ips snippet=”download-snippet”]