IK Multimedia iRig Pre 2 Ultra Portable
XLR Microphone User Manual

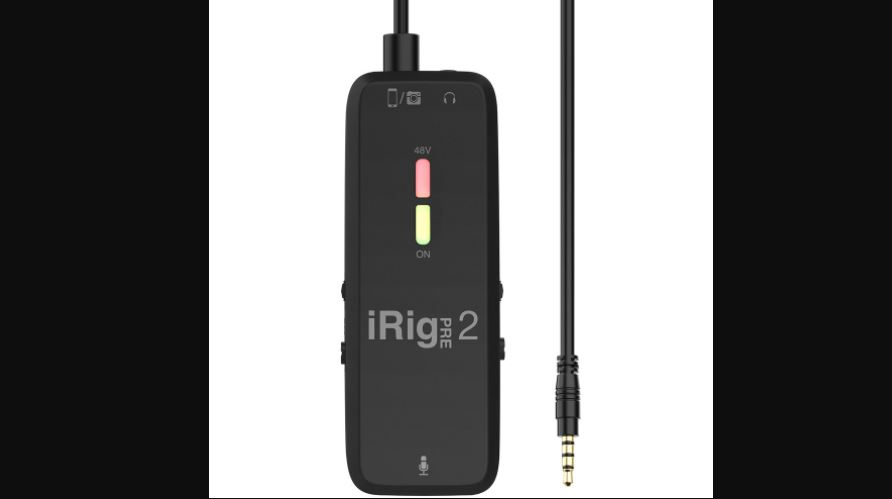
iRig Pre 2
Thank you for purchasing iRig Pre 2.Your package contains:
- iRig Pre 2
- 2 AA batteries (alkaline)
- Velcro strap
- Quick start guide
- Registration card

iRig Pre 2 is the successor of the very popular iRig Pre, the first mobile preamp interface for mobile devices, like iPhone, iPad and Android phones and tablets.
Just like its predecessor, iRig Pre 2 is an ultra-portable XLR microphone preamp that sports a compact batterypowered design, and a stylish soft-touch finishing, that can be used anywhere with any device. In fact, not only iRig Pre 2 connects to any mobile devices accepting an analog TRRS input, but now it also connect to any DSLR camera via its 3.5 mm – 1/8″ jack, thanks to its new auto-sensing circuit output circuit.
Register your iRig Pre 2
By registering, you can access technical support, activate your warranty and receive free JamPointsTM which will be added to your account. JamPointsTM allow you to obtain discounts on future IK purchases! Registering also keeps you informed of all the latest software updates and IK products. Register at: www.ikmultimedia.com/registration
Installation and setup
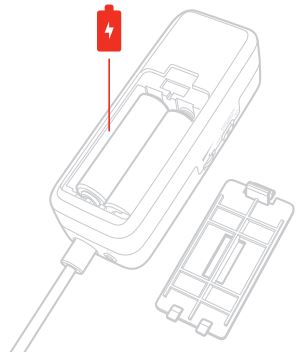
- Insert the supplied batteries into the battery compartment.

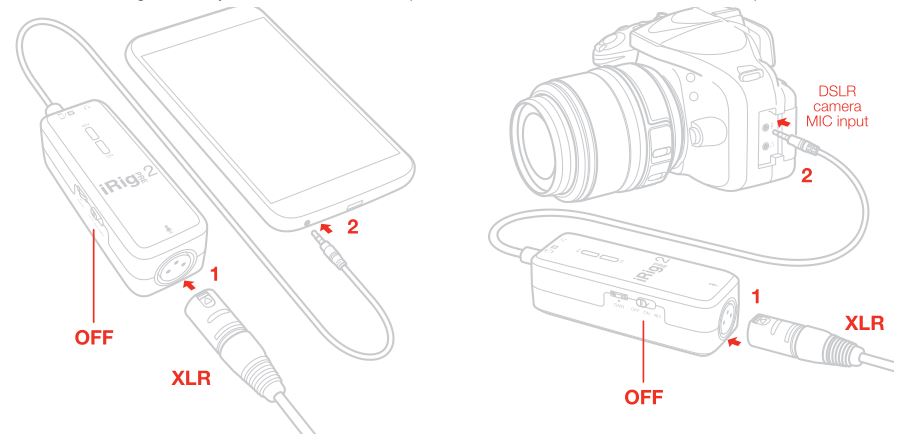
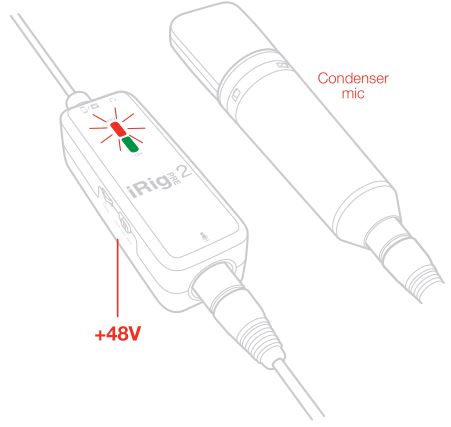
- Connect your microphone to the XLR input connector (making sure to have the 48V phantom power Off).
- Connect iRig Pre 2 to your mobile device headphone socket or to the DSLR camera Mic input.
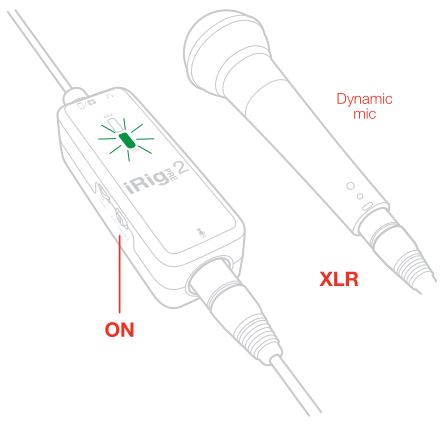
- Turn the iRig Pre 2 ON by sliding the power switch to the ON position. The green LED will light.
- If you are using a microphone that needs phantom power (like most condenser microphone), slide the power switch to the upper position (marked +48V) to turn phantom power ON. The red LED will light.
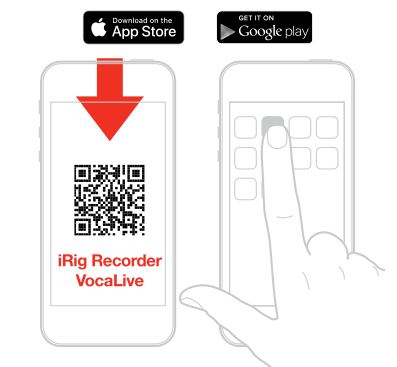
- If you have not done so already, download your favourite software/app. ikdownloads.com/irigpre2
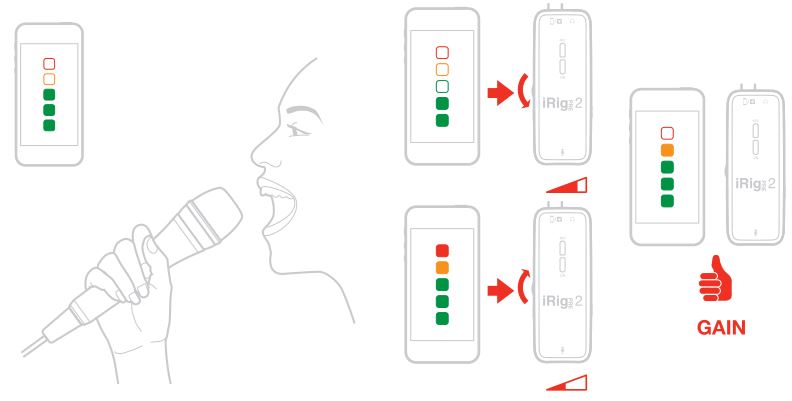
- You are now able to record using your preferred microphone on your device. To get optimal results, you need to properly adjust the GAIN control. Check the input level meter on the app you are using to record (like iRig Recorder). This level meter should peak as high as possible but should never reach the maximum or clipping level.
- Connect your headphones to the Headphone Output jack on iRig Pre 2 and set its level with the dedicated volume wheel.

Usage tips
- To avoid having too much noise in the recordings, always set the GAIN properly. If the GAIN is too low, recordings will be too quite, and when boosted within the apps they will become too noisy. If the GAIN is too high, recordings will be distorted.
- Be CAREFUL not to turn the phantom power ON with passive ribbon microphones as the current that will flow into the ribbon element could damage it. When using ribbon mics, turn ON phantom power ONLY if the microphone specifications clearly say it’s needed.
- If you hear feedback issues when using high GAIN settings, lower the mobile device volume with the device volume
Direct monitoring
When recording an audio signal into your audio software, there is often a slight delay before it reaches the outputs of the software and iRig Pre 2. This delay, called latency, is caused by the computer processing required to convert and record audio. Since this delay can be distracting, iRig Pre 2 provides a direct monitoring path from the input to the output, which is activated by the Direct Monitor switch. When Direct Monitoring is enabled, the input signal is mixed with the output signal from your audio software and routed directly to the Headphone output. This lets you hear the “live” inputs without latency. The Direct Monitor switch has no effect on what is being recorded by your software. When using the Direct Monitor feature, make sure any software monitoring option for direct (or “low latency”) monitoring is disabled. Disabling low latency monitoring prevents “double monitoring” of input audio signals when using the Direct Monitoring feature. When “double-monitoring” occurs, there will be an increase in volume and an undesirable “phasing” sound. For more details about its monitoring function, refer to the documentation for your audio software.
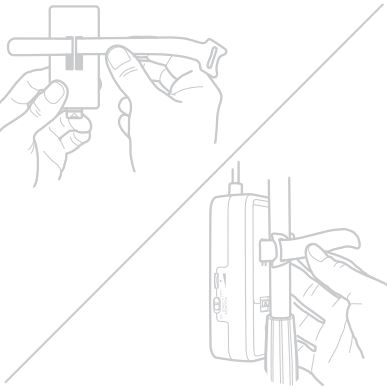
Stand adapter
You can fix iRig Pre 2 to any microphone stand or pole via the included velcro strip.
Specifications
- Frequency response: from 20 Hz to 20 KHz +/- 1.5dB
- EIN (@gain min): -113.5 dBA
- EIN (@ gain max): -92.4dBA
- THD+N: -90 dBA / 0,003%
- Gain range: 48dB
- Phantom max current: 6mA
- Battery duration (Alkaline 2xAA): approx 20 hours when phantom is off, approx 7 hours when phantom is on.
Warranty
Please visit: www.ikmultimedia.com/warranty for the complete warranty policy.
Support and more info
www.ikmultimedia.com/supportwww.irigpre2.comApple is not responsible for the operation of this device or its compliance with safety and regulatory standards.
FCC statement
This device complies with Part 15.107 and 15.109 Class B of the FCC Rules CFR47: October 2010.
Operation is subject to the following two conditions: 1. This device may not cause harmful interference. 2. This device must accept any interference received, including interference that may cause undesired operation.
Changes or modifications not expressly approved by the party responsible for compliance could void the user’s authority to operate the equipment.
iRig® Pre 2 is a trademark or registered trademark property of IK Multimedia duction Srl. All other product names and images, trademarks and artists names are the property of their respective owners, which are in no way associated or affiliated with IK Multimedia.
2021/01/12
References
[xyz-ips snippet=”download-snippet”]