IK iRig Stream User Manual
Rig Stream
Thank you for purchasing iRig Stream.Your package contains:
- iRig Stream.
- Lightning cable.
- USB-A cable.
- USB-C cable.
- Quick Start Guide.
- Registration Card.
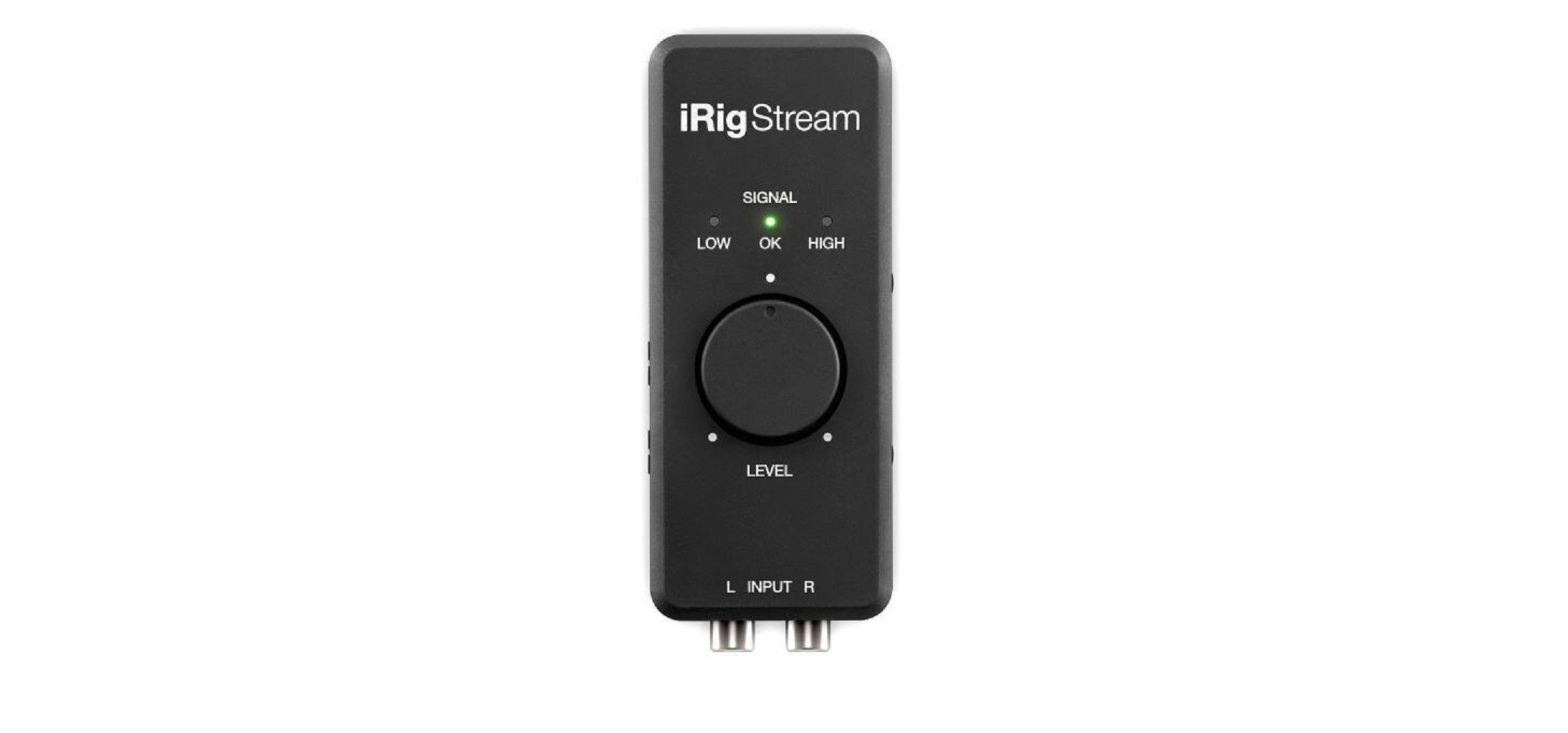
The iRig Stream is a compact MFi audio streaming interface perfect for the musician or content creator on the go. The iRig Stream pre-mixes multiple sources of audio (line input and microphone) down to a Stereo (or Mono) track that’s routed to your favorite streaming media service. And for true ready-to-go convenience, the iRig Stream delivers continuous use via USB power (device powered) or, alternatively, it can be connected to an optional PSU that will charge the connected iOS device.
Register your iRig StreamBy registering, you can access technical support, activate your warranty and receive free JamPoints™ which will be added to your account. JamPoints™ allow you to obtain discounts on future IK purchases! Registering also keeps you informed of all the latest software updates and IK products. Register at: www.ikmultimedia.com/registration
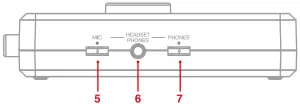
Overview
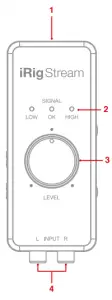
- mini-DIN host connection
- LED signal meter
- Main Level knob
- RCA line inputs
- Microphone gain control
- Headset/Phones jack
- Phones level control
- DC input for optional PSU
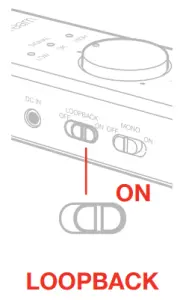
- Loopback switch
- Mono switch
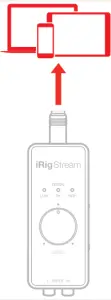
Installation and setup
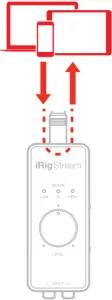
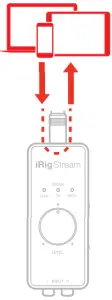
- Connect the iRig Stream to the host device with the provided cable (Lightning, USB-A and USB-C).
- . Download and launch the app.
- In order to allows you to monitoring the incoming audio with apps and software that do not allow for audio input monitoring, a direct monitoring function is always enabled on iRig Stream. If a “phasing” effect is present, you can disable the input monitoring from your recording app. For more details about its monitoring function, refer to the documentation for the audio software.
- Connect any line level signal to the front RCA stereo input. To adjust the volume of the device connected to these connectors, use the volume controls of that device and the Level knob on top of iRig Stream.
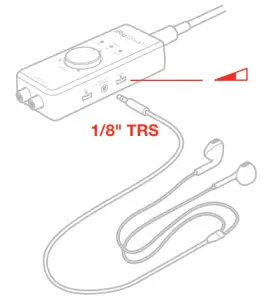
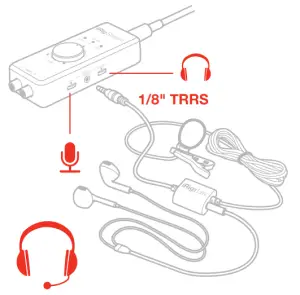
- Connect a TRRS headset (compatible with CTIA standard) or an iRig analog microphone to the 1/8” Headset/Phone jack. You can adjust the microphone level with the Mic thumbwheel and the headphone level with the Phones thumbwheel. Alternatively, you can directly connect a pair of headphone to the Headset/Phone jack and set its level with the Phones thumbwheel.
- The main Level knob lets you control the overall audio input streaming level coming from the RCA line input and from the (eventually) connected microphone/headset.
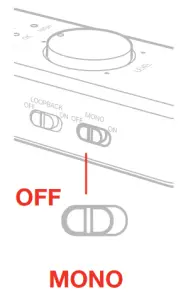
- With the Mono switch turned on, the audio stream to your host will pass from a stereo streaming to a mono streaming. This is helpful with apps that accepts mono audio streams.
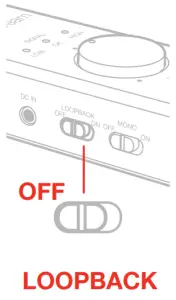
- With the Loopback function turned on, the audio that is input to the iRig Stream from your host via USB is returned back to the host. Also in this case, the main Level knob will control the overall level that is recorded.
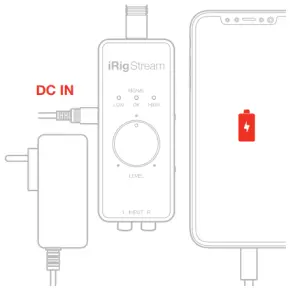
- With the optional PSU (iRig PSU 3A), the iRig Stream can charge the connected iOS device.


Connecting iRig Stream to Mac/Pc
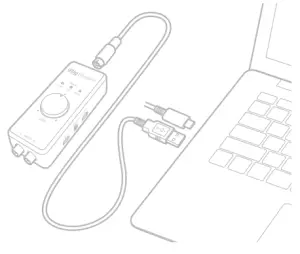
Once the iRig Stream is connected to the host with the appropriate cable, launch your audio application and select iRig Stream as the input/output device from your system’s audio preferences. All the functionality described above allows you to cope with any registration and streaming needs.
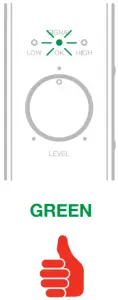
Rig Stream signal LEDs

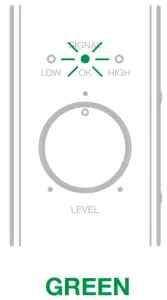
The three LEDs on iRig Stream give you important information about the iRig Stream’s operating status. Each status is indicated by a different color:
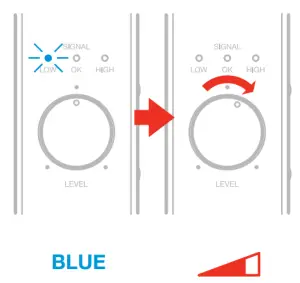
- Signal LOW: bright blue LED. iRig Stream is connected and active and the input signal is low. Use the main Level knob to increase the overall level that is recorded.
- Signal OK: green LED. iRig Stream is active and the input signal is OK.
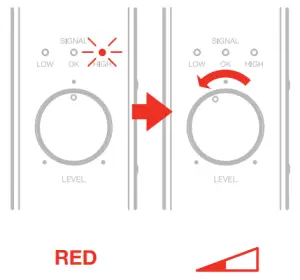
- Signal HIGH: red LED. iRig Stream is active and the input signal is too high. Use the main Level knob to decrease the overall level that is recorded.
Connection examples
Here are some examples of connecting mic or line level signals to iRig Stream.
Connecting headset/phones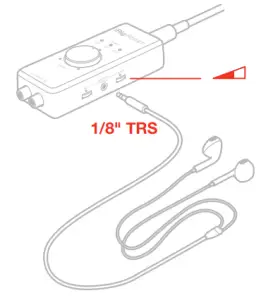
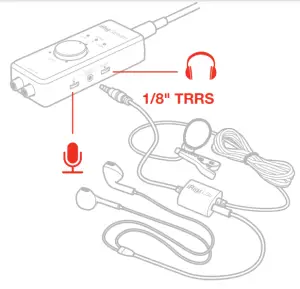
It is possible to connect an headset (compatible with CTIA wiring standard) or an iRig analogue microphone to the Headset/Phones port. The headset’s microphone gain can be controlled with the MIC thumbwheel. In this case the main Level knob will control the overall signal level that is streamed to the connected host. If an headphones is connected, its volume can be controlled with the PHONES thumbwheel.
Connecting line level signal to the RCA input
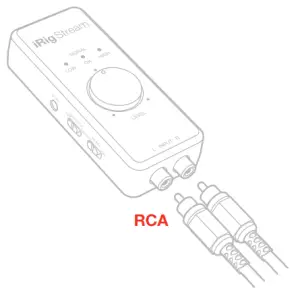
It is possible to connect any line level source to the RCA inputs. This signal can come from an mp3 player, a computer or an audio mixer. The main Level knob adjusts the overall volume that is recorded. To adjust the volume of the device connected to the RCA inputs, use the volume controls of that device.IMPORTANT: please note that these are line level inputs and not PHONO inputs so, PHONO signal, needs to be converted to a LINE LEVEL signal before to be connected.
Connecting RCA and headsetIt is also possible to connect both RCA and headset at the same time. In this case the mic gain will be controlled by the MIC thumbwheel and the overall volume that is recorded (RCA+Mic) is controlled by the main Level knob.
Using the loopback function

With the LOOPBACK function turned on, the audio that is input to the iRig Stream from your host via USB is returned back to the host. The main Level knob will control the overall level that is recorded.
Using the mono function
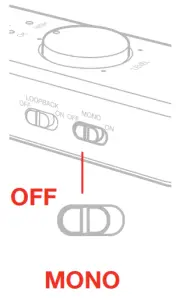
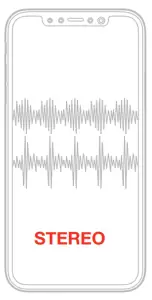
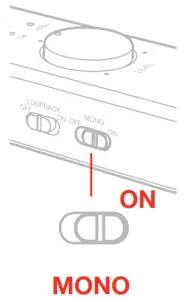
The stereo streaming to the host can be converted to a mono streaming thanks to the MONO switch. This is helpful with apps that accepts mono audio streams.
Troubleshooting
Sound is distorted.Check that the input level on iRig Stream has been set properly. If the signal LED is red (HIGH) when you stream your audio, decrease the input level as described in this guide.
I don’t get any soundIn order for iRig Stream to turn on, a Core Audio-compatible audio app must first be launched on your iOS device or Mac.
- iOS: be sure you are using an app that works with audio input from the Lightning dock connector.
- Mac: be sure you have set “iRig Stream” as the audio input device on the audio app you are using.
A “phasing” sound is present while monitoring the incoming signal.In order to allows you to monitoring the incoming audio with apps and software that do not allow for audio input monitoring, a direct monitoring function is always enabled on iRig Stream. If a “phasing” effect is present, you can disable the input monitoring from your recording app. For more details about its monitoring function, refer to the documentation for your audio software.
Specifications
CommonConversion:24-bit A/D, 24-bit D/A
Sampling Rate:32 kHz ,44.1 kHz, 48 kHz
Power:USB bus powered or, DC IN. When connected to an external PSU (iRig PSU 3A, not included), iRig Stream charge the connected iOS lightning device.
Metering:3x LEDs
Device Connection:mini-DIN
Dimensions:105.5mm x 44.5mm x 24mm (4,15”x1,75”x0,94”)
Line input
Connector:2x RCA (unbal.) Left/Right
Nominal Input Level:-10dBV
Head Room:12dB
Input Impedance:16.5kOhms
Frequency Response:20 Hz – 20kHz
Headset/Phone
Connector:1/8” TRRS jack (CTIA wiring standard)
Supply voltage:> 2,5V
Microphone gain:Adjustable with numbered thumbwheel
Frequency Response:20 Hz – 20kHz
Headphone Level control:numbered thumbwheel
Headphone Output Power:100mW into 50Ohms
Warranty
Please visit:www.ikmultimedia.com/warrantyfor the complete warranty policy
Support and more infowww.ikmultimedia.com/supportwww.irigstream.com
Regulatory
IK Multimedia
IK Multimedia Production SrlVia dell’Industria 46, 41122 Modena, ItalyPhone: +39-059-285496 –Fax: +39-059-2861671
IK Multimedia US LLC590 Sawgrass Corporate Pkwy, Sunrise, FL 33325Phone: (954) 846-9101 –Fax: (954) 846-9077
IK Multimedia AsiaTB Tamachi Bldg. 1F, MBE #709,4-11-1 Shiba, Minato-ku, Tokyo 108-0014 www.ikmultimedia.com/contact-us
 report this ad
References
[xyz-ips snippet=”download-snippet”]