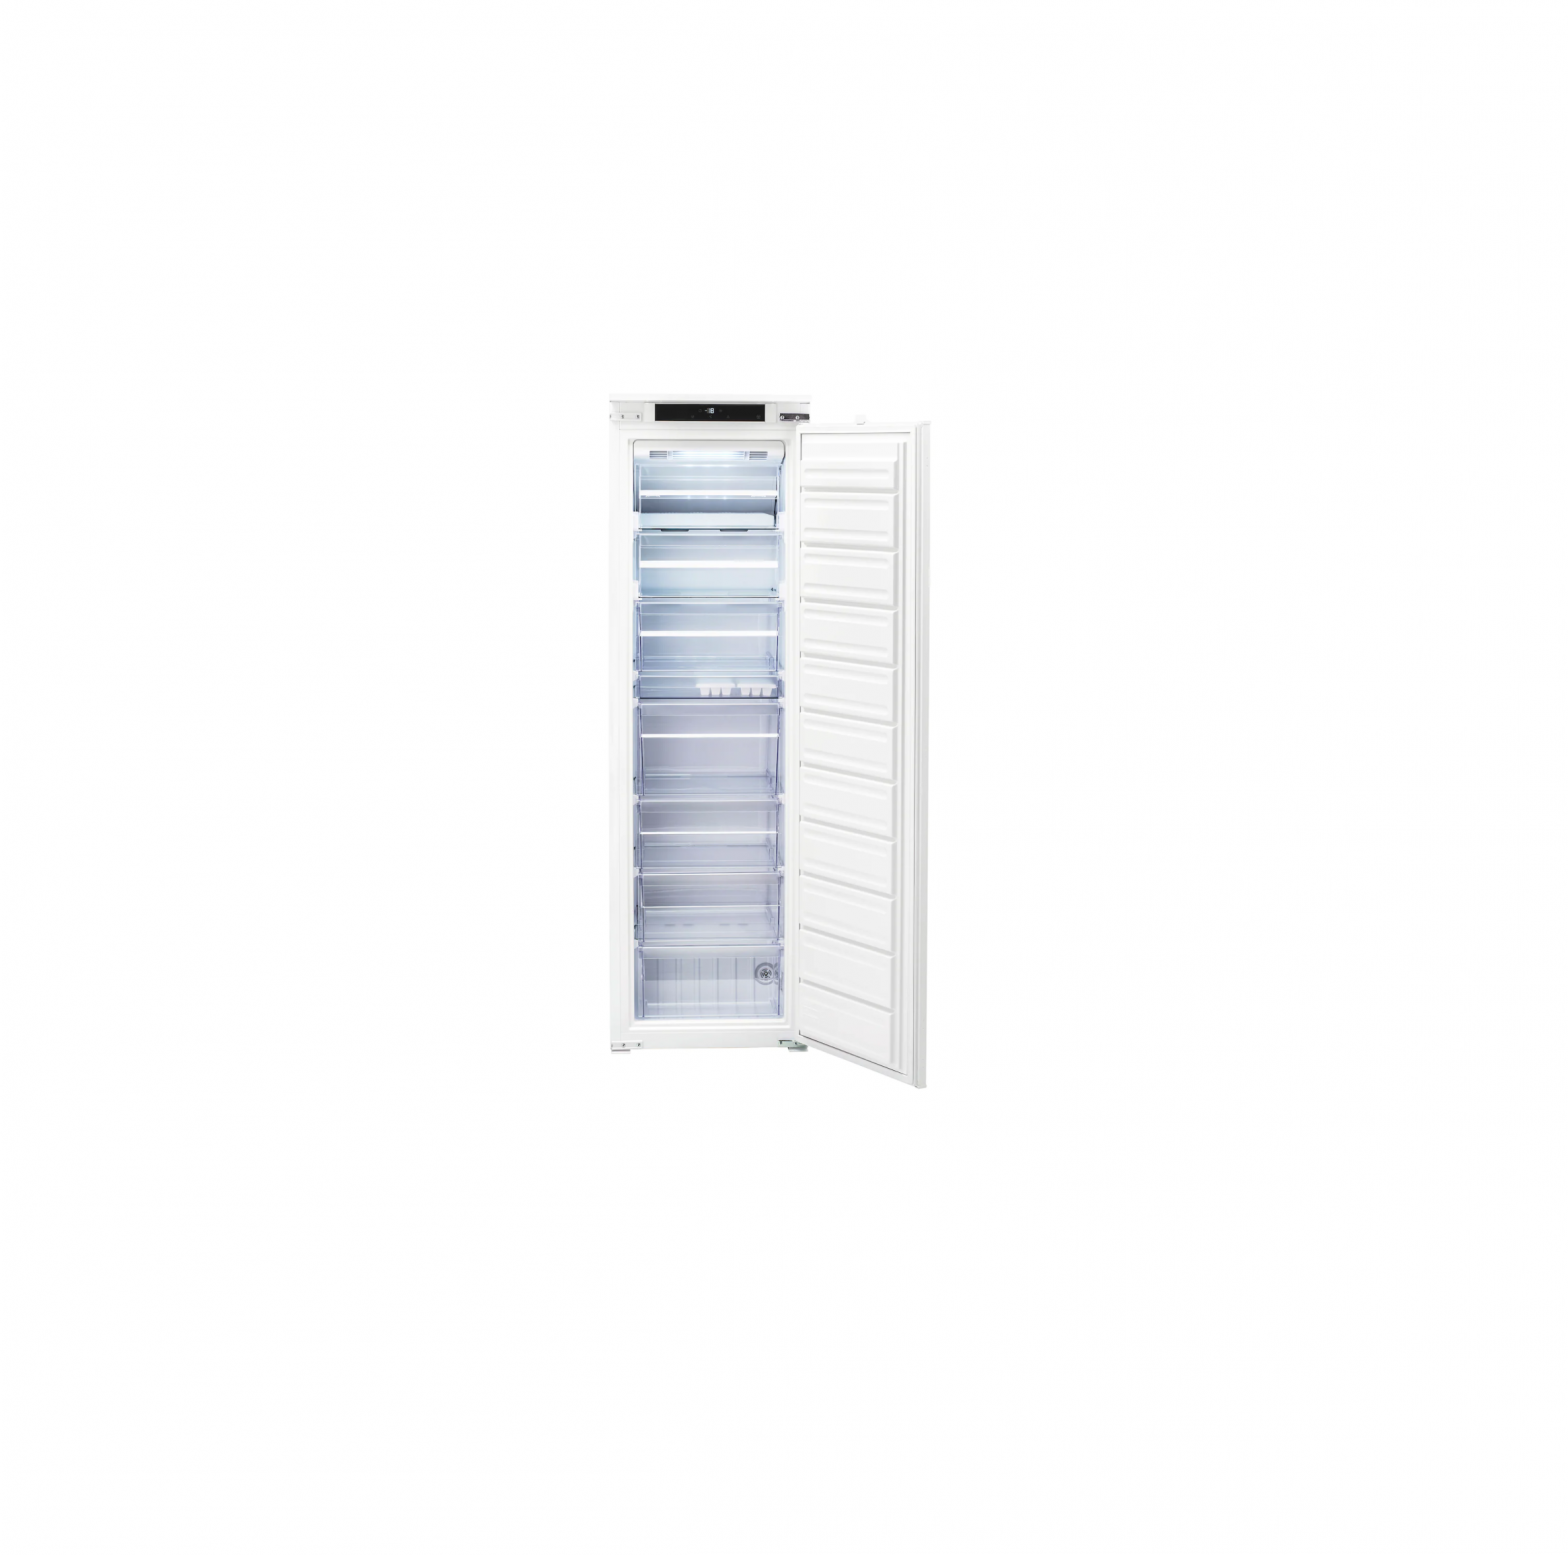
IKEA FRYSA Freezer
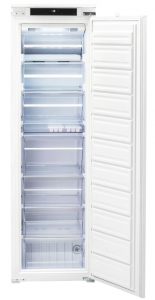


Product description
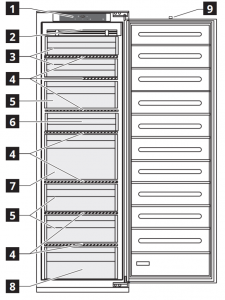
![]() Control panel
Control panel![]() NO FROST Module
NO FROST Module![]() Flap Freezer
Flap Freezer![]() Glass shelf
Glass shelf![]() Middle Drawer Freezer
Middle Drawer Freezer![]() Small Drawer Freezer
Small Drawer Freezer![]() Big Drawer Freezer
Big Drawer Freezer![]() Lower Drawer Freezer
Lower Drawer Freezer![]() Door magnet switch housing
Door magnet switch housing
Characteristics, technical data and images may vary according to the model.
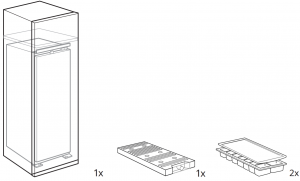
Accessories
|
|
|
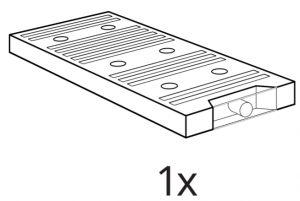 Freezer block
 Ice tray
First use
Connect the appliance to the mains power supply. The ideal temperatures for preserving food have already been set at the factory.
To avoid food waste, please refer to the recommended To avoid food waste, please refer to the recommended setting and storage times found in the user manual.
Note: After switching the appliance on, it will be necessary to wait for 4 to 5 hours before a temperature suitable for a standard appliance load is reached.
Controls

![]() On/Stand-by
On/Stand-by![]() Temperature display
Temperature display![]() Fast Freeze
Fast Freeze![]() Eco function
Eco function![]() Black Out alarm
Black Out alarm![]() Turning Off the Sound Alarm
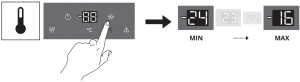
Turning Off the Sound Alarm![]() Temperature Setting
Temperature Setting
On/Stand-byPress for 3 seconds the ![]() button to turn the appliance off.In Stand-by mode, two dashes light up on the display and the light in the refrigerator compartment does not turn on.To turn the product on again, a brief press on the button is sufficient.Note: this procedure does not disconnect the appliance from the electricity supply.
button to turn the appliance off.In Stand-by mode, two dashes light up on the display and the light in the refrigerator compartment does not turn on.To turn the product on again, a brief press on the button is sufficient.Note: this procedure does not disconnect the appliance from the electricity supply.
Temperature displayThe display shows the freezer compartment temperature(between -16°C and -24°C). Recommended setting: -18°C or -20° It is possible to set a different temperature with the ![]() button.
button.
Fast FreezePress the ![]() button 24 hours before placing large amount of fresh food in the freezer compartment.When the function is turned on the icon °C lights up. The function turns off automatically after 48 hours, or manually by pressing the
button 24 hours before placing large amount of fresh food in the freezer compartment.When the function is turned on the icon °C lights up. The function turns off automatically after 48 hours, or manually by pressing the ![]() button
button
Eco functionEco function allows one to concentrate the energy consumption of the product during off-peak time (usually coinciding with night time), when energy is available in large quantity and it costs less than during the day (only in specific countries –using multiple-rate system based on off-peak times- check your rate plan with your utility company). To activate the function, press the button ![]() Eco at the reduced rate start time (depending on the specific rates plan). For example, if the reduced rate applies starting at 10:00 p.m., press the button that corresponds to that time. When the LED is ON, the function is active. After you activate the function, the product automatically starts to adapt the energy consumption to the time (i.e. Consuming more energy during the night then during the day).IMPORTANT: In order to work properly, the function must be enabled both during the night and during the day. The function will remain enabled until deactivated (it will also be deactivated in the event of a blackout, or whenever the appliance is turned off). To deactivate the function, press the button again. When the LED is OFF, the function is not active.Note: the power consumption of the appliance is declared with the Eco function disabled
Eco at the reduced rate start time (depending on the specific rates plan). For example, if the reduced rate applies starting at 10:00 p.m., press the button that corresponds to that time. When the LED is ON, the function is active. After you activate the function, the product automatically starts to adapt the energy consumption to the time (i.e. Consuming more energy during the night then during the day).IMPORTANT: In order to work properly, the function must be enabled both during the night and during the day. The function will remain enabled until deactivated (it will also be deactivated in the event of a blackout, or whenever the appliance is turned off). To deactivate the function, press the button again. When the LED is OFF, the function is not active.Note: the power consumption of the appliance is declared with the Eco function disabled
Black Out alarmThis alarm is triggered in the event of a prolonged power outage that has caused the temperature inside the freezer compartment to rise.The red indicator light flashes ![]() and an acoustic signal is triggered, which will remain active until the door is closed. The freezer compartment temperature indicators may flash.To turn the sound signal off, press the “Turn off alarm” button
and an acoustic signal is triggered, which will remain active until the door is closed. The freezer compartment temperature indicators may flash.To turn the sound signal off, press the “Turn off alarm” button ![]() . If the freezer compartment has not yet reached the temperature for the optimal preservation of the food items, the temperature alarm may be triggered (see temperature alarm).Check the food before consuming it.
. If the freezer compartment has not yet reached the temperature for the optimal preservation of the food items, the temperature alarm may be triggered (see temperature alarm).Check the food before consuming it.
Turning Off the sound alarmTo turn off the sound alarm, briefly press the button ![]() .
.
Door Magnet switchDo not remove, it is part of the normal operation of the product.
Installation
 The appliance must be handled and installed by two or more persons – risk of injury. Use protective gloves to unpack and install – risk of cuts. Installation, including water supply (if any), electrical connections and repairs must be carried out by a qualified technician. Do not repair or replace any part of the appliance unless specifically stated in the user manual. Keep children away from the installation site. After unpacking the appliance, make sure that it has not been damaged during transport. In the event of problems, contact the dealer or your nearest Aftersales Service. Once installed, packaging waste (plastic, Styrofoam parts etc.) must be stored out of reach of children – risk of suffocation. The appliance must be disconnected from the power supply before any installation operation – risk of electric shock. During installation, make sure the appliance does not damage the power cable – risk of fire or electric shock. Only activate the appliance when the installation has been completed. Be careful not to damage the floors (e.g. parquet) when moving the appliance. Install the appliance on a floor or support strong enough to take its weight and in a place suitable for its size and use.Make sure the appliance is not near a heat source and that the four feet are stable and resting on the floor, adjusting them as required, and check that the appliance is perfectly level using a spirit level. Wait at least two hours before switching the appliance on, to ensure that the refrigerant circuit is fully efficient. WARNING: When positioning the appliance, ensure the supply cord is not trapped or damaged. WARNING: To avoid a hazard due to instability, positioning or fixing of the appliance must be done in accordance with the manufacturer instructions. It’s forbidden to place the refrigerator in such way that the metal hose of gas stove, metal gas or water pipes, or electrical wires are in contact with the refrigerator back wall (condenser coil). To guarantee adequate ventilation, the distance between the rear of the appliance and the wall behind the appliance should be 50 mm, to avoid access to hot surfaces. A reduction of this space will increase the Energy consumption of product.Please remove the power cord from condenser hook during installation before connecting product to power supply.
When contacting our Service Provider, please state the codes provided on your product’s identification plate.The model information can be retrieved using the QR-Code reported in the energy label. The label also includes the model identifier that can be used to consult the https://eprel.ec.europa.eu database portal.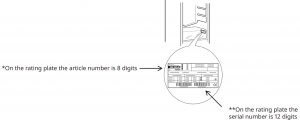
Inspection check list
Please follow the inspection checklist before using your appliance. If any answer is NOT please follow the relevant action.Please remember to write down the product serial number and article number as required and attach your receipt to this page.
| Product serial number (rating plate) * |
| Product artical number (rating plate) ** |
| Purchasing date |
 |
If the answer is YES | Actions to do if NOT |
| Consideration TrayCheck that the tube is inside the tray | Put the tube inside the tray | |
| Making sure gasket seals all around the doorwhen the door is closed | Refer to the AI – door alignment step | |
| Checking no collision between parts/furniture while opening/closing the cooling door | Refer to the AI – door alignment step | |
| Secure the installation inside any kitchen system and fixed as required | Follow the AI for the proper installation |
General information
The drawers, baskets and shelves should be kept in their current position unless otherwise specified in this quick guide. The light system inside the refrigerator compartment uses LED lights, allowing for better lighting than with traditional light bulbs, as well as for very low energy consumption. Doors and lids of the refrigeration appliance should be removed before disposal in the landfill, to avoid children or animals getting trapped inside.
Technical data
|
IKEA |
FRYSA | 22 | 294 | 38 | F |
| Brand | Model | Freezing capacity (kg/24h) | Energy consumption (kwh/year) | Noise level(dba) |
Energy class |

References
[xyz-ips snippet=”download-snippet”]