
imperii Macro Flash Ring
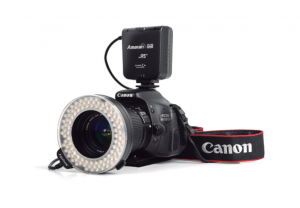
Description of the parts
- Macro Ring Head
- Power Control
- Extensible Cable
- Colored Diffuser
- LED Ring Flash
- Blockade
- Ring Adapter
- Battery Cover
- Foot Base
- Adjustment Knob
- Thread
- Test Button (PILOT)
- Button Switch “MODE”
- LED Light
- Power Switch
- Intensity Adjustment (Left/ Decrease)
- Intensity Adjustment (Right/ Increase)
- LCD Screen
Main Functions
- High quality LED technology very similar to natural daylight. Seven levels of luminance, new functions of photographic light to perform the desired snapshot.
- The left and right flash carry out the function of giving more volume to the objects. Its use is oriented towards the pictures with macro.
- High definition LCD screen that shows the objects more clearly and vividly.
- The flash ring can be mounted on a video camera as a light source.
- High luminance and low consumption LED lights.Please read the safety instructions before using the flash ring
- The ring only fits with the indicated cameras.
- To avoid short circuits or internal damages, do not disassemble any part of the flash ring. If the casing is broken or the flash presents deterioration, send it to the company responsible.
- Do not shoot the flash near the eyes.
- If the ring flash is not to be used for more than two weeks, remove the batteries to prevent leakage.
- When you change the batteries, replace all 4 at once.
- Be especially careful when using the ring. It is a fragile product that before hits or falls, may suffer irreparable damage.
- Keep the flash ring in a cool, dry place, away from high temperatures and high exposure to sunlight. Do not put it in a drawer with mothballs since they can damage your circuits.
- Use a damp cloth to clean the flash. Never use solvent, petrol or other cleaner with chemical products.
Installation and Assembly of the Flash Diffuser
- Turn the diffuser following the direction of the arrow to open it.
- Connect the diffuser to the body of the ring according to the indicated direction.
- Turn the diffuser according to the direction of the arrow to turn it on.Note: There are 4 types of diffusers: orange, blue, white and transparent.
Battery Installation
- Slide the lid covering the batteries according to the direction indicated by the arrow and open it.
- Install the batteries according to the instructions on the cover and make sure the positive and negative poles are connected correctly.
- Slide the battery cover according to the direction of the arrow to close it.Note: Use 4 standard AA batteries. To prevent damage, do not use batteries with the damaged surface.
Installing and Uninstalling the Control Panel
- Install the control panel in the flash of the camera and rotate the foot wheel to the end to loosen it.
- Put the control panel in the flash of the camera to connect it to its foot.
- Turn the wheel of the foot according to the direction of the arrow.
- To remove the control panel, loosen the wheel of the foot and remove it.Connect the DevicesThanks to the new sensor technology, the flash rings are compatible with the following cameras:
- RF-550D is compatible with: Nikon, Canon, Panasonic, Olympus
- RF-550E is compatible with: SONY
Installing the Flash Ring on the Camera Lens
The accessories include ring adapters for: 49mm, 52 mm, 55mm, 58mm, 62 mm, 67 mm, 72 mm and 77mm.
- Choose and install the ring adapter that fits your camera lens.
- Note: Forcing the connection of the ring too much may make it more difficult to remove it from the lens.
- Press the flash locking ring button place it in the lens and release the button.Note: Check that the ring is properly fitted to the lens.
Basic Functions
Buttons:
- Power switch: press and hold for 3-5 seconds to tum the flash ring on or off.
- MODE button: press this button to alternate between the flash in the left/right part of the ring.
- Intensity adjustment (left / decrease, right / increase): press this button to control the energy intensity of the flash.
- Permanent LED light: press this button to keep the ring light fixed.
- Test button (PILOT): Press this button to check the flash brightness.
Turn On/Turn OffPress and hold the ON/ OFF button for 3-5 seconds to turn the flash ring on or off. When turning the ring off, it is recommended to press the before removing the batteries.Press the PILOT button to test the flash is working properly.
Permanent LED lightPress the Permanent LED light button and the flash will keep the LED lighting.
Flash ModePress this button (switch mode) to access the flash mode.
L and R ModePress this button (switch mode} to access the L (left part of the ring) and R (right part of the ring) and make a more vivid and voluminous picture.
Brightness AdjustmentPress the intensity adjustment button (left / decrease, right / increase) to adjust the brightness of the light.Start and sleep mode of the LCD screen.The screen will automatically turn off after 20 seconds if the device is not being used (press any button or shoot the flash).The screen will turn on if any operation is carried out.The ring flash will automatically turn off after 30 minutes and will enter into a power saving mode if no button is pressed. In this mode, the flash can work only after you tum the power switch on.
Note:
- When the switch is in the LIGHT mode, the battery will run out in a normal way, according to the batteries being used.In the FLASH mode, they will run out more quickly.
- When the battery level is between 0-10%, the battery will run out quickly.
- When the battery level is between 0-10%, it is advisable to replace the batteries with new ones.
Limited Warranty
✓ This product is guaranteed for 2 years from the date of purchase.✓ Warranty is effective since the commercial invoice duly is filled and sealed settlement.✓ If there is any problem with the product, the user should contact us in the adress:[email protected]. Once received, the doubts, incidents and problems will be resolved by email. If this is not possible and the problem persists, the guarantee will be processed in accordance with current law.✓ The warranty is extended for two years, referring only to manufacturing defects✓ The expedition to the nearest service center or our central office to be made prepaid. The item must arrive well packed and with all its components.✓ Assume no liability for damages arising from misuse of the product✓ The warranty does not apply in the following cases:
- If you have not been followed this manual correctly
- If the product has been tampered
- If it has been damaged by improper use
- If the defects have arisen as a result of power failures
PRODUCT__________________________MODEL____________________________SERIES_____________________________
TECHNICAL SERVICE : http://imperiielectronics.com/index.php?controller=contact
![]()
imperii Macro Flash Ring User Manual – imperii Macro Flash Ring User Manual – imperii Macro Flash Ring User Manual –
[xyz-ips snippet=”download-snippet”]