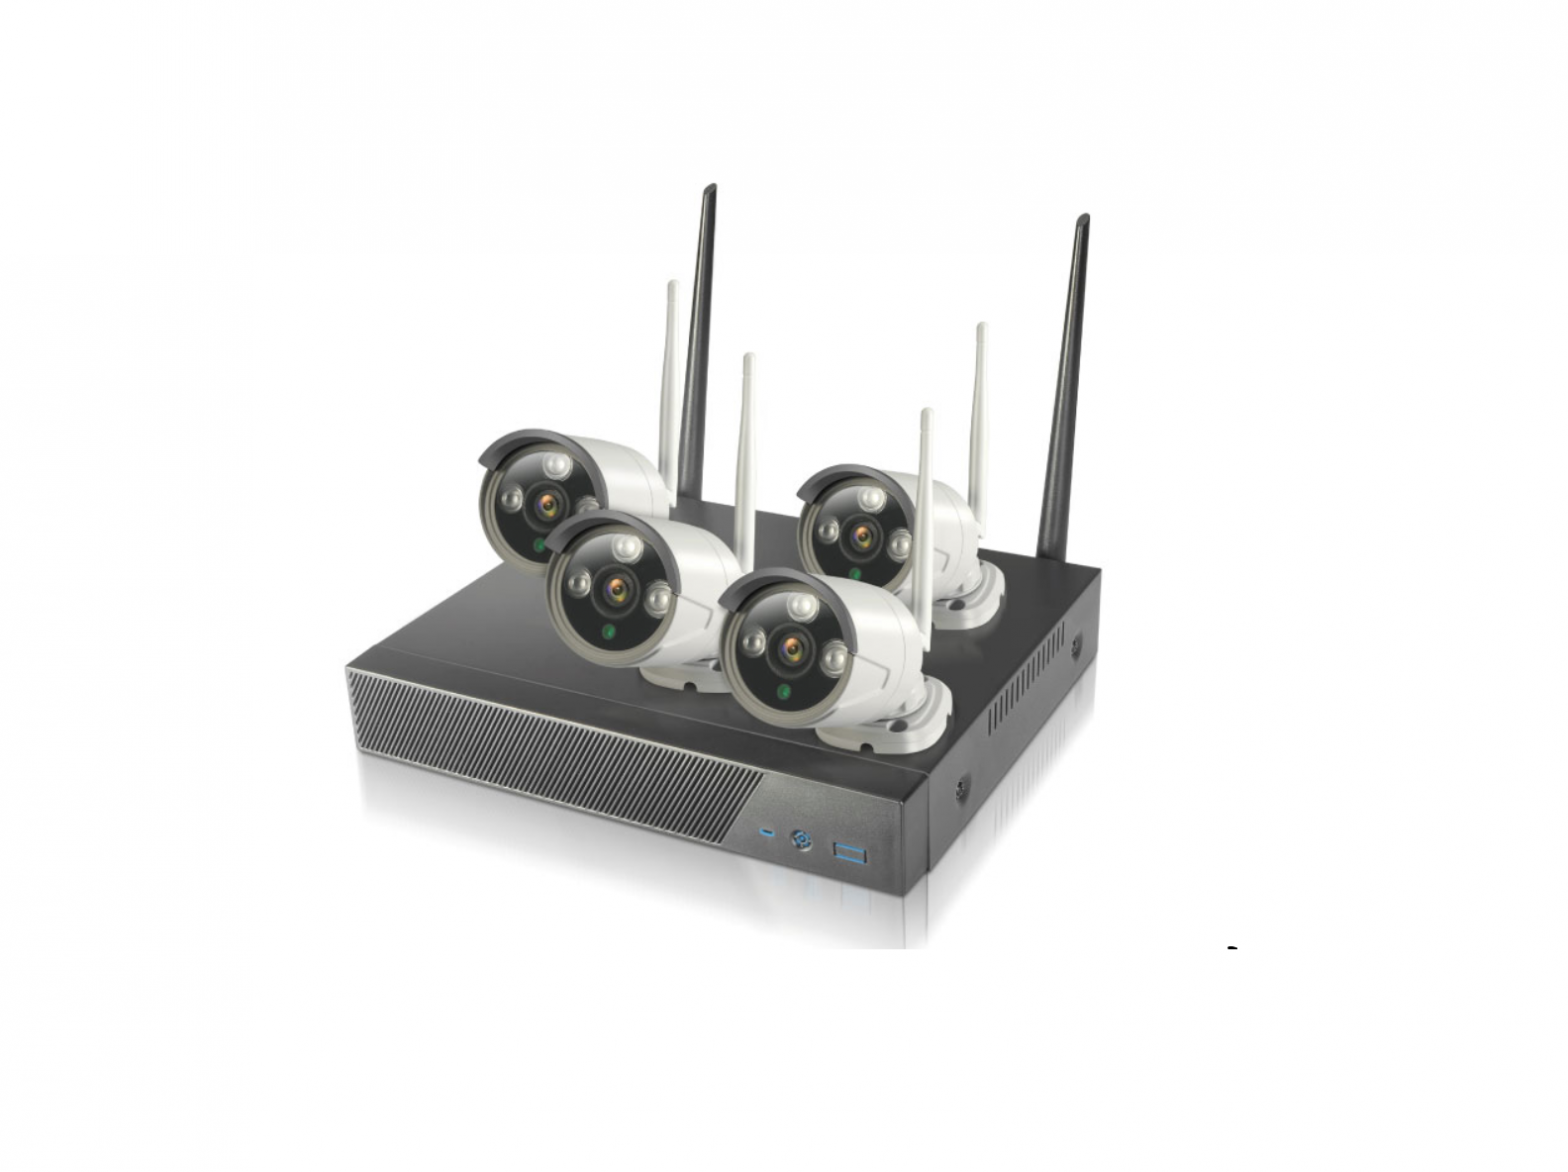
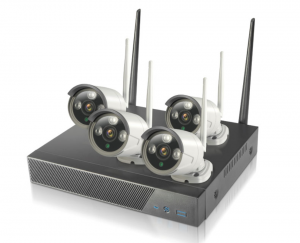
imperii Surveillance Kit 4 Cameras with Vision Pakko Night
Statement
Before using the camera, please read the user manual carefully, and obey to the rules when you use, thank you for purchasing the product.
![]() Cautions:
Cautions:
- Please modify the user password when use this product, so as not to be stolen criminals.
- Please do not install it in the place where is wet, dusty and easy to be touched for child.
- Please install it in the draughty place, be sure not to block the air vents of camera.
- Please use and reserve it in the allowed temperature range, be sure not to dismantle it.
![]() Special announcement:
Special announcement:
- Instruction is for reference only, product please in kind prevail.
- Instruction content is according to the real-time product, we will not inform in the future.
- Instruction may include something not be inaccurate in technology or consistent with the function of product or wrong printing, please according to the explanation of our company
Front Panel key Instruction
| Icon | Name | Icon | Name |
| ESC | Cancel | Menu | Main menu |
| OK | OK |  |
Direction |
| Power | Power Indicator | Rec | Video indicator |
| Alarm | Alarm indicator | IR | Infrared signal reception |
Back Panel Interface Instruction
| Icon |
Name |
 |
DC Power Input |
 |
Power Switch |
 |
USB Interface |
 |
Internet Interface |
 |
VGA-OUT |
 |
HD-OUT |
|
A-out |
Audio Frequency Output |
![]() Key instruction may provide more than itself, it means that the product doesn’t possess all of them, product please in kind prevail.
Key instruction may provide more than itself, it means that the product doesn’t possess all of them, product please in kind prevail.
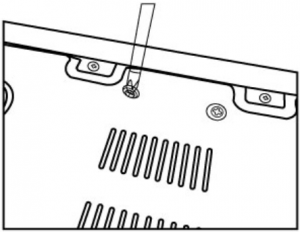
Hard Disk Installation
(If you needn’t to storage, please skip this step)
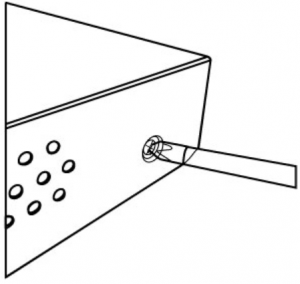
- Remove side and tail board screws and take off cover board

- Turn on power, data line and embed hard disk
- Using screws to fasten the hand disk and chassis baseplate
- Aim at card slot, close the cover board and tighten the screws


![]() Recommend using monitoring special hard disk such as Toshiba and so on.
Recommend using monitoring special hard disk such as Toshiba and so on.
Connection Diagram
Wireless connection diagram

![]() Note: Turn on the power after all lines are connected
Note: Turn on the power after all lines are connected
Wired connection diagram
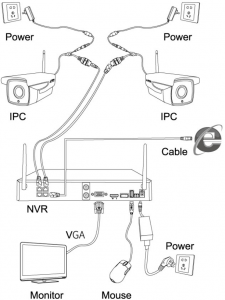
![]() Note: There are two types of internet access, you should distinguish them. LAN is just used to connect camera and DVR. You should connect WAN if you want to access outer net.
Note: There are two types of internet access, you should distinguish them. LAN is just used to connect camera and DVR. You should connect WAN if you want to access outer net.
Power on Operation
Turn on power :Turn on power and wait the system start. (Some types has power switch, please close it.)
Initialization settings :
- Please follow the system interface reminder, click [Next], then enter the system login interface.Default [user] :ad min [password ] :none, click [ OK]
- Click [Next] , set the system time and system language.
- Click [Next] ,enter APP scan interface.(Scan QR code and you cam download the monitoring software applications.)
- Click [Next] , enter scan and add interface.(Open the monitoring software application in mobile, scan and add device.)
- Click [Next] , set code for wireless.(It has accomplished pairing before leaving factory, so you can see the picture when turn on power.)If there is no picture, please complete pairing operation as the follows:
- Click [Code for wireless] wait addition.
- After adding the IPC and displaying the image successful the operation code for wireless is finished.
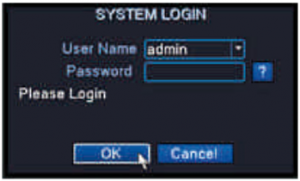 Default [user] :ad min [password ] :none, click [ OK]
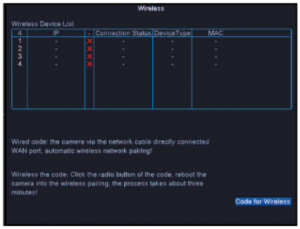

![]() Note: You also can use code for wire according the system prompt, disconnect the cable after display1ing the image then the pairing is successful.
Note: You also can use code for wire according the system prompt, disconnect the cable after display1ing the image then the pairing is successful.
Repeater Using Instruction
Repeater is a product of matching. It uses 5V USB to supply power.After turn on power, click [Code for wireless] in the interface of NVR wireless setting. When the repeater indicator light flashes green at 1 rate per second, means that you pair successfully.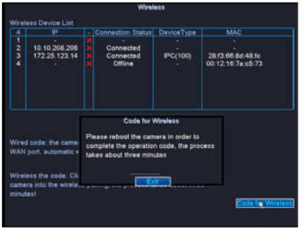
![]() Note: Repeater can effectively improve the signal and increase wireless coverage, but repeater can’t work alone, it need to use with the WIFI kit.
Note: Repeater can effectively improve the signal and increase wireless coverage, but repeater can’t work alone, it need to use with the WIFI kit.
Record Setting
Recorder can identify the pic1ure channel and start record automatically.If you want to set especially for the video, you can refer to the following steps:Click right [Main menu] > [Video function] > [Video setting] , interface shows as below: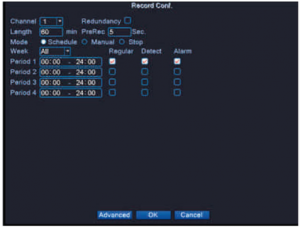 [Channel] :Video setting for different channels, [All] means all channels.[Length] : Set the length of each video file and default is 60 minutes.[Period] :Support for time slot video, only in the set time can start the video.[Video type] : Set the video type and it’s convenient to search the video when you playback the video.
Video Playback
Click right [Main menu] > [Video function] > [Video setting] ,interface show as below: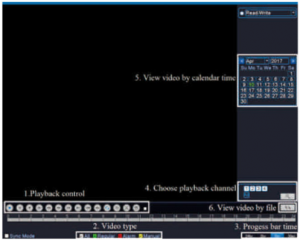
- Playback control
- Progress bar time
- Video type
- Choose playback channel
- View video by calendar time
- View video by file
Internet Access
 IE access:
(Set the device IP and PC IP on the same internet segment.) Input the IP of device ( such as 192.168.1.9) in the IE browser address bar, click [download plug-in] , and follow the prompts to complete the download and install the plug-in. Input user name and password in the login interface after installation, and you can view and manage the device.
 PC: VMS video management system
Access method: Login wiki.xm030.com [product software download] > [VMS] download the latest version of the video management system [VMS]. Finish the install according to the system software tips and add the devices to view and manage.
 Cloud platform:
Login cloud service website: enter into www.xmeye.net. Click [new users guide] to complete the registration and landing cloud service account, you can add device to achieve remote management and view.
 Mobile APP access:
Login Android application market (such as assistant of Baidu, assistant of 360 and so on.) and Apple users land in APP Store. Then search the keywords [XMeye] to complete download and installation. You can add the device after registration and login to achieve remote view and management in the mobile. (Note: Account password should be consistent with the one in the cloud platform.)
TECHNICAL SERVICE : http://imperiielectronics.com/index.php?controller=contact![]()
imperii Surveillance Kit 4 Cameras with Vision Pakko Night User Manual – imperii Surveillance Kit 4 Cameras with Vision Pakko Night User Manual – imperii Surveillance Kit 4 Cameras with Vision Pakko Night User Manual –
[xyz-ips snippet=”download-snippet”]