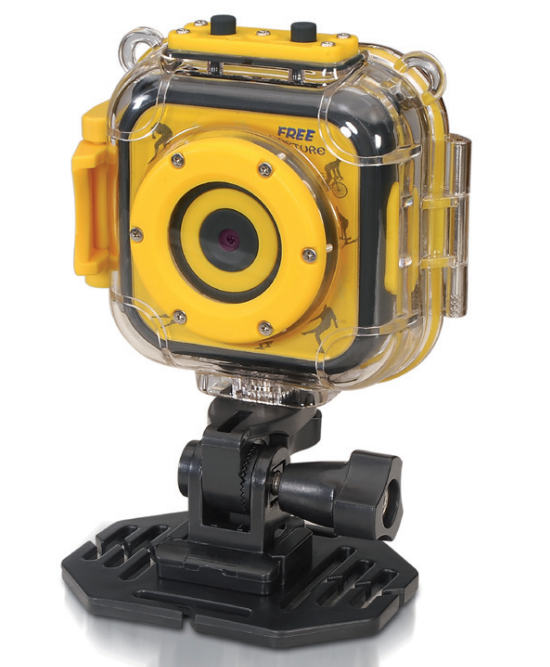
imperii Xtreme Camera PIX For Kids Allroad
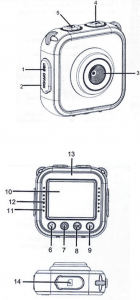
Product Overview
- Micro USB Port
- Battery Power switch
- Lens
- Recording button
- Take photos button
- Page Up Button
- Power on/off Button
- Shutter Button
- Page Down Button
- LCD
- Busy indicator light (blue)Charge indicator light (red)
- Speaker
- Microphone
- Micro SD Card Slot

Start to use
- Charge the built-in lithium batteryThe camera is equipped with extremal 3,tV lithium battery. Please ensure power available for the camera and timely charge it in case of low battery.Connect the camera to computer for charging under shutdown status.The charging indicator light will be on when charging, and will be offwhen the battery is fully charged. Generally, the battery can be fullycharged after about e hours.
- How to use the memory card2.1 Properly insert the TF card into the card holder as per the instructions indicated near the card holder.2.2 To remove the TF card, press the end of memory card gently, the card will be ejected.Note: The camera is not equipped with built-in memory. Please insert memory card before using.
- Power on/offPlease switch the battery power to “I” status before you turn on the camera3.1 Power on: Short-press the power Button the screen will be on and the camera will be started.3.2 Power off: Hold on Power Button tor 3 seconds when the camera is in the idle state to turn it off.3.3 Auto screen off: The screen will be turned off automatically when thetime that the camera is in the idle state for automatic screen of to save power.3.4 Power off when the camera is lack of electricity. When electrical capacity of the battery is very low, an icon of will be displayed on the LCD screen, prompting you to charge it in time. When the icon flickers the camera will be turned off automatically.Tips: Under long time not using camera and protecting battery, please switch the battery power button to no” status
- Recording mode, photo mode, playback mode and system settings4.1 Recording ModeAfter power is on, the camera will enter video recording mode directly and inpreview mode, short-press Recording Button to start video recording; short press it again to stop shooting: Short-press page up button or page down button to choice color effect of images, there are seven kinds of col or effects, such as normal, black and white, retro, negative, red, green, blue.4.2 Photo modeWhen you turn on your camera, you can short-press the take photos button to enter photo mode, short-press it again to capture your photo. Then short-press page up button or page down button to select different frames.4.3 Playback modeIn recording mode or photo mode, you can short-press the power onbutton . The LCD display will show as follow:You can short-press page up button and page down button to change mode. Then short-press shutter button to confirm mode you choose, then short-press power on button to exit it.:Recording mode :Photo mode :Playback mode :System settings
 Connect the camera to computer for charging under shutdown status.The charging indicator light will be on when charging, and will be offwhen the battery is fully charged. Generally, the battery can be fullycharged after about e hours.
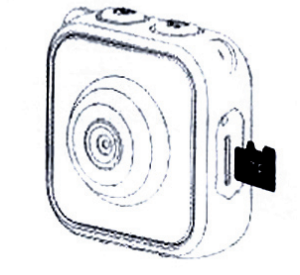 Note: The camera is not equipped with built-in memory. Please insert memory card before using.
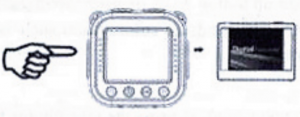 3.2 Power off: Hold on Power Button
 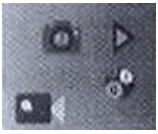 You can short-press page up button
 You view the captured video photos in one of the following ways:
- Please press button enter the Playback mode as above steps, then press down button to select the video or photo as desired.To playback a video, press shutter button to start, press shutter button again to pause playing videos and press power on button to stop playing videos. In playback section, press page up button or page down button to scroll the photos and videos, you can press power on button to enter to the mode choice.
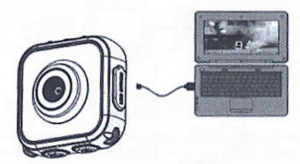
- Connect your camera to a computer using the supplied USB cable to view your captured videos and photos.
4.4 System settings
You can enter to system settings as above steps, short-press page up button ![]() or page down button
or page down button ![]() to choice and short-press the shutter button
to choice and short-press the shutter button ![]() to confirm then short-press power on button
to confirm then short-press power on button ![]() to exit menu.
to exit menu.
The functions as follows:
- Resolution: 1 M (1280X960), 3M (2048X1536), 5 M (2502X1944)
- Movie size: HD (1280X720), 640 (640X480)
- Power frequency: 50 HZ, 60 HZ
- Power save: Select OFF/1 min/3 Min /5 mini Exit. To conserve battery power the camera will shut off if no key are pressed within the selected time.
- Date & Time: setting the date and time of the cameras
- Language: setting the language of the cameras
- Invert Mode: you can set to change the image upside down
- Format: Erase all data on the SD Card
- Reset All: Reset settings of the camera to factory default
- Connect to PC
The camera has a plug-and-play function. Connect the power-on device to the computer with the USB cable, and the mode can be automatically switched to the removable hard disk. Removable disk icon will appear in the “My Computer” window. The pictures and video files you shot stored in the removable disk: H\DCIM\ 1 OOMEDIA folder (His this equipment removable disk):
![]() Note: During file downloading, it is prohibited to disconnect USB connection, and plugging out the memory card when USB connected is also prohibited to avoid loss of data
Note: During file downloading, it is prohibited to disconnect USB connection, and plugging out the memory card when USB connected is also prohibited to avoid loss of data
| Image sensor | 1.3 mega-pixel CMOS Image sensor |
| Function mode | Recording, photo, playback |
| LCD screen | 1.77” LCD Screen |
| Picture resolution | 1M (1280X960, 3M (2048X1536, SM (2592X1944) |
| Video resolution | HD (1280X720), 640 (640X480) |
| Storage medium | TF card (Maximum supporting 32 GB) |
| USB port | USB 2.0 |
| Power supply | External 3.7V rechargeable lithium battery |
| Menu language | English/Simplied Chinese |
| Power Save | 1 min./3 min./5 mi./OFF |
| Operating system requirements | Windows XP/Vista/7/8, Mac 10.8 |
TECHNICAL SERVICE : http://imperiielectronics.com/index.php?controller=contact
![]()
imperii Xtreme Camera PIX For Kids Allroad Instruction Manual – imperii Xtreme Camera PIX For Kids Allroad Instruction Manual – imperii Xtreme Camera PIX For Kids Allroad Instruction Manual –
[xyz-ips snippet=”download-snippet”]