
![]()

QUICK SETUP GUIDE24″/32″/39″ 60Hz LED TV
NS-24DF310NA21 / NS-32DF310NA21 / NS-39DF310NA21
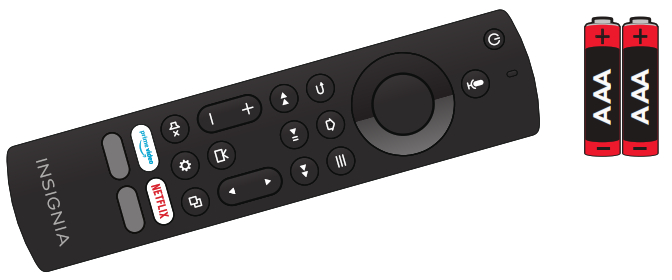
INCLUDED ACCESSORIESVoice Remote with Alexa and two AAA batteries

 STOPBefore using your new TV, read these instructions to prevent any damage.Do not plug the power cord in until all other devices have been connected.
Final flat size: 23.38 × 16.52 in. 593.85 × 419.61 mm
INSTALLING THE STANDS OR A WALL MOUNT
Place your TV face-down on a cushioned, clean surface.
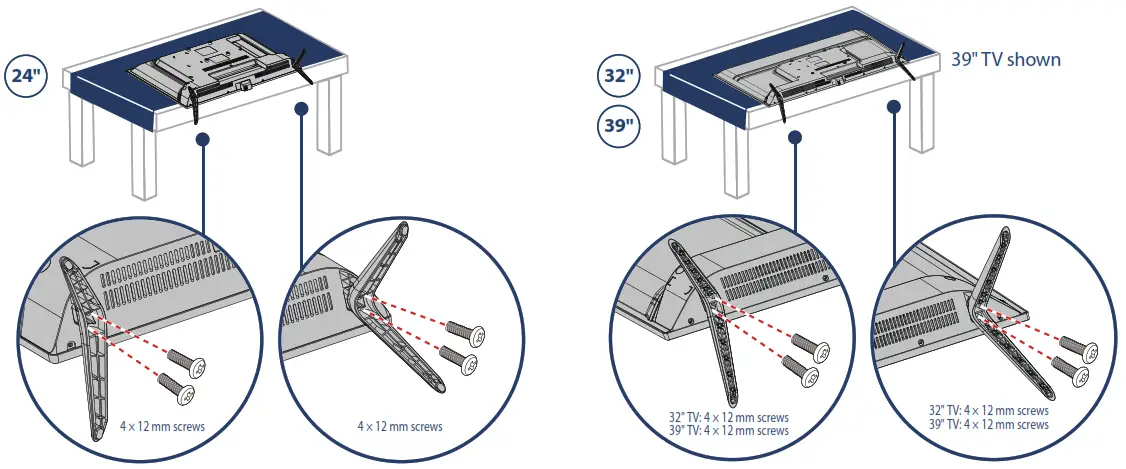
STANDS
- Align the TV stand screw holes with the holes on your TV’s bottom.
- Use a Phillips screwdriver and two of the provided screws to secure each stand to your TV.
WALL MOUNTBefore you mount your TV, make sure that:
- You remove the stands.
- The wall-mount bracket supports the weight of your TV. See the instructions that came with your wall mount for more information about how to correctly mount your TV.
WARNING: Your TV has four VESA mounting holes on the back.You must secure a wall-mount bracket to all four holes.If you do not use all four holes, your TV may fall and cause property damage or personal injury.Note: Wall-mount screws are not included.

24″ VESA Mounting Pattern100 × 100 mm Screws: type M4, 10 mm to 12 mm length depending on the wall mount
32″ VESA Mounting Pattern100 × 100 mm Screws: type M4, 10 mm to 12 mm length depending on the wall mount
39″ VESA Mounting Pattern200 × 200 mmScrews: type M6, 10 mm to 12 mm length depending on the wall mount
FEATURES
 Note: Images do not necessarily represent the exact design of your television.
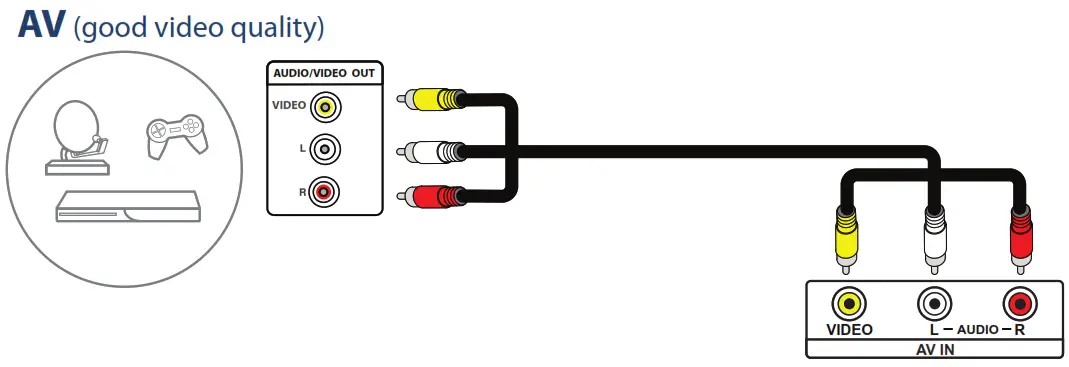
MAKING CONNECTIONS
 AUDIO OPTIONS
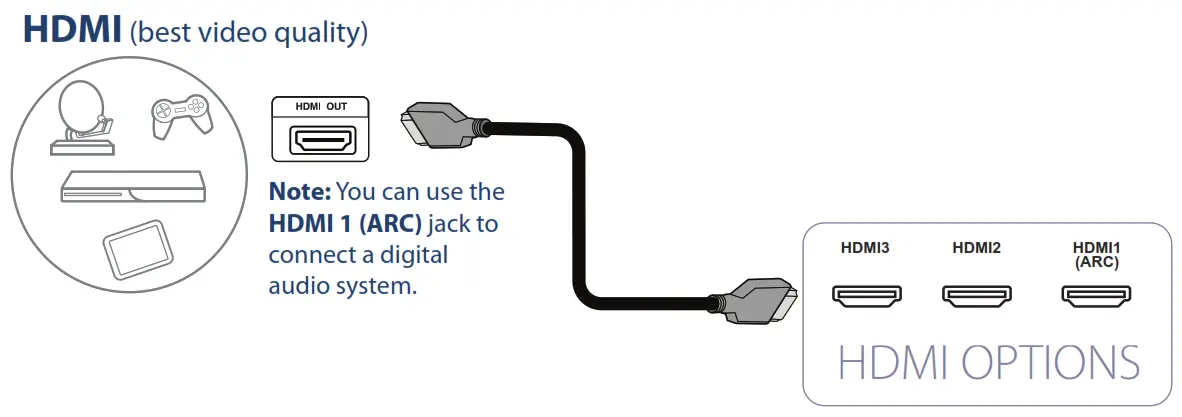
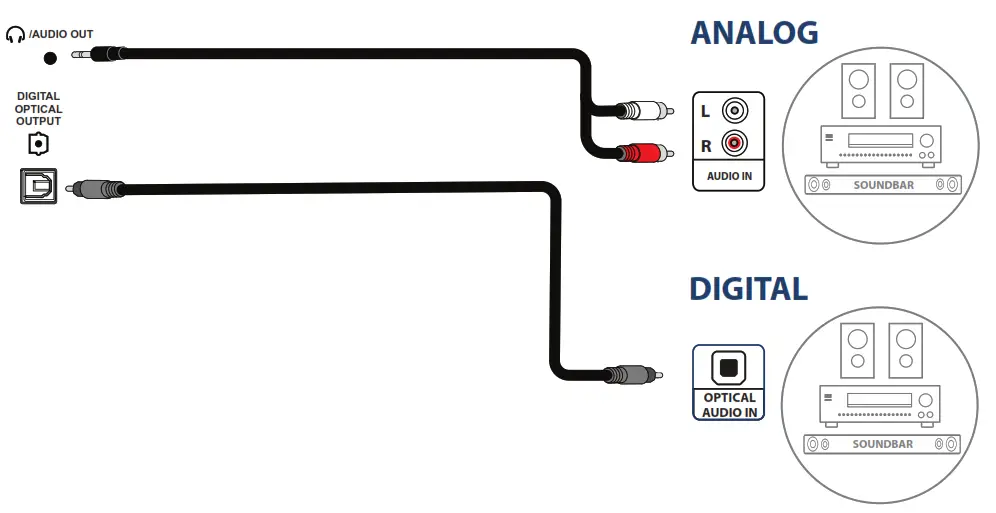 You can use the DIGITAL OPTICAL OUTPUT jack or the HDMI1 (ARC) jack.Note: If you need to change the digital audio format, go to the Home menu, select Settings, then select Display & Sounds. Select Audio Output, then select Digital Audio Format and change the setting to PCM.

Note: You can use a wired Ethernet connection to access the internet, instead of a WiFi connection. Plug an Ethernet cable into the ETHERNET jack on your TV and your Ethernet connection.
TURNING ON YOUR TV
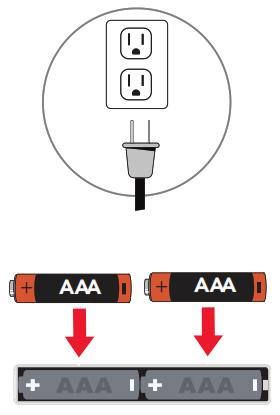
- Plug the power cord into a power outlet.

- Remove the remote control cover and install the batteries.
- Presson your remote.
- Follow the on-screen instructions.
COMPLETE THE ON-SCREEN SETUP
Your TV should automatically pair to your new Voice Remote with Alexa.
- If your remote is not paired, press. If you continue to have issues, re-insert or replace the batteries and try again.
- Select your Wi-Fi network from the displayed network list.Note: If your Wi-Fi network is password-protected, enter your network password using the on-screen keyboard.If your network is hidden, select the Join another Network tile.
- Select your experience: Full (recommended) or Basic.• Select Full to access live TV, over tens of thousands of streaming movies and TV episodes, thousands of apps, and Alexa skills. To get started, sign in to or sign up for a free Amazon account.• Select Basic to access live TV and the six preset streaming apps. Alexa and the full Appstore are not included.
- If you connected your TV to an antenna or cable wall jack:A Go to Settings > Live TV > Channel Scan.B Follow the on-screen instructions to scan for channels.Note: To browse and watch live TV, use the On Now row or press on your remote.
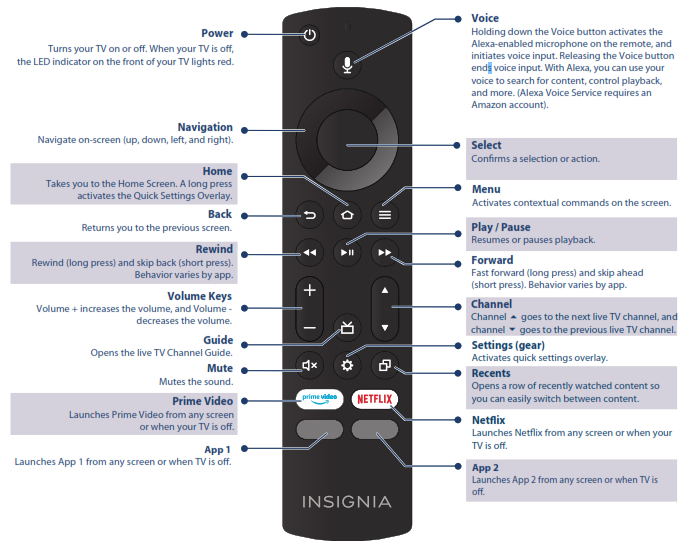
USING YOUR VOICE REMOTE WITH ALEXA
FIND YOUR USER GUIDE ONLINE
- Go to www.insigniaproducts.com.
- Use the search bar to find NS-24DF310NA21, NS-32DF310NA21, or NS-39DF310NA21.
- Select Support & Downloads.
- Next to the User Guide, select the language you want.
![]()
A Smarter TV Is HereHD Picture Quality, Fire TV Experience Built-in, Voice Remote with Alexa
![]() Access Your Favorite Content – All Through One Home ScreenFire TV Edition seamlessly integrates live over-the-air TV and streaming channels on a unified home screen
Access Your Favorite Content – All Through One Home ScreenFire TV Edition seamlessly integrates live over-the-air TV and streaming channels on a unified home screen
![]() Endless Entertainment – Netflix, Prime Video, YouTube, Hulu, HBO, and moreWatch over 500,000 streaming movies and TV episodes with access to tens of thousands of channels, apps, and Alexa skills
Endless Entertainment – Netflix, Prime Video, YouTube, Hulu, HBO, and moreWatch over 500,000 streaming movies and TV episodes with access to tens of thousands of channels, apps, and Alexa skills![]() Control It All With Your Voice – Voice Remote with AlexaUse your voice to watch live TV, launch apps, search for titles, play music, switch inputs, control smart home devices, and moreFull Experience is required to access all features described.
Control It All With Your Voice – Voice Remote with AlexaUse your voice to watch live TV, launch apps, search for titles, play music, switch inputs, control smart home devices, and moreFull Experience is required to access all features described.
ONE-YEAR LIMITED WARRANTYVisit www.insigniaproducts.com for details.NEED ADDITIONAL HELP?Check out our Support Community at http://community.insigniaproducts.com/ for helpful information from other Insignia TV owners.WE’RE HERE FOR YOUwww.insigniaproducts.comFor customer service, call: 1-877-467-4289 (U.S./Canada)CONTACT AMAZON FIRE TV CUSTOMER SERVICEwww.amazon.com/deviceservices/support

AMAZON TERMS & POLICIESBefore using Fire TV Edition, please read the terms located at www.amazon.com/deviceservices/support. Please also read all terms and policies for services related to Fire TV Edition, including but not limited to Amazon’s Privacy Noticelocated at www.amazon.ca/privacy, Amazon’s Conditions of Use located at www.amazon.ca/conditionsofuse, and any other terms or usage provisions available at www.amazon.com/deviceservices/support.All terms, rules, notices, policies, and provisions are, collectively, the “Agreements.” By using Fire TV Edition, you agree to be bound by the terms of the Agreements.Amazon, Fire, Alexa, Prime, and all related logos are trademarks of Amazon.com, Inc. or its affiliates.Certain services are subject to change at any time, may not be available in all areas, and may require separate subscriptions.For DTS Patents, see http://patents.dts.com.Manufactured under license from DTS, Inc. DTS, the Symbol, DTS and the Symbol together, and TruSurround are registered trademarks and/or trademarks of DTS, Inc. in the United States and/or other countries.© DTS, Inc. All Rights Reserved.U.S. and Canada:INSIGNIA is a trademark of Best Buy and its affiliated companies.Registered in some countries.Distributed by Best Buy Purchasing, LLC7601 Penn Ave South, Richfield, MN 55423 U.S.A.©2020 Best Buy. All rights reserved.
V3 ENGLISH 20-0127
References
[xyz-ips snippet=”download-snippet”]